Table of Contents
Ready to elevate your baking game? This comprehensive guide dives into the delightful world of sourdough french bread rolls. We’ll unravel the mysteries behind these delectable treats, transforming your kitchen into a mini-bakery. From understanding the nuances of sourdough starters to mastering the art of shaping and baking, we'll equip you with the knowledge and confidence to create perfect sourdough french bread rolls every time. Forget store-bought; prepare for an unforgettable taste and texture experience. This journey will cover everything from selecting the right ingredients and understanding the fermentation process to achieving that irresistible crusty exterior and fluffy interior. Prepare to be amazed as you learn how easy it is to make these artisan-style rolls right in your own home. Get ready to impress your family and friends with your newfound baking skills! Let's get started on your path to mastering the art of sourdough french bread rolls.
Understanding Sourdough French Bread Rolls
Understanding Sourdough French Bread Rolls
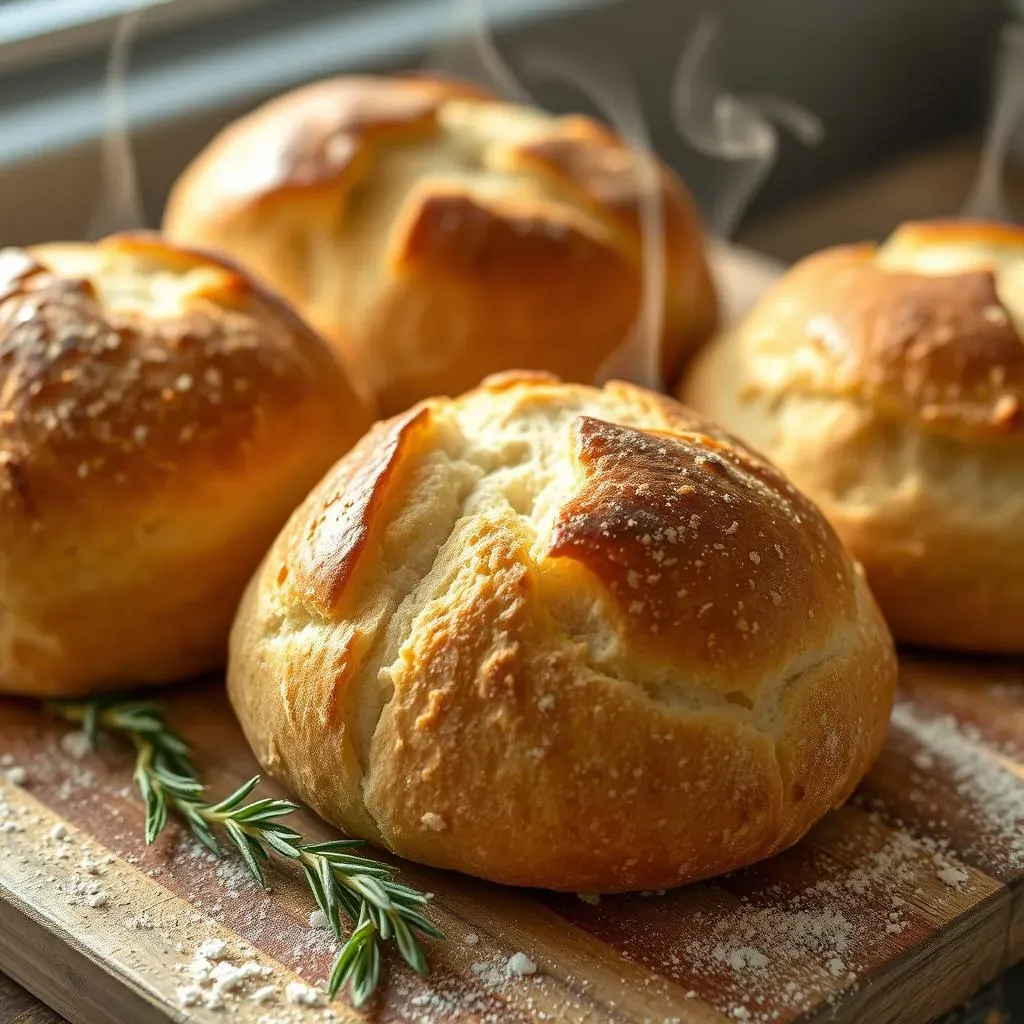
So, you're diving into the world of sourdough french bread rolls? Awesome! Let's start with the basics. These aren't your average dinner rolls. They're a testament to the magic of fermentation, boasting a unique tangy flavor and a satisfyingly chewy texture that's unlike anything you'll find in a regular roll. The key difference lies in the sourdough starter—a living culture of wild yeasts and bacteria that leavens the dough naturally, giving the bread its characteristic sourness and complex flavor profile. This slow fermentation process also contributes to the rolls' improved digestibility and a longer shelf life. Unlike quick-rise yeast breads, sourdough bread develops its flavor over time, making each bite a journey for the taste buds. Thinking about making a sourdough starter? Check out our easy 3-ingredient sourdough recipe to get you started!
Type of Roll | Key Characteristics |
|---|---|
Sourdough French Bread Rolls | Tangy flavor, chewy texture, slow fermentation, improved digestibility |
Regular Yeast Rolls | Sweet or savory, soft texture, quick rise, shorter shelf life |
The beauty of sourdough french bread rolls lies in their versatility. They're perfect for breakfast with butter and jam, a delightful accompaniment to soups and stews, or as the base for delicious sandwiches. Their slightly acidic taste cuts through rich flavors, making them a great pairing for hearty meals. Experimenting with different flours, additions (like herbs or seeds), and shaping techniques will allow you to create your own unique signature rolls. For example, adding some whole wheat flour can result in a nuttier, more rustic roll, while incorporating seeds like sunflower or poppy seeds provides extra texture and visual appeal. If you're feeling adventurous, try this French country sourdough bread recipe for a similar experience.
- Breakfast with butter and jam
- Accompaniment to soups and stews
- Sandwich base
- Pairings with hearty meals
One common question is whether sourdough french bread rolls are healthier than regular rolls. While not inherently "healthier," the slow fermentation process in sourdough bread does break down some of the complex carbohydrates and phytic acid, making it potentially easier to digest for some people. The nutritional value will also vary depending on the type of flour used. Want to learn more about the health comparison? Check out our French bread vs sourdough comparison.
Mastering the Sourdough Starter for Perfect Rolls
Mastering the Sourdough Starter for Perfect Rolls
The Heart of the Matter: Your Sourdough Starter
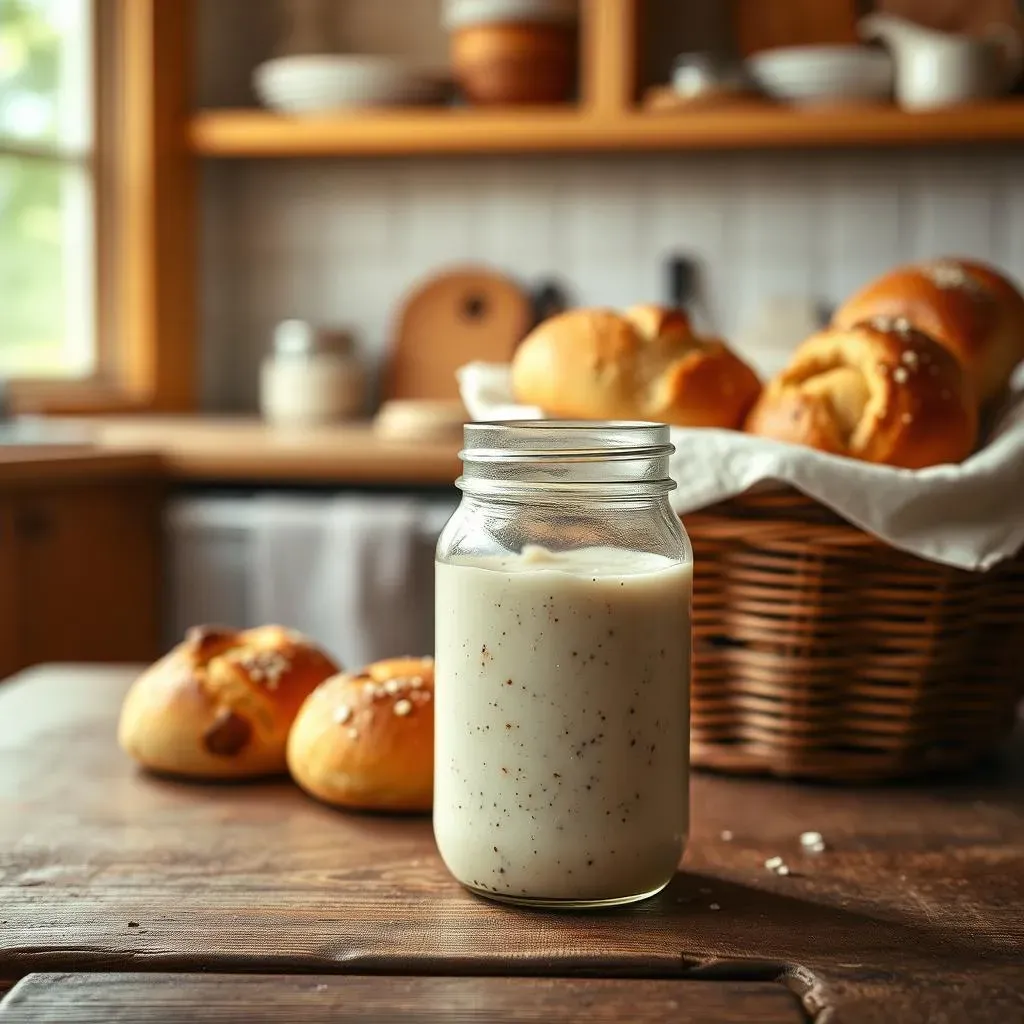
Your sourdough starter is the unsung hero of this whole operation. It's a living, breathing ecosystem of wild yeasts and bacteria, and its health directly impacts the flavor and rise of your rolls. A happy, active starter is bubbly and slightly tangy, a sign it's ready to work its magic. Think of it as a tiny, delicious pet that needs regular feeding and care. Neglect it, and your rolls will suffer. A weak starter can lead to flat, flavorless rolls, while an overly active one might result in an overly sour or unpredictable rise. Want to learn more about creating a fantastic starter? Our guide to making a sourdough starter will get you started.
Regular feeding is key. This usually involves mixing your starter with fresh flour and water at regular intervals (typically once a day or every other day, depending on the temperature and activity). This process nourishes the yeasts and bacteria, keeping them thriving and ready to leaven your dough. The feeding schedule will influence the starter's activity level, impacting the fermentation time of your rolls. A more active starter will ferment faster, while a less active one will need more time. This is where observation and experimentation come into play; your starter will become your baking companion, and you'll learn to understand its unique rhythms.
Starter Activity | Description | Impact on Rolls |
|---|---|---|
Inactive | Little to no bubbles, flat | Flat, flavorless rolls |
Active | Many bubbles, slightly risen | Good rise, tangy flavor |
Overly Active | Very bubbly, overflowing | Overly sour, unpredictable rise |
Feeding Your Starter: A Simple Routine
Feeding your starter is surprisingly simple. The basic ratio is usually 1:1:1 – one part starter, one part flour, one part water. However, the exact ratios can vary depending on the type of flour you use and your environment. Experiment to find what works best for you and your starter's personality. Some prefer a slightly wetter starter, while others prefer a firmer consistency. Regardless of your preference, the goal is to maintain a healthy balance; a starter that's too dry may not thrive, and one that's too wet might become soupy and smell unpleasant. For more detailed information, check out our 6-hour sourdough bread recipe which covers starter management.
Consistency is key. Regular feeding will establish a rhythm for your starter, making it easier to predict its behavior and activity level. This predictability is essential for consistent baking results. You'll learn to recognize the signs of a healthy starter – its bubbly texture, pleasant aroma, and consistent rise. Keeping a detailed log of your starter's feeding schedule and observations can be incredibly helpful, especially when you're first starting out. This will help you understand the nuances of your starter's behavior and develop your own baking intuition.
- Maintain a consistent feeding schedule.
- Observe your starter's activity level.
- Adjust feeding ratios as needed.
- Keep detailed records of your observations.
Troubleshooting Your Starter: Common Problems and Solutions
Even the most experienced bakers encounter occasional starter issues. A common problem is a sluggish or inactive starter. This can be due to several factors, including improper feeding, temperature fluctuations, or even a change in the type of flour you're using. If your starter seems to be struggling, don't panic. Try increasing the feeding frequency or adjusting the water-to-flour ratio. Sometimes, a simple "refresh" – discarding a portion of the starter and feeding the remaining portion with fresh flour and water – can revitalize it. If problems persist, consider starting over with a fresh starter.
Another potential issue is an overly active or "hoochy" starter. This happens when the starter has fermented for too long without being fed, leading to the production of alcohol. If this happens, simply discard a significant portion of the starter and feed it with fresh flour and water. A healthy starter should have a pleasant, slightly tangy aroma, not a strong alcoholic smell. Remember, patience and observation are key to mastering your sourdough starter. It's a journey, not a race. For more advanced troubleshooting, consider our sourdough bread without yeast guide.
StepbyStep Sourdough French Bread Rolls Recipe
StepbyStep Sourdough French Bread Rolls Recipe
Mixing the Dough: A Symphony of Ingredients
Let's get baking! We'll start by combining your active sourdough starter (remember, bubbly and lively!), water, flour (bread flour is ideal, but all-purpose works in a pinch), salt, and a touch of sugar (optional, but it enhances the browning and flavor). The precise measurements will depend on your recipe, but the key is to mix everything thoroughly until a shaggy dough forms. This is where your trusty stand mixer (or your strong arms!) comes in handy. Kneading develops the gluten in the flour, giving your rolls that lovely chewy texture. Knead for about 8-10 minutes, until the dough is smooth and elastic. For a detailed step-by-step, check out our French bread recipe.
After kneading, let the dough rest for a while (usually 30-60 minutes). This allows the gluten to relax, making it easier to shape later. This process, called autolyse, also contributes to the development of flavor and texture. During this rest period, the dough will become slightly more relaxed and easier to handle. You'll notice it becoming more supple and less sticky. This rest is crucial for creating a smoother, more consistent final product. For an alternative approach, try our same-day sourdough recipe.
- Combine starter, water, flour, salt, and sugar.
- Knead until smooth and elastic (8-10 minutes).
- Let the dough rest for 30-60 minutes.
Shaping and Baking: From Dough to Deliciousness
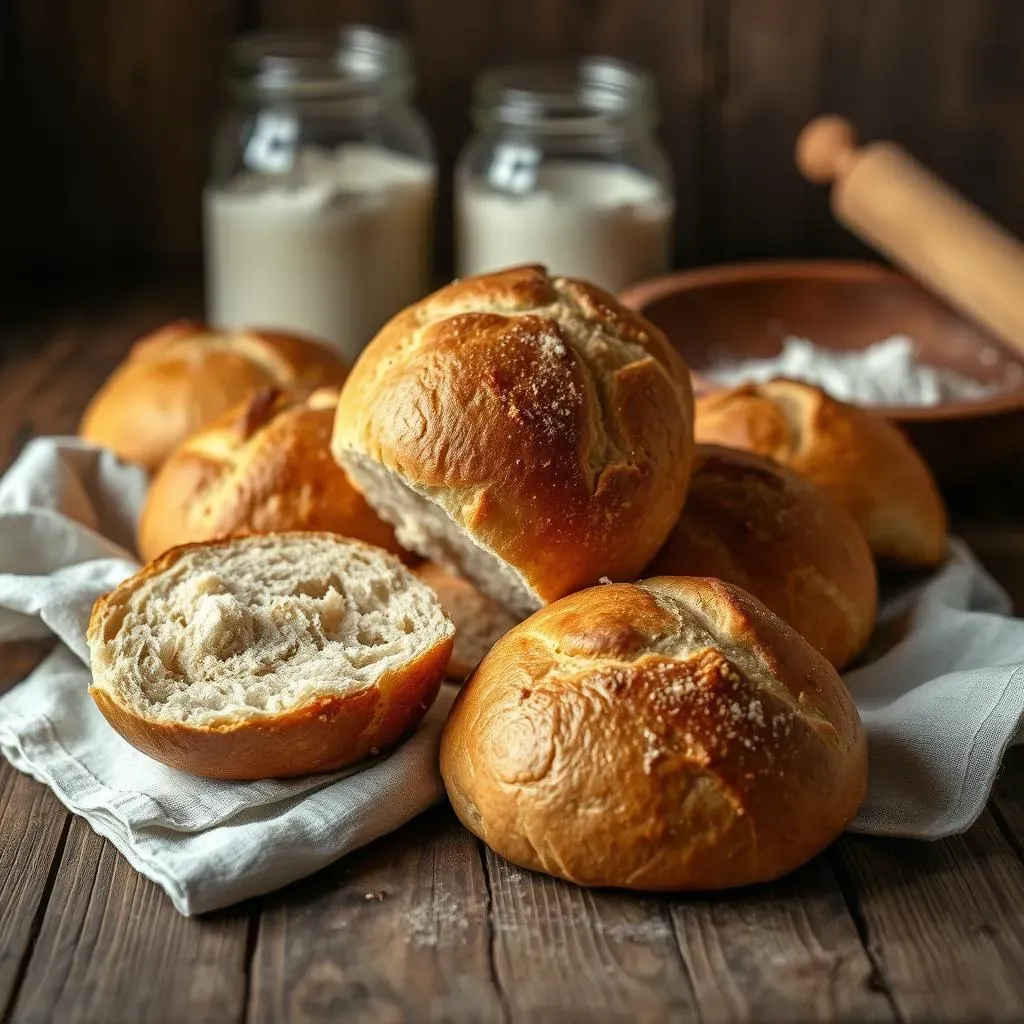
Once rested, gently divide your dough into equal portions, shaping each into a smooth ball. Then, gently roll each ball into an oval shape, tucking the ends underneath to create a tight, round roll. Place the shaped rolls onto a baking sheet lined with parchment paper, leaving some space between each one for rising. Cover the baking sheet and let the rolls proof (rise) in a warm place until doubled in size – this typically takes several hours, depending on your environment and starter activity. A warm oven (turned off) or a proofing box can help speed up the process. You may want to check out our 6-hour sourdough recipe for proofing tips.
Preheat your oven to a high temperature (around 400°F or 200°C). Right before baking, you can lightly brush the rolls with water or milk for a beautiful golden-brown crust. Baking time will vary depending on the size of your rolls and your oven, but generally ranges from 20 to 25 minutes. Keep a close eye on them to prevent burning. A perfectly baked sourdough french bread roll has a crisp, golden-brown crust and a soft, airy interior. Let them cool completely before serving – this allows the internal structure to set, resulting in the best texture.
Step | Description |
|---|---|
Shape | Divide dough, shape into balls, then ovals |
Proof | Let rise in a warm place until doubled |
Bake | Preheat oven, bake at 400°F (200°C) for 20-25 minutes |
Tips and Tricks for the Best Sourdough French Bread Rolls
Mastering the Bake: Oven Spring and Crust
Achieving that perfect oven spring—that glorious rise your rolls get in the oven—is a key to success. A good oven spring results in light, airy rolls. Ensure your rolls are properly proofed before baking; under-proofed rolls won't rise as much, while over-proofed rolls might collapse. For optimal results, aim for a dough that's almost doubled in size. The oven temperature is also critical. A hot oven (around 400°F or 200°C) helps create a crisp crust, while a slightly lower temperature might yield a softer crust. Experiment to find what works best for your oven. Want more tips on achieving that perfect crust? Check out our guide to making crusty sourdough bread.
Consider adding steam to your oven during the first few minutes of baking. This creates a humid environment, promoting a better rise and a crispier crust. You can achieve this by placing a pan of hot water on the bottom rack of your oven or by spritzing the rolls with water before baking. Baking on a baking stone or a pizza stone can also improve crust development and even baking. These surfaces retain and radiate heat efficiently, contributing to a crisper crust and a more even bake. For a more detailed guide, see our amazing French bread recipe.
Tip | Description |
|---|---|
Proper Proofing | Ensure rolls are almost doubled in size before baking. |
Oven Temperature | A hot oven (400°F or 200°C) creates a crisp crust. |
Adding Steam | Creates a humid environment for better rise and crust. |
Flavor and Texture Tweaks: Getting Creative
Don't be afraid to experiment with different flours! Adding whole wheat flour, rye flour, or even a touch of spelt flour can significantly impact the flavor and texture of your rolls. Whole wheat flour adds a nuttier flavor and a denser crumb, while rye flour provides a slightly tangier taste and a more open crumb. Spelt flour contributes a subtle sweetness and a chewier texture. Remember that different flours absorb water differently, so you may need to adjust the hydration of your dough accordingly. For more ideas, try our 00 flour sourdough recipe.
Incorporate additions to your dough! Seeds (sunflower, poppy, flax), herbs (rosemary, thyme), or even dried fruits (cranberries, raisins) can add exciting dimensions to your rolls. Remember that additions can impact the dough's hydration, so you may need to adjust your recipe accordingly. Experimentation is key! Keep a baking journal to track your experiments and note your successes and failures. This way, you can refine your recipe over time to create your own signature rolls. You might also like our French sourdough bread recipe for inspiration.
- Experiment with different flours (whole wheat, rye, spelt).
- Incorporate seeds, herbs, or dried fruits.
- Adjust hydration as needed.
- Keep a baking journal to track your progress.