Table of Contents
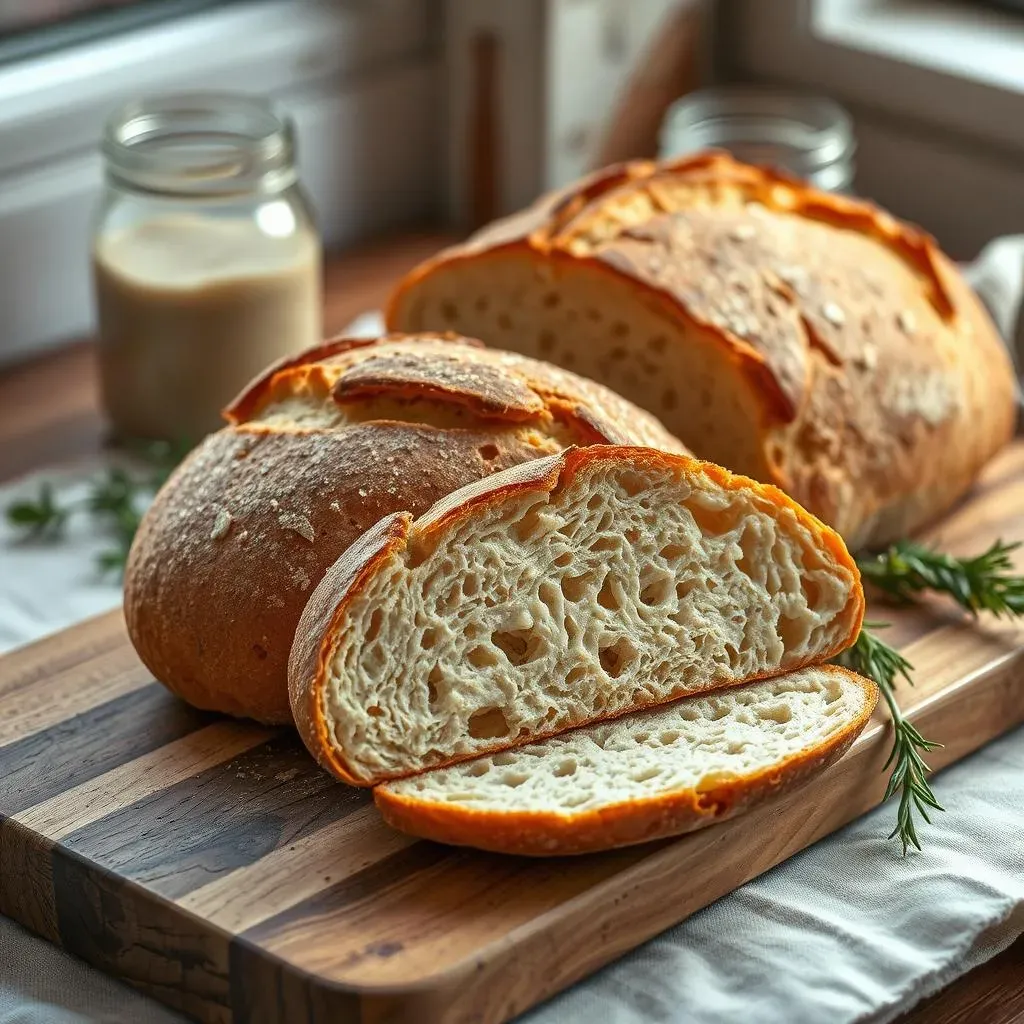
Ready to elevate your baking game? This article is your ultimate guide to crafting irresistible sourdough French bread using a starter. Forget bland, store-bought loaves; we're diving headfirst into the world of homemade, artisan bread with incredible depth of flavor and satisfying texture. We'll begin by exploring the importance of your sourdough starter – the heart and soul of this recipe. Understanding your starter's health and activity is crucial for achieving the perfect rise and that signature tangy taste. Next, a detailed, step-by-step sourdough french bread recipe with starter will walk you through each stage of the process, from mixing the dough to achieving a perfectly golden-brown crust. Finally, we'll share insider tips and tricks to help you troubleshoot common issues and consistently bake amazing sourdough French bread every time. Whether you're a seasoned baker or just starting your sourdough journey, this comprehensive guide will empower you to create bakery-quality loaves right in your own kitchen. Get ready to impress your friends and family with your newfound bread-making expertise!
The Essential Sourdough Starter: Your Key to Perfect Sourdough French Bread
The Essential Sourdough Starter: Your Key to Perfect Sourdough French Bread
Understanding Your Starter
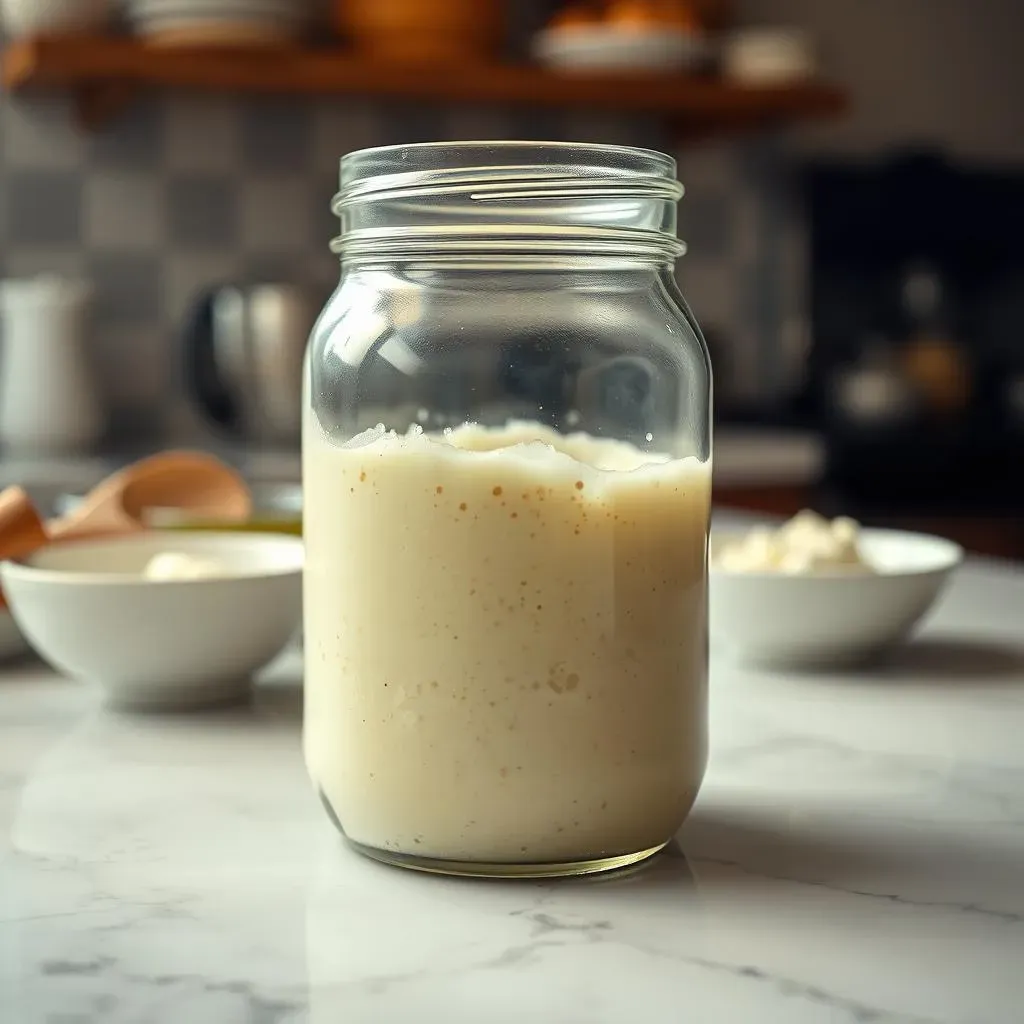
Let's talk sourdough starter! It's the magical ingredient that makes sourdough bread so unique. Think of it as a tiny, bubbly ecosystem of wild yeasts and bacteria, patiently fermenting and adding that incredible tangy flavor we all crave. A healthy, active starter is the foundation of a great loaf. You wouldn't start building a house without a solid foundation, right? Similarly, you can't expect amazing sourdough French bread without a thriving starter.
Before we get into the recipe, it's super important to know how to care for your starter. A well-maintained starter ensures consistent results. Regular feeding is key, and you'll learn to recognize the signs of a happy, bubbly starter ready for baking. If you're new to sourdough, don't worry! There are plenty of resources available to help you get started, including our guide on making sourdough bread with a starter.
Starter Activity | Description | Ready to Bake? |
|---|---|---|
Inactive | Flat, no bubbles | No |
Lightly Active | Few bubbles, slow rise | Maybe, depending on recipe |
Active | Many bubbles, doubled in size | Yes! |
Feeding Your Starter
Feeding your starter is like giving it a delicious meal. This process provides the necessary nutrients for the yeast and bacteria to thrive. The frequency of feeding depends on the type of flour you use and the environment your starter lives in. A warmer environment means more frequent feedings. Overfeeding can lead to a soupy starter, while underfeeding results in a sluggish, inactive one. The goal is to find the right balance for your starter and your kitchen's temperature.
There's a lot of information out there about different feeding schedules and methods. Experiment to find what works best for you and your starter. Remember, consistency is key to success. If you want to learn more about maintaining a healthy starter, check out our article on sourdough vs french bread which includes a section on starter care. This will help you understand the nuances of starter management and avoid common pitfalls.
- Use a clean jar or container.
- Discard half the starter before feeding.
- Mix in equal parts flour and water.
- Observe for activity (bubbles).
A StepbyStep Sourdough French Bread Recipe with Starter: From Dough to Oven
Mixing the Dough: The Foundation of Flavor
With your bubbly starter ready, let's get baking! First, gather your ingredients: flour, water, salt, and of course, your perfectly fed starter. The exact quantities will depend on your recipe; there are many variations out there, but the basic principles remain the same. You'll want to use bread flour for its higher protein content, which leads to a better gluten development and that satisfying chewiness we love in French bread. For a more detailed guide on choosing the right flour, check out our post on sourdough vs. French bread.
The mixing process itself is a crucial step. It's where you begin to develop the gluten network that gives your bread its structure. Gentle, thorough mixing is key; you don't want to overwork the dough. If you're using a stand mixer, use a low speed and a dough hook. For hand mixing, it will take some elbow grease, but the effort is worth it! After initial mixing, let the dough rest (autolyse) for a while. This allows the flour to fully hydrate, making gluten development easier. After the autolyse period, add the salt and continue mixing until you have a cohesive dough. Need a visual guide? Check out our video tutorial on making French bread with sourdough starter.
- Gather ingredients (flour, water, salt, starter).
- Mix gently but thoroughly.
- Let the dough rest for autolyse.
- Add salt and continue mixing.
Bulk Fermentation: Letting the Magic Happen
Bulk fermentation is where the magic of sourdough truly unfolds. During this time, the yeast and bacteria in your starter happily munch on the sugars in your flour, producing carbon dioxide gas. This gas creates those lovely air pockets that give sourdough its characteristic airy texture. The length of bulk fermentation depends on factors like the temperature of your environment and the activity of your starter. A warmer kitchen will lead to a faster fermentation. You'll know it's time to move to the next step when the dough has increased significantly in volume and is bubbly and light.
During bulk fermentation, you'll perform a series of folds, gently stretching and folding the dough over itself. These folds help to strengthen the gluten structure and ensure even fermentation. The number of folds and their timing depend on the recipe, but the aim is to build strength and develop a smooth, elastic dough. Want to see the folding technique in action? Our amazing French bread recipe has a detailed video showing the process. Remember to keep the dough covered to prevent a skin from forming.
Time | Temperature | Dough Appearance |
|---|---|---|
2-4 hours | 70-75°F (21-24°C) | Increased volume, bubbly |
4-6 hours | 65-70°F (18-21°C) | Increased volume, slightly less bubbly |
Tips and Tricks for Baking the Best Sourdough French Bread with Starter
Mastering the Bake: Oven Spring and Scoring
Let's talk about oven spring – that magical moment when your dough dramatically expands in the oven, creating a beautiful, airy loaf. Proper shaping and proofing are crucial for a good oven spring. Gently shaping your dough avoids damaging the delicate gluten structure developed during fermentation. Underproofing leads to a dense loaf, while overproofing results in a collapsed one. Finding that sweet spot takes practice, but observing your dough's texture and rise will guide you.
Scoring your dough before baking isn't just for aesthetics; it controls where the loaf expands during oven spring. Strategic cuts allow for even rising and prevent the loaf from bursting unpredictably. Different scoring patterns create unique visual effects, and you can experiment to find your favorite style. For more detailed guidance on shaping and scoring, our sourdough baguette recipe provides step-by-step visuals.
- Shape gently to avoid deflating the dough.
- Proof until almost doubled in size.
- Score strategically to control oven spring.
- Experiment with different scoring patterns.
Baking Techniques for a Crusty Exterior and Soft Interior
The baking process itself is where you truly transform your dough into a masterpiece. Using a Dutch oven or a baking stone helps to create steam, which leads to a wonderfully crispy crust and a soft, chewy crumb. Steam also helps develop that signature golden-brown color. If you don't have a Dutch oven, don't worry! You can still achieve excellent results by creating steam in your oven using a pan of hot water or ice cubes. For more on alternative baking methods, see our guide on making French bread with sourdough starter.
Maintaining the correct oven temperature is also crucial. Too high, and you risk burning the outside before the inside is cooked through. Too low, and your bread might be dense and underbaked. A good oven thermometer is your best friend here! Baking time depends on your oven and the size of your loaf. Use a skewer or toothpick to test for doneness: it should come out clean when inserted into the center. Want to know more about oven temperature control? Check out our post on baking sourdough bread in a Dutch oven, here.
Baking Method | Advantages | Disadvantages |
|---|---|---|
Dutch Oven | Even baking, crispy crust | Requires a Dutch oven |
Baking Stone | Crispy crust, good heat retention | Requires a baking stone |
Sheet Pan | Simple, accessible | Less crispy crust |