Table of Contents
Ever dream of biting into a perfectly crusty, yet soft-on-the-inside small french bread roll? You know, the kind that makes you close your eyes and sigh with pure, carb-fueled joy? Well, get ready to make that dream a reality because this guide is your ticket to baking these little beauties at home. We're not talking about some fancy, complicated recipe either. This is straightforward, easy to follow, and yields results that'll impress even the snobbiest of bread lovers. We will walk you through everything from the simple ingredients you’ll need to the best way to shape these small french bread roll before baking. Get ready to learn the secrets to achieving that golden crust and fluffy interior. We'll also tackle how to keep them fresh and delicious for days (if they even last that long!) I'll share some simple tips and tricks I’ve picked up over the years, and before you know it, you'll be pulling warm, fragrant small french bread rolls from your oven like a pro.
The Secret to Perfect Small French Bread Rolls

The Secret to Perfect Small French Bread Rolls
The Magic of Simple Ingredients
Okay, let's get real, the secret to amazing small french bread rolls isn't some crazy, complicated technique. It's all about the basics, done right. Think of it like building with LEGOs – you don't need a million different pieces, just a few good ones that fit together perfectly. For these rolls, it starts with really good flour, warm water, a bit of yeast (the magic ingredient, if you ask me), salt for flavor, and a touch of sugar to get the yeast going. That’s it! Forget the fancy stuff. It’s about letting these simple elements work their magic, and trust me, they do.
The real key here, though, is the quality of your ingredients. Using a good quality flour will make a noticeable difference in the texture of your rolls. And don't skimp on the yeast; fresh yeast is always best, but if you're using active dry yeast, make sure it's not expired. I once tried to make these with old yeast, and it was like trying to inflate a balloon with a pinhole – it just didn't work. So, fresh ingredients, my friend, that is where the real magic begins.
Ingredient | Why It's Important |
|---|---|
Good Quality Flour | Provides structure and texture |
Warm Water | Activates the yeast |
Fresh Yeast | Helps the dough rise |
Salt | Adds flavor and controls yeast |
Sugar | Feeds the yeast |
The Importance of Time and Temperature
So, now that we have the ingredients covered, let's talk about time and temperature, two other key elements to getting that perfect small french bread roll. When it comes to bread, patience is a virtue. You can’t rush the rising process, and you definitely can't rush the baking. The dough needs time to do its thing, which is to develop flavor and that light, airy texture. I know it's tempting to speed things up, but trust me, a slow rise is where the flavor lives. Think of it like letting a good story simmer – the longer it goes, the richer it becomes.
Temperature is just as important. The water needs to be warm, not hot, to activate the yeast without killing it. And the oven needs to be preheated to the right temperature to get that golden, crispy crust we all love. I’ve had my share of burnt bottoms and pale tops by not paying attention to temperature. It’s a balancing act, but once you get the hang of it, you'll be baking like a pro. So, pay attention to the details, and your small french bread rolls will reward you with perfect texture and taste.
"The best bread is made with simple ingredients and a lot of love... and a little bit of patience." - A wise baker (probably)
Ingredients and Tools for Small French Bread Roll Success

Ingredients and Tools for Small French Bread Roll Success
Gathering Your Baking Arsenal
Alright, so you're ready to make some magic in the kitchen? Before we get flour all over the place, let's talk about what you'll need. It’s not about having every fancy gadget under the sun. For these small french bread rolls, we keep it pretty straightforward. Think of it like stocking up for a fun adventure – you need the right gear to make it a smooth journey. We're talking about the essentials: a good mixing bowl, measuring cups and spoons, a kitchen scale (if you're feeling fancy), and a baking sheet. Oh, and don't forget a clean surface for kneading. I use a simple wooden board, but any flat surface will do.
These aren't just random tools; they're your partners in this baking dance. A good mixing bowl will hold all your ingredients comfortably, a scale will ensure accurate measurements (no more guessing!), and that baking sheet will be your canvas for golden-brown perfection. I remember when I first started, I tried using a tiny bowl, and it was a total disaster. Flour was everywhere, and the dough was a sticky mess. So, do yourself a favor and get the right tools. It makes the whole process so much smoother.
The Essential Ingredients Checklist
Now that we've got our tools sorted, let's talk about the stars of the show: the ingredients. We’re keeping it basic here, but each one plays a crucial role. You'll need all-purpose flour, warm water, active dry yeast, salt, and a little bit of sugar. That’s it, seriously! No fancy stuff required. But, like I mentioned before, the quality of your ingredients matters. Using good flour will make a difference in the texture of your rolls. And don’t underestimate the importance of fresh yeast. It’s the engine that makes your dough rise, so treat it well. I always imagine the yeast as tiny little workers, and when they are happy, they do their job well.
Also, make sure your water is warm, not hot. Too hot, and you'll kill the yeast, and your dough won't rise. It's like giving your little workers a scalding bath – not good. And a little bit of sugar feeds the yeast and helps it get going. Think of it as their morning coffee. Salt, on the other hand, controls the yeast and adds flavor. It’s the balance to the sweetness. So, gather your ingredients, and let’s get ready to bake. Remember, simplicity is key here, and these simple ingredients are what will create something truly amazing.
Tool/Ingredient | Why You Need It |
|---|---|
Mixing Bowl | To hold and mix ingredients |
Measuring Cups/Spoons | For accurate measurements |
Kitchen Scale (Optional) | For precise ingredient amounts |
Baking Sheet | To bake the rolls on |
All-Purpose Flour | The foundation of the dough |
Warm Water | Activates the yeast |
Active Dry Yeast | Makes the dough rise |
Salt | Adds flavor and controls yeast |
Sugar | Feeds the yeast |
Optional Extras (But Highly Recommended)
While the core ingredients are all you need for great small french bread rolls, there are a few extras that can elevate your baking game. A bench scraper is a game changer when it comes to handling dough. It helps you divide it and move it around without making a mess. I love using it to gently scoop up dough that's sticking to my countertop. Also, a pastry brush can be used to give your rolls that beautiful shine. Before baking, brush the top of the rolls with a little bit of egg wash or milk. It’s like giving your rolls a little spa treatment before they go into the oven. And if you're feeling adventurous, try adding a little bit of herbs to your dough, like rosemary or thyme. It’s a great way to add some extra flavor.
These extras aren't essential, but they sure do make the baking process more enjoyable. Think of them like the cool accessories that complete a great outfit. They’re not strictly necessary, but they can add a touch of style and functionality. So, if you have them, great! If not, no worries – your small french bread rolls will still be amazing. The key takeaway here is to use what you have and make the most of it. It's all about having fun and creating something delicious from scratch.
Shaping and Baking Your Small French Bread Rolls
Shaping and Baking Your Small French Bread Rolls
The Art of Shaping Your Rolls
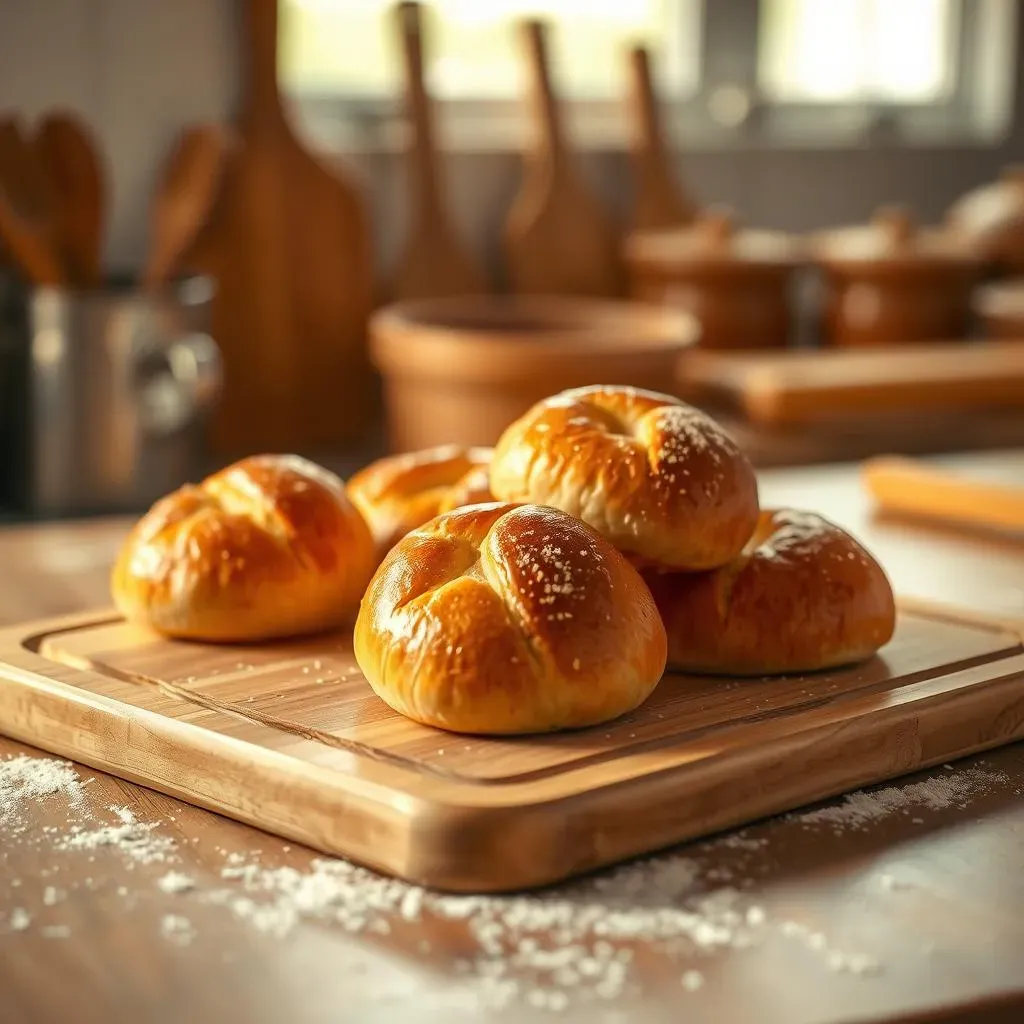
Okay, so your dough has risen and looks all puffy and ready to go? Awesome! Now, let's talk about shaping those small french bread rolls. It might seem intimidating, but trust me, it's easier than it looks. The goal is to create nice, round balls of dough that will bake evenly. I like to start by gently deflating the dough. It's almost like giving it a little pat on the back. Then, I turn it out onto a lightly floured surface. From there, I divide it into equal portions. I use a bench scraper for this, but a knife works too. Think of it like cutting a pie – you want each piece to be roughly the same size. Then, you take each piece and gently form it into a ball. Imagine you're rolling playdough, but don't overwork it. I like to cup my hand around it and gently rotate it on the counter until it forms a nice, smooth sphere. It's kind of therapeutic, actually.
Once you've got your little dough balls, you're ready for the next step, but don’t worry if they're not perfect. They'll still taste amazing. I've had my share of lopsided rolls, and they always disappear quickly. The key is to be gentle with the dough and not overhandle it. Think of it as a delicate dance – you want to guide it, not force it. And remember, practice makes perfect. The more you do it, the better you'll get. So, don't stress if your first batch isn't flawless. It's all part of the fun. I remember when I first started, my rolls looked more like little blobs than balls, but hey, they still tasted good.
Shaping Step | Description |
|---|---|
Deflate Dough | Gently pat down the risen dough. |
Divide Dough | Cut the dough into equal portions. |
Form Balls | Gently roll each portion into a smooth ball. |
Baking to Golden Perfection
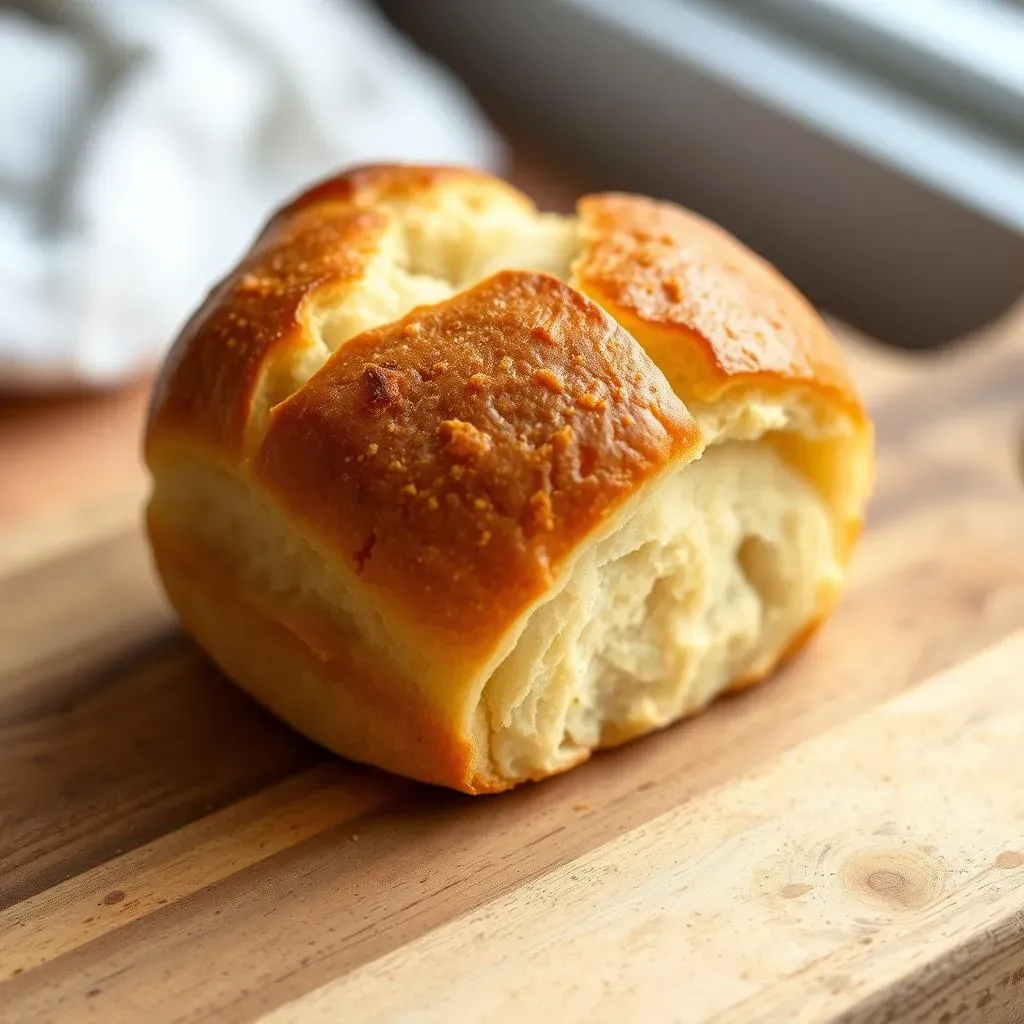
Alright, your rolls are shaped, and now it's time for the grand finale: baking. This is where the magic really happens. Preheat your oven to 400 degrees. While the oven is heating up, place your shaped rolls on a baking sheet lined with parchment paper. This will prevent them from sticking. I like to space them out a bit so they have room to expand. If you want that shiny, golden crust, now is the time to brush them with a little bit of egg wash or milk. It's like giving your rolls a final touch of glamour before they go into the oven. Then, slide them into the preheated oven and set a timer for about 15-17 minutes.
Keep an eye on them as they bake. You're looking for that perfect golden-brown color. The bottom should also be nicely browned. When they’re ready, take them out of the oven and let them cool on a wire rack. I know it's tempting to dig in right away, but trust me, letting them cool a bit will make them even better. The crust will crisp up, and the inside will set perfectly. And that’s it! You’ve just baked your own small french bread rolls. It's a pretty amazing feeling, isn't it? Remember, baking is like a science experiment. It takes a little bit of trial and error, but once you get the hang of it, it’s incredibly rewarding. I've had my share of baking mishaps, but those are all learning experiences. So, don’t be afraid to experiment and have fun with it.
"Baking is a dance between science and art, and the oven is your stage." - A passionate baker (me)
Serving and Storing Your Homemade Small French Bread Rolls
Serving and Storing Your Homemade Small French Bread Rolls
Serving Suggestions
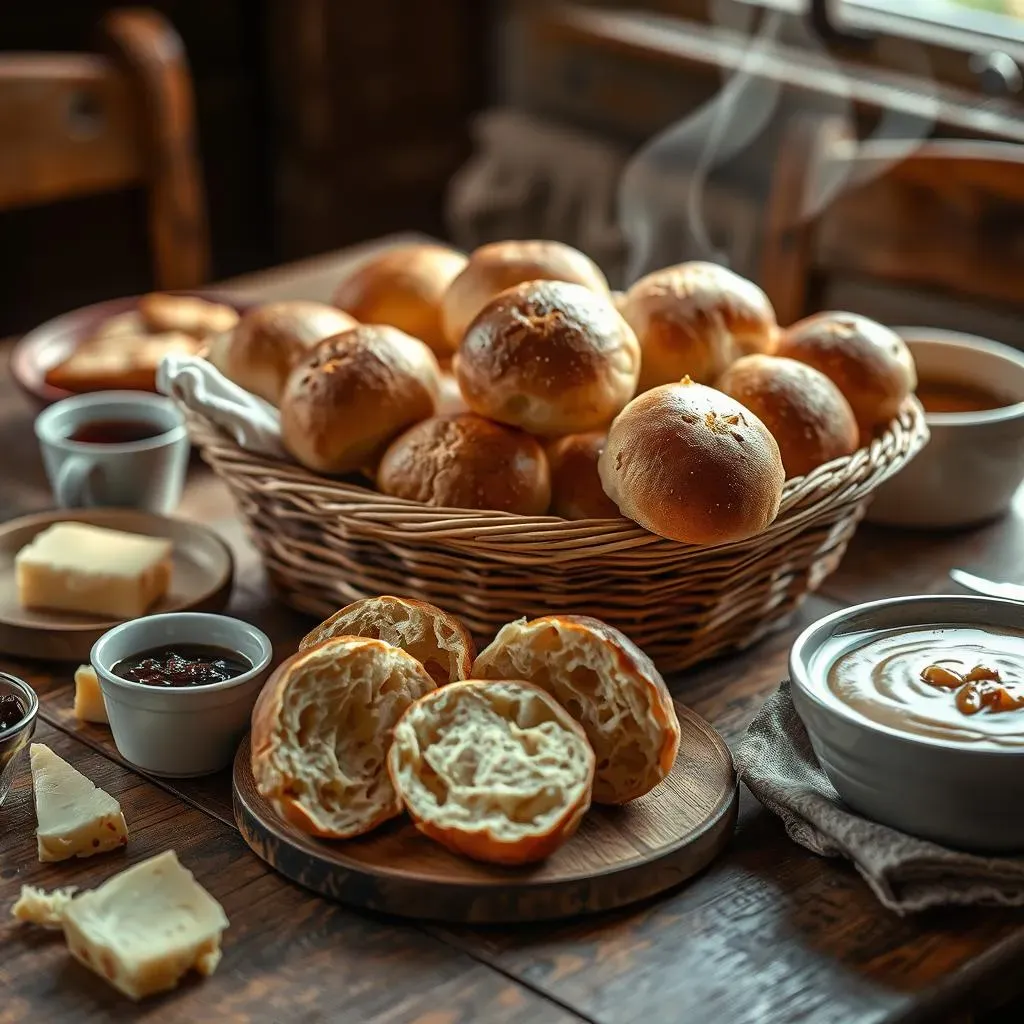
Alright, you've baked these amazing small french bread rolls, and now it's time to enjoy them. The possibilities here are endless. Think of these rolls as tiny canvases for deliciousness. I like to slice them open and spread a little bit of butter on them while they're still warm. It's simple, but oh so satisfying. They also make fantastic mini sandwiches. Try filling them with ham and cheese, or maybe some roast beef and mustard. They're also great for dipping in soups or stews. Imagine dunking a warm roll into a bowl of creamy tomato soup – pure comfort food. And if you're feeling fancy, try making little bruschetta with them. Top them with some diced tomatoes, garlic, and basil – it’s a great appetizer. The key is to use your imagination and have fun with it. These rolls are so versatile, they can go with just about anything. I remember once, I used them to make mini pizzas, and they were a huge hit. So, don’t be afraid to experiment and get creative. It’s your kitchen, your rules, and your delicious small french bread rolls.
Another thing I really love is using them as part of a bread basket for a dinner party. They always impress, and everyone loves a fresh, homemade roll. They pair well with almost any meal, from pasta to salads. And if you have any leftover, they make great croutons. Just cube them up, toss them with some olive oil and herbs, and bake them until they're crispy. It’s a great way to reduce waste and enjoy your rolls in a different way. I’ve also been known to just eat them plain, straight off the cooling rack. They're that good! So, however you choose to serve them, these small french bread rolls are sure to be a crowd-pleaser. It’s all about enjoying the fruits of your labor and sharing them with the people you love.
Serving Idea | Description |
|---|---|
Butter & Jam | Simple, classic, and delicious. |
Mini Sandwiches | Fill with your favorite ingredients. |
Soup Dippers | Perfect for dunking into warm soups. |
Bruschetta | Top with tomatoes, garlic, and basil. |
Bread Basket | Impress your guests with homemade rolls. |
Croutons | Cube and bake for a crispy topping. |
Storing Your Rolls for Later
Okay, so you've baked way too many small french bread rolls, or maybe you just want to save some for later? No problem! Storing them properly is key to keeping them fresh and delicious. If you plan to eat them within a day or two, just keep them in a bread bag or an airtight container at room temperature. This will help keep them soft. But, if you want to keep them longer, freezing is the way to go. Let the rolls cool completely, then wrap them individually in plastic wrap and place them in a freezer bag. They can stay frozen for up to a month. When you’re ready to eat them, just take them out of the freezer and let them thaw at room temperature. You can also pop them in the oven for a few minutes to warm them up and crisp them again.
I’ve learned the hard way that leaving them out in the open air will make them dry and hard. So, always make sure they’re properly wrapped. I also like to write the date on the freezer bag, so I know how long they’ve been frozen. It’s a simple trick, but it helps a lot. And remember, reheating frozen rolls will bring back that fresh-baked flavor and texture. So, don’t be afraid to make a big batch and freeze some for later. It’s a great way to always have fresh bread on hand. I often make a double batch, so I have some ready for the week. It's like having a secret stash of homemade goodness. And it’s so satisfying when you can pull out a warm roll from the oven, even if it's been frozen for a while. So, store them smart, and you’ll always have delicious small french bread rolls ready to go.
"The only thing better than fresh bread is having fresh bread whenever you want." - A very happy baker (still me)
Reheating Tips for That Fresh-Baked Feel
So, you've stored your small french bread rolls, and now you're ready to enjoy them. But maybe they've lost a little of that fresh-baked magic? No worries! Reheating them is super easy, and it can bring them back to life. If they're frozen, let them thaw at room temperature first. Then, you can either use your oven or a toaster oven. Preheat your oven to about 350 degrees, and place the rolls directly on the rack, or on a baking sheet. If you want a softer roll, wrap them in foil. Bake them for about 5-10 minutes, or until they're warmed through. And if you want a crispier crust, skip the foil and bake them directly. They’ll come out warm and delicious, almost like they were just baked. If you're using a toaster oven, just set it to the same temperature and keep a close eye on them so they don't burn.
Another trick I love is to sprinkle a little water on the rolls before reheating. It’s like giving them a little steam bath and helps to restore the moisture. I've had my share of dry, reheated rolls, and this little trick makes a huge difference. And if you have a grill, you can also reheat them there. It gives them a nice, smoky flavor. Just make sure to keep a close eye on them, so they don't burn. The key to reheating is to be gentle and not overdo it. You want to warm them through without drying them out. So, whether you're using the oven, toaster oven, or grill, with a little bit of care, your small french bread rolls will taste like they were just baked. And that, my friend, is the best feeling. I always feel so proud when I can bring back the magic of fresh-baked bread, even if it’s been stored for a while.
Wrapping Up Your Small French Bread Roll Adventure
So, there you have it – your very own batch of homemade small French bread rolls, ready to be devoured. It might have seemed a bit daunting at first, but hopefully, you've discovered that baking these delicious rolls is simpler than you thought. From mixing the dough to that satisfying final bake, each step contributes to the magic of fresh bread. Now you can enjoy your rolls with butter, jam, or alongside your favorite meal, or even just on their own. The best part is that you now have the skills and knowledge to whip up these small french bread rolls whenever the craving hits. Keep practicing, experiment with different flours, and most importantly, enjoy the process and the incredible taste of your homemade creation. Happy baking!