Table of Contents
Ever smell that amazing aroma wafting from a bakery, that rich, garlicky scent that makes your mouth water? That, my friend, is the magic of roasted garlic, and when it's slathered on crusty French bread, it's pure heaven. Forget those sad, dry garlic bread sticks you find in the freezer aisle; we're talking about the real deal here. This isn't just about garlic bread; it's about transforming simple ingredients into something extraordinary. In this article, I'm going to show you how easy it is to make the most amazing **roasted garlic french bread** right in your own kitchen. We'll start by roasting the garlic to sweet, mellow perfection, then we will mix it with butter and spread it on the bread before baking it to golden crispiness. Get ready to impress your friends and family, or just treat yourself to the best garlic bread you've ever tasted. Let's get started, shall we?
Why Roasted Garlic Makes the Best French Bread
Why Roasted Garlic Makes the Best French Bread
The Magic of Roasting
Okay, so you might be thinking, "Garlic is garlic, right?" Wrong! Raw garlic has this sharp, pungent bite that can be a bit much, especially if you're planning to eat a whole bunch of it on bread. But when you roast it, something magical happens. The heat transforms those harsh compounds into something sweet and mellow. It's like the garlic is giving up its secrets, its real flavor, and it's a total game changer for your taste buds. Imagine the difference between a screaming toddler and a sleeping baby, that's how different raw and roasted garlic are.
And it's not just the flavor. Roasting garlic also softens it to a creamy, spreadable texture. You know that feeling when you try to mince raw garlic and it keeps sticking to your knife? Well, roasted garlic is like butter - it's so easy to mash and mix into other ingredients. This makes it perfect for blending into butter or oil, so you get that garlicky goodness in every single bite. No more chunks of raw garlic hiding in your bread. This is smooth, flavorful perfection.
Garlic Type | Flavor Profile | Texture |
|---|---|---|
Raw Garlic | Sharp, Pungent, Spicy | Firm, Crunchy |
Roasted Garlic | Sweet, Mellow, Nutty | Soft, Creamy, Spreadable |
Beyond the Flavor
It's not just about the taste and texture, though. The aroma of roasted garlic is intoxicating. It fills your kitchen with a smell that says, "Something amazing is about to happen." It's like a warm hug for your senses. And when that aroma combines with the smell of baking bread? Forget about it; it's pure culinary bliss. It's the kind of smell that makes people wander into the kitchen asking, "What's cooking?" And trust me, you'll want to tell them all about your roasted garlic french bread.
Plus, using roasted garlic allows you to use a lot more garlic without being overpowering. You know how sometimes too much raw garlic can leave you with that unpleasant aftertaste? Roasted garlic doesn't do that. It's mild enough to load up on without any regrets. So, you get that intense garlic flavor you crave, but it's balanced and delicious. It's like having your cake and eating it too, only this time it's garlic bread.
Easy Steps to Perfect Roasted Garlic
Easy Steps to Perfect Roasted Garlic
Gather Your Garlic
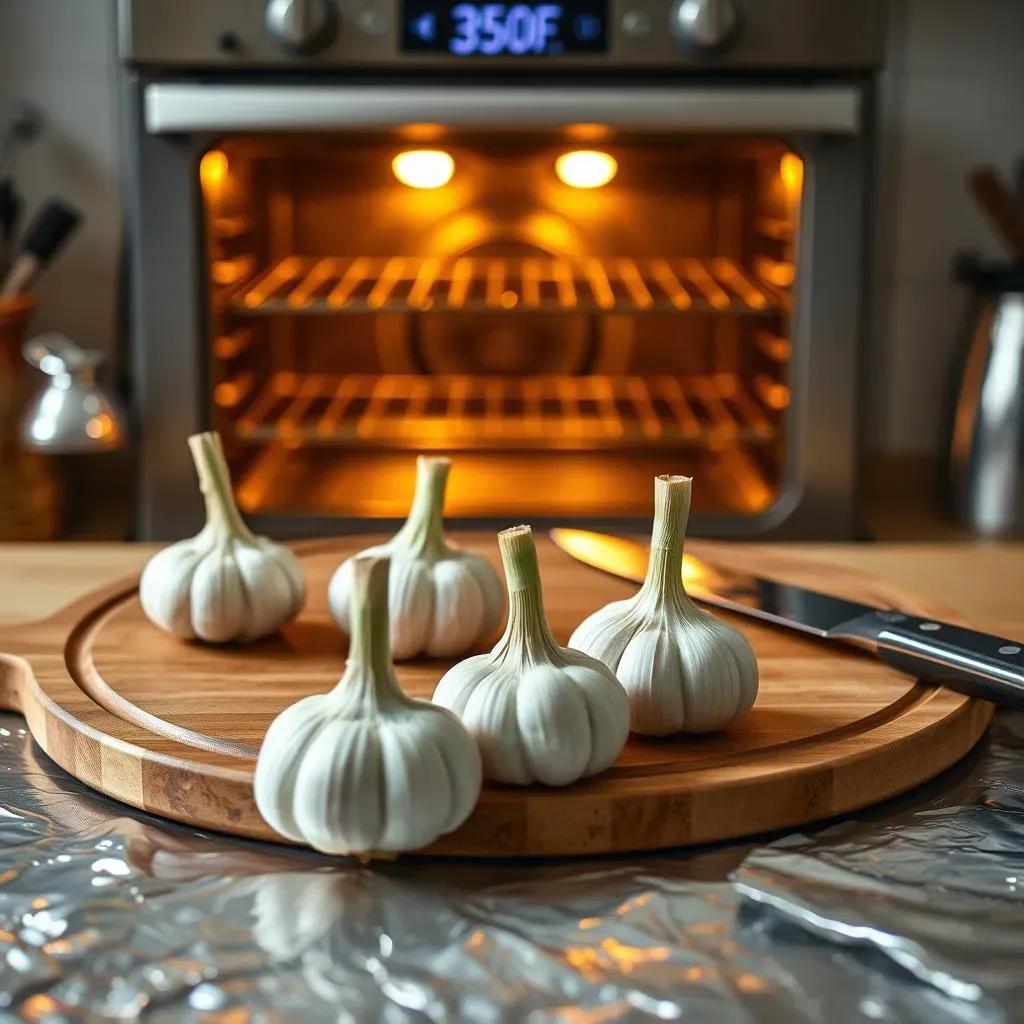
Alright, let's get to the fun part: roasting the garlic! First things first, you need some good garlic. I usually go for whole heads of garlic, not the pre-peeled cloves. You want those bulbs nice and firm, with the papery skin still intact. Think of it like choosing a good apple; you want it to feel solid and not mushy. You'll need a few heads of garlic for a decent loaf of french bread, so don't be shy. I usually use about three to four medium-sized heads, but you can adjust based on your love for garlic. Remember, roasted garlic is mild, so more is often better!
Next, grab your trusty knife. Now, this isn't a delicate operation, no need to be precise here. You're just going to slice off the very top of each garlic head, exposing the cloves inside. Think of it like giving the garlic a little haircut. This will allow the heat to penetrate and do its magic. Don't worry about cutting too much off; a little exposed clove is all you need. And while you're at it, preheat your oven to 350°F (175°C). We're getting ready to make some garlic magic!
- Choose Firm Garlic: Look for heads that are solid, not soft or mushy.
- Trim the Tops: Slice off the top of each head to expose the cloves.
- Preheat Your Oven: Set the oven to 350°F (175°C).
The Roasting Process
Now that your garlic is prepped, it's time to get them ready for roasting. Place each garlic head on a piece of aluminum foil, making sure you have enough foil to wrap them up. Drizzle a little olive oil over the exposed cloves; just a teaspoon or so will do. This helps keep the garlic moist and aids in the roasting process. You can add a pinch of salt at this point, but it’s not mandatory. Wrap each garlic head tightly in its foil packet, creating a little steam oven. This helps the garlic get super soft and creamy.
Pop the foil-wrapped garlic packets into your preheated oven and let them roast for about 40 to 45 minutes. The exact time can vary depending on the size of your garlic heads, so keep an eye on them. You'll know they're ready when they're super soft and the cloves are a lovely golden brown. The smell in your kitchen will be incredible, so brace yourself. Once they're done, carefully remove them from the oven and let them cool down a bit before handling. Nobody wants burnt fingers, especially when delicious garlic awaits.
Step | Action | Why |
|---|---|---|
1 | Wrap garlic in foil | Creates a steam oven for even cooking |
2 | Drizzle with olive oil | Keeps garlic moist and aids roasting |
3 | Roast for 40-45 minutes | Softens and sweetens the garlic |
Making the Roasted Garlic French Bread
Making the Roasted Garlic French Bread
The Garlic Butter Base
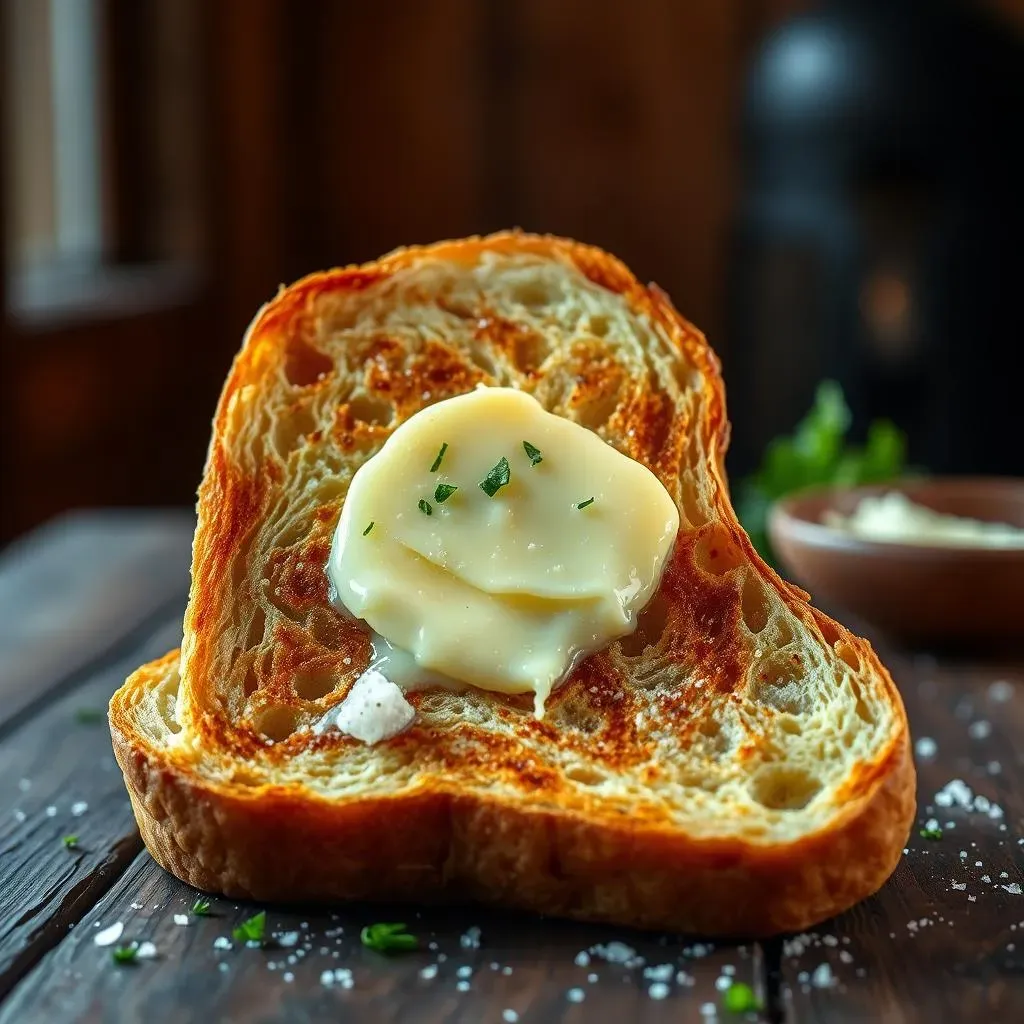
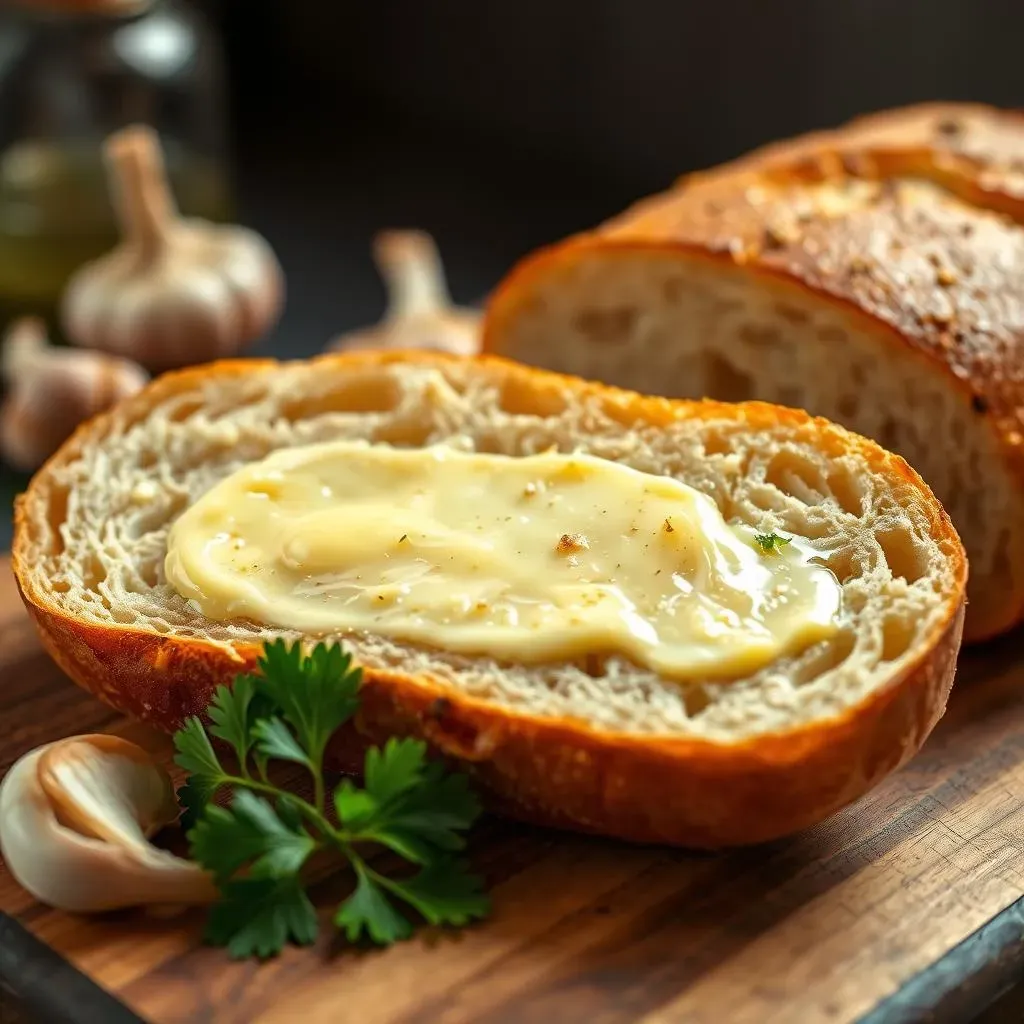
Okay, the garlic is roasted, your kitchen smells incredible, now let's get to the fun part: making that garlic butter! Once the garlic heads are cool enough to handle, squeeze the roasted garlic cloves out of their skins into a small bowl. They should just slide out with a gentle push. It's like squeezing out toothpaste, but way more delicious. Now, grab some softened butter – unsalted is best here, but salted works in a pinch – and add it to the bowl with the garlic. I like to use about half a cup of butter for three to four heads of garlic, but you can adjust the amount to your preference. Then, take a fork and mash it all together until you get a nice, smooth, garlicky paste. You can add a pinch of salt or some herbs like parsley or rosemary at this point if you want to get fancy. It's like creating a flavor explosion, and it's all happening in one bowl.
Now, for the bread! Slice your French bread loaf in half lengthwise, like you're opening a book. You want to expose the soft, inside part of the bread, ready to soak up all that delicious garlic butter. Then, take your garlicky butter mixture and generously spread it all over the cut sides of the bread. Don't be shy; you want to make sure every nook and cranny is covered. Think of it like painting a masterpiece, only this one is edible. You should have a nice thick layer of garlic butter on both halves of the bread. This is where the magic really happens, and the bread soaks up all that flavor.
"The best way to spread love is through a delicious meal, and roasted garlic french bread is a love letter to your taste buds." - Some Wise Foodie
Baking to Golden Perfection
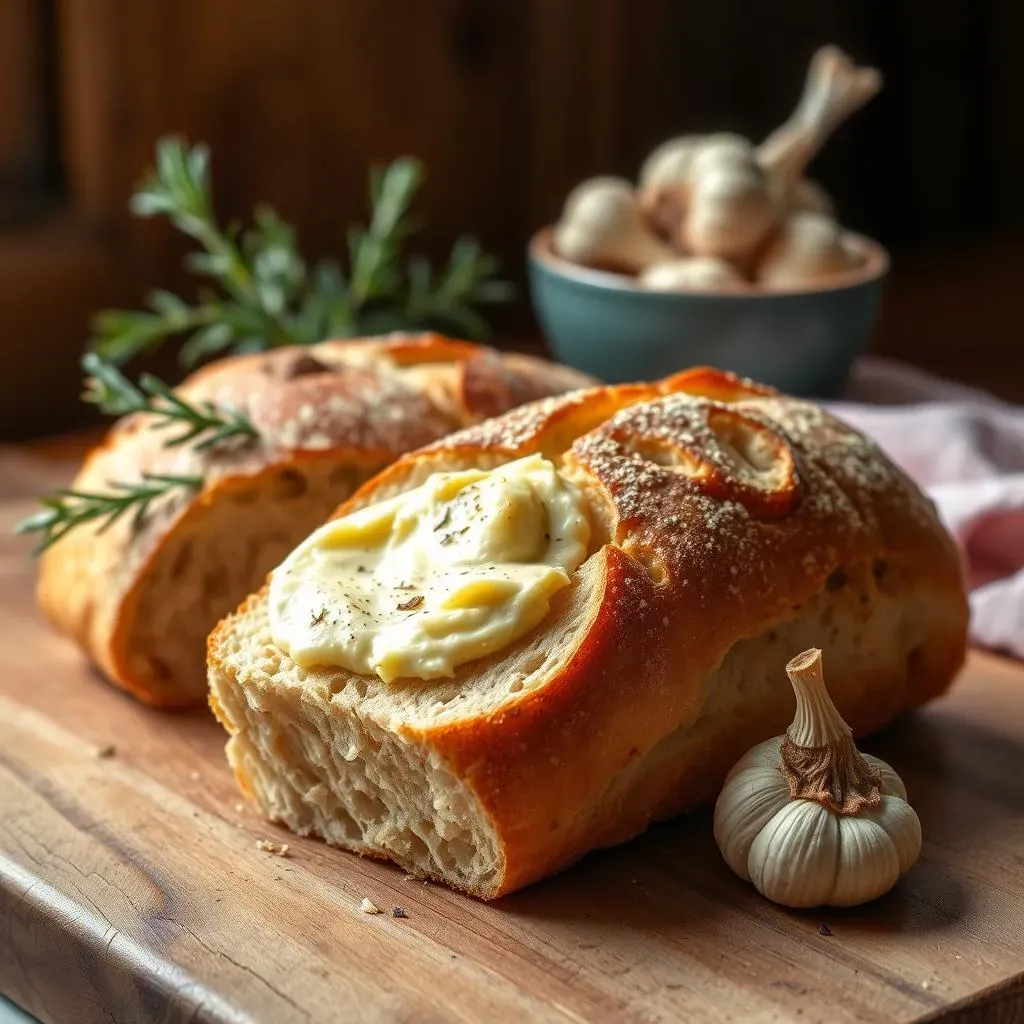
With your garlic butter slathered all over the bread, it's time for the final step: baking! Place the bread halves, cut-side up, on a baking sheet. You can line the baking sheet with parchment paper if you want to make cleanup a breeze, but it's not mandatory. Then, pop the baking sheet into your preheated oven. Now, instead of baking at 350°F, we're going to switch to the broiler for the last few minutes. This is where we get that nice, golden-brown, crispy top. Broil for about 2-3 minutes, keeping a close eye on it so it doesn't burn. The bread should be golden brown and bubbly. It's like watching a transformation happen right before your eyes.
Once the bread is perfectly toasted and golden, take it out of the oven and let it cool for a minute or two before slicing. The aroma will be absolutely irresistible, but trust me, you want to wait just a bit so you don't burn your mouth. Slice the bread into thick slices and serve immediately. The crust will be nice and crispy, while the inside will be soft and full of garlicky flavor. It's a perfect combination of textures and tastes that will have everyone coming back for more. I mean, who can resist warm, buttery, roasted garlic french bread?
Step | Action | Result |
|---|---|---|
1 | Mash roasted garlic with butter | Creates garlic butter base |
2 | Spread garlic butter on bread | Infuses bread with flavor |
3 | Broil until golden brown | Crisps the top of the bread |
Serving and Enjoying Your Garlic Bread Creation
Serving and Enjoying Your Garlic Bread Creation
The Perfect Pairing
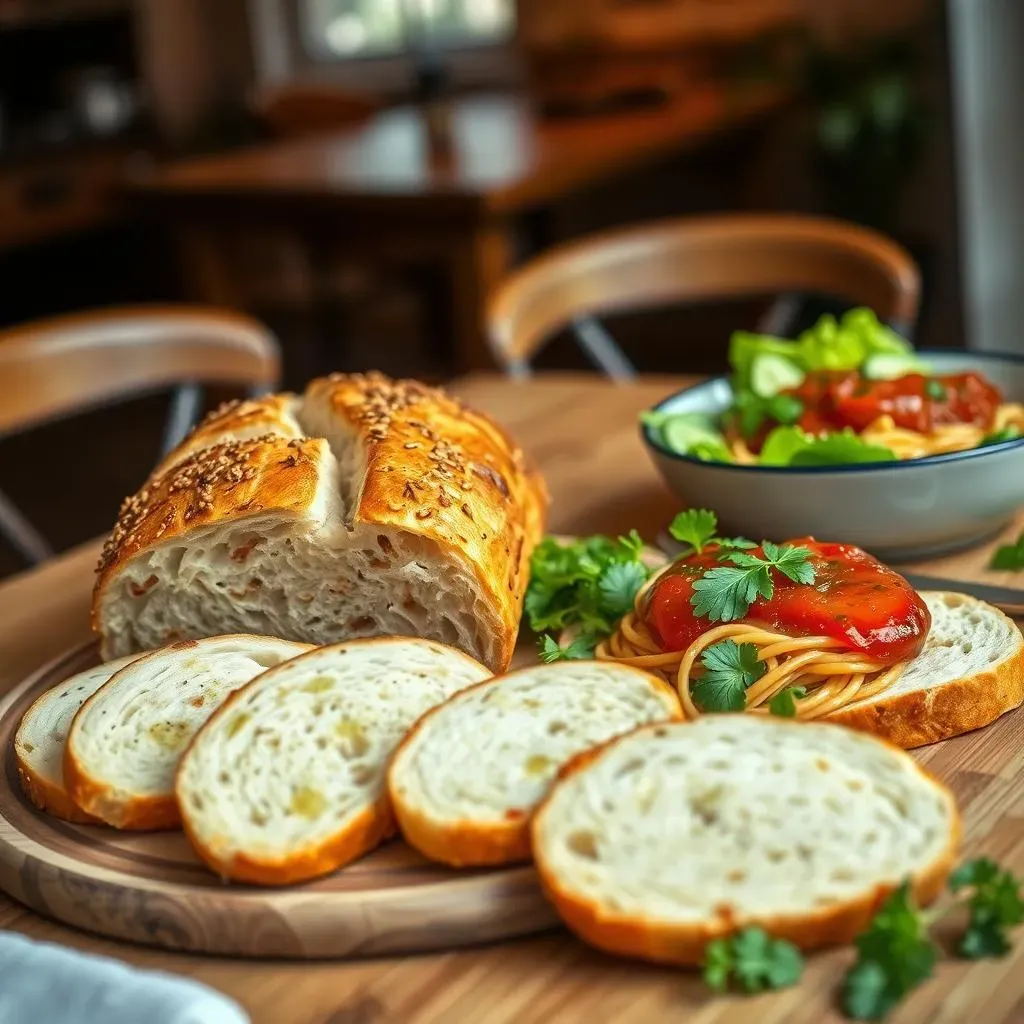
Alright, your roasted garlic french bread is out of the oven, smelling absolutely divine. Now, what do you serve it with? Well, the possibilities are endless! This bread is so versatile; it goes with just about anything. I love it alongside a big bowl of pasta, especially something like spaghetti with marinara sauce. The garlic in the bread complements the tomatoes perfectly. It's like they were made for each other. Or, if you're having a cozy night in, a simple salad with a light vinaigrette is a great choice. The bread adds a comforting warmth to the fresh, crisp salad. Think of it as the star of a simple meal, the main event that elevates everything around it. It's not just a side; it's a flavor enhancer.
But honestly, sometimes I just eat it on its own. Seriously, it's that good! A few slices of warm, garlicky bread is a perfect snack or a quick lunch. I've been known to sneak a slice or two straight off the baking sheet while it's still warm. Don't judge me; you'll probably do the same thing. The point is, don't feel like you have to overthink it. This bread is amazing with fancy meals or just as a little pick-me-up. It’s about enjoying the simple pleasure of good food.
Meal Type | Perfect Pairing |
|---|---|
Pasta Night | Spaghetti with Marinara Sauce |
Light Lunch | Fresh Salad with Vinaigrette |
Snack Time | Enjoy it on its own! |
Tips for Serving
When it comes to serving your roasted garlic french bread, timing is everything. You want to serve it while it's still warm and the crust is nice and crispy. If you're making it ahead of time, you can keep it warm in a low oven (around 200°F or 95°C) for a short while, but be careful not to dry it out. It's like keeping a secret, a little trick to keep that goodness fresh and tasty. I’ve found that cutting it into slices just before serving is best because it prevents the bread from getting soggy. It also makes it easier for people to grab and enjoy. You can arrange the slices on a platter or in a basket, depending on the occasion. It's all about making it look as good as it tastes.
And here's a little secret: if you have any leftover garlic butter, don't throw it away! You can use it to make garlic toast, spread it on sandwiches, or even melt it over veggies. It's like a little bonus flavor bomb that keeps on giving. I’ve even used it to sauté some shrimp, and it was delicious. So, don't let any of that garlicky goodness go to waste. It’s like having a little jar of flavor magic in the fridge.
"Good food is all the sweeter when shared with good friends." - Unknown
Storing Leftovers (If There Are Any!)
Okay, let's be real: sometimes there's leftover roasted garlic french bread, but not often. If you do happen to have some, you'll want to store it properly to keep it from getting stale. The best way to do this is to wrap the bread tightly in foil or plastic wrap and store it at room temperature for a day or two. It's like tucking it in for a little nap, keeping it fresh. You can also store it in the fridge for a few more days, but it might lose some of its crispness. When you're ready to eat it again, you can reheat it in the oven or toaster oven for a few minutes until it's warm. It's almost as good as the first time. Or, if you're feeling lazy, you can just pop it in the microwave for a few seconds, but be aware that it might get a little soft. It's all about finding what works best for you. The important thing is to enjoy every last bite.
But, honestly, my favorite way to use leftover roasted garlic bread is to make croutons. Just cut the bread into cubes, toss them with a little olive oil and herbs, and bake them until they're golden brown and crispy. These homemade croutons are amazing in salads or soups. It's like giving the bread a second life, a little transformation into something new and exciting. So, next time you have leftover garlic bread, don't throw it away; give it a second chance at deliciousness.