
Table of Contents
Ever dreamt of warm, crusty bread rolls straight from your oven? Me too! The smell of baking bread is just the best, right? But who has hours to spend kneading and waiting? That's where this quick french bread rolls recipe comes to the rescue. I'm going to walk you through how to create these little beauties without all the fuss. You'll be amazed at how simple it is to whip up these rolls, perfect for a weeknight dinner or a weekend brunch. We'll start with the basics, then I'll share my secret tips for achieving that perfect texture and golden crust. Don’t worry if you’re not a baking pro, this recipe is super beginner-friendly. From mixing the dough to the final bake, I'll guide you every step of the way. So, if you're ready to ditch the store-bought bread and make some magic in your kitchen, let’s get baking! We'll also tackle storing your rolls for later and how to serve them, making sure no roll goes uneaten. Get ready to bake some deliciousness!
The Magic Behind Quick French Bread Rolls
The Magic Behind Quick French Bread Rolls
The Speed Factor
Okay, so what makes these rolls "quick"? The secret isn't some magic spell, it’s all about the yeast and how we treat it. Instead of letting it slowly rise for hours, we use a bit more yeast and a warm environment. Think of it like this, the yeast is a tiny engine, and we're giving it the fuel and a cozy room to get to work fast. This way, we get the yummy, airy bread we all crave without the all-day wait. It's perfect for those of us who want fresh bread without becoming full-time bakers.
The Science of Softness
Ever wonder why some bread is like a rock and some is cloud-like? It's not random! It’s a mix of gluten development and hydration. When we mix the flour and water, gluten starts to form, giving the dough its structure. We want it strong enough to hold its shape, but not so strong that it becomes tough. That's where the "feel" comes in. You’ll learn to recognize when the dough is just right – not too sticky, not too dry. And don't be afraid to add a touch more water or flour. It's all about finding that perfect balance that leads to soft, chewy rolls.
Key Ingredient | Why It Matters |
|---|---|
Yeast | Makes the dough rise and gives it that airy texture |
Flour | Provides the structure and chewiness |
Water | Hydrates the flour and activates the yeast |
Salt | Controls the yeast and enhances the flavor |
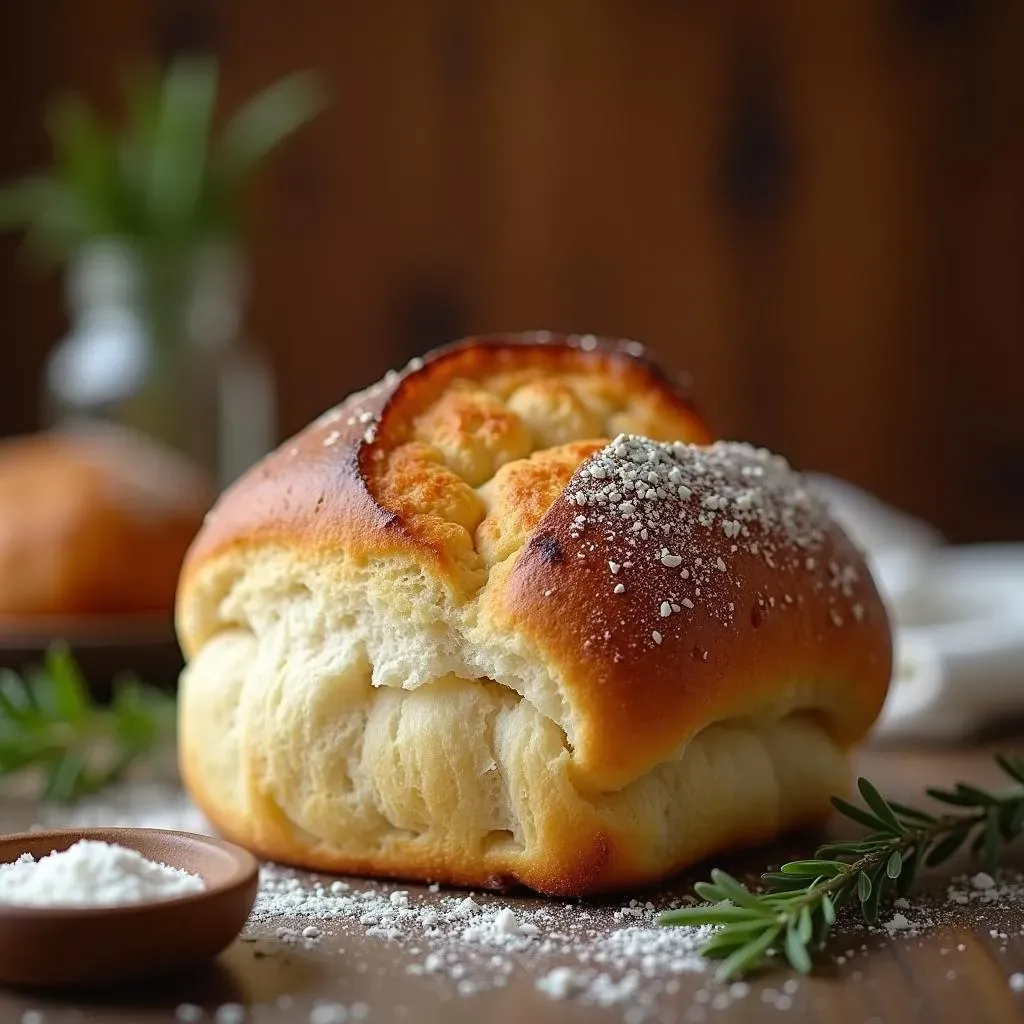
The Crusty Exterior
The crust is, let's be honest, the best part. It’s that satisfying crunch that contrasts beautifully with the soft inside. The secret here? Heat and steam. A hot oven is crucial for that crispy crust. And a little steam, whether from a pan of water or a quick spritz, helps keep the crust moist while it bakes, allowing it to get that beautiful golden-brown color. Think of it like giving your rolls a little spa treatment. This process ensures you get that bakery-quality crust that everyone loves.
Your GoTo Quick French Bread Rolls Recipe
Your GoTo Quick French Bread Rolls Recipe
The Simple Ingredients
Alright, let's get down to the nitty-gritty! This recipe is all about simplicity, so you won't need any fancy ingredients. We're talking about the basics: flour, water, yeast, salt, and a touch of sugar to feed the yeast. That’s it! I always say the best recipes are the ones that don't require a trip to a specialty store. I usually have all of this in my pantry. It’s about using what you have, and making something amazing out of it. Think of it as turning basic building blocks into something extraordinary.
Now, about the flour, I usually go for all-purpose, it is the most forgiving. But if you have bread flour, that's even better. It will give you a slightly chewier texture but don’t stress if you don’t have it. The type of yeast matters too; instant yeast is your best friend for this, it's fast and reliable. If you're using active dry yeast, just make sure you activate it in warm water first, that way you know it’s ready to work its magic. Once you have these ingredients, we’re ready to roll! (Pun intended.)
Step-by-Step Instructions
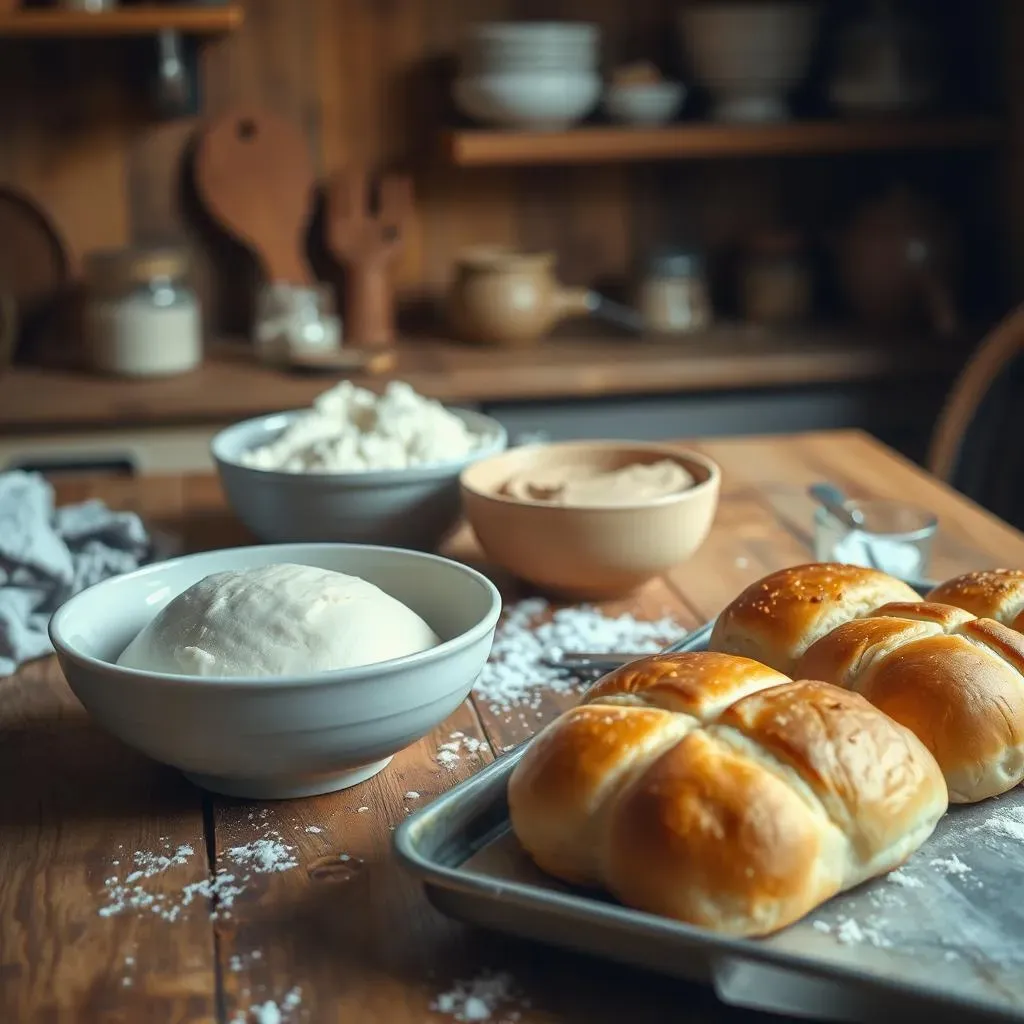
Okay, here's the fun part: mixing everything together. First, you’ll combine the warm water, sugar, and yeast. Let that sit for about 5-10 minutes, until it gets foamy; that’s how you know the yeast is active. Then, in a big bowl, you’ll mix the flour and salt, and slowly add the yeast mixture. I always start mixing with a spoon and then switch to my hands once it starts to come together. It’s a bit messy, but that’s part of the fun. Knead the dough for about 5-7 minutes until it becomes smooth and elastic. Don’t overdo it though, we’re not aiming for a super tough dough here.
Next, place the dough in a lightly oiled bowl, cover it, and let it rest in a warm spot for about 30-45 minutes, or until it doubles in size. Once it’s risen, punch it down gently to release the air, and divide it into 6-8 equal pieces. Shape each piece into a roll, place them on a baking sheet, and let them rise again for about 20 minutes. Finally, bake them at 400°F (200°C) for about 15-20 minutes, or until they are golden brown. And there you have it, your quick french bread rolls recipe is ready!
Ingredient | Amount |
|---|---|
Warm Water | 1 1/4 cups |
Sugar | 1 teaspoon |
Instant Yeast | 2 teaspoons |
All-Purpose Flour | 3 1/2 cups |
Salt | 1 1/2 teaspoons |
Tips for Perfect Quick French Bread Rolls
Tips for Perfect Quick French Bread Rolls
Mastering the Dough
Okay, so you've got the basic recipe down, but what about those little tweaks that can take your rolls from good to *amazing*? First up, let's talk about the dough. It's all about feel, folks. You want it to be smooth and elastic, but not too sticky. If it's sticking to your hands, add a little bit of flour, a tablespoon at a time, until it feels right. Remember, it's easier to add flour than to take it away. On the flip side, if your dough feels too dry, add a touch of water, again, a tablespoon at a time. It's like Goldilocks and the three bears, you want it just right. The kneading process is also very important, it’s not about brute force, it’s about technique. Use the heel of your hand to push the dough away from you, then fold it back over, repeat this action. This helps develop the gluten, making your rolls nice and chewy.
Next is the rise. The temperature of your kitchen can affect how fast the dough rises. If it's cold, it will take longer, and if it's warm, it will rise quicker. I like to place my dough in a warm spot, like near the oven, or in a slightly warmed oven (turned off, of course!) with the door slightly ajar. This creates the perfect environment for the yeast to do its magic. Also, don't over-proof it. You want it to double in size, but if it rises too much, it can collapse. When it’s time to shape the rolls, be gentle. We're not trying to squish the air out of them. Just form them into nice round shapes, or whatever shape you prefer. It’s your bread, so have fun with it!
Tip | Why it Works |
|---|---|
Dough Feel | Ensures the right texture, not too sticky or dry |
Kneading Technique | Develops gluten for a chewy texture |
Warm Rise | Speeds up the yeast activity |
Gentle Shaping | Keeps the air in the dough for a light roll |
Baking to Perfection
Now, let's talk about baking. The oven is like the final boss in this game. Preheating is crucial. You want that oven nice and hot before you put your rolls in. I also like to add some steam to the oven. You can do this by placing a baking pan with hot water on the lower rack, or by spritzing the oven with water right after putting the rolls in. The steam helps create that beautiful crust that we all crave. Keep an eye on your rolls, baking times can vary depending on your oven. They should be golden brown and sound hollow when you tap them on the bottom. This is your sign that they're ready. Once they’re out of the oven, let them cool on a wire rack. This prevents the bottoms from getting soggy. And, if you can resist, let them cool for a bit before digging in. It’s hard, I know, but it makes a difference.
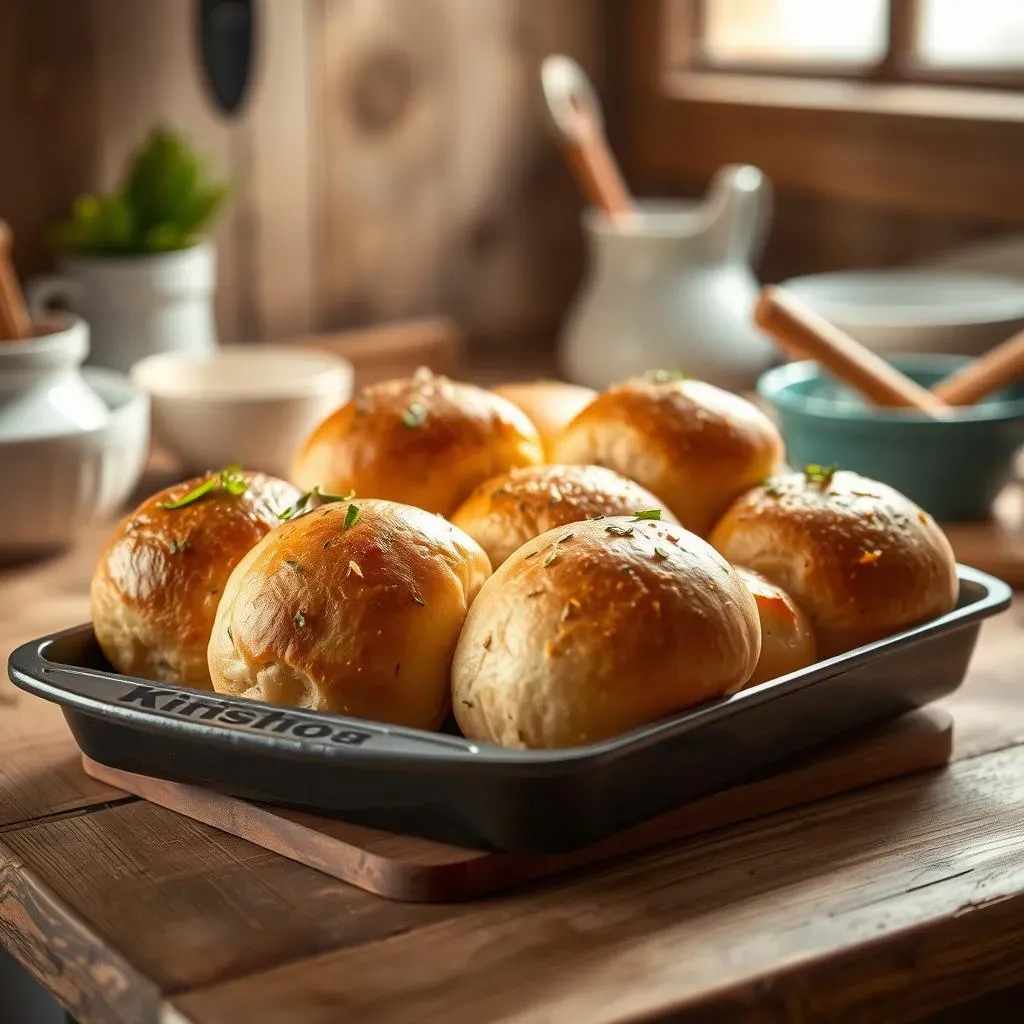
Flavor Boosters
Want to take your rolls to the next level? There are so many ways to add flavor. Before baking, brush the tops with melted butter or olive oil and sprinkle with some sea salt. Or, add some herbs to the dough, like rosemary or thyme. You can also add garlic powder to make garlic bread rolls. The possibilities are endless! Don't be afraid to experiment and make this recipe your own. You can even add some cheese, like parmesan, to the tops before baking. It's all about having fun and creating something delicious. It’s your kitchen, so do what makes you happy! So experiment, have fun, and most importantly, enjoy your baking journey. You’ve got this!
Quick French Bread Rolls: Serving and Storage
Quick French Bread Rolls: Serving and Storage
Serving Suggestions
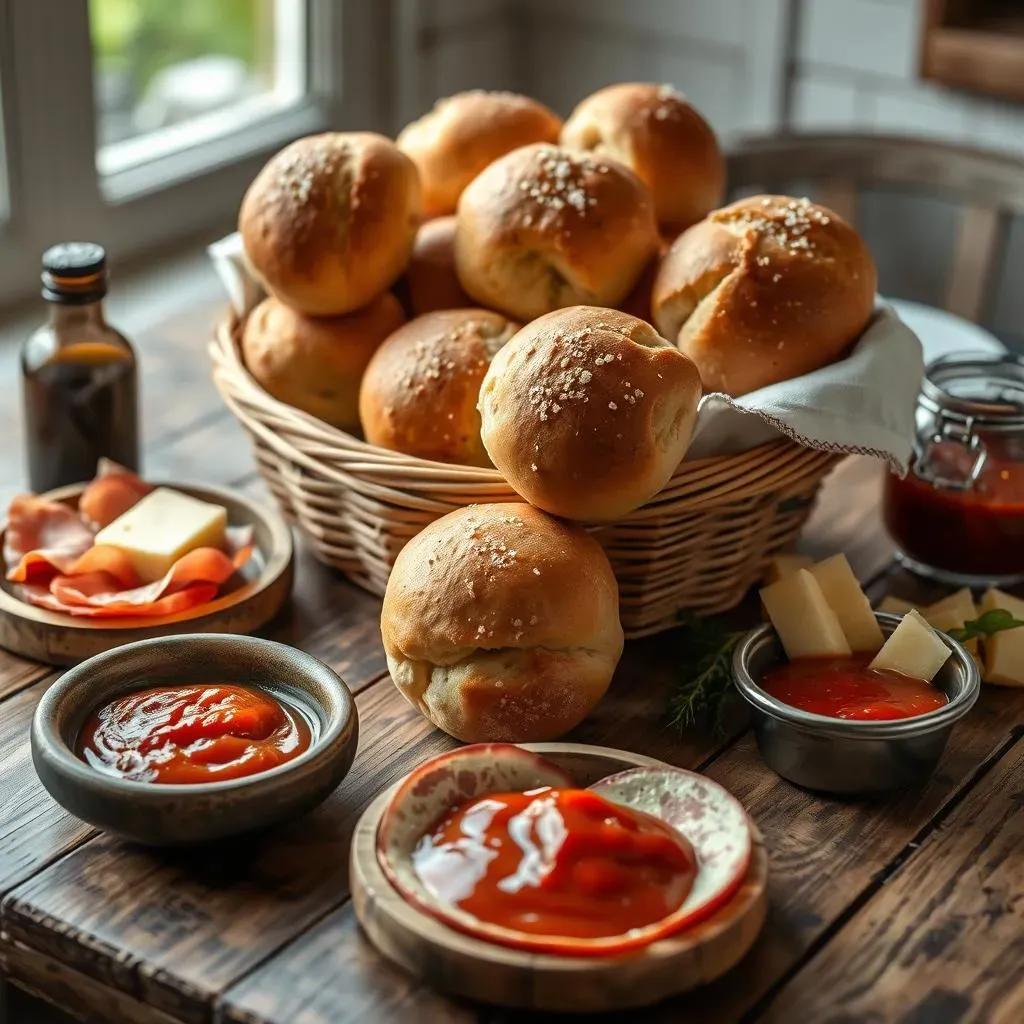
Okay, so you've got these amazing, fresh-baked rolls. Now, what do you do with them? Well, the possibilities are endless! My favorite way to enjoy these is fresh out of the oven, with a smear of butter and a sprinkle of sea salt. It’s simple, but oh-so-good. They're also fantastic for sandwiches, or used as a side to your favorite pasta dish. Think of them as your blank canvas for culinary creativity. I've used them for mini-burgers, sliders, and even as a base for bruschetta. Seriously, the limit does not exist. If you're having a soup night, these rolls are just begging to be dipped into something warm and hearty. They also make for a great addition to any charcuterie board, it's that extra touch that everyone loves.
Don't underestimate the power of a simple side. These rolls can elevate any meal. And if you're having a party, a basket full of these warm rolls is always a crowd-pleaser. I’ve seen people grab multiple rolls, because they are just that good. They are also a great option for a quick breakfast. Just slice them open and add your favorite toppings, like avocado and a fried egg. It’s a great way to start the day. So, get creative, have fun, and enjoy the fruits of your baking labor. These rolls are versatile, delicious, and guaranteed to make any meal a little bit better.
Serving Idea | Why It's Great |
|---|---|
Butter and Salt | Simple, classic, and lets the bread shine |
Sandwiches | Versatile and can be filled with anything |
Soup Dippers | Perfect for soaking up delicious broth |
Charcuterie Boards | Adds a homemade touch to any spread |
Storage Tips
Alright, let's talk about keeping these rolls fresh. If you're planning on eating them within a day or two, just store them in an airtight container at room temperature. This will keep them soft and delicious. I like to use a bread box, but any container will do. If you live in a humid area, you might want to add a paper towel to the container to absorb any excess moisture. This will help prevent them from getting soggy. If you want to keep them longer, freezing is your best bet. Let them cool completely, then wrap them tightly in plastic wrap and place them in a freezer bag. They can stay frozen for up to three months.
When you’re ready to eat them, let them thaw at room temperature, or you can reheat them in the oven. To reheat, preheat your oven to 350°F (175°C) and bake the rolls for about 5-10 minutes, or until they are warmed through. You can also spritz them with water before reheating to help refresh the crust. Avoid microwaving them, as they can get tough. I know it's tempting, but trust me, the oven is the best way to go. With these simple storage tips, you can always have fresh-baked rolls on hand. It’s like having a little bakery in your own kitchen. So, go ahead and bake a big batch, you can enjoy them for days.
Reheating and Refreshing
Let's face it, sometimes we want that fresh-baked taste again, even if the rolls are a few days old. Reheating is the key here, and it's super simple. Preheat your oven to 350°F (175°C). If the rolls are frozen, let them thaw a bit before placing them in the oven. Sprinkle a little water on the rolls before putting them in the oven, this helps to rehydrate the crust. Bake them for about 5-10 minutes, or until they are warmed through. This method will make them taste almost as good as the day they were baked. If you're in a real hurry, you can use a toaster oven, it works just as well. But please, avoid the microwave, unless you want them to become rubbery. A little extra effort goes a long way when it comes to reheating your rolls. It's all about those little touches that make a big difference. So, don't be afraid to experiment and find what works best for you. Happy baking and eating!
Quick French Bread Rolls: Your New Baking Best Friend
So, there you have it – your guide to mastering the art of quick French bread rolls. I hope you've seen that baking doesn't need to be a long, drawn-out affair. This recipe is all about getting fantastic results without spending hours in the kitchen. Whether you're a seasoned baker or just starting out, these rolls are a game-changer. They’re perfect for any meal, any day. From the first mix to the last bite, I know you’ll enjoy the process and the deliciousness that comes from your own oven. So go ahead, bake a batch and impress yourself (and maybe your friends and family too!). And remember, the best baking moments are those shared, so pass the rolls around and enjoy the simple joy of homemade bread. Happy baking!