Table of Contents
Ever dreamed of enjoying warm, crusty French baguettes without spending hours in the kitchen? Forget complicated recipes and lengthy processes! This article delivers a "quick and easy French baguette recipe" that even baking novices can master. We’ll guide you step-by-step through a simple yet effective method, ensuring you achieve perfectly golden-brown, airy baguettes. Get ready to impress your friends and family with homemade bread that tastes like it came from a Parisian boulangerie. We'll cover essential ingredients, simple techniques, and helpful tips to perfect your baking skills. Ready to transform your kitchen into a mini-French bakery? Let's get started!
Mastering the Quick & Easy French Baguette Recipe
Mastering the Quick & Easy French Baguette Recipe
Understanding the Basics
Let's be honest, the thought of making baguettes can seem intimidating. Images of flour-dusted bakers working magic in ancient ovens spring to mind. But the truth is, a truly delicious baguette doesn't require years of apprenticeship or a fancy wood-fired oven. This quick and easy recipe focuses on streamlining the process while maintaining amazing flavor and texture. We'll use simple techniques to achieve professional results, making the whole process surprisingly accessible.
Think of it like this: a great baguette is a balance of a few key elements – the right flour, the right hydration, and the right baking technique. Get those three things right, and you're well on your way to baguette bliss. We'll break down each element in detail, making sure you understand exactly what's going on at each stage. Forget complicated jargon, we'll use clear, easy-to-understand language that anyone can follow. Even if you've never baked bread before, you'll be surprised at how quickly you pick it up.
Element | Importance | Our Approach |
|---|---|---|
Flour | Provides structure and flavor | High-protein flour for best results |
Hydration | Affects texture and rise | Precise water measurements for optimal dough consistency |
Baking Technique | Creates the characteristic crust | Simple steam technique for crispy exterior, soft interior |
The Power of Simplicity
Many traditional baguette recipes involve long, complex processes, including multiple rises and elaborate shaping techniques. Our approach is different. We prioritize efficiency without sacrificing quality. By focusing on a few key steps and using readily available ingredients, we make this recipe incredibly accessible. It’s about achieving that perfect balance of a crisp, golden-brown crust and a soft, airy interior – without the fuss.
This isn't about shortcuts that compromise flavor; it’s about smart techniques that maximize results. We'll leverage the power of a few key ingredients and simple methods to create baguettes that rival those found in the best bakeries. Imagine the satisfaction of biting into a perfectly crafted baguette, knowing you made it yourself, quickly and easily. This recipe is your gateway to that satisfaction. You'll be amazed at how straightforward and rewarding the process actually is.
- Simple ingredient list
- Minimal kneading required
- Fast rising time
- Easy shaping technique
- Quick baking time
Essential Ingredients for Your Quick & Easy French Baguette

Essential Ingredients for Your Quick & Easy French Baguette
The Star of the Show: Flour
Let's start with the foundation of any great baguette: the flour! You wouldn't build a house without strong bricks, and you won't bake a perfect baguette without the right flour. We're looking for a high-protein flour, ideally with a protein content of 12% or higher. This higher protein content translates to more gluten, which gives your baguette that wonderful chewy texture and helps it rise beautifully. Don't be afraid to splurge a little on good quality flour; it makes a huge difference in the final product. Think of it as the secret weapon that elevates your baguette from good to extraordinary.
Avoid all-purpose flour for this recipe; it simply doesn't have the gluten development needed for a proper baguette. High-protein bread flour, or even a strong baker's flour, will be your best bet. The extra gluten will give you a more substantial rise and a delightful chewiness that will have you reaching for another slice (or two!). The difference is night and day. Trust me on this!
Flour Type | Protein Content (%) | Suitable for Baguettes? |
|---|---|---|
All-Purpose | 8-11 | No |
Bread Flour | 12-14 | Yes |
Baker's Flour | 14+ | Yes |
The Unsung Heroes: Yeast, Water, and Salt
While flour takes center stage, the supporting cast of ingredients is equally crucial. We'll need active dry yeast to leaven our dough, giving it that characteristic airy texture. Don't skimp on the yeast; use a fresh packet for the best results. Warm water activates the yeast, so make sure it's lukewarm, not hot (hot water will kill the yeast!). Think of it as Goldilocks and the Three Bears – the water temperature needs to be just right.
Salt is often overlooked, but it's vital for flavor and dough development. It also controls the yeast activity, preventing it from becoming too enthusiastic. Use a good quality sea salt or kosher salt for the best taste. Don't be afraid to experiment with different salts to see how they affect the flavor profile of your baguettes. A pinch of sugar can also help feed the yeast and give a slight sweetness to your bread, but it's entirely optional.
- Active dry yeast (1 packet or 2 1/4 tsp)
- Warm water (around 105°F)
- Sea salt or kosher salt (to taste)
- (Optional) 1 teaspoon of sugar
Optional Enhancements: Oil and Other Flavorings
While not strictly essential, a touch of olive oil can add richness and flavor to your baguettes. It also helps keep the dough from sticking and makes it easier to handle. A teaspoon or two is all you need. You could also experiment with adding herbs, such as rosemary or thyme, for an extra aromatic kick. Just remember to keep the additions minimal so as not to overwhelm the delicate flavor of the bread itself.
Remember, this is your baguette; feel free to experiment and add your own personal touches. Maybe you'd like to try a touch of honey or a sprinkle of sesame seeds. The beauty of baking is the freedom to create and customize. These additions are completely optional, but they can add a lovely twist to your quick and easy French baguettes. Have fun exploring!
"The secret to a good baguette is simple ingredients, handled with care." - A wise baker (probably)
StepbyStep Guide: Baking Your Quick & Easy French Baguette
StepbyStep Guide: Baking Your Quick & Easy French Baguette
Mixing and Kneading: The Foundation of a Great Baguette
Alright, let's get our hands dirty! In a large bowl, combine your high-protein flour, salt, and sugar (if using). Make a well in the center and add your yeast. Gradually pour in the lukewarm water, mixing with a wooden spoon or your hands until a shaggy dough forms. Don't worry about perfection at this stage; it's okay if it's a little messy. Then, add your olive oil and knead the dough for about 5-7 minutes until it becomes smooth and elastic. If you're using a stand mixer, use the dough hook attachment for about 5 minutes on medium speed. This kneading develops the gluten, which is essential for a good rise and chewy texture.
The kneading process is where the magic happens – you're developing the gluten strands in the dough, creating that beautiful chewy texture. Don't be afraid to get your hands a little messy; it's all part of the fun! If the dough is too sticky, add a tablespoon or two of flour at a time until it's manageable. If it's too dry, add a teaspoon of water at a time. The goal is a dough that's slightly tacky but not overly sticky. You should be able to form a ball without it sticking to your hands too much. Once you have a smooth, elastic dough, you're ready to move on to the next step.
Step | Action | Tip |
|---|---|---|
1 | Combine dry ingredients | Ensure yeast is not in direct contact with salt. |
2 | Add water gradually | Water temperature is crucial – lukewarm is best. |
3 | Knead for 5-7 minutes | If using a stand mixer, use the dough hook. |
Rising, Shaping, and Baking: Bringing Your Baguette to Life
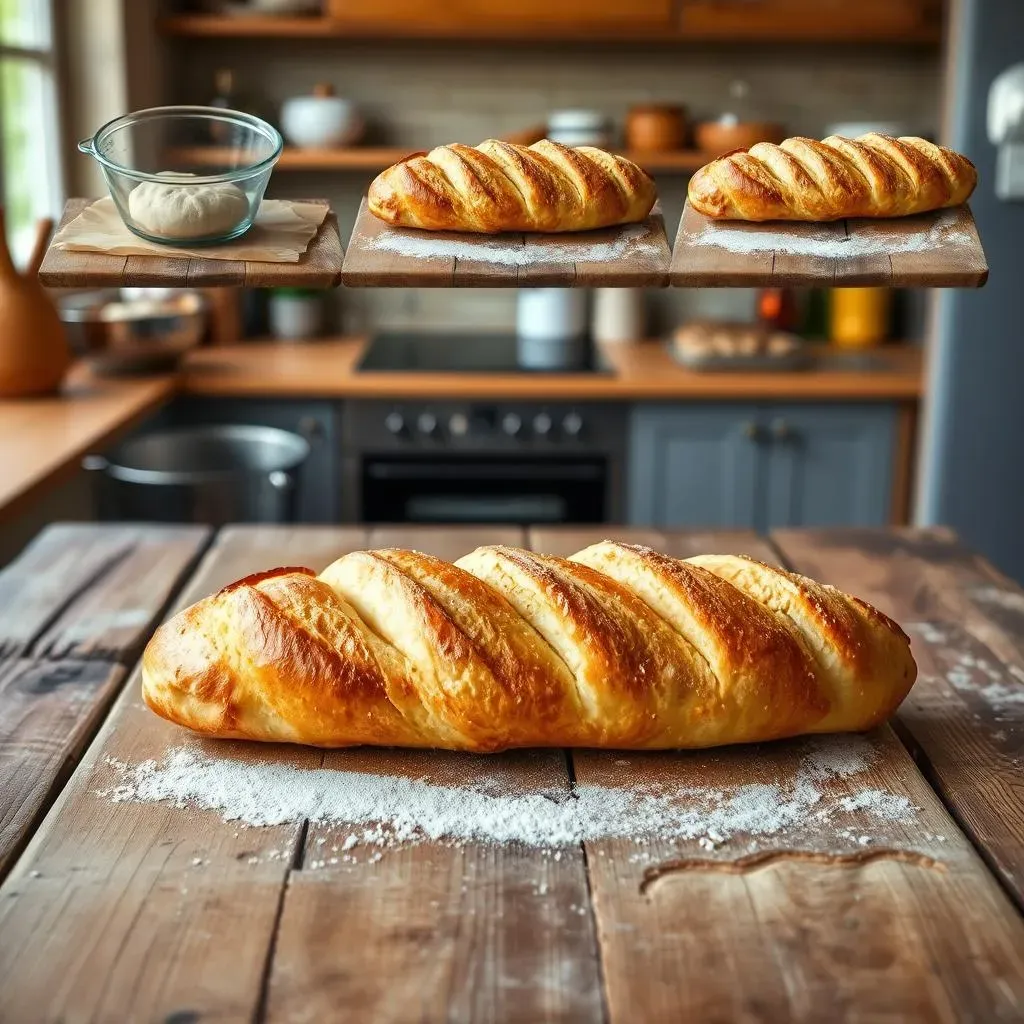
Once your dough is kneaded, place it in a lightly oiled bowl, turning to coat. Cover the bowl with plastic wrap and let it rise in a warm place for about 1-1.5 hours, or until doubled in size. This is where the yeast works its magic, creating those lovely air pockets that give the baguette its airy texture. While the dough is rising, preheat your oven to 450°F (232°C) with a baking sheet inside. This will help create steam in the oven, which is essential for a crispy crust.
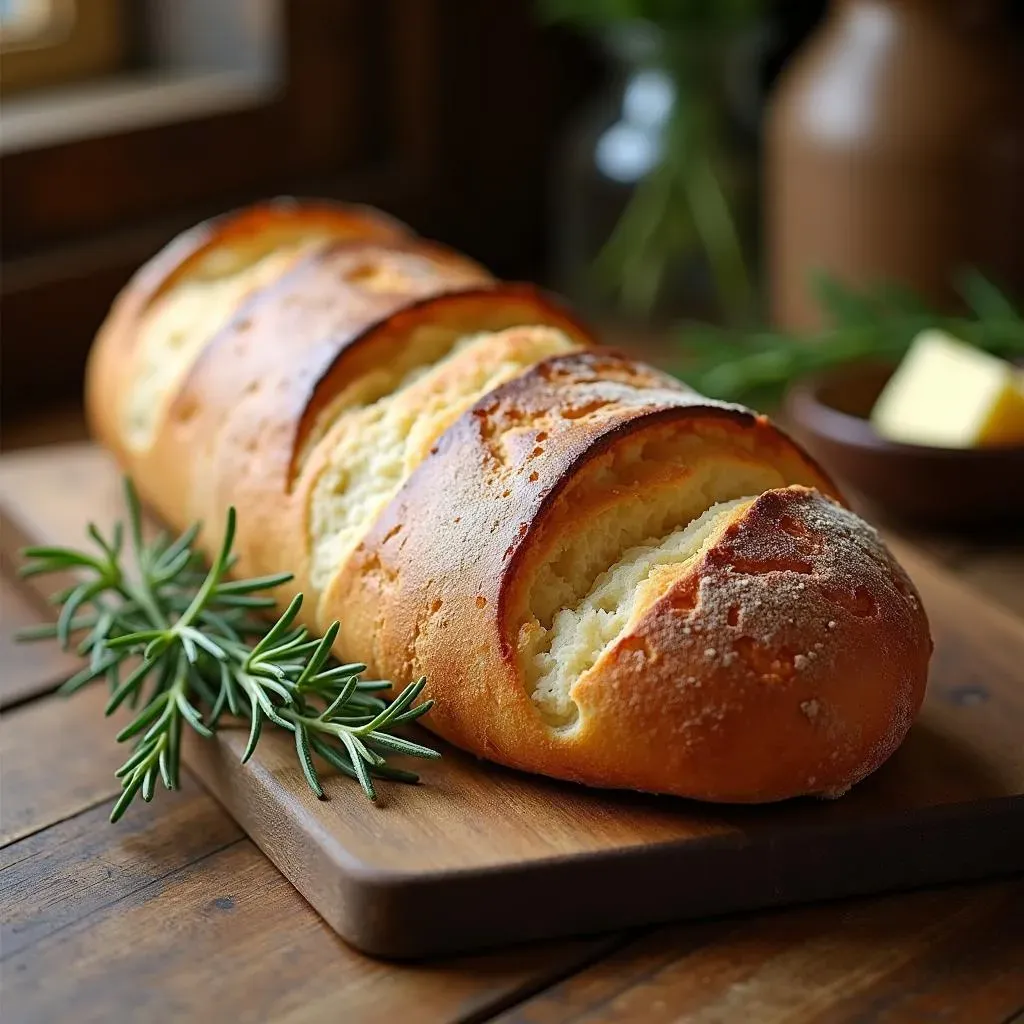
After the first rise, gently punch down the dough to release the air. Divide it into 2-3 equal pieces, shape each piece into a long baguette, and place them on a parchment-lined baking sheet. Lightly slash the tops of the baguettes with a sharp knife or lame (a special bread scoring tool). This allows the bread to expand evenly during baking, creating that characteristic crackly crust. Place a pan of hot water on the bottom rack of your oven to create steam (this is crucial for a crispy crust!). Bake for 20-25 minutes, or until the baguettes are golden brown and sound hollow when tapped on the bottom.
- First rise: 1-1.5 hours
- Preheat oven to 450°F (232°C) with a baking sheet inside.
- Shape into baguettes and slash the tops.
- Bake for 20-25 minutes with a pan of hot water on the bottom rack.
Tips and Tricks for the Perfect Quick & Easy French Baguette
Tips and Tricks for the Perfect Quick & Easy French Baguette
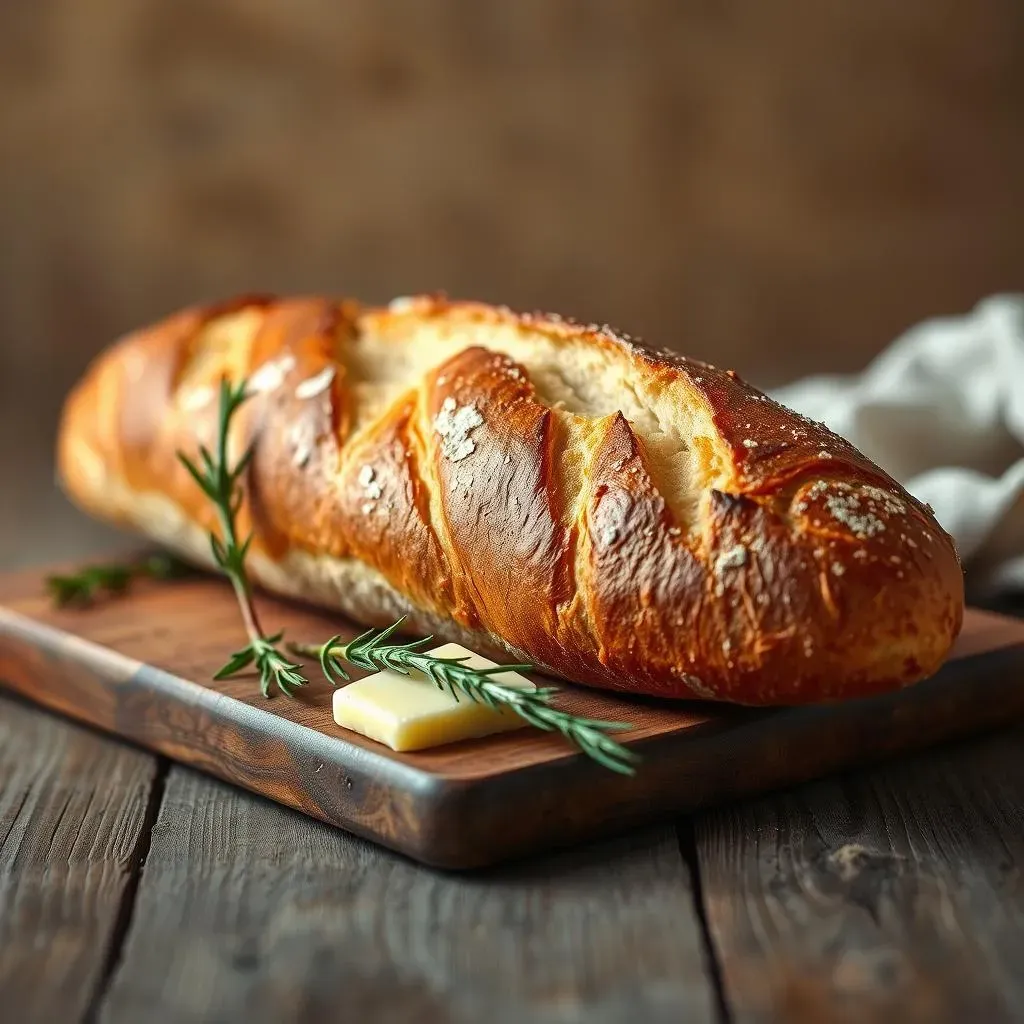
Mastering the Steam: The Secret to a Crackly Crust
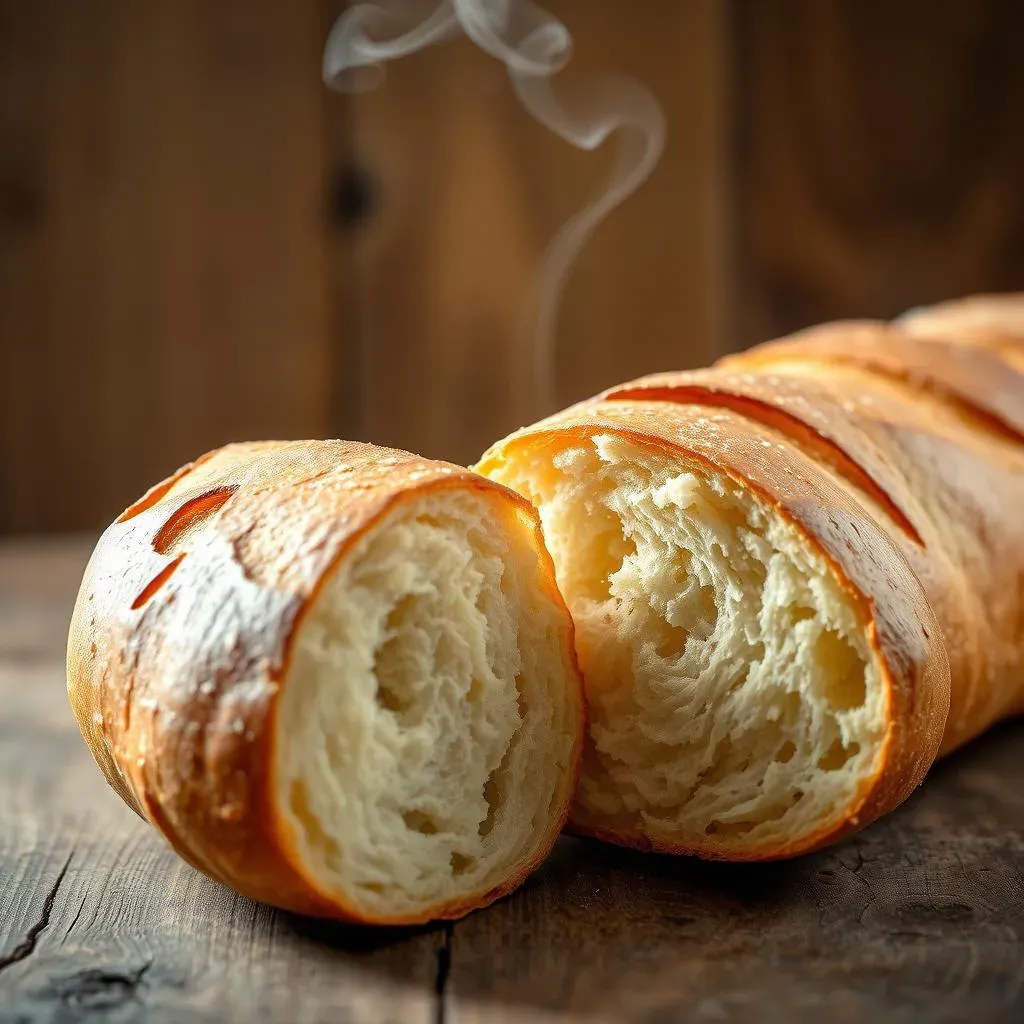
That gorgeous, crackly crust is what elevates a baguette from ordinary bread to something truly special. The key? Steam! Creating a steamy environment in your oven during the first few minutes of baking helps develop that perfect crust. You can achieve this by placing a pan of hot water on the bottom rack of your oven. The steam creates a humid atmosphere, preventing the crust from forming too quickly and allowing the inside to rise properly. Without steam, you risk a tough, pale crust.
Don't underestimate the power of steam! It's the difference between a bakery-quality baguette and a slightly disappointing loaf. Experiment with the amount of water you use – a shallow pan with about an inch of boiling water usually does the trick. You might need to adjust this depending on your oven. The goal is a good amount of steam in the first 10-15 minutes of baking. After that, you can remove the pan of water and let the baguettes bake until golden brown.
Tip | Benefit |
|---|---|
Use a pan of hot water | Creates steam for a crispy crust |
Pre-heat your baking sheet | Ensures even baking |
Don't open the oven door too early | Maintains oven temperature and steam |
Scoring: The Art of the Slash
Those elegant slashes on top of a baguette aren't just for show; they're crucial for proper expansion. Scoring allows the dough to expand evenly during baking, preventing it from bursting unevenly. Use a sharp knife or a lame (a special bread scoring tool) to make several diagonal slashes about 1/2 inch deep. The depth of the slashes should be consistent for even expansion. Practice makes perfect; don’t worry if your first few attempts aren't picture-perfect. The most important thing is to make consistent slashes that allow the dough to expand properly.
Think of scoring as guiding the baguette's expansion. Without it, the dough might burst unpredictably, resulting in an unevenly shaped loaf. A well-scored baguette will have a beautiful, symmetrical rise with those characteristic ear-like protrusions. Experiment with different scoring patterns to find what you like best. Some bakers prefer simple slashes, while others create more elaborate designs. The possibilities are endless!
- Use a sharp knife or lame.
- Make consistent, 1/2-inch deep slashes.
- Experiment with different scoring patterns.
Cooling and Storage: Preserving Your Baguette's Perfection
Once your baguettes are golden brown and sound hollow when tapped, remove them from the oven and let them cool completely on a wire rack. This prevents them from becoming soggy. Resist the urge to slice into them while they're still warm; let them cool completely to enjoy their full texture and flavor. Once cooled, store them in a paper bag or airtight container at room temperature for up to 2 days. For longer storage, freeze them – they freeze beautifully!
Proper cooling and storage are essential for preserving the quality of your freshly baked baguettes. A wire rack allows for even airflow, preventing moisture from accumulating and making the crust soggy. If you're storing them for longer than a day or two, freezing is a great option. Simply wrap them tightly in plastic wrap and then place them in a freezer bag. To reheat, thaw them overnight in the refrigerator and then reheat in a 350°F oven for about 5-10 minutes, or until warmed through.
"Patience is a virtue, especially when it comes to baking. Let your baguettes cool completely before slicing!" - Your Friendly Neighborhood Baker