Table of Contents
Ever bite into a sandwich that's just… perfect? The kind where the bread is as much a star as the filling? That's the magic of NOLA-style french bread rolls. These aren't your average grocery store rolls; they're a culinary experience, a taste of New Orleans right in your kitchen. We're talking about a crust that shatters with a satisfying crunch, giving way to an airy, soft interior that's begging to be piled high with your favorite ingredients. If you’ve ever wondered how to capture that unique texture and flavor, you're in the right place. This article will be your guide, taking you through the key elements that make these rolls so special, from the ingredients to the techniques. We'll explore what sets NOLA-style french bread rolls apart from the rest, then we'll dive into a straightforward, step-by-step recipe that’ll have you baking like a pro. Finally, we’ll cover some tips for serving and storing your homemade creations, so you can enjoy that fresh-baked goodness for days. Get ready to roll up your sleeves and bake some unforgettable NOLA-style french bread rolls.
The Soul of NOLAStyle French Bread Rolls: What Makes Them Special?
The Soul of NOLAStyle French Bread Rolls: What Makes Them Special?
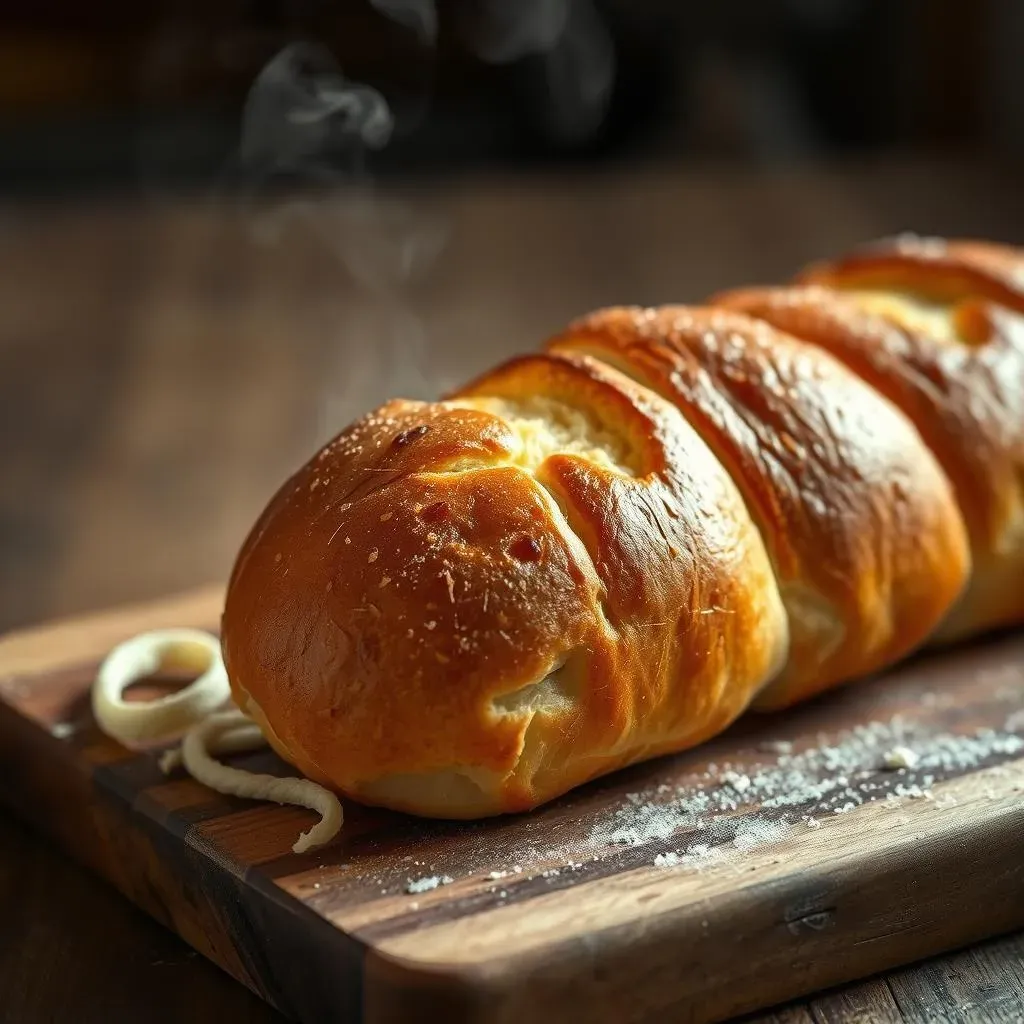
Okay, so you're curious about what makes these NOLA-style french bread rolls so special, right? It's not just about slapping some dough in the oven and calling it a day. These rolls have a history, a vibe, a whole 'thing' going on. First off, it's all about the crust. It's not just crispy; it's got this delicate, almost flaky quality that shatters when you bite into it. Then, you hit the inside, and it's like a fluffy cloud – light, airy, and with just the right amount of chew. This isn't your typical dense, bread-like roll. Think of it as the Goldilocks of bread – not too hard, not too soft, but just right. It's this perfect balance of textures that makes them uniquely NOLA. And it’s not just texture; there's a subtle tang, a depth of flavor you don't get with regular bread. It's a combination of the ingredients and the way they're treated. It is this specific method that gets the air pockets just perfect.
Crafting Your Own: A StepbyStep Guide to NOLAStyle French Bread Rolls
Crafting Your Own: A StepbyStep Guide to NOLAStyle French Bread Rolls
The Foundation: Mixing the Dough
Alright, let's get our hands dirty, shall we? First, you're going to need some basic ingredients: flour, water, a touch of sugar, olive oil, and salt. Don't get fancy; we’re going for simplicity here. The key is the order in which you add them. Water goes into your mixing bowl first, then the sugar, oil, flour, and lastly, the salt. It's like building a tiny edible skyscraper, each layer important. Now, you’ll want to mix that all together until it forms a shaggy dough. Don't worry if it looks a bit rough; we're not aiming for perfection yet. Think of it as a messy start to something beautiful. This first mix is really about just getting everything acquainted.
I remember the first time I tried this, I was so worried about getting it exactly right. My dough was sticky, lumpy, and looked nothing like the pictures. But, you know what? It still tasted amazing. So don't sweat the small stuff; just get in there and mix it up.
The Magic of the Rise: Patience is Key
Now comes the waiting game. After the initial mix, you'll let the dough rest for a bit. This is where the magic happens. It's like the dough is taking a deep breath, relaxing and getting ready to become something truly special. You'll want to give it a good 20 minutes or so, then give it a little knead and let it rise again. This is not a race; it's more like a slow dance. The longer you let it rise (within reason, of course, we’re not talking days), the more airy and flavorful your rolls will be. Think of the yeast as tiny little chefs working hard to make your bread delicious. If you rush them, you’ll be sacrificing flavor and texture.
I once tried to speed up the process by putting my dough in a warm oven. It rose, alright, but it tasted kinda funky. Lesson learned: patience is a virtue, especially when baking. Let the dough do its thing at its own pace.
Step | Action | Time |
|---|---|---|
1 | Mix ingredients into a shaggy dough | 5-10 minutes |
2 | First Rise | 20 minutes |
3 | Knead and second rise | 2-3 hours |
Shaping and Baking: The Grand Finale
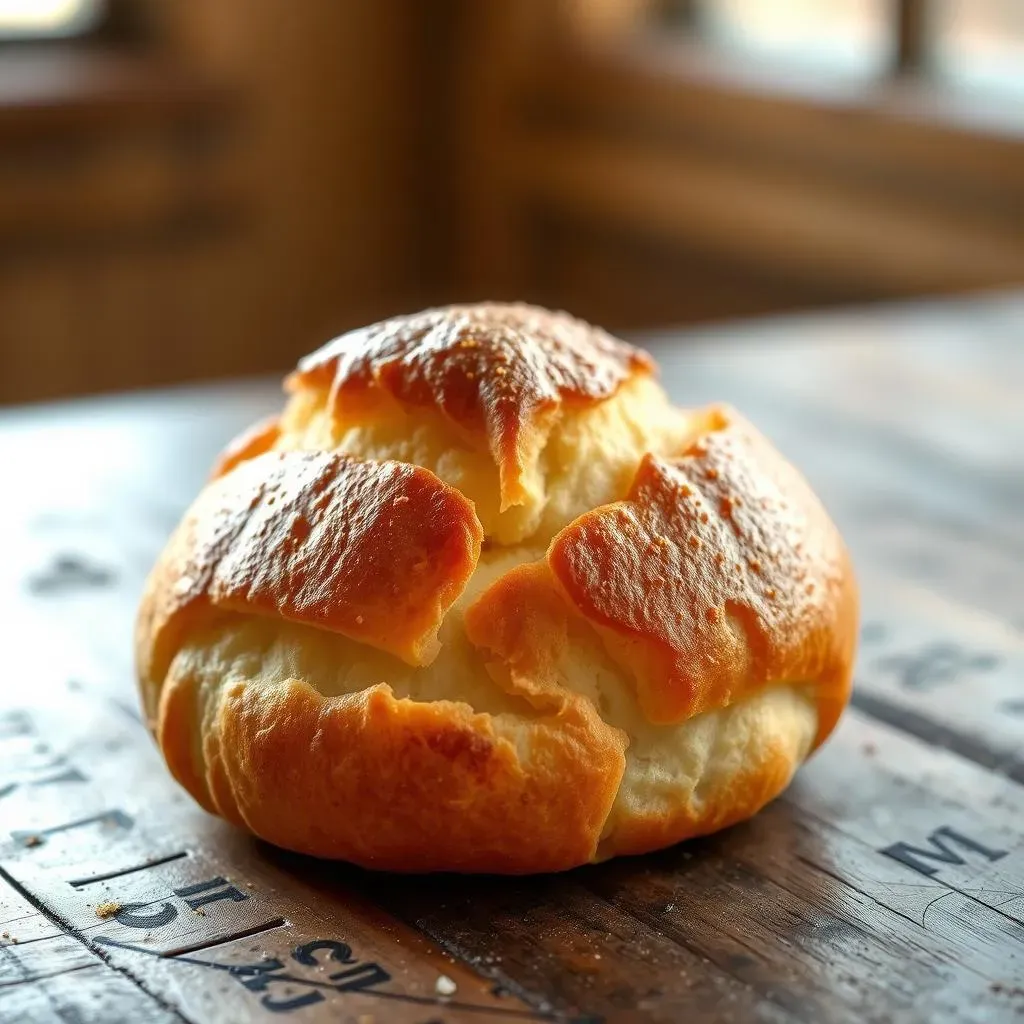
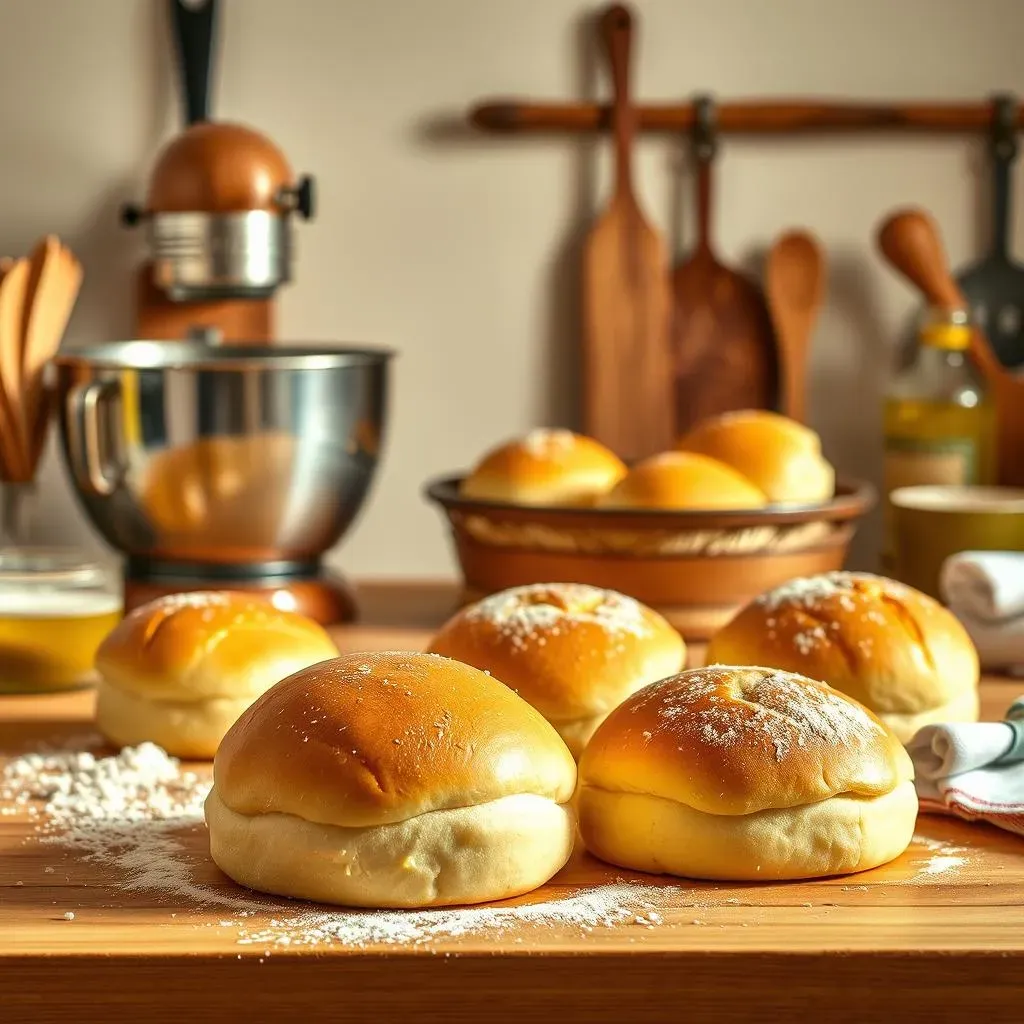
Okay, the dough has risen, and now it's time for the fun part: shaping those rolls. Gently deflate the dough (don't punch it like you’re mad at it), and divide it into equal portions. Roll each portion into a log and let them rest. This little rest will help them puff up nicely in the oven. Finally, it's baking time. Preheat your oven to a high temperature, and get those rolls in there. You'll want to bake until they're golden brown and the crust is beautifully crisp. The smell that will fill your kitchen is nothing short of heavenly. When they’re done, take them out and let them cool on a rack. Don’t even think about cutting into them right away; you need to let them rest so the crumb can set. Trust me; it's worth the wait.
There’s something incredibly satisfying about watching those rolls go from a shapeless lump to golden brown beauties. It's like a little bit of magic right in your kitchen. I've had some disastrous baking days, but there's always a thrill when the final product turns out perfect.
Beyond the Basics: Serving and Storing Your NOLAStyle French Bread Rolls
Beyond the Basics: Serving and Storing Your NOLAStyle French Bread Rolls
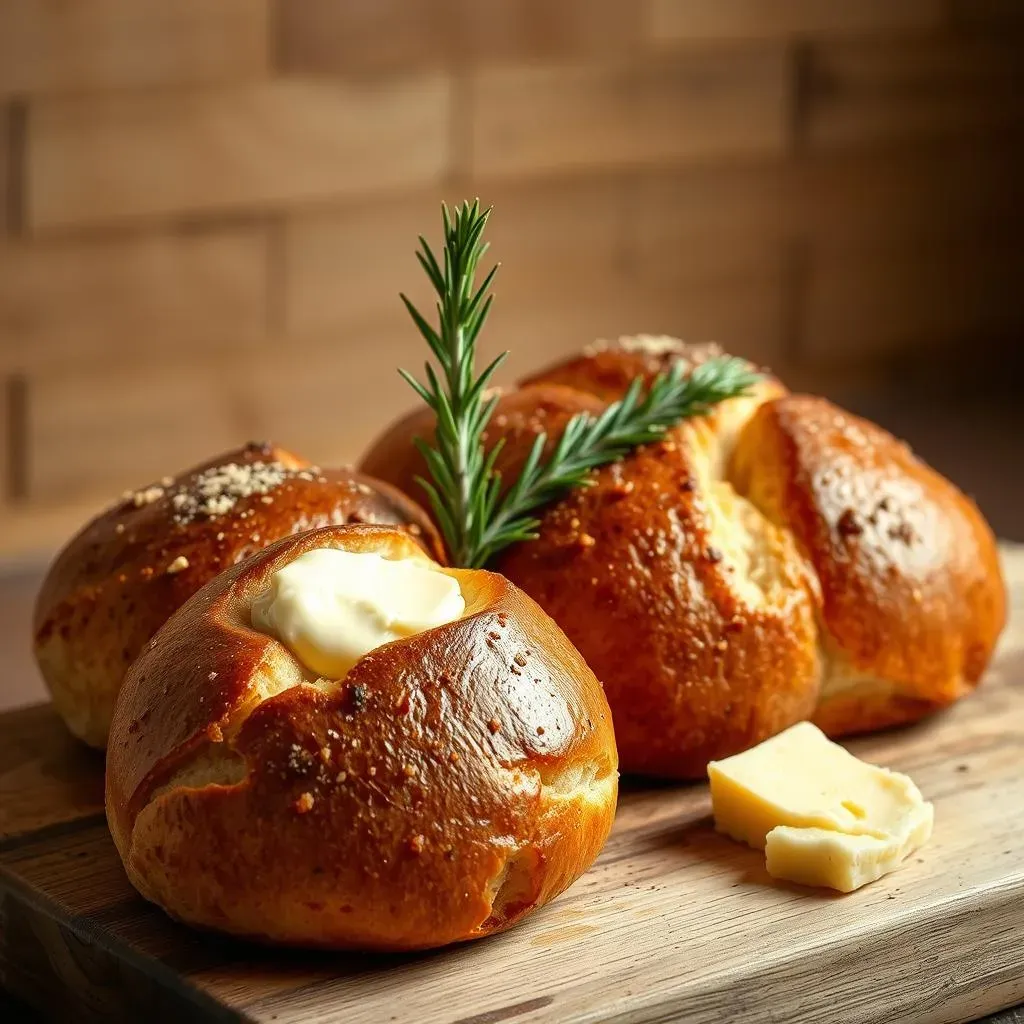
So, you've baked these gorgeous NOLA-style french bread rolls, and now you're wondering, "What next?" Well, the fun doesn't stop at the oven. These rolls are incredibly versatile. They're fantastic for classic New Orleans po'boys, loaded with fried shrimp or roast beef. But don't limit yourself; they make amazing sandwiches of all kinds. Think BLTs, turkey and swiss, or even a simple tomato and mozzarella. The light, airy texture of the rolls makes them perfect for soaking up flavorful sauces and fillings. And if you're not using them for sandwiches, you can serve them alongside a hearty soup or stew. They are also great just with some good butter or olive oil. The possibilities are endless, really. Don't be afraid to experiment and get creative with your toppings and pairings. I once used them for mini pizzas, and they were a hit!
Serving Suggestion | Description |
|---|---|
Po'boys | Classic New Orleans sandwich, typically with fried seafood or roast beef. |
Sandwiches | Ideal for BLTs, turkey & swiss, or any sandwich filling. |
Soup Accompaniment | Serve alongside hearty soups or stews. |
Simple sides | Serve with butter or olive oil |
Now, let's talk storage. Freshly baked NOLA-style french bread rolls are best enjoyed on the day they're made, but they can be stored for later. If you're not eating them right away, let them cool completely on a wire rack. Once they're cool, store them in a paper bag or a bread box at room temperature. This helps maintain their crusty exterior. Avoid storing them in plastic bags, as this can make the crust soggy. They'll keep well for a day or two, but for longer storage, you can freeze them. Wrap them tightly in plastic wrap, then place them in a freezer bag. When you're ready to use them, let them thaw at room temperature and refresh them in a warm oven for a few minutes to crisp up the crust. It’s like giving them a mini spa day before their big debut. I always make a double batch, freeze half, and enjoy fresh rolls whenever I want.
- Cool completely on a wire rack.
- Store in a paper bag or bread box at room temperature for 1-2 days.
- Freeze in plastic wrap and freezer bag for longer storage.
- Thaw at room temperature and refresh in a warm oven.