
Table of Contents
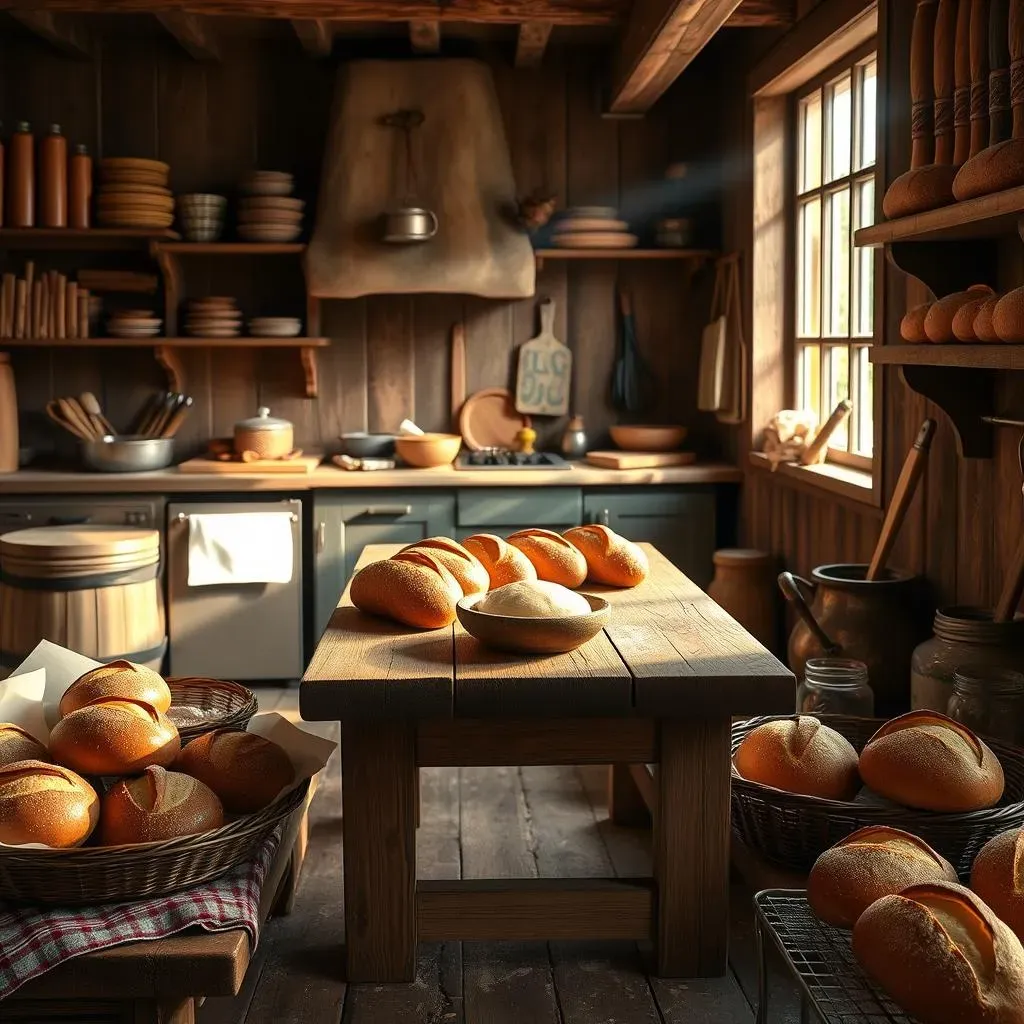
Ever dream of biting into a warm, crusty roll that's light and fluffy inside? Well, you're in for a treat! This isn't just any bread recipe; it's your ticket to mastering the art of making french bread rolls right in your own kitchen. Forget those store-bought, bland imitations. We're talking about the real deal: rolls with a satisfying crunch and a soft, airy center that will make you the envy of every dinner table. This guide will take you through each step, from mixing the simple dough to baking golden, irresistible rolls. We'll start by uncovering the secrets to the perfect dough, then move on to easy-to-follow shaping techniques, and finally, baking tips to get that classic French bread texture. I'll also share some extra tips and tricks I've picked up along the way, so even if you're new to bread making, you will be a pro before you know it. Get ready to impress yourself and everyone else with your amazing homemade french bread rolls.
The Secret to Making Perfect French Bread Rolls
The Secret to Making Perfect French Bread Rolls
Okay, so you want to know the real secret? It's not some magical ingredient or some fancy technique that only professional bakers know. It’s all about understanding the basics and paying attention to the details. The foundation for any great French bread roll is a simple dough made from just a few ingredients: flour, water, yeast, and salt. The key is in the quality of your ingredients and how you treat the dough. We're talking about using good quality flour, not just any old bag you found at the back of your pantry, and water that’s warm enough to get that yeast going without killing it. It’s not about being perfect but about understanding the process. Think of it like a science experiment, but one you get to eat at the end.
StepbyStep: Your Guide to Making French Bread Rolls
StepbyStep: Your Guide to Making French Bread Rolls
Mixing the Dough: The First Step
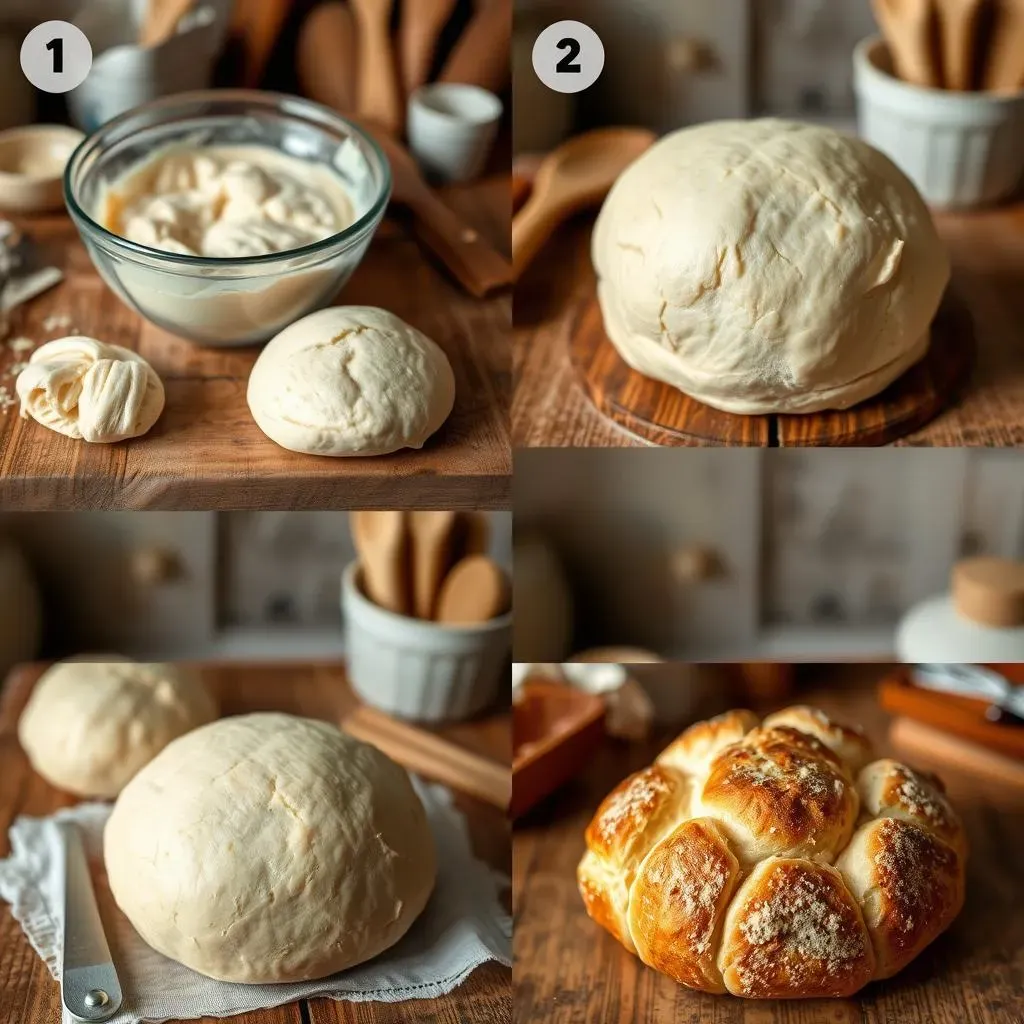
Alright, let's get our hands floury! First, you'll need to activate the yeast. Think of it as waking up the little guys who are going to make our bread rise. In a bowl, mix warm water (not too hot, or you'll cook them!) with a pinch of sugar. Then, sprinkle the yeast on top and let it sit for about 10 minutes, until it gets all foamy and bubbly. This means the yeast is alive and ready to go. In a separate bowl, combine your flour and salt. Once the yeast is ready, pour that frothy mixture into the flour, and start mixing. You can use a stand mixer or do it by hand, whatever floats your boat. The dough will start to come together, and you will need to knead it until smooth and elastic.
Kneading and Proofing: Patience is Key
Now, the kneading. This isn't just about mashing dough around; it's about developing the gluten, which is what gives bread its structure. You'll need to knead the dough for about 8-10 minutes until it becomes smooth and stretchy. It should feel nice and soft, not sticky. After kneading, it's time for the first proofing, which is just a fancy word for letting the dough rest and rise. Place the dough in a lightly oiled bowl, cover it, and let it sit in a warm place for about an hour, or until it doubles in size. This is where the magic happens! The yeast is doing its thing, creating all those air pockets that will make our rolls light and fluffy.
Step | Description | Time |
|---|---|---|
Activate Yeast | Mix warm water, sugar, and yeast. Let sit until foamy. | 10 minutes |
Combine Ingredients | Mix activated yeast with flour and salt. | 5 minutes |
Kneading | Knead dough until smooth and elastic. | 8-10 minutes |
First Proofing | Let dough rise in a warm place until doubled. | 1 hour |
Shaping and Baking: The Final Countdown
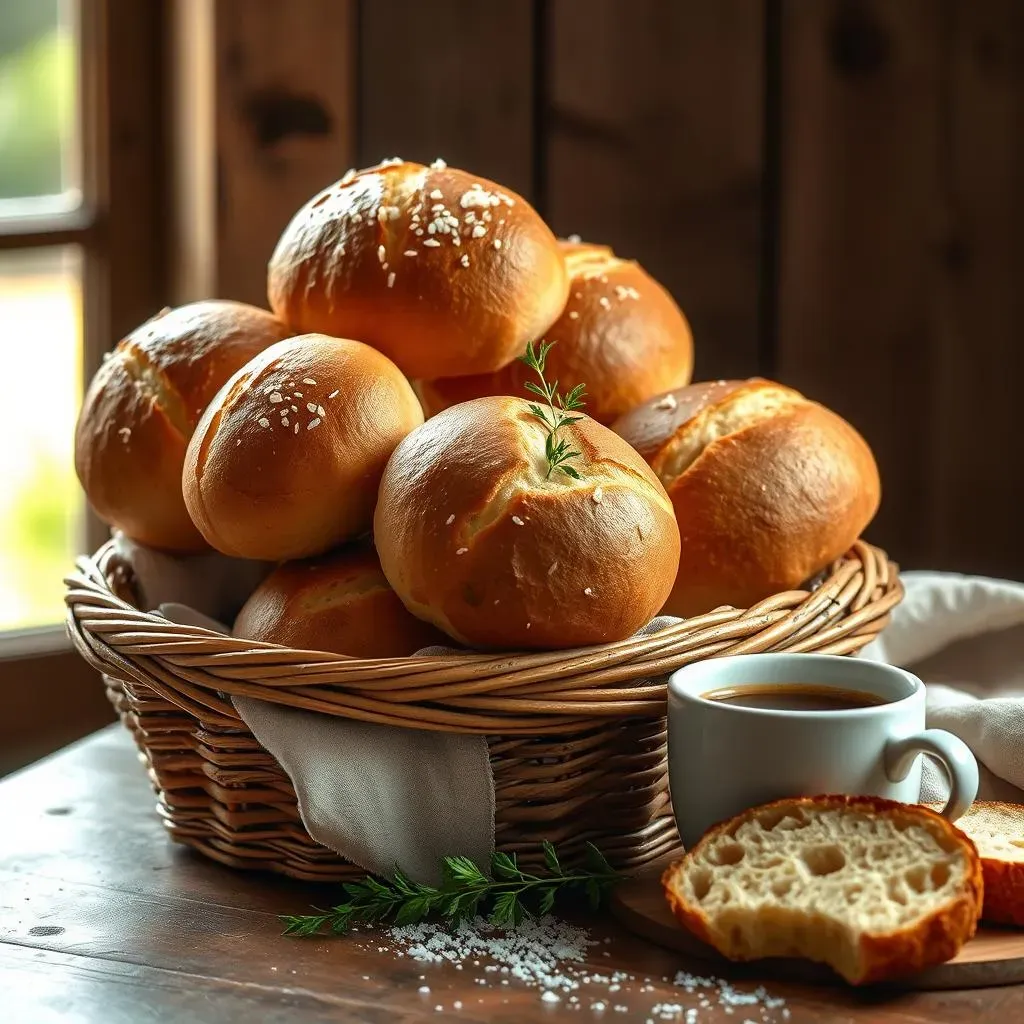
Once the dough has doubled, gently punch it down to release the air. Then, divide it into equal portions, about 6-8 pieces depending on how big you want your rolls. Shape each piece into a ball, and place them on a baking sheet lined with parchment paper. Cover the rolls again, and let them proof for a second time, about 30 minutes. This second rise will make them even lighter. While the rolls are proofing, preheat your oven. Before putting them in, you can brush them with a little egg wash for a nice golden color. Bake until they're golden brown and sound hollow when you tap them, usually around 20-25 minutes. Once done, let them cool on a wire rack before digging in. Remember, patience is key. If you rush any step, it can impact the final result.
Tips and Tricks for the Best Homemade French Bread Rolls
Tips and Tricks for the Best Homemade French Bread Rolls
Okay, so you've got the basics down, but let's talk about taking your rolls from good to absolutely amazing. First up, the water temperature is crucial. You want it warm, like bathwater, not hot enough to make the yeast cry. A good way to test it is to stick your finger in, if it feels comfortable, it's perfect. Also, don't skimp on the kneading; it's what gives your rolls that beautiful texture. If you're kneading by hand, try using a 'push-fold' method. Push the dough away with the heel of your hand, then fold it back on itself. Keep rotating and repeating. It’s like a little dough massage. And don't rush the proofing process. Let the dough rise in a warm, draft-free place. If your kitchen is cold, try placing the bowl in the oven with the light on. The gentle warmth will encourage the yeast to do its best work. Also, a little steam in the oven during baking is a game-changer for that crusty exterior. You can achieve this by placing a pan of hot water at the bottom of your oven.
Another tip I have is using a baking stone. It helps distribute the heat evenly and gives the rolls a nice crusty bottom. If you don't have one, a regular baking sheet will work, but preheating it in the oven while the oven is preheating helps. Also, scoring the tops of the rolls before baking is not just for looks; it helps control how they expand in the oven. Use a sharp knife or a razor blade to make a few shallow cuts. And remember that the dough will be a little sticky, that is expected, don't try to add more flour. After the rolls are baked, let them cool completely on a wire rack. This prevents them from getting soggy. If you're not planning to eat them all right away, they freeze beautifully. Just wrap them tightly in plastic wrap and then in a freezer bag. When you are ready to eat them, let them thaw at room temperature and warm them in the oven.
- Water Temperature: Use warm, not hot, water to activate the yeast.
- Kneading Technique: Knead thoroughly using a push-fold method.
- Proofing Environment: Let the dough rise in a warm, draft-free place.
- Steam in Oven: Add steam for a crustier exterior.
- Baking Stone: Use a baking stone for even heat distribution.
- Scoring: Score the tops before baking for controlled expansion.
- Cooling Rack: Cool completely on a wire rack to prevent sogginess.
Serving and Storing Your Freshly Made French Bread Rolls
Serving and Storing Your Freshly Made French Bread Rolls
Serving Suggestions: Enjoying Your Rolls
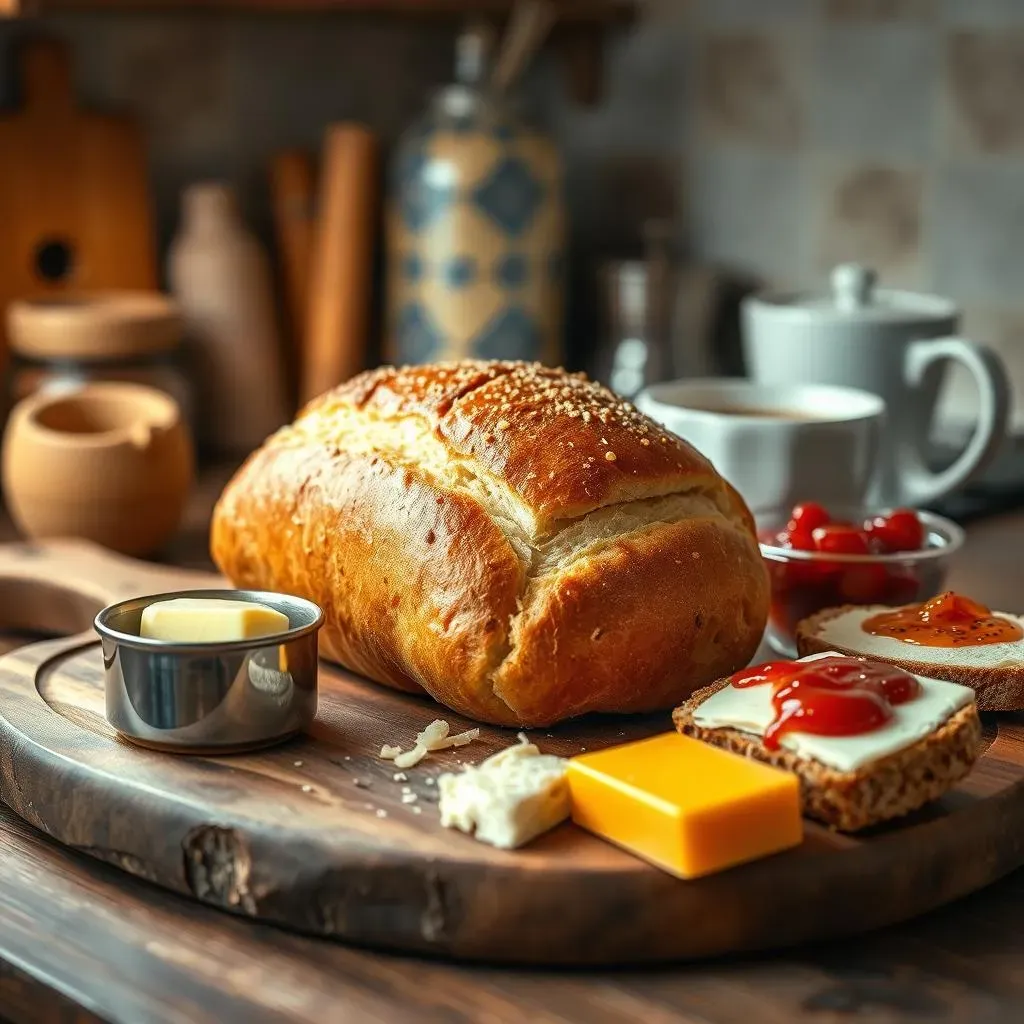
Alright, you've baked these beautiful rolls, and now it's time to think about how to enjoy them. Seriously, the possibilities are endless! Fresh out of the oven, with a pat of butter, is a classic for a reason. The warmth melts the butter perfectly, creating a simple yet delightful experience. But don't stop there! These rolls are fantastic for sandwiches, from simple ham and cheese to more gourmet creations. They're also great for soaking up sauces; think of them with a hearty stew or a flavorful pasta dish. If you're feeling a little fancy, try using them for mini sliders or bruschetta. And let's not forget about breakfast – a warm roll with jam or Nutella is a perfect start to any day. The versatility of these rolls is truly amazing. It's like having a blank canvas for your culinary creations.
I remember one time, I had a bunch of friends over, and I made these rolls. I served them alongside a big pot of chili, and they were a huge hit. Everyone was raving about how good they were, and honestly, it made me feel like a rockstar baker. They were perfect for soaking up all that delicious chili, and the contrast between the soft interior and crusty exterior was just amazing. It really highlighted how these rolls can elevate a simple meal into something special. So, don't be afraid to experiment and try them with all sorts of different foods. You might just discover your new favorite combination!
Storing Your Rolls: Keeping Them Fresh
So, you've made a batch of these fantastic rolls, but you're not going to eat them all at once (or maybe you are, no judgment here!). The key to keeping them fresh is proper storage. For the first day or two, you can keep them at room temperature in a bread bag or a tightly sealed container. This will help prevent them from drying out. If you live in a humid climate, you might want to consider adding a paper towel to the container to absorb any extra moisture. This will help keep them from getting soggy. The important thing is to keep them sealed to avoid them from turning stale.
Now, if you want to keep them longer, freezing is your best friend. Once the rolls have cooled completely, wrap each one tightly in plastic wrap, and then place them in a freezer bag. Make sure to squeeze out as much air as possible before sealing the bag. This will help prevent freezer burn. They can stay in the freezer for up to 3 months. When you're ready to eat them, take them out and let them thaw at room temperature. To get them warm and crispy again, pop them in a preheated oven for a few minutes. It's like they're fresh out of the oven again! You can also use a microwave, but the texture might not be as perfect as baking it in an oven.
Storage Method | Duration | Tips |
|---|---|---|
Room Temperature | 1-2 days | Store in a bread bag or sealed container. |
Freezer | Up to 3 months | Wrap tightly in plastic, then in a freezer bag. |
Reheating from Frozen | Few minutes in the oven | Let thaw, then bake to crisp up. |