
Table of Contents
Ever dreamed of pulling a perfectly crusty, airy baguette from your oven? The kind that makes that satisfying crackle when you break it open? It's not some secret bakery magic, it’s all about technique, and a big part of that is knowing how to roll out french bread correctly. This guide isn't just going to show you how it's done, it will walk you through each step, making it easy and fun. We'll start with the basics: what exactly *is* a baguette? Then, we'll get into the nitty-gritty of preshaping, which is more important than you might think. Next, we'll tackle proofing, because a good rise is key to that perfect texture. Finally, I'll show you step-by-step how to shape a baguette like you've been doing it for years. So, grab your apron, clear some counter space, and let's get baking! By the end of this, you’ll be a baguette-shaping wizard, ready to impress everyone with your homemade bread.
What is a Baguette?
What is a Baguette?
The Skinny on Baguettes
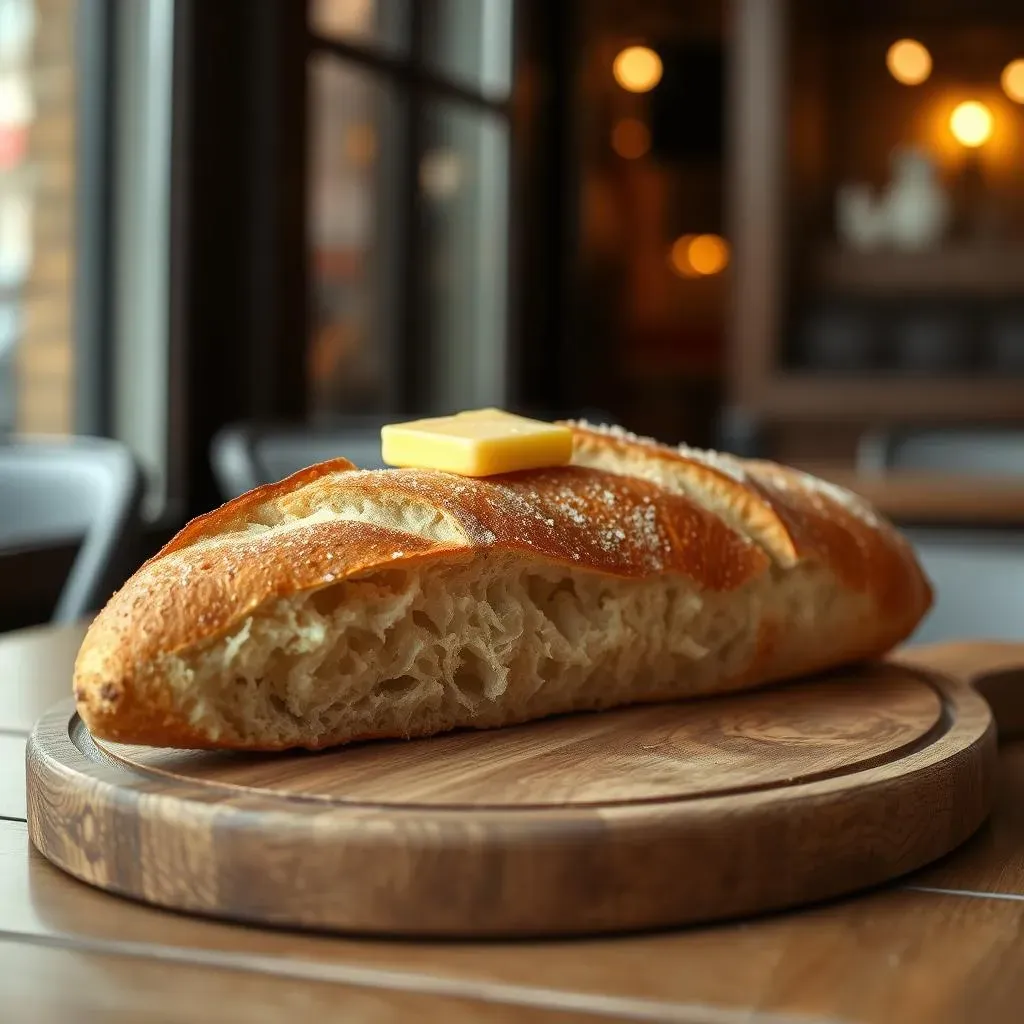
Okay, so you're wondering, "What *is* a baguette, really?" It's not just any long loaf of bread, my friend. Think of it as the supermodel of the bread world: tall, slender, and incredibly chic. A true baguette is defined by its shape – long and thin, with a super crispy crust and a soft, airy inside. It's the kind of bread you imagine Parisian artists nibbling on in a cafe, with a swipe of butter and a strong coffee. I'm not kidding, the whole vibe is very specific!
Baguettes are traditionally made with just a few simple ingredients: flour, water, salt, and yeast. The magic is in the technique, not in some fancy list of additions. Most of the time, it’s all-white flour, which is why the flavor is so mild. It’s a canvas, ready to be paired with all sorts of flavors, from rich cheeses to savory meats, even just a bit of good olive oil. It's the perfect base for a sandwich, or just a vehicle to get some delicious butter into your mouth. It’s really versatile, and that’s part of its charm.
Baguette Breakdown
The beauty of a baguette is in its simplicity, but don't let that fool you. There's a lot of technique that goes into that crusty exterior and that light and airy interior. It's a balance of high hydration (meaning, a lot of water in the dough), proper fermentation, and a hot oven with plenty of steam. The crust should be thin and almost shatter when you bite into it, while the inside should have big, irregular holes. If it looks like a perfect sponge, well, then you've got yourself a loaf of bread, but not a baguette.
Think of it like this: a baguette is a tightrope walk between crispy and fluffy, and the baker is the acrobat. It’s all about finesse, and that’s what makes it so rewarding to bake.
The Importance of Preshaping Baguette Dough
The Importance of Preshaping Baguette Dough
Why Bother Preshaping?
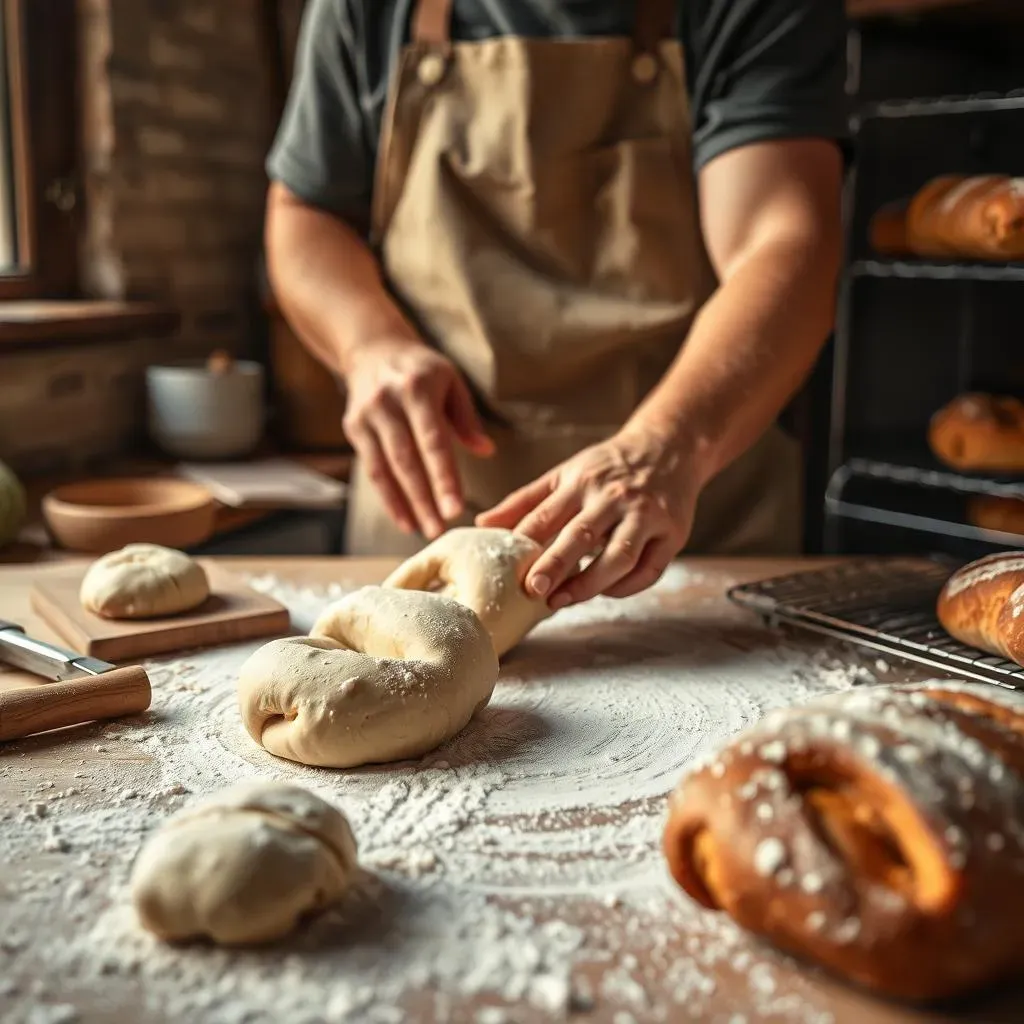
Okay, so you’ve mixed your dough, let it rise, and now you're itching to make a baguette. But hold up! Don't skip the preshaping step. Think of it like warming up before a workout. You wouldn't just jump into a marathon, would you? Preshaping is all about getting your dough ready for its final form. It’s where you gently coax it into a shape that’s easier to work with later. It’s like giving your dough a little pep talk before the main event.
Without preshaping, you might end up with a baguette that’s uneven, dense, or just plain wonky. It’s about building the right structure and tension in the dough. This step also helps to redistribute the gases produced during fermentation, which leads to a more consistent crumb (that’s the inside texture). Trust me, this little bit of extra effort makes a huge difference. It's the secret handshake of baguette baking.
The Preshaping Process
So, how do you actually do it? Well, after the bulk fermentation (the big rise), you'll gently turn your dough out onto a lightly floured surface. Then, you'll divide it into the number of baguettes you want to make. Usually, I aim for about 250-300 grams of dough per baguette, but you can adjust based on your preference. After dividing, you'll scale each piece and gently preshape it into a round or a rectangle, depending on the recipe you’re following. The key word here is 'gently'. You don't want to deflate the dough. It's a delicate dance, not a wrestling match.
This isn't the final shape yet, it's more like a rough draft. The preshape sets the stage for the final shaping, making it easier to roll out the dough into the long, slender baguette we all know and love. It’s like giving the dough a little nudge in the right direction. It might seem like an unnecessary step, but it's really a critical part of the process. It’s the difference between a decent baguette and a *great* baguette.
The Benefits of Preshaping
Preshaping is not just about making the final shaping easier. It also helps to develop the gluten structure in the dough. This means your baguettes will have better oven spring (that’s the final rise in the oven) and a lighter, more open crumb. It also helps to create a more even distribution of air bubbles, which contributes to that beautiful, airy texture. It's like giving your dough a little workout before the main event. The more you work the dough gently, the better the final product will be.
Plus, preshaping gives the dough a little time to rest, which is important because the gluten will relax and become more extensible, meaning it's easier to shape without tearing. This step isn't about rushing; it's about patience and precision. Think of it as the calming breath before the final sprint. It's the quiet moment where the dough prepares itself for its big debut. It’s a small thing that makes a very big difference in the final product.
Benefit | Description |
|---|---|
Easier Final Shaping | Makes it smoother to roll dough into long baguettes. |
Better Gluten Structure | Improves oven spring and crumb texture. |
Even Air Distribution | Creates a more consistent, airy texture. |
Dough Relaxation | Allows gluten to relax, preventing tearing during final shaping. |
How Do You Proof Baguettes?

How Do You Proof Baguettes?
The Proof is in the... Proofing?
Alright, so you've preshaped your dough, and it's looking pretty good. But don't get ahead of yourself; we're not baking just yet! Now comes the all-important proofing stage. Proofing is simply the final rise of your dough after it's been shaped, before it goes into the oven. It’s a crucial step for developing that airy, light texture we all crave in a baguette. Think of it as the dough’s last chance to stretch its legs and get all puffy before the big bake. It’s not just about letting it sit there, it’s about creating the right environment for the yeast to do its magic. If you rush this stage, you'll end up with a dense, sad-looking baguette, and nobody wants that!
The goal of proofing is to allow the yeast to continue producing carbon dioxide, which creates those lovely air pockets in the dough. This is what gives the baguette its characteristic open crumb. If you’ve ever seen a baguette with big, irregular holes, that’s the result of proper proofing. It’s like the dough is breathing, expanding, and becoming its best self. If you don't give it enough time to proof, it will be dense, and if you proof it for too long it will be flat, so it's all about finding the sweet spot. You're not just waiting; you're nurturing the dough.
The Couche: Your Baguette's Best Friend
So, how do you actually proof a baguette? Well, the traditional method involves using something called a "couche." A couche is essentially a piece of heavy linen fabric that’s used to support the dough during its final proof. It's like a little hammock for your baguettes. The couche provides structure and prevents the dough from spreading out too much, which is really important for maintaining that long, slender shape. It also wicks away excess moisture from the dough, which helps to create a better crust. It’s a game-changer for baguette baking, trust me on that one.
You can buy a couche online or at a specialty kitchen store, but honestly, a heavy linen dish towel will do the trick just fine. Just make sure it’s clean and hasn’t been washed with scented detergent. You want your baguettes to smell like bread, not lavender! Before you place your dough on the couche, you'll need to lightly flour it. This prevents the dough from sticking to the fabric. Then, you'll gently place each baguette seam-side up on the couche, using the fabric to create little folds between each one. It's like creating a little support system for your dough. Think of it as giving your baguette a little hug as it gets ready for the oven.
Proofing Tips and Tricks
Once your baguettes are nestled in their couche, it's time to let them proof. The ideal proofing time will depend on the temperature of your kitchen. In a warm kitchen, the dough will rise faster, so you'll need less time. In a cooler kitchen, it will take longer. A good rule of thumb is to proof until the dough has increased in size by about 50-75%. The dough should feel light and puffy, and when you gently poke it, the indentation should slowly spring back. If it springs back too quickly, it needs more time. If it doesn’t spring back at all, it’s likely over-proofed. It’s like a Goldilocks situation, you need to find the perfect balance.
Another thing to keep in mind is that if you're using a cold bulk fermentation method, you'll want to proof at room temperature. This method is when you leave your dough in the fridge for a long period of time before shaping it, it adds more flavor. Also, avoid cold proofing, that can make your crust thicker. Cold proofing can be useful if you want to bake the next day, but not if you want a thin, crispy crust. It’s all about knowing your dough and adjusting accordingly. It’s like having a conversation with your dough, paying attention to its cues and responding accordingly. Proofing is a dance between time, temperature, and dough, and it's a dance worth learning.
Proofing Method | Description | Tips |
|---|---|---|
Couche | Linen fabric used to support baguettes during proofing. | Flour the couche well to prevent sticking. |
Time | Varies based on kitchen temperature. | Proof until dough has increased by 50-75%. |
Temperature | Room temperature is ideal for cold bulk fermentation dough. | Avoid cold proofing for a thinner crust. |
How to Shape Baguettes
How to Shape Baguettes
The Five-Step Shaping Saga
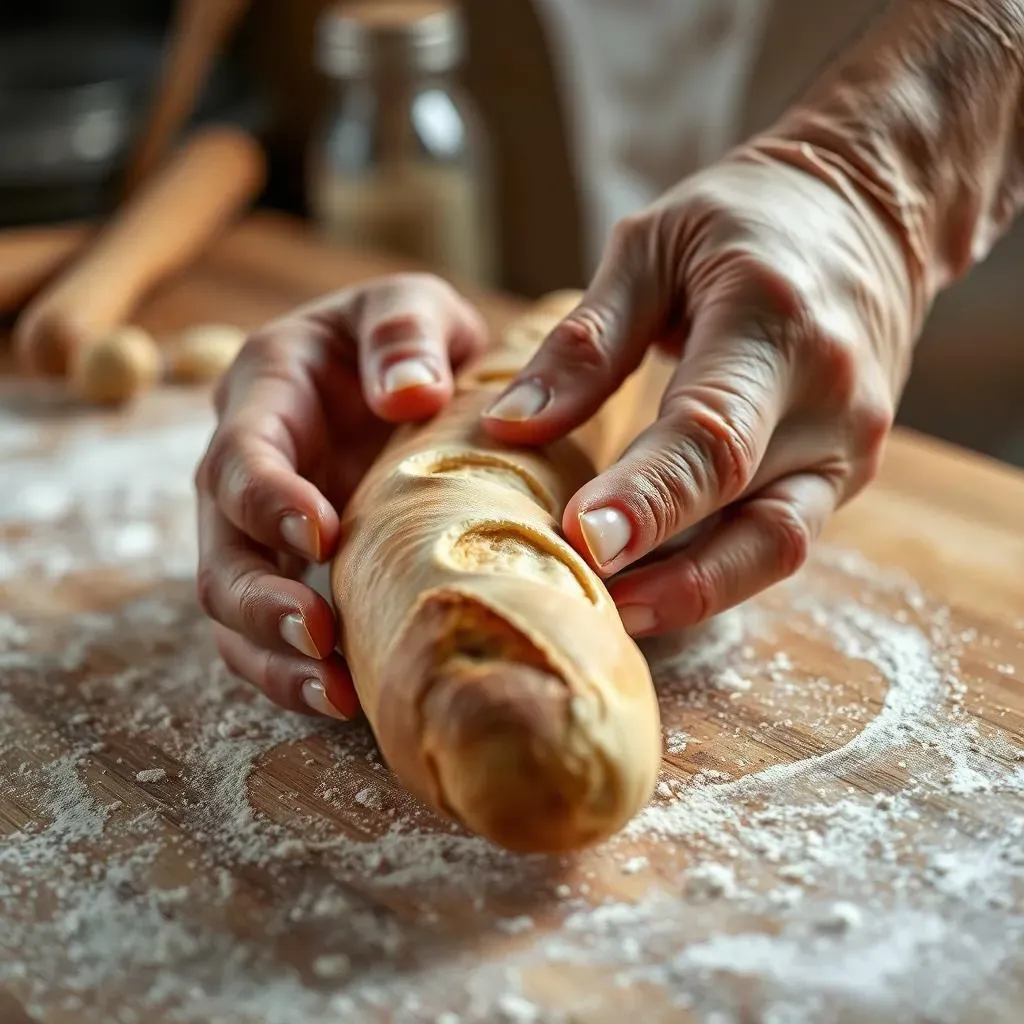
Okay, so here's where the magic really happens. Shaping a baguette might seem intimidating, but it's actually quite simple once you get the hang of it. Think of it like learning a dance; at first, the steps might feel awkward, but with practice, they'll become second nature. This process has five key steps. First, we're going to take each preshaped piece and gently flatten it into a rectangle. It's like you're giving your dough a little massage, making sure it's nice and relaxed. Then, we'll fold the top half of the dough down towards the middle, pressing it lightly. It’s like folding a letter, nice and neat. This begins the process of creating that signature baguette shape. It’s all about working with the dough, not against it.
Next, flip the dough over, and fold the top half down again, pressing it gently. You'll notice it's starting to look more like a log now. Then, using your thumb, you'll curl the top edge of the dough down, tucking it under. This is a crucial step for creating tension on the surface of the dough. It's like giving the dough a little tuck and roll. After that, flip the dough over again, and seal the dough by gently rolling it from the middle out to the edges, making sure the seam is securely sealed. It’s like putting a lid on a container. Finally, we’ll roll the dough back and forth, lengthening it to the desired baguette length. The dough should be as long as your baking surface. It’s like stretching a piece of taffy, nice and even. Don't worry if your first few attempts aren't perfect. Shaping takes practice, and you'll get better with each try. It's a process of learning, not a competition.
Shaping Tips and Tricks
Now, let's talk about some tips to help you get the best shape. First, always work on a lightly floured surface to prevent the dough from sticking. You don’t want your dough to turn into a sticky mess. Also, be gentle with the dough. You don’t want to deflate it or tear it. Think of it like handling a fragile flower. The pressure you apply should be light and even. When you're rolling the dough, use a back-and-forth motion, starting from the middle and working your way out. This helps to create a consistent shape along the length of the baguette. It’s like using a rolling pin, but with your hands.
Also, the pointiness of your baguettes is really up to you. Some people prefer a pointy end, while others prefer a more rounded end. It’s all about personal preference. The main thing is to make sure that the baguette is evenly shaped along its length. If you’re having trouble getting the dough to the right length, let it rest for a few minutes and then try again. Sometimes the dough just needs a little break. It's like stretching a rubber band, it will only go so far before it needs to relax. Remember, baking is a journey, not a race. It’s all about enjoying the process and learning something new along the way. Each baguette is unique, and that’s what makes them so special.
Step | Action | Tips |
|---|---|---|
1 | Flatten the dough into a rectangle. | Be gentle and work on a lightly floured surface. |
2 | Fold the top half down towards the middle. | Press lightly to seal the fold. |
3 | Flip and fold the top half again. | Maintain a gentle touch. |
4 | Curl the top edge down, tucking it under. | Use your thumb to create tension. |
5 | Seal the dough and roll to the desired length. | Roll from the middle out, ensuring even length. |