Table of Contents
Ever dreamt of pulling a golden, crusty baguette from your oven, the kind that makes your kitchen smell like a Parisian bakery? It all starts with knowing how to roll French bread dough properly. It’s not as tricky as it looks, I promise! This article is your guide to mastering this essential skill, and it will help you transform a simple dough into a beautifully shaped loaf. We'll start by discussing the importance of shaping and why it matters for the final texture of your bread. Then we will move on to crucial first steps of pre-shaping, setting you up for success. I will show you the secrets to how to roll french bread dough to get that classic baguette form. Finally, I’ll share some tips for baking your baguette to get that perfect, thin crust. By the end of this, you'll be baking baguettes like a pro, ready to impress your friends and family. So, let's get started and turn that dough into something amazing!
Understanding the Art of Baguette Shaping
Understanding the Art of Baguette Shaping
Why Shaping Matters
Okay, so you've got your dough, it looks like a blob, and you might be wondering, "Why can't I just bake it like this?" Well, you could, but it wouldn't be a baguette, it would be some kind of bread blob. The shaping process is key to achieving the baguette's signature long, thin shape and that wonderful airy crumb inside. It's not just about making it look pretty, it's about controlling the gas distribution. This helps create those big, irregular holes we love in a good baguette. It's like sculpting, but with dough, and the result is so much more satisfying than a random lump of baked dough.
Think of it like building a house, you wouldn't just dump a pile of bricks and expect a house, right? Shaping is the same, it's like the architectural plan for your bread. It ensures the gluten structure is developed correctly. This allows the dough to rise properly during baking. This is how you get that perfect balance of a crisp crust and a soft interior. So, by understanding the art of shaping, you're not just making bread, you're crafting an experience.
The Science Behind the Shape
Now, let's get a little nerdy. Baguette shaping isn't just some random folding and rolling; it's all about manipulating the gluten. Gluten is the protein in flour that gives dough its elasticity. When you shape the dough, you're essentially stretching and aligning these gluten strands. This process helps create a network that can trap the carbon dioxide produced by the yeast. The end result is a light and airy bread. If you just throw the dough in the oven, this network isn't as well developed, leading to a denser, less flavorful loaf.
Also, the way you handle the dough affects its surface tension. A properly shaped baguette will have a tight outer layer, which helps create that characteristic crackly crust. It's all a delicate balance of forces. The tension on the surface, the gluten development inside, and the way the gas is distributed. It might seem like a lot, but with practice, you’ll get a feel for it. And trust me, the results are totally worth it. If you want a good baguette, shaping isn't optional, it's essential.
Shaping Step | Why it Matters |
|---|---|
Pre-shaping | Begins to build tension and gluten structure |
Final Shaping | Creates the desired shape and surface tension |
Proofing | Allows dough to rise while maintaining shape |
The Crucial First Steps: PreShaping Your Dough
The Crucial First Steps: PreShaping Your Dough
Why Pre-Shaping is a Must
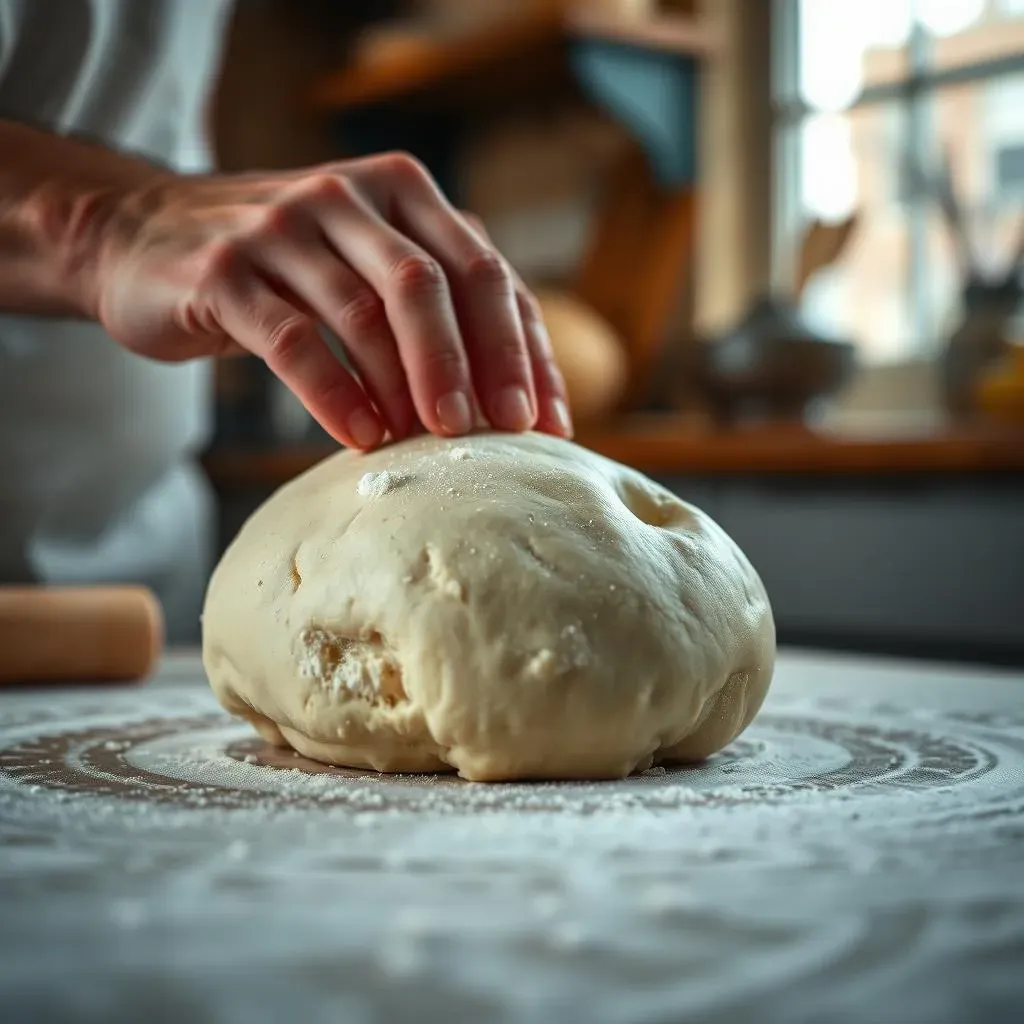
Alright, so you've got this beautiful, bubbly dough after its first rise, and you're probably itching to turn it into a baguette, right? Hold your horses! Before we get to the fancy rolling part, there's a crucial step called pre-shaping. Think of pre-shaping as a warm-up before the main event. It's a gentle way to get the dough into a more manageable shape and build some initial tension. This step is all about making the final shaping easier and more effective. If you skip this, your dough might be too relaxed and won't hold its shape as well during proofing and baking. It's like trying to run a marathon without stretching – you might make it, but it won't be pretty.
Pre-shaping isn't about perfection, it’s about setting the stage for perfection. It prepares the dough by gently developing the gluten structure and making it more elastic. This makes the final shaping process much smoother. I remember the first time I skipped pre-shaping, my baguettes ended up looking like deflated footballs instead of elegant loaves. Trust me, a little pre-shaping goes a long way. This step is your secret weapon for a perfect baguette and it’s one of the most important steps in how to roll french bread dough. We are just laying the foundation so we can make the dough easier to handle during the final shaping and make sure it has the right tension.
Pre-Shaping Step | What to Do |
|---|---|
Dividing the Dough | Gently portion dough into equal sizes |
Rounding the Dough | Lightly shape each portion into a loose round |
Resting the Dough | Allow the dough to relax for 10-20 minutes |
How to Pre-Shape: A Simple Guide
Okay, so let's get practical. First, you'll want to gently turn your dough out onto a lightly floured surface. Be careful not to deflate it too much. Then, divide the dough into the number of baguettes you want to make. Usually, a good recipe will make 2-3 baguettes. Next, take each portion and gently round it into a loose ball. Don't stress about making it perfect, just a light touch is best. Think of it like a gentle hug for your dough, not a wrestling match. The key is to create a smooth surface without tearing the dough. Once you have these little round dough balls you need to let them rest for 10 to 20 minutes. This is called the bench rest, it allows the gluten to relax which makes it easier to handle for the final shaping.
During the bench rest, the dough will relax and spread out a bit. This is totally normal and exactly what we want. This resting period is so important because it allows the gluten to relax and makes the dough more elastic, ready for the next step. So, don't be tempted to skip this part, it’s all part of the magic. If you rush the process, you’ll end up with dough that’s hard to shape and won’t rise properly. It's like trying to fold a piece of paper that's been crumpled up – it's going to be much harder than if it was flat and relaxed. Patience is key here, and remember, great baguettes are worth waiting for. It’s a vital part of how to roll french bread dough like a pro.
The Secret to Perfect Baguette Shape: How to Roll French Bread Dough
The Secret to Perfect Baguette Shape: How to Roll French Bread Dough
The Art of the Roll
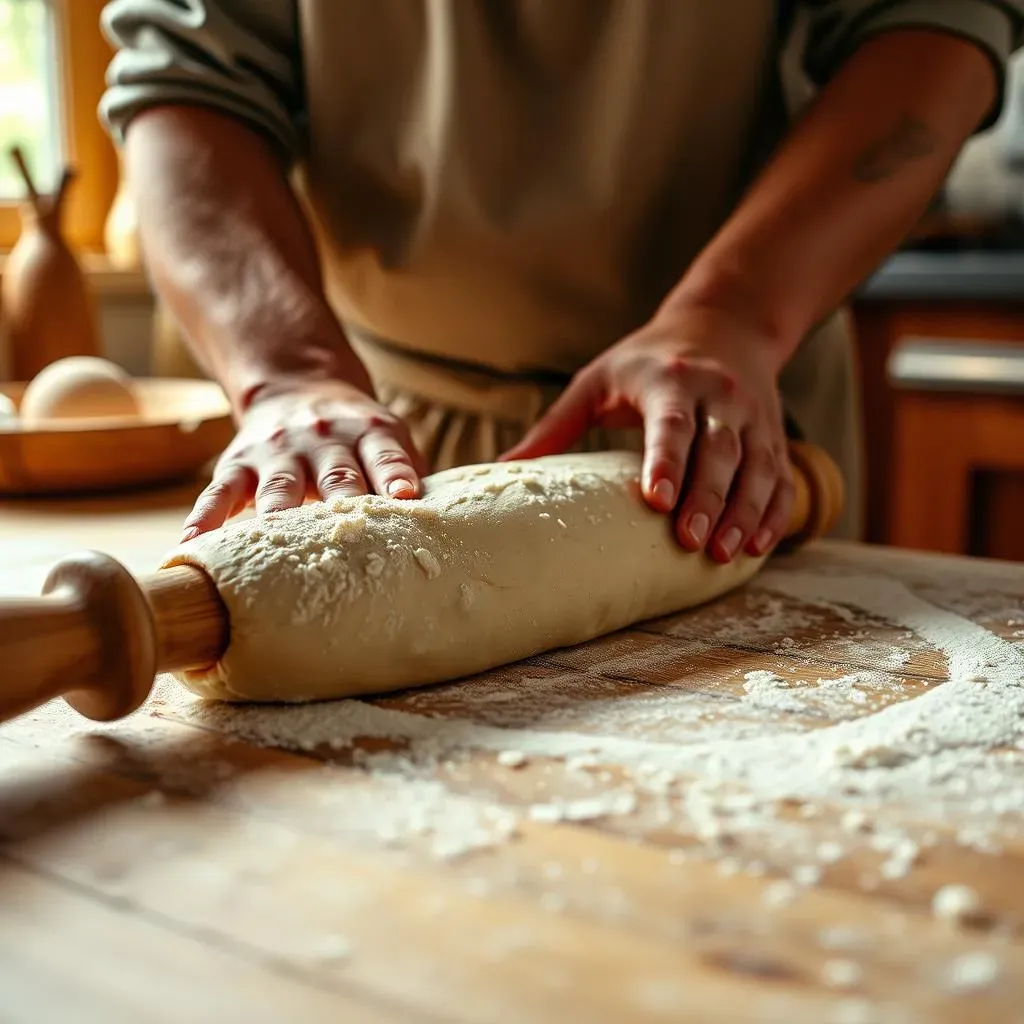
Okay, now for the main event – how to roll French bread dough to get that classic baguette shape! This is where the magic truly happens. After your dough has rested from the pre-shape, it's time to transform it from a round ball into a long, elegant loaf. The key here is to be gentle but firm, and to work with a consistent motion. Think of it like you're stretching the dough, not squashing it. You want to elongate it while maintaining some tension on the surface. This step is all about creating the structure that will give you that perfect crust and crumb. I know it sounds intimidating but trust me, with a little practice, you’ll be rolling like a pro in no time.
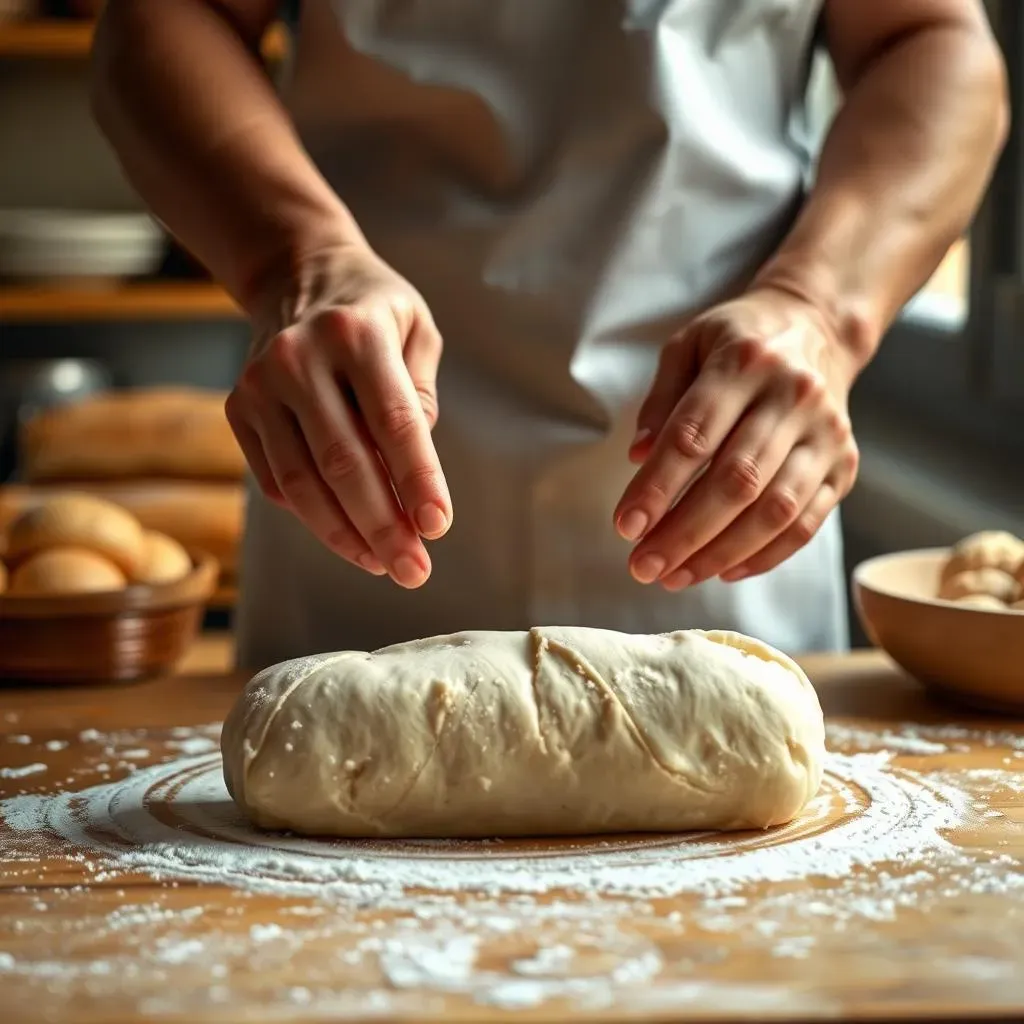
Now, let’s get into the nitty-gritty. First, gently flatten your rested dough ball into a rectangle. Then, using your hands or a rolling pin, start rolling from the top edge, gently pressing down and rolling towards the bottom. You want to create a long, even shape. Next, fold the top third of the dough towards the center, and then fold the bottom third over that, like you’re folding a letter. This creates a seam in the middle. Then, using your hands, gently roll this seam along the surface. This will seal the dough and create a nice, even shape. It’s all about creating that tension while also ensuring the dough is stretched evenly. This process is crucial for the final baguette shape, and it makes a huge difference in the final product. It is the core of how to roll french bread dough.
Rolling Step | What to Do |
|---|---|
Flattening | Gently flatten the rested dough into a rectangle |
Folding | Fold the top third down, then the bottom third over |
Rolling | Roll the seam to seal and elongate the dough |
Tips for Success
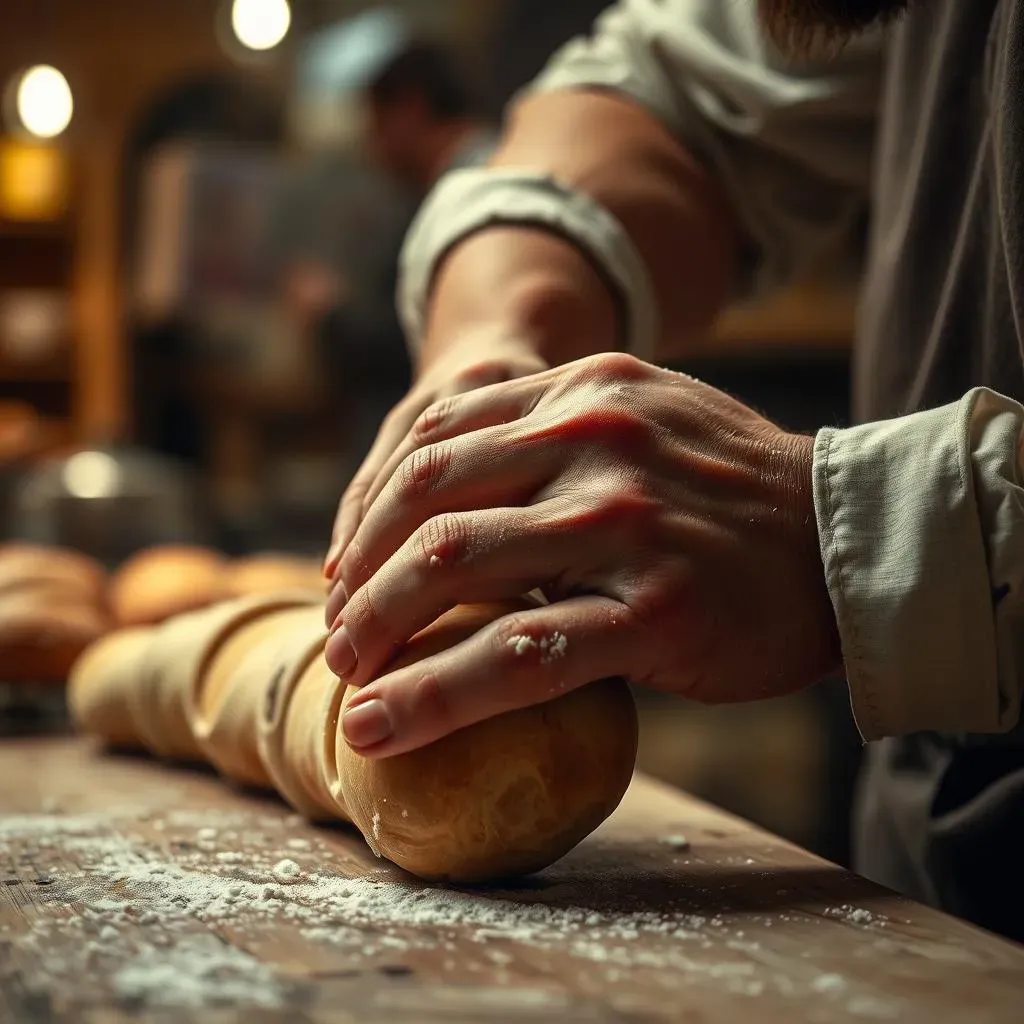
Rolling the dough can be tricky at first, but with a few tips, you’ll get the hang of it. First, don't be afraid to use a little bit of flour on your work surface to prevent sticking. However, you want to use it sparingly, too much flour can dry out the dough. Also, make sure you are using a consistent motion, you want to avoid jerky movements. The dough should be handled gently, this will help it maintain its structure. If the dough shrinks back as you roll, it means that the gluten needs more time to relax. Just let it rest for a few minutes and then try again. Patience is key here. Remember, every baguette you make is a learning experience, and even mistakes can be delicious. The most important tip is to not give up. It might not be perfect the first time, but you will get better with practice. Keep rolling, keep learning, and keep baking.
Another important tip is to make sure you are using your hands and fingers to help shape the dough. Use your fingers to gently taper the ends of the baguette. This will give them that classic pointy look. If you want a more rounded end, just leave them as they are. Also, make sure that you are using a light touch. You don’t want to overwork the dough. Overworking can cause the dough to become dense and tough. The goal is to create a smooth, even surface with a good amount of tension. Remember, the more you practice, the better you’ll get at this. Just like any skill, mastering how to roll french bread dough takes time and dedication. So, grab that dough, get rolling, and let’s make some amazing baguettes!
Baking to Perfection: Achieving the Ideal Crust

Baking to Perfection: Achieving the Ideal Crust
The Heat is On: Baking for Crust
Alright, so you've shaped your baguettes, and they're looking pretty darn good. Now it's time to bake them to golden-brown perfection. The baking process is where we transform that shaped dough into a crispy, airy loaf. The key to a great crust is high heat and steam. High heat helps the dough to rise quickly and creates those wonderful blisters on the crust, and steam keeps the surface moist, which allows it to expand before it hardens. It's like giving your baguette a sauna treatment before it gets its tan. You might think that baking is the easiest part, but it requires as much attention to detail as the shaping. The oven and the steam are your best friends when it comes to achieving the ideal crust. So, let's turn up the heat and get baking!
To get that perfect crust, you need to preheat your oven to a high temperature, usually around 450-475°F (230-245°C). Make sure you preheat for at least 30 minutes to ensure the oven is evenly heated. Also, you need to create steam in the oven. There are a few ways to do this; you can use a baking stone or a Dutch oven to help retain heat, and you can add some ice cubes to a hot pan in the bottom of the oven or spray water into the oven a few times during the first 10-15 minutes of baking. The steam helps the crust expand and develop that beautiful, crackly texture. You will be amazed how much difference the steam will make to the crust of your baguette. It is key to a beautiful, golden-brown, crisp crust. So, don't skip the steam, it's the secret ingredient to a perfect baguette.
Baking Element | Why it Matters |
|---|---|
High Heat | Promotes rapid rise and crust development |
Steam | Keeps surface moist, allowing it to expand and become crispy |
Baking Time | Ensures the baguette is fully cooked and golden brown |
Cooling and Enjoying Your Creation
Once your baguettes are baked to a gorgeous golden-brown, it's time to take them out of the oven. Be careful, they will be hot! Place them on a wire rack to cool. This allows air to circulate around the baguettes and prevents the crust from becoming soggy. It's also really important to let the baguettes cool completely before slicing into them. It's hard, I know, the aroma will be intoxicating, but patience is key. If you cut into them too soon, they’ll be gummy inside. You want to give the crumb time to set. Think of it like letting a cake cool before icing it, you wouldn't want a melted mess. So, let them cool, then enjoy the fruits of your labor.
Once your baguettes are cooled, it's time to slice and enjoy! The best part about making bread is sharing it with others. Serve your baguettes with some good cheese, olive oil, or a tasty soup. The possibilities are endless. And there you have it, you have successfully rolled and baked your own French baguettes. Remember, practice makes perfect, so don't be discouraged if your first few attempts aren't quite perfect. Keep baking, keep learning, and keep enjoying the process. Every baguette you make will be a little better than the last. And who knows, maybe one day you’ll open your own little bakery, all because you learned how to roll french bread dough.