Table of Contents
Ever craved the crisp crust and airy interior of a perfect French baguette, but with a gluten-free twist? This article is your guide to mastering the art of gluten-free sourdough French bread. We'll explore the unique challenges and rewards of baking this delicious bread without gluten, starting with the irresistible appeal of gluten-free sourdough and its distinct characteristics. Next, we'll walk you through a detailed, step-by-step process, providing clear instructions and helpful tips for each stage of the baking journey, from creating a thriving gluten-free sourdough starter to achieving that signature golden-brown crust. Finally, we'll address common pitfalls and offer expert troubleshooting advice to ensure your gluten-free sourdough French bread turns out perfectly every time. Prepare to embark on a culinary adventure as we unlock the secrets to baking exceptional gluten-free sourdough French bread – a treat that's both delicious and surprisingly achievable.
The Allure of GlutenFree Sourdough French Bread
The Allure of GlutenFree Sourdough French Bread
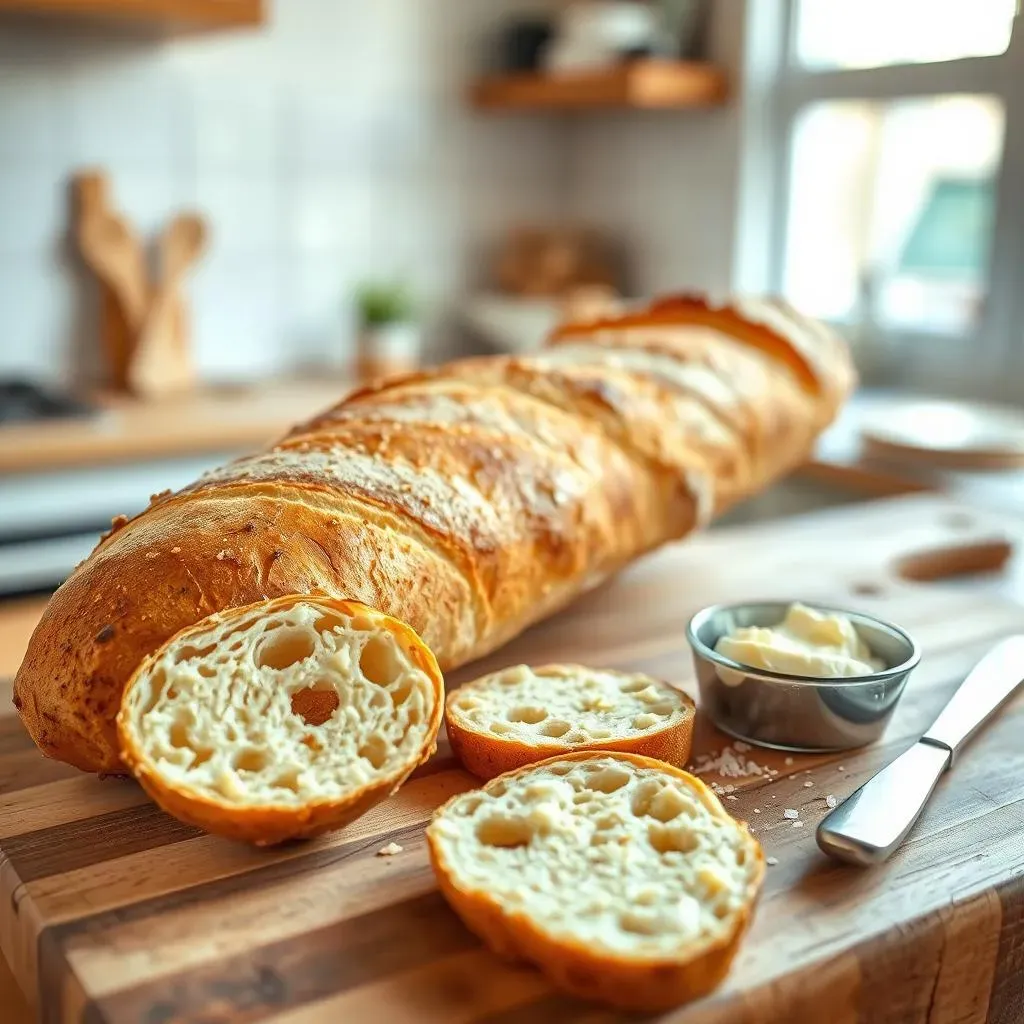
So, you're diving into the world of gluten-free baking? Fantastic! But let's be real, gluten-free bread often gets a bad rap. It can be dry, crumbly, and frankly, disappointing. That's where the magic of gluten-free sourdough French bread comes in. It's a game-changer. The long fermentation process, a hallmark of sourdough, creates a complex flavor profile that's far beyond anything you'd find in a typical gluten-free loaf. Think tangy, slightly sour notes dancing on your tongue, a depth of flavor that traditional gluten-free recipes often lack. And the texture? Forget the cardboard-like consistency. With gluten-free sourdough, you can achieve a delightfully chewy crumb, a satisfying resistance that mimics the real deal. This isn't just about avoiding gluten; it's about elevating gluten-free baking to a whole new level of deliciousness. It's about experiencing the joy of a truly artisanal loaf, free from gluten but brimming with character.
- Complex Flavor Profile: Tangy, sour notes
- Chewy Crumb: Satisfying texture
- Artisanal Quality: Elevates gluten-free baking
Plus, there's something incredibly rewarding about nurturing a sourdough starter. It's a living organism, a testament to the power of simple ingredients. It requires patience and attention, but the results are well worth the effort. The starter itself is a fascinating aspect of this whole process, a miniature ecosystem of wild yeasts and bacteria working together to create magic. And once you’ve mastered your starter, the possibilities are endless! You can use it to make all sorts of amazing gluten-free breads and even try some delicious French Toast with sourdough. Check out this amazing recipe!
Traditional Gluten-Free Bread | Gluten-Free Sourdough Bread |
|---|---|
Often dry and crumbly | Chewy and flavorful |
Simple flavor | Complex flavor profile |
Short shelf life | Longer shelf life |
Baking GlutenFree Sourdough French Bread: A StepbyStep Guide
Baking GlutenFree Sourdough French Bread: A StepbyStep Guide
Preparing Your Gluten-Free Sourdough Starter
Before you even think about mixing your dough, you need a happy, healthy gluten-free sourdough starter. This isn't just flour and water; it's a vibrant ecosystem of wild yeasts and bacteria. You'll want to feed it regularly, keeping a close eye on its activity (look for bubbles!). A strong starter is crucial for a successful loaf. Don't rush this process; patience is key! A well-maintained starter is the foundation of your bread's flavor and texture. There are many resources available online to guide you through this process. If you're new to sourdough, a simple online search for "gluten-free sourdough starter guide" will yield plenty of helpful tutorials.
Remember, a good starter is active and bubbly. It should almost double in size after feeding. If it's not showing much activity, you might need to adjust its feeding schedule or even start over. It's a bit like caring for a pet; it needs consistent care and attention. Finding the right balance of flour and water is important, too. Overly wet starters can be difficult to manage, while too-dry ones might struggle to thrive. Experiment to find what works best for you and your environment. A strong and active starter contributes greatly to the overall quality of your gluten-free sourdough bread. For more in-depth information on starter maintenance, check out this helpful guide: Ultimate guide to sourdough starter.
- Ensure your starter is active and bubbly.
- Adjust feeding schedule as needed.
- Find the right balance of flour and water.
Mixing and Proofing the Gluten-Free Dough
Once you have a robust starter, it’s time to make the dough! The process is similar to traditional sourdough, but with some key differences due to the nature of gluten-free flours. You'll want to use a good quality gluten-free bread flour blend that already contains xanthan gum or a similar binder. This helps mimic the structure that gluten provides in traditional dough. Mixing the dough requires a bit of care; you don't want to overmix it. Gentle folding is key to developing the structure without tearing it. Remember, gluten-free dough is more delicate than traditional dough.
After mixing, the dough needs time to rise, or proof. This is where the magic happens. The yeast in your starter produces carbon dioxide, creating those lovely air pockets that give sourdough its characteristic texture. The length of the proofing time depends on factors like temperature and the activity of your starter. Warm temperatures will speed up the process, while cooler temperatures will slow it down. You can proof your dough at room temperature or, for a slower, more controlled rise, in the refrigerator. Over-proofing can result in a gummy loaf, so pay close attention to the dough's texture and don't be afraid to bake a little early if necessary. A longer cold proof will develop flavor and improve the texture of the final bread. For more information on sourdough techniques, check out this helpful article: Sourdough bread techniques.
Proofing Method | Time | Result |
|---|---|---|
Room Temperature | 4-6 hours | Faster rise, more intense flavor |
Refrigerator | 12-18 hours | Slower rise, enhanced flavor development |
Shaping, Baking, and Enjoying Your Gluten-Free Sourdough French Bread
Shaping your gluten-free sourdough is a crucial step. Because gluten-free dough lacks the elasticity of traditional dough, you need to handle it gently. Avoid aggressive kneading or stretching. A simple shaping technique is often best. Gently form your dough into the desired shape (baguettes, boules, etc.) and place it in a well-floured banneton basket or on a parchment-lined baking sheet. The final shaping is important for both the visual appeal and the texture of your final product. A properly shaped loaf will bake more evenly and have a nicer crust.
Finally, baking! Preheating your oven is essential. A hot oven creates steam, which helps develop a crispy crust. You may want to use a Dutch oven for even baking and a more controlled environment. Baking times vary depending on your oven and the size of your loaf. Use a thermometer to check the internal temperature (it should reach around 200-210°F). Once baked, let your loaf cool completely before slicing and serving. The cooling process is crucial for the bread to set properly. Slicing into a warm loaf can result in a gummy interior. Once cool, you'll be rewarded with a delicious loaf of gluten-free sourdough French bread. Check out this recipe for more inspiration: Amazing crusty sourdough bread.
- Handle the dough gently during shaping.
- Preheat your oven thoroughly.
- Use a thermometer to check internal temperature.
- Let the bread cool completely before slicing.
Troubleshooting Tips for Perfect GlutenFree Sourdough French Bread
Troubleshooting Tips for Perfect GlutenFree Sourdough French Bread
Dealing with a Gummy Interior
Ah, the dreaded gummy interior! It's a common problem with gluten-free sourdough, often caused by over-proofing or insufficient baking. Over-proofed dough has simply fermented too long, resulting in excessive moisture and a sticky texture. Insufficient baking means the internal temperature didn't reach high enough to fully set the starches. Next time, keep a close eye on your dough during proofing and use a thermometer to ensure it reaches the correct internal temperature (around 200-210°F) during baking. Don't be afraid to bake it a little longer if needed, even if the crust starts to brown more quickly than expected. Remember, a properly baked loaf will sound hollow when tapped on the bottom.
To improve the texture, you might need to adjust your hydration level. If your dough is overly wet, try reducing the amount of liquid next time. If the dough seems too dry, add a bit more liquid but make sure not to over-wet the dough. Experimenting with different gluten-free flour blends can also make a difference. Some blends are naturally more prone to producing gummy results than others. A good quality bread flour blend designed for sourdough will help. For more tips on troubleshooting gluten-free baking, check out this helpful resource: Ultimate guide to sourdough.
- Check internal temperature with a thermometer.
- Adjust hydration levels (water).
- Experiment with different flour blends.
A Crust Too Hard or Too Soft
The perfect crust is a delicate balance of crispness and chewiness. A crust that's too hard might be the result of over-baking or too little steam during baking. Conversely, a soft crust might indicate under-baking or insufficient steam. Try experimenting with different baking methods to find what works best for your oven. Using a Dutch oven is a great way to retain moisture and create steam, leading to a beautiful, evenly browned crust. If you don't have a Dutch oven, you can try placing a pan of water at the bottom of your oven to increase humidity.
Another factor influencing crust texture is the type of gluten-free flour blend you use. Some blends produce crispier crusts than others. Experimentation is key! Also, be mindful of oven temperature and baking time. Over-baking will inevitably result in a hard crust, while under-baking will leave the crust soft and under-developed. Pay attention to the color of your crust, and don’t be afraid to adjust the baking time slightly to achieve the desired level of crispness. For more advice on baking techniques, check out this article: Crusty sourdough bread.
Problem | Possible Cause | Solution |
|---|---|---|
Hard Crust | Over-baking, insufficient steam | Reduce baking time, add steam |
Soft Crust | Under-baking, insufficient steam | Increase baking time, add steam |
Lack of Rise
A flat loaf is disheartening, but often fixable. The most common cause of poor rise is a weak or inactive starter. Make sure your starter is bubbly and active before you begin making the dough. Another culprit is insufficient proofing. The dough needs enough time to rise properly. Warm temperatures speed up the process, while cold temperatures slow it down. If your loaf doesn't seem to be rising, try moving it to a warmer spot. Ensure your flour blend is appropriate for sourdough baking, as some blends don't rise as well as others. A good quality blend designed for sourdough baking will yield better results.
Finally, consider your hydration levels. Too much or too little water can negatively impact the rise. If you are using a recipe from a different source, make sure to account for this. The ideal hydration level varies depending on your flour and environment. It's a good idea to start with a recipe that specifies weights and use a kitchen scale for precise measurements. Precise measurements are essential for consistent results in baking, especially when working with gluten-free flours. For a comprehensive guide to troubleshooting sourdough issues, consult this resource: Sourdough troubleshooting.
- Ensure your starter is active and bubbly.
- Proof the dough for sufficient time.
- Check your hydration levels and flour blend.