Table of Contents
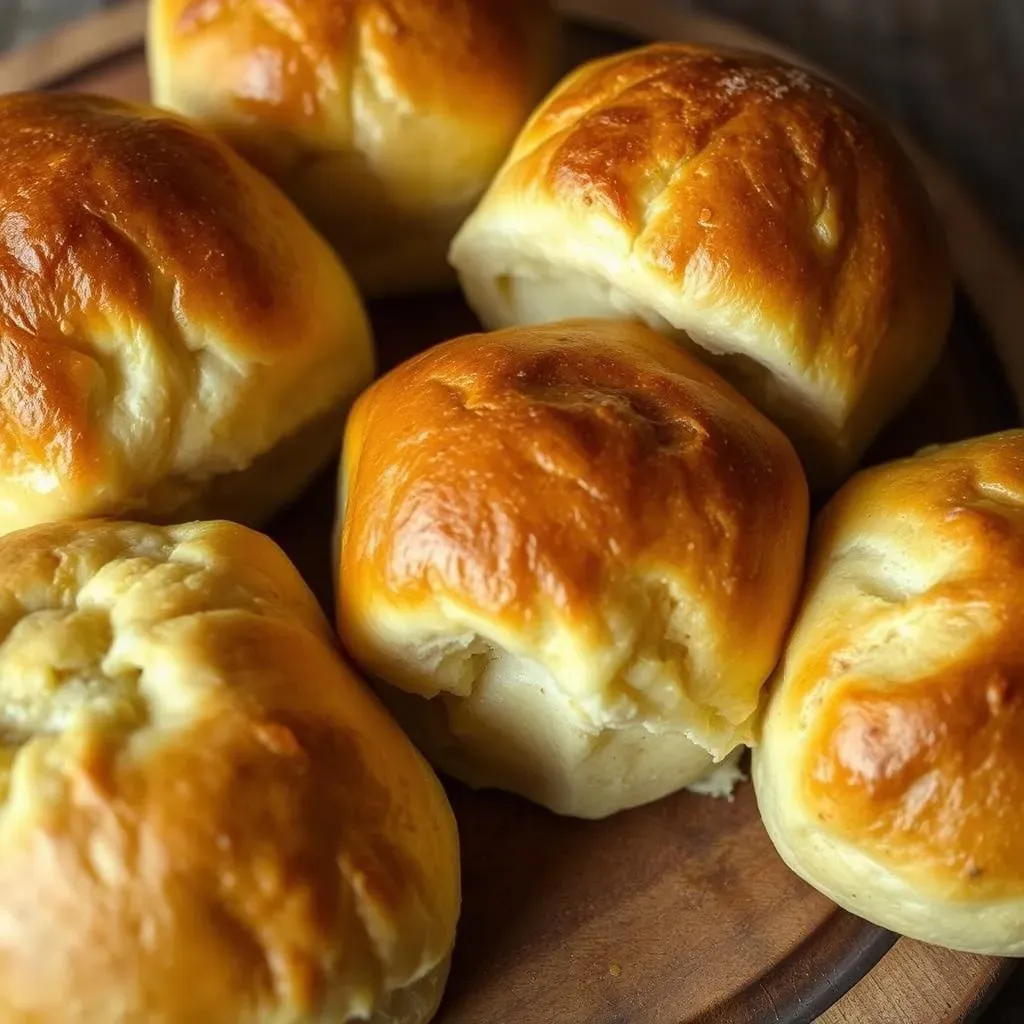
Ever dreamt of sinking your teeth into a perfectly crusty French roll, but thought it was off-limits because of gluten? Well, dream no more! This article is your guide to creating amazing gluten free french rolls right in your own kitchen. We're not talking about those sad, crumbly imitations you find at the store. We're talking about rolls that are crispy on the outside, fluffy on the inside, and so delicious you won't believe they're gluten-free. We'll walk you through the entire process, from gathering your ingredients to achieving that perfect golden-brown crust. We will show you how easy it is to bake these rolls and share tips for serving and storing them. So, whether you're a seasoned baker or a kitchen newbie, get ready to master the art of gluten free french rolls. Let's get baking!
Crafting the Perfect Gluten Free French Rolls
Crafting the Perfect Gluten Free French Rolls
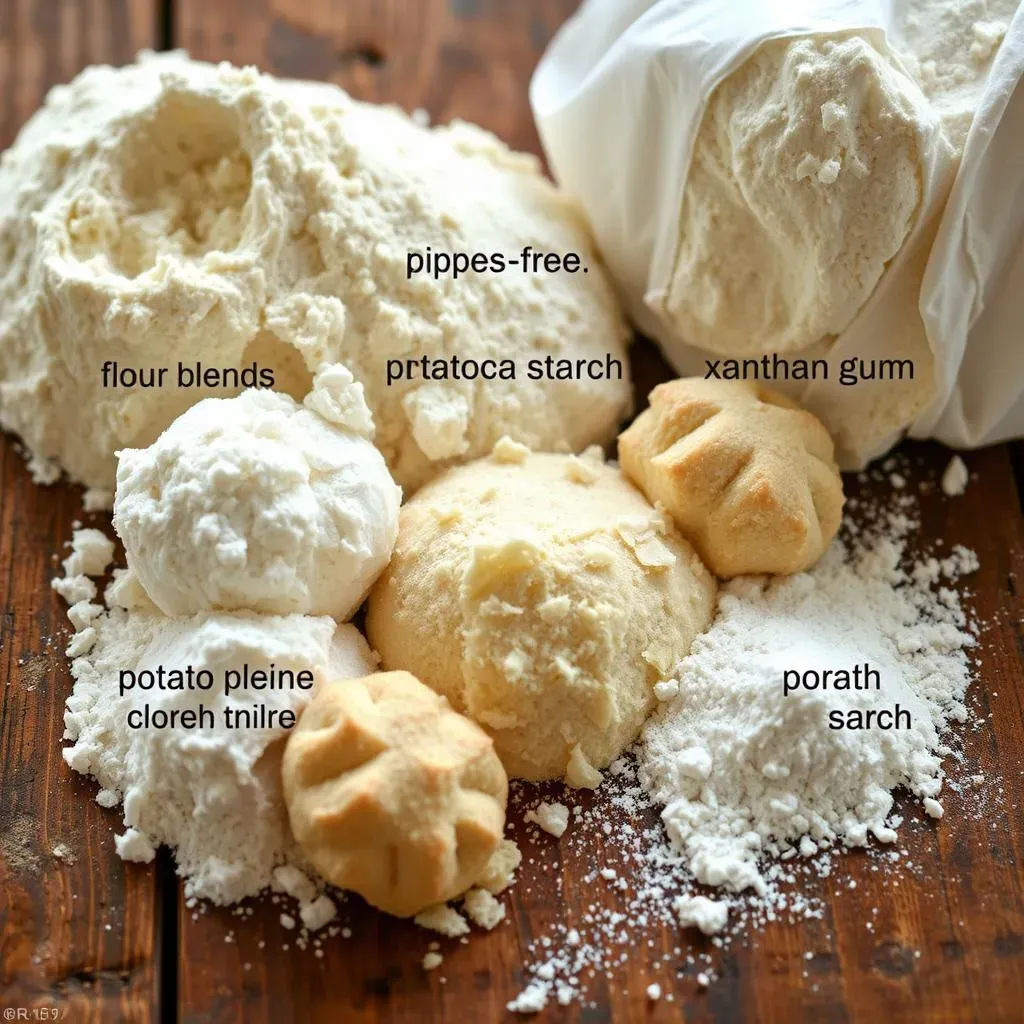
Okay, so you're diving into the world of gluten-free baking, specifically those elusive French rolls, huh? It's like a quest, I get it. The first step is all about understanding your ingredients. Forget regular wheat flour; we're in gluten-free territory now. That means we need a good blend, and I'm talking about a mix that can mimic the structure and chewiness of wheat. Think of it as building a tiny, edible castle, and your flour blend is the foundation. Don't just grab any bag labeled 'gluten-free.' Look for blends that include starches like tapioca or potato, and a gum, like xanthan gum. It’s what creates that lovely elasticity. Don’t worry, I will explain more later. Think of it like, a secret weapon against crumbly bread.
The Secret to a Crusty Exterior on Gluten Free French Rolls
The Secret to a Crusty Exterior on Gluten Free French Rolls
The Steam Trick
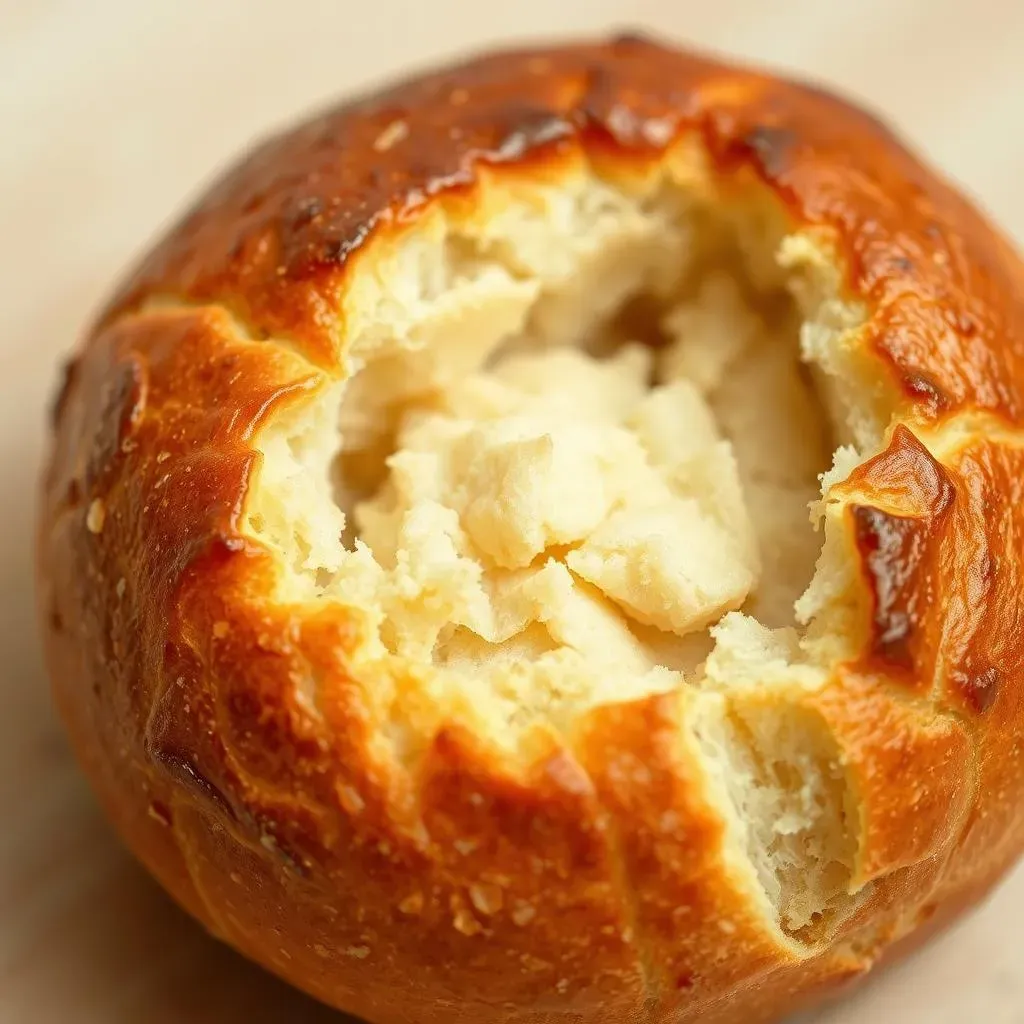
Alright, let's talk crust. That satisfying crackle when you bite into a French roll? That's not just luck, it’s science! The key player here is steam. Yes, steam. When you bake bread, the steam helps keep the outside of the dough moist, which allows it to expand fully before it sets. It's like giving your rolls a sauna before they hit the heat. This extra moisture on the surface of the dough creates a beautiful, thin crust that's both crisp and chewy.
Think of it like this: you know how a balloon gets all tight and shiny when it's full of air? That's kind of what steam does to the surface of the roll. It stretches it out, making it super thin and ready to crisp up. Without steam, you’re more likely to get a hard, dense crust, and nobody wants that.
Baking with Steam: A How-To
So, how do we create this magical steam bath? There are a few ways, and I've tried them all. My go-to method involves placing a shallow pan of hot water on the bottom rack of the oven while the rolls bake. As the water heats up, it releases steam, creating a humid environment. You could also use a spray bottle to mist the inside of the oven with water right before you put the rolls in. I've found that a good combo of both works best. It's like giving the rolls a double dose of moisture for maximum crustiness.
Method | How to | Why it works |
|---|---|---|
Pan of water | Place a shallow pan of hot water on the bottom rack of the oven during baking. | Creates a consistent, humid environment for even crust development. |
Spray bottle | Mist the inside of the oven with water right before placing the rolls in. | Provides a quick burst of steam, helping the surface expand rapidly. |
Combination | Use both a pan of water and a spray bottle for maximum steam. | Offers the benefits of both methods, ensuring a crispy crust. |
Temperature Matters
Another piece of the puzzle is temperature. We’re not baking cookies here; we want a hot oven. A temperature of 450°F (232°C) is what I aim for. This high heat helps the crust form quickly, before the inside of the roll dries out. It's like a quick sear on a steak, you want that beautiful crust to form before the inside gets overcooked. And don’t even think about opening the oven door too soon. That lets all the precious steam out, and your rolls will be sad and crustless. Patience is key, my friend.
And when it comes to the baking time, keep in mind that it may vary from oven to oven. I usually bake mine for 20-25 minutes, or until they’re a nice golden brown. Keep a close eye on them, because no one likes burnt rolls. Remember, baking is a science, but with practice, you’ll get the hang of it.
Serving and Storing Your Homemade Gluten Free French Rolls
Serving and Storing Your Homemade Gluten Free French Rolls
Serving Suggestions
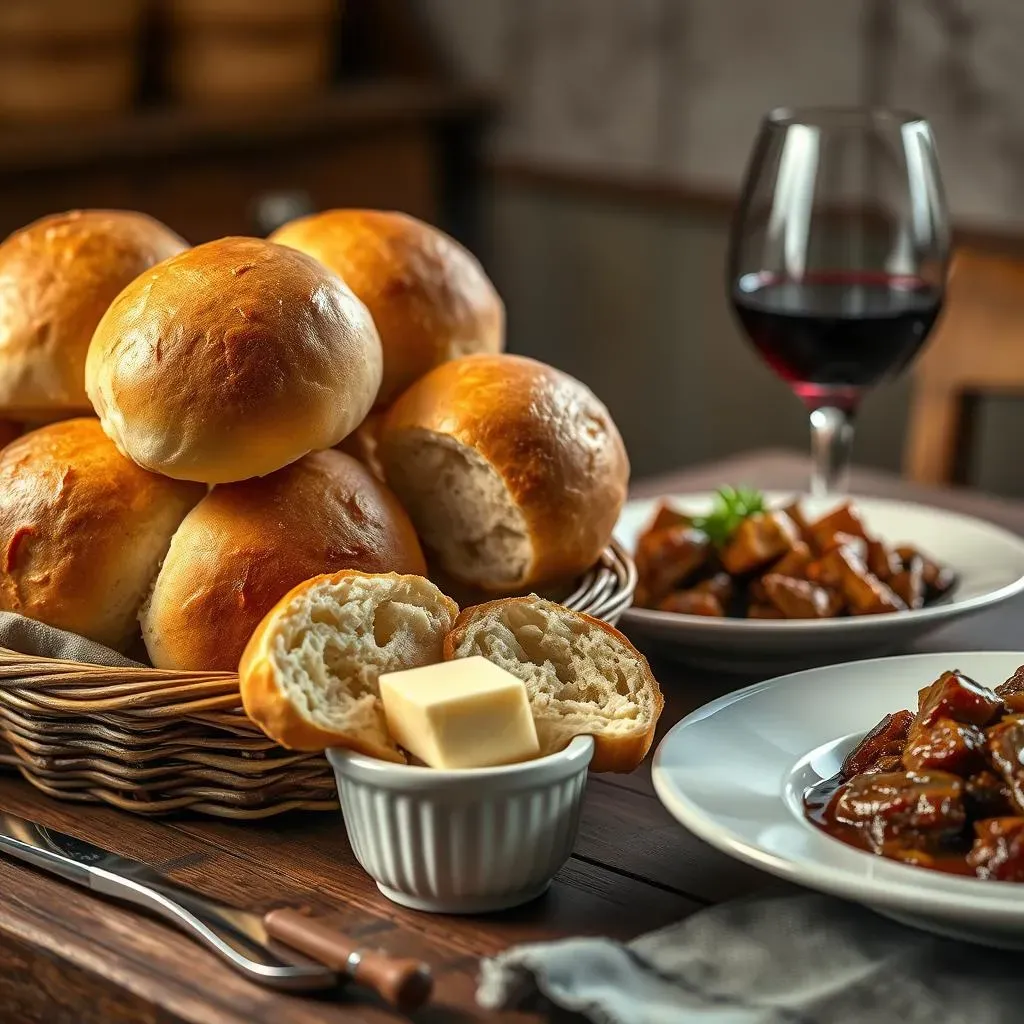
Okay, so you've baked these beautiful gluten free french rolls, and now you're wondering, "What do I do with them?" Well, the possibilities are endless! These rolls are fantastic warm, straight from the oven, with a little bit of butter. It's a simple pleasure, but sometimes the simplest things are the best. They're also amazing as a side to your favorite soup or stew, soaking up all those delicious juices. Think about them with a hearty beef stew or a creamy tomato soup – pure comfort food. And don't even get me started on using them for sandwiches. Imagine a warm, crusty roll filled with your favorite deli meats, cheeses, and veggies. It's a game changer, trust me.
I've even used them to make mini pizzas. Just slice them in half, top with sauce, cheese, and your favorite toppings, and bake until the cheese is bubbly. It's a fun way to use up any leftover rolls and a great hit with kids. Honestly, once you have a batch of these on hand, you'll find yourself using them for everything. They are so versatile that they will become your go-to bread. The key is to enjoy them fresh, while that crust is still at its peak of crispiness.
Storing Your Rolls
Now, let’s talk storage because, as much as we wish we could eat them all in one sitting, sometimes we need to keep some for later. The best way to store your gluten free french rolls is to let them cool completely first. Once they’re cool, place them in an airtight container or a resealable plastic bag. This helps keep them from drying out. You can store them at room temperature for a day or two, but if you need to keep them longer, the freezer is your friend. Frozen rolls can last for up to a month, and they'll still be delicious when you thaw them out. Just make sure to wrap them well to prevent freezer burn.
When you're ready to eat your frozen rolls, there are a couple of ways to reheat them. You can let them thaw at room temperature or pop them directly into a preheated oven at 350°F (175°C) for about 10 minutes. If you want to bring that crust back to life, try running them under a little water before you reheat them. The water will help rehydrate the crust, so it gets crispy again in the oven. It's like magic, I tell ya!
Storage Method | Duration | Tips |
|---|---|---|
Room Temperature | 1-2 days | Store in an airtight container or bag. |
Freezer | Up to 1 month | Wrap tightly to prevent freezer burn. |
Reheating Tips
Reheating is an art, especially when you want to keep that fantastic crust. The best way is to use your oven. Just preheat it to 350°F (175°C) and give your rolls a quick water bath. The water can be a quick run under the faucet, or you can mist them with a spray bottle. Then pop them in for about 10 minutes. This will help bring back that crispy exterior. If you're in a hurry, a toaster oven can also work, but keep a close eye on them, because they can get burned quickly.
Avoid microwaving them if you want to maintain the crusty texture. Microwaves tend to make bread soft and soggy, which is definitely not what we’re going for. So, stick to the oven for the best results. And, let’s be honest, there’s nothing quite like a warm, crispy roll with a bit of butter. It’s like a little slice of heaven, and you deserve it after all that hard work. So, go ahead, enjoy those amazing gluten free french rolls! You've earned it.