Table of Contents
Ever get that craving for warm, garlicky goodness, the kind that makes your kitchen smell amazing? I know I do! That's why I'm excited to share this super simple garlic french bread recipe oven method that's a total game-changer. Forget those store-bought loaves that just don't hit the spot. We're talking about homemade, crispy-on-the-outside, soft-on-the-inside garlic bread that will have everyone begging for more. This isn't some fancy, complicated recipe; it's designed for real people who want delicious food without the fuss. In this article, we'll walk through the basic ingredients you'll need, the easy steps to get it perfect every time, plus some ideas for storing leftovers (if there are any!) and some fun flavor twists. Get ready to transform your dinner game with this easy garlic french bread recipe oven. Let's get baking!
Garlic French Bread Oven Recipe: Simple Ingredients, Big Flavor
Garlic French Bread Oven Recipe: Simple Ingredients, Big Flavor
The Magic of Simple Ingredients
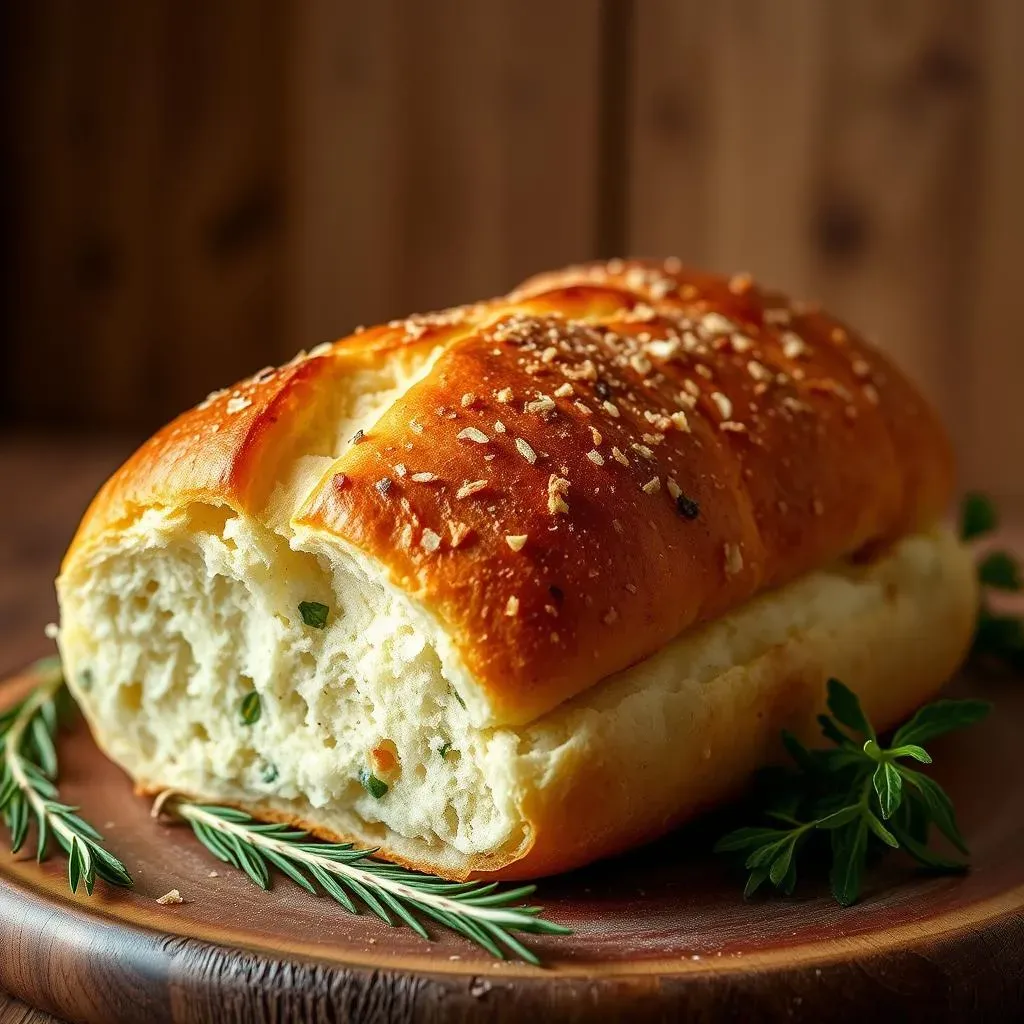
Okay, let's talk about the real stars of this show: the ingredients. You won't believe how few things you need to create something so delicious. We're not talking about a long list of stuff you've never heard of. Nope, it's all about fresh, basic stuff. Think a good loaf of French bread (the kind that's crusty on the outside and soft on the inside), some butter (yes, real butter!), fresh garlic, a bit of parsley, and a pinch of salt. That's it! No fancy oils, no weird spices, just simple ingredients that come together to make pure magic in your oven. The beauty of this recipe is that each ingredient shines, so get the good stuff!
I remember the first time I tried making garlic bread from scratch. I was so intimidated, thinking it was going to be some big, complicated thing. But honestly? It was so easy, I felt like I was cheating! The simplicity of it all is what makes this recipe such a winner. You're not spending hours prepping or needing to be some culinary genius. It's a "throw it together and bake" kind of deal, which is perfect for weeknights or when you have unexpected guests. Trust me, you'll be surprised how something so simple can taste so darn good.
The Essential Ingredient List
- 1 Loaf of French Bread
- 1/2 Cup of Butter, softened
- 4-5 Cloves of Garlic, minced
- 2 Tablespoons Fresh Parsley, chopped
- 1/4 Teaspoon Salt
Why These Ingredients Work
Now, you might be thinking, "That's it?" Yep, that's it. But here's why these specific ingredients work so well together. The French bread is the perfect base, it's sturdy enough to hold up to the butter and garlic, but soft enough to soak up all those flavors. The butter is the carrier, it melts into every nook and cranny, making the bread super moist and flavorful. Fresh garlic is key here, don't even think about using garlic powder, fresh garlic is what gives that punch of flavor we are looking for. And parsley? Well, it adds a touch of freshness and a pop of color. It's like the sprinkles on a cupcake.
And the salt? It's the unsung hero. It brings all those flavors together, making them pop even more. It's like the conductor of an orchestra, making sure everyone is playing in tune. When you put these ingredients together, it's like a party in your mouth. You have the crunch of the bread, the richness of the butter, the boldness of the garlic, and the freshness of the parsley. It's a symphony of flavors, and it's all thanks to these simple ingredients. So, don’t overthink it, just gather your stuff and let's get cooking!
StepbyStep Guide to Perfect OvenBaked Garlic Bread
StepbyStep Guide to Perfect OvenBaked Garlic Bread
Prep Your Bread and Garlic
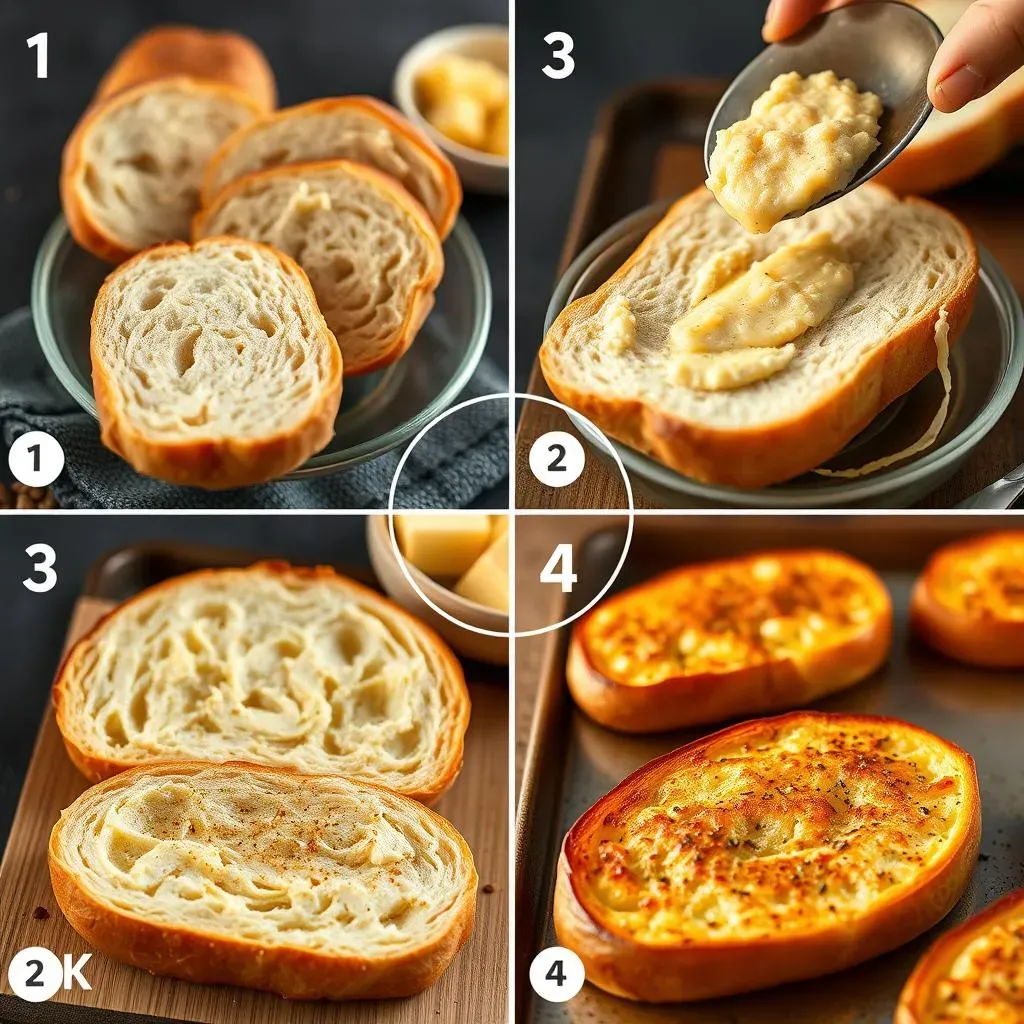
Alright, let's get started with the fun part: making the actual garlic bread! First things first, grab that loaf of French bread. Now, you've got a choice here. You can either slice it in half lengthwise, like you're opening a book, or you can cut it into individual slices, but not all the way through, like a hasselback potato. I personally prefer the lengthwise cut because it gives you a nice big canvas for that garlic butter. Once your bread is prepped, it's time to tackle the garlic. Mince those cloves until they are super fine. The smaller the pieces, the more garlic flavor you'll get in every bite. No one wants big chunks of garlic, unless you are a vampire.
Now, here's a little tip I learned from my grandma: don't be shy with the garlic. I mean, it's garlic bread, after all! If you're a garlic lover like me, throw in an extra clove or two. Just make sure it's all minced up nicely. Also, make sure your butter is softened, because it'll be much easier to mix with the garlic. If you forgot to take it out of the fridge (like I always do), just pop it in the microwave for a few seconds. Not too long, though, or you'll end up with a melted butter puddle.
Making the Garlic Butter Mixture
Okay, now for the good stuff. In a small bowl, add your softened butter, minced garlic, chopped parsley, and salt. Mix it all together until it's well combined. You want it to be a smooth, creamy, garlicky concoction. This is where the magic happens, so don't rush it. You could use a fork or a small spatula, whatever you have available. Just make sure everything is distributed evenly. Take a moment to smell that amazing aroma. That's the smell of deliciousness in the making!
I like to think of this step as creating the flavor bomb. The butter is the base, but the garlic, parsley, and salt are what give it that extra kick. It's like assembling the pieces of a puzzle, each ingredient playing its part to create a masterpiece. Once you've got your garlic butter mixed, it's time to spread that goodness onto your bread. I like to use a butter knife or a small spatula to spread it evenly over every inch of the bread. Don't be shy, make sure every nook and cranny is covered.
Ingredient | Amount | Notes |
|---|---|---|
French Bread | 1 Loaf | Sliced lengthwise or into thick slices |
Butter | 1/2 Cup | Softened |
Garlic | 4-5 Cloves | Minced |
Parsley | 2 Tablespoons | Freshly Chopped |
Salt | 1/4 Teaspoon | To taste |
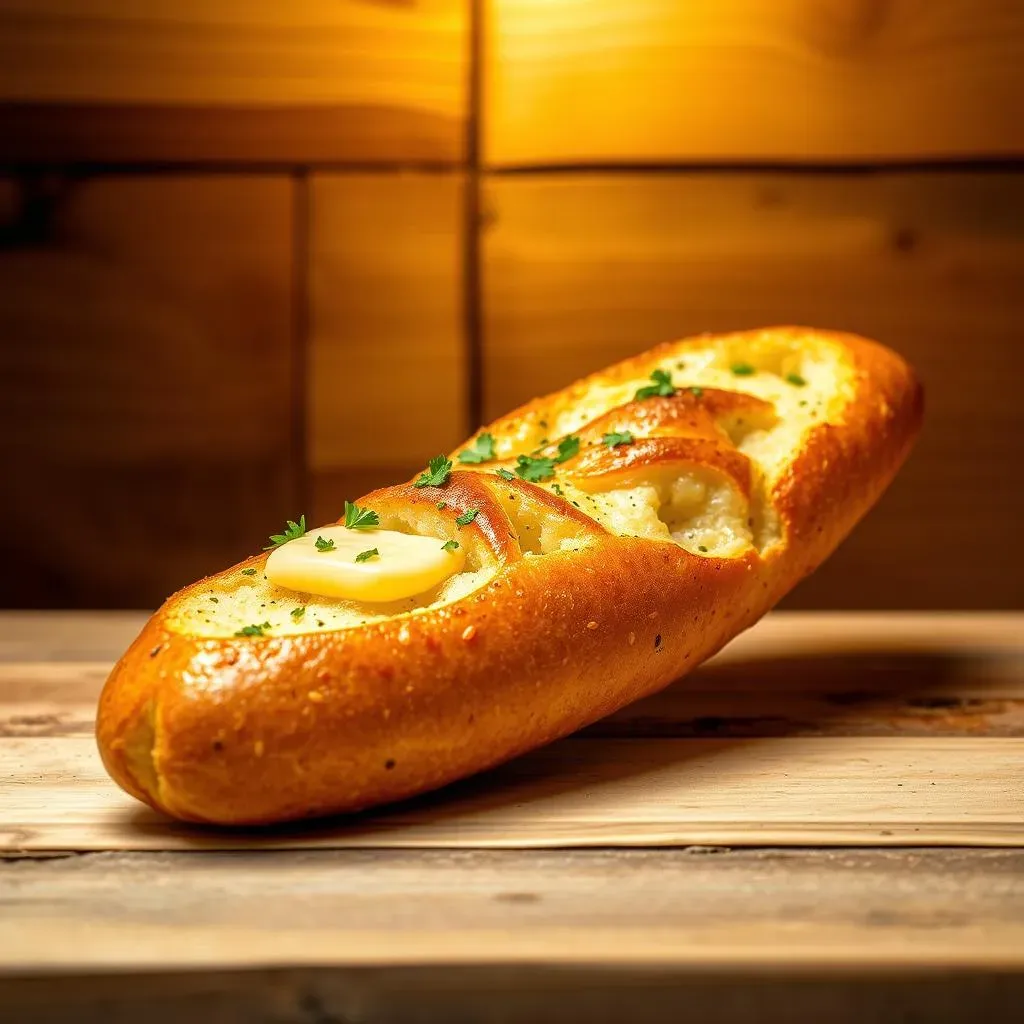
Baking to Golden Perfection
Now that your bread is all dressed up in garlic butter, it's time for the oven. Preheat your oven to 400 degrees Fahrenheit. Place the garlic bread on a baking sheet and pop it in the oven. Bake for about 10-15 minutes, or until the bread is golden brown and crispy on the edges. Keep an eye on it, every oven is different. You want it to be toasted but not burned. The smell wafting through your kitchen at this point will be incredible.
Once it's done, take it out of the oven and let it cool for a minute or two before slicing it into pieces. I know it's tempting to dig in right away, but trust me, a little cooling time makes it easier to handle. Plus, it gives the flavors a chance to meld together even more. And there you have it, perfect oven-baked garlic bread! It's so easy, right? You'll be making it every single night!
Serving and Storing Your Garlic French Bread
Serving and Storing Your Garlic French Bread
Serving Suggestions: The Perfect Pairings
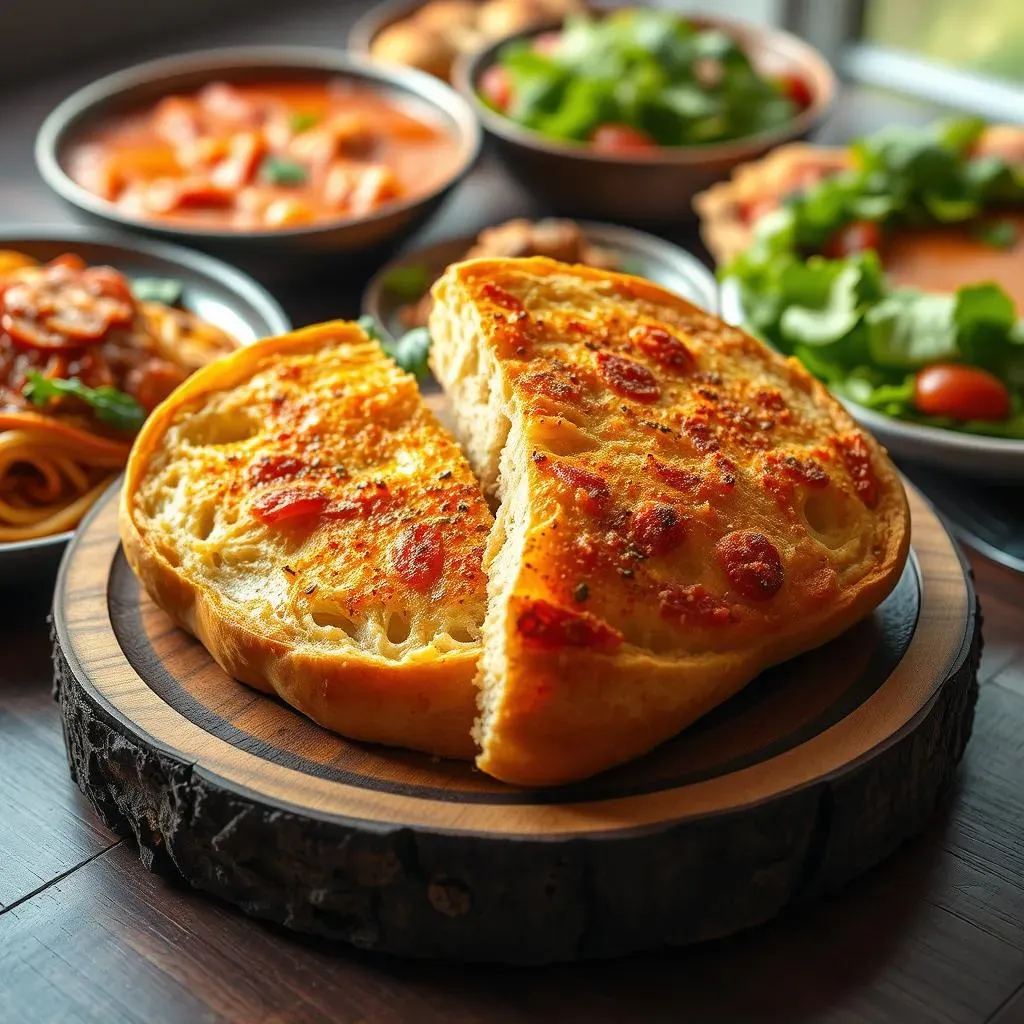
Okay, so your garlic bread is out of the oven, smelling amazing, and you're probably already drooling. But what do you serve it with? Well, the great thing about garlic bread is that it goes with practically everything! Seriously, it's like the chameleon of side dishes. But if you're looking for some specific ideas, I've got you covered. It's a classic with Italian dishes, like pasta, lasagna, and pizza. Picture this: a big bowl of spaghetti and meatballs, and a side of warm, garlicky bread. It's the perfect comfort food combo.
But don't limit yourself to just Italian. Garlic bread is also great with soups and salads. It adds a nice carb-y crunch to a light salad, or it's perfect for dipping in a creamy soup. I've even had it with grilled chicken and veggies, and it was delicious. The possibilities are endless! And if you're having a party, garlic bread is always a crowd-pleaser. It's easy to make a big batch, and everyone loves it. Just set out a platter of garlic bread, and watch it disappear.
- Italian Pasta Dishes (Spaghetti, Lasagna, etc.)
- Soups (Tomato, Minestrone, etc.)
- Salads (Caesar, Garden, etc.)
- Grilled Meats and Vegetables
- Basically anything!
Storing Leftovers: Keeping it Fresh
Now, let's talk about leftovers. If you somehow manage to not devour all the garlic bread in one sitting, you'll need to know how to store it. The key is to keep it from drying out. The best way to do this is to wrap it tightly in foil or plastic wrap, or place it in an airtight container. You can store it at room temperature for a day or two, but if you want to keep it longer, pop it in the fridge.
In the fridge, it will last for about 3-4 days. But if you want to keep it even longer, you can freeze it! Yes, you can freeze garlic bread. Just wrap it tightly and place it in a freezer-safe bag. It will keep for a few months. When you're ready to eat it, you can reheat it in the oven, air fryer, or even the microwave. The oven or air fryer will give you the best results, but the microwave works in a pinch.
"The best way to store garlic bread is to wrap it tightly and keep it in a cool, dry place. But let's be honest, it rarely lasts long enough to need storing!" - My Grandma
Reheating Tips: Bringing it Back to Life
Okay, so you've got your leftover garlic bread, and you're ready to eat it. But how do you reheat it without it getting soggy? Well, here's the secret: the oven or air fryer is your best friend. Preheat your oven to 350 degrees Fahrenheit, place the garlic bread on a baking sheet, and bake for about 5-10 minutes, or until it's heated through and crispy. The air fryer works even faster. Just pop it in for a few minutes, and you'll have perfectly reheated garlic bread.
If you're in a hurry, you can use the microwave, but be warned, it might get a little soft. If you're using the microwave, wrap the bread in a paper towel and heat it in short intervals until it's warm. The key is not to overdo it. You want it warm and toasty, not soggy and sad. And there you have it, reheated garlic bread that's just as good as the first time. Now, go enjoy that garlicky goodness!
Garlic Bread Recipe Oven: Mixins and Variations

Garlic Bread Recipe Oven: Mixins and Variations
Elevating Your Garlic Bread: Time to Experiment
Alright, so you've mastered the basic garlic bread, and it's amazing, right? But what if I told you that you could take it up another notch? That's where the fun part comes in: mix-ins and variations! This is where you can really let your creativity shine and make your garlic bread truly your own. Think of the basic recipe as a blank canvas, and now you're going to add some color and texture. I'm not talking about complicated stuff, just simple additions that can make a huge difference in the flavor.
One of my favorite ways to spice things up is by adding some cheese. I mean, who doesn't love cheese? Parmesan is a classic choice, but you can also use mozzarella, provolone, or even a blend of Italian cheeses. Just sprinkle it on top of the garlic butter before baking, and it melts into a gooey, cheesy masterpiece. And if you're feeling adventurous, try adding some herbs. A little rosemary or thyme can add a lovely earthy note to your garlic bread. You can add the herbs to the butter mixture or sprinkle them on top before baking. The options are truly endless!
"The only limit to your garlic bread is your imagination!" - My friend, the foodie.
Flavor Boosters: Mix-in Ideas
Okay, let's get into some specific mix-in ideas. If you're a fan of pesto, try adding a spoonful or two to your garlic butter mixture. It gives the bread a bright, herbaceous flavor that's absolutely delicious. Or, if you want a smoky flavor, try adding some roasted garlic. Just roast a head of garlic until it's soft and caramelized, then mash it into your butter. It's a game-changer, trust me. You can also add some red pepper flakes for a little heat. Or try a sprinkle of paprika for a smoky sweetness.
And for those who want to add a touch of sweetness, a drizzle of honey can be surprisingly good. It's unexpected, but it works. Don't be afraid to mix and match and see what you come up with. That's the joy of cooking, it's all about experimenting and finding what you love. So, go ahead, get creative, and make your garlic bread the best it can be.
Variation Ideas
- Cheesy Garlic Bread: Add shredded mozzarella, Parmesan, or provolone.
- Pesto Garlic Bread: Mix in a spoonful of pesto to the garlic butter.
- Roasted Garlic Bread: Mash in some roasted garlic for a deeper flavor.
- Spicy Garlic Bread: Add red pepper flakes or a pinch of cayenne.
- Herbaceous Garlic Bread: Sprinkle with rosemary, thyme, or oregano.
- Sweet Garlic Bread: Drizzle with honey after baking.