Table of Contents
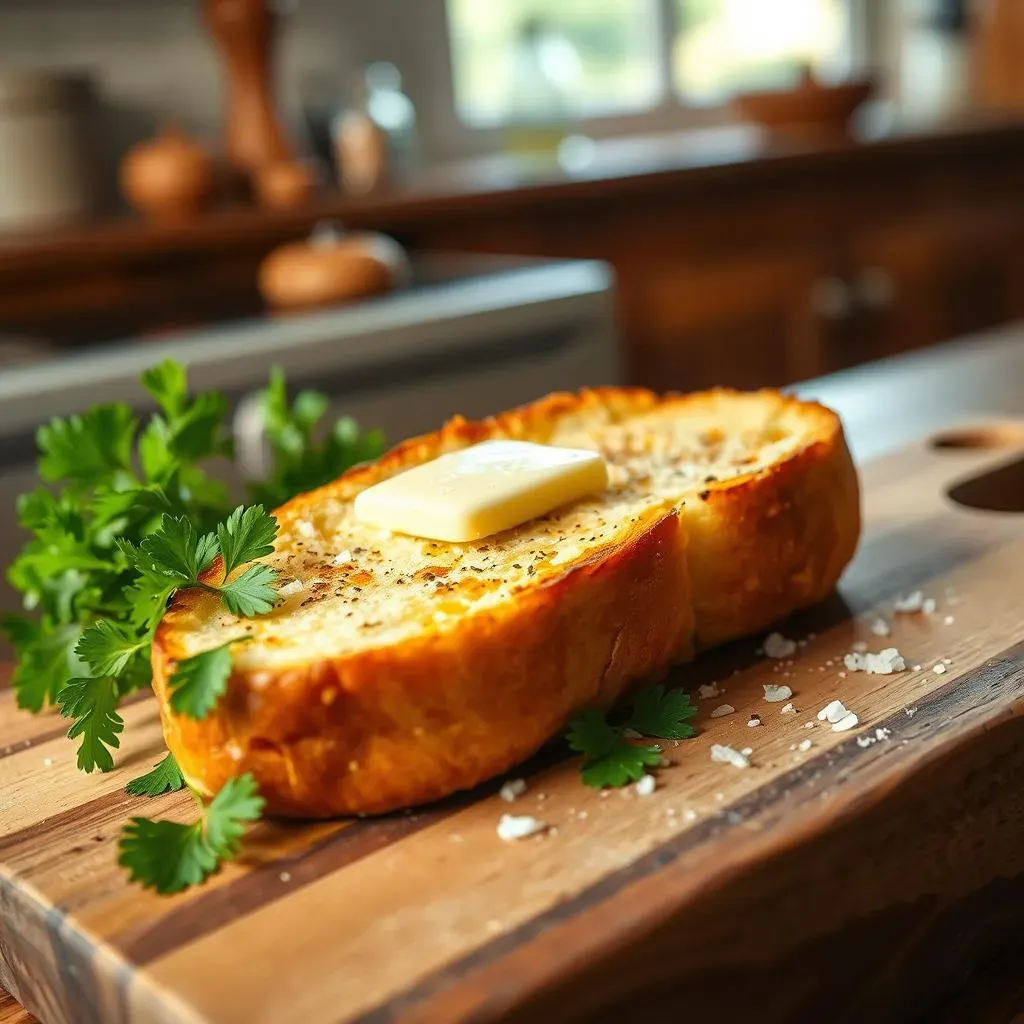
Let's be honest, is there anything better than warm, crusty garlic bread? I think not. Today, we’re not just making any garlic bread; we’re crafting the ultimate side dish using a classic: French bread. This isn't about complicated cooking; it’s about taking a simple loaf and transforming it into a flavor explosion. We’ll start by exploring why French bread is the perfect base for this culinary adventure, its airy texture and sturdy crust soaking up all that garlicky goodness. Then we'll get into the secret of creating an exceptional garlic butter, the heart of every great garlic bread. I'll walk you through a simple, step-by-step baking process that even a beginner can master, ensuring your garlic bread using french bread is golden brown and irresistible. Finally, we'll cover how to serve it and what to do with any leftovers (if there are any!). Get ready to elevate your meals with this easy, yet impressive, recipe.
Why French Bread is Perfect for Garlic Bread
Why French Bread is Perfect for Garlic Bread
The Crust Factor
Okay, let's get real about why French bread is the MVP of garlic bread. It all starts with that amazing crust. It's not just hard; it's got that perfect crispiness that can stand up to a generous slathering of garlic butter without getting soggy. Think of it like a tiny, delicious armor, protecting the soft interior from becoming a mushy mess. Other breads might buckle under the weight of all that flavor, but French bread? It holds its form like a champ, giving you that satisfying crunch with every bite.
The Interior Magic
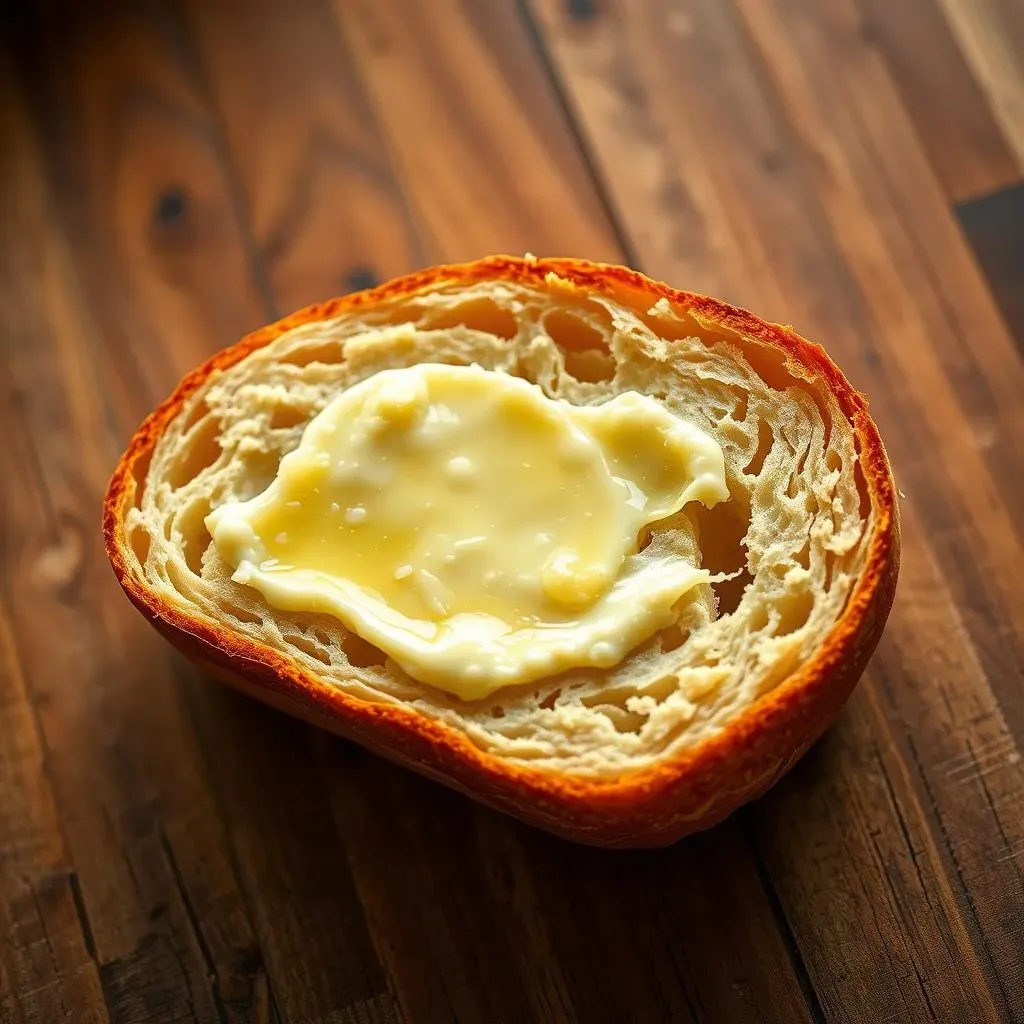
Now, while the crust is important, the inside of the French bread is where the real magic happens. It's got this airy, open crumb structure, which means tons of little nooks and crannies for the garlic butter to seep into. It's like a sponge, soaking up all that deliciousness and distributing it evenly throughout each slice. You don't just get a surface coating of flavor; you get it infused deep within the bread. This ensures that every bite is bursting with garlicky goodness, not just the top layer.
Bread Type | Crust Texture | Interior Texture | Butter Absorption |
|---|---|---|---|
French Bread | Crisp, sturdy | Airy, open crumb | Excellent |
Soft White Bread | Soft | Dense | Poor |
Baguette | Crisp, thin | Dense | Good |
The Perfect Slice
Lastly, let's talk about the shape. French bread is typically wider and flatter than a baguette, which means you get these nice, substantial slices. It's the ideal canvas for garlic bread, providing ample surface area for maximum butter coverage. Plus, those wide slices are perfect for dipping into your favorite sauces or enjoying alongside a hearty meal. It’s not just about taste; it's about the whole experience, from the first bite to the last. French bread just nails it in terms of size, shape, and texture, making it the undefeated champion of garlic bread.
How to Make the Best Garlic Butter for French Bread
How to Make the Best Garlic Butter for French Bread
The Butter Base
Alright, let's talk butter. This isn’t the time for skimping! You want real, unsalted butter for the best flavor. Why unsalted? Because we want to control the saltiness ourselves, and let the garlic shine. Take your butter out of the fridge and let it soften. You don’t want it melted, just soft enough to easily mix with the other ingredients. Think of it like the foundation of a house; it needs to be solid and reliable. If you use melted butter, it might get too runny, and you won't get that perfect spreadability.
Garlic: Fresh vs. Powder
Now, for the star of the show: garlic. You have a choice here—fresh garlic or garlic powder. I'm going to be honest, fresh garlic is the way to go. Mince it finely or use a garlic press, and you'll get that pungent, robust flavor that makes garlic bread so addictive. But if you’re short on time, garlic powder can be a decent substitute. Just don't expect the same punch. The key is to use a generous amount, but don't overdo it. You want it garlicky, not overpowering. It's like adding the right amount of spices to a dish – it should enhance, not dominate.
Ingredient | Fresh Garlic | Garlic Powder |
|---|---|---|
Flavor | Pungent, robust | Milder, slightly sweet |
Texture | Small pieces | Powder |
Best Use | When you want a strong garlic flavor | When you need a quick option |
Flavor Boosters
Okay, we have the butter and garlic, but let's add some extra oomph. A pinch of salt is crucial, especially if you’re using unsalted butter. Don’t be shy with it, but start with a little and add more to taste. Freshly chopped parsley is also a great addition, giving the butter a pop of color and a touch of freshness. You could also add a dash of dried Italian herbs for extra depth. These aren't just random additions; they elevate the butter from good to exceptional. It’s like adding a sprinkle of magic to your mix, each ingredient working together to create something truly special.
StepbyStep Guide to Baking Garlic Bread with French Bread
StepbyStep Guide to Baking Garlic Bread with French Bread
Prepping the Bread
Alright, let's get this show on the road. First things first, preheat your oven to 400°F (200°C). While that's heating up, grab your French bread and slice it lengthwise. You want to create two long halves, like you're opening a book. Now, if you're feeling fancy, you can also slice the bread into individual pieces, but honestly, keeping it in halves is easier and less messy. It's like setting the stage for a performance; you've got to have your props (the bread) ready before the main event.
Applying the Garlic Butter
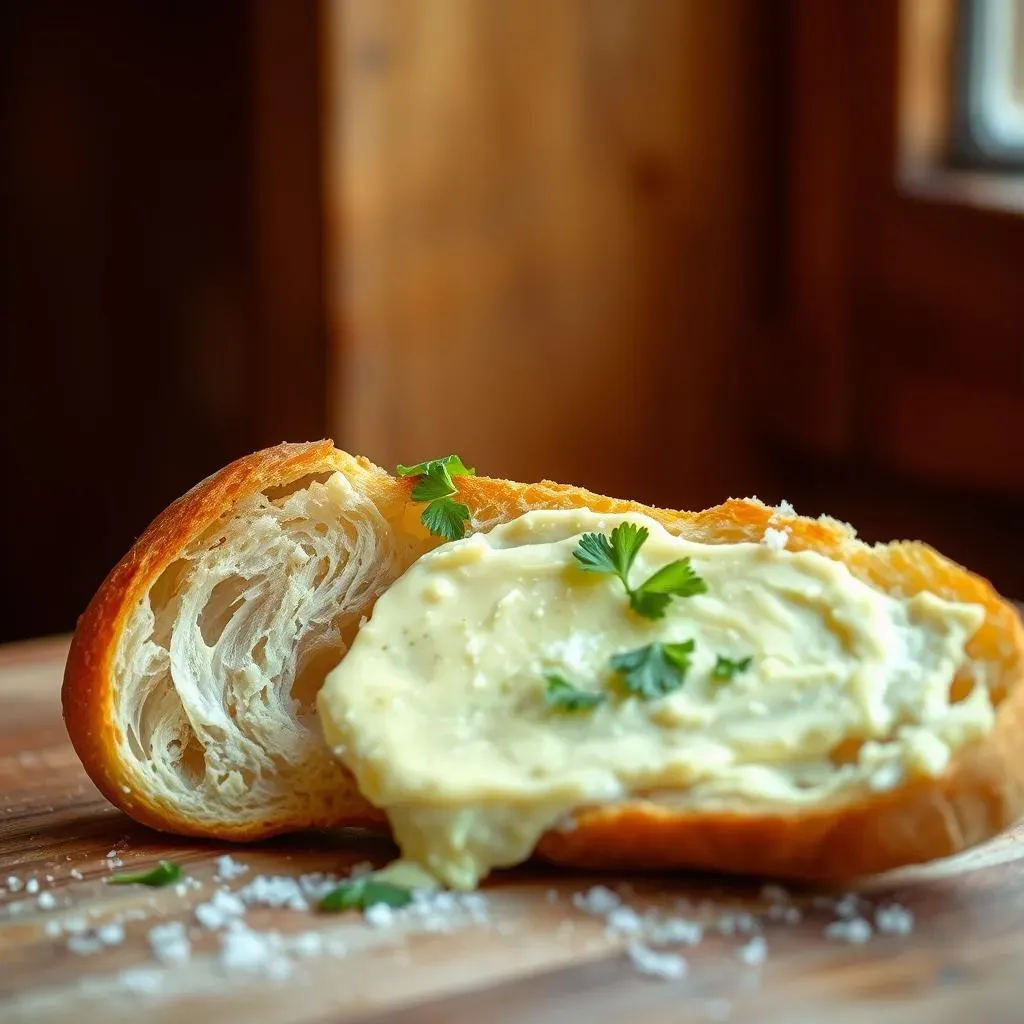
Now for the fun part: slathering on that amazing garlic butter we made earlier. Take a generous amount and spread it evenly over the cut sides of the French bread. Don't be shy; make sure every nook and cranny is coated. This isn't about being dainty; it’s about ensuring every bite is packed with flavor. Imagine you're painting a masterpiece, only instead of paint, you’re using garlic butter, and instead of a canvas, it’s French bread. It’s a beautiful thing, really.
Step | Action | Why it's important |
|---|---|---|
1 | Preheat oven to 400°F (200°C) | Ensures even cooking |
2 | Slice French bread lengthwise | Creates more surface area for butter |
3 | Spread garlic butter generously | Maximizes flavor |
Baking to Golden Perfection
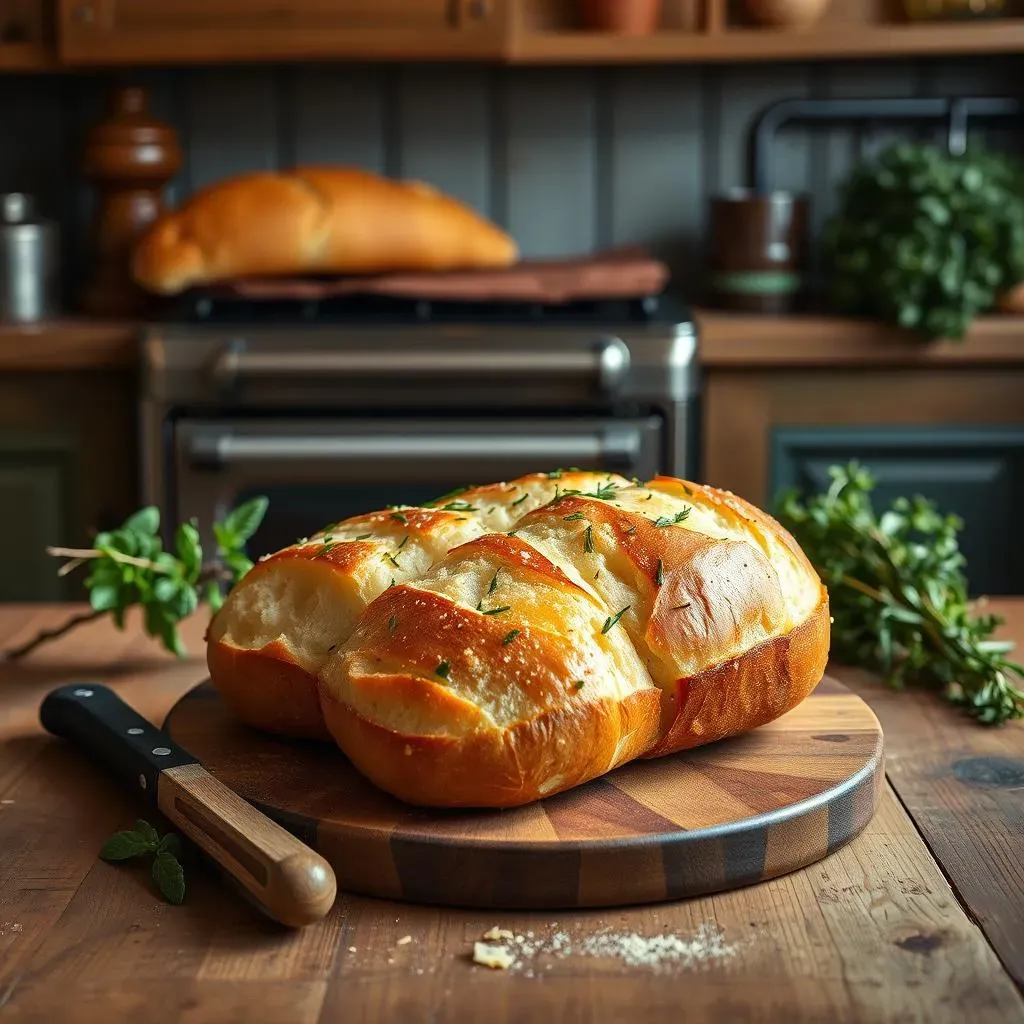
Okay, time to bake! Place the buttered bread halves onto a baking sheet. You can line it with parchment paper if you want to make cleanup easier, but it's not absolutely necessary. Put the baking sheet in the preheated oven and bake for about 10-12 minutes. Keep an eye on it; you want the bread to be golden brown and crispy, but not burnt. It's like watching a sunset; you want to catch it at its peak beauty, not after it's faded away. Once it’s golden and fragrant, take it out of the oven and let it cool slightly before serving.
Serving and Storing Your Homemade Garlic French Bread
Serving and Storing Your Homemade Garlic French Bread
Serving Suggestions
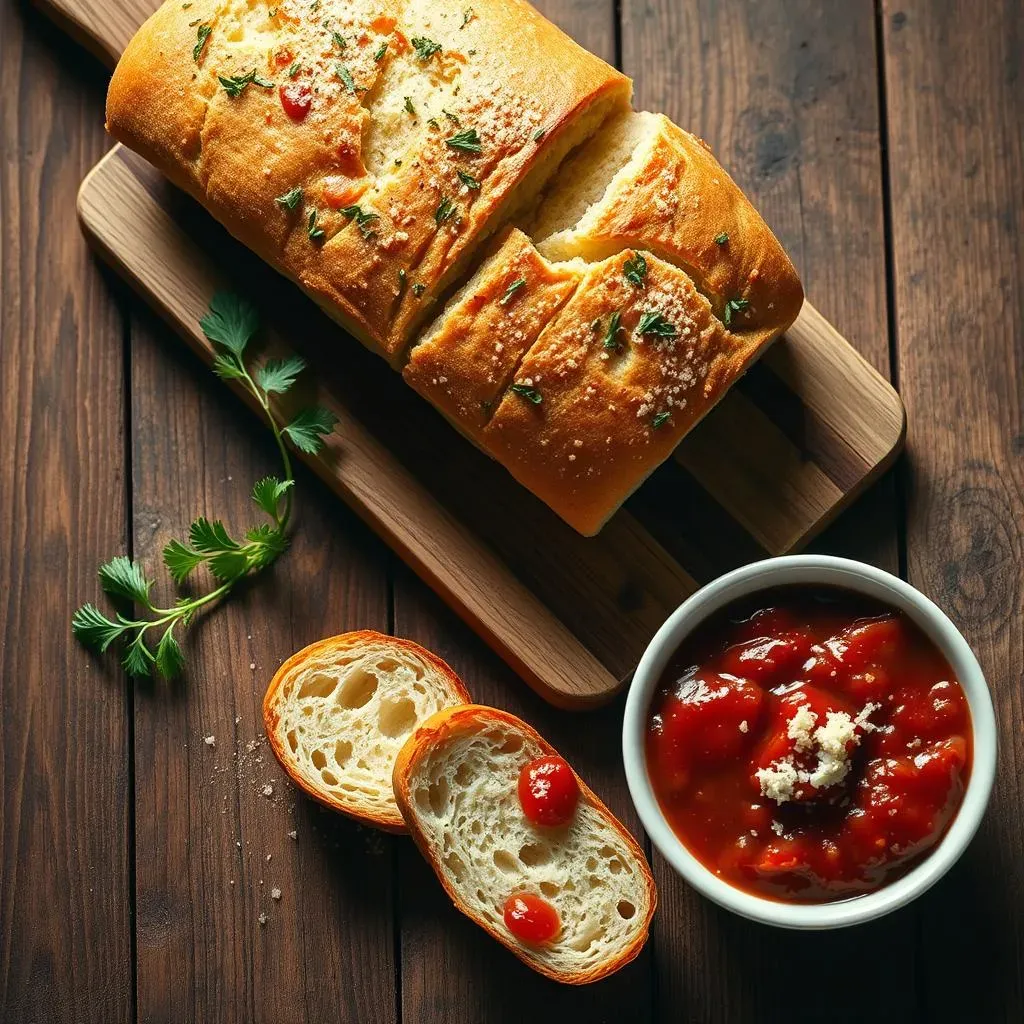
Alright, your kitchen smells amazing, and that golden, garlicky French bread is calling your name. But how do you serve it up right? Well, first off, let it cool slightly after baking; you don't want to burn your tongue on that deliciousness. Now, you can serve it as is, sliced into smaller pieces. It's perfect alongside a big bowl of pasta, a hearty soup, or even just as a snack on its own. Seriously, this garlic bread goes with almost anything. Think of it as the ultimate sidekick, always ready to add a little extra flavor and warmth to any meal. It's the kind of bread that makes people say "Wow, this is good!".
If you want to get a little fancy, try serving it with some marinara sauce for dipping. The acidity of the tomato sauce complements the richness of the garlic butter perfectly. Or, you could sprinkle some grated parmesan cheese on top while it's still warm from the oven. It’s like adding a touch of elegance without a ton of effort. And remember, presentation matters; arrange the slices nicely on a platter, and watch how quickly they disappear. It's not just about the taste; it's about making the whole experience enjoyable from start to finish.
Storing Leftovers
Okay, so you’ve somehow managed to not eat all the garlic bread in one sitting (impressive!). Now, what to do with the leftovers? The key is to keep it as fresh as possible. Once the bread has cooled completely, wrap it tightly in aluminum foil or plastic wrap. You can store it at room temperature for a day or two, but for longer storage, the fridge is your friend. In the fridge, it will stay good for about three to four days. But let's be honest, it's never going to be quite as amazing as fresh out of the oven.
If you know you're not going to eat it within a few days, you can also freeze it. Wrap it well, and it will be good for a month or two. When you're ready to eat it, just pop it back in the oven at 350°F (175°C) for about 10-15 minutes, or until heated through. It won’t be quite as crispy as the first time, but it’ll still be delicious. Just don't microwave it; you'll end up with a soggy mess. Trust me, I've made that mistake before. It’s like giving your garlic bread a second chance to shine, even if it’s not its debut performance.
Storage Method | Duration | Best Use |
|---|---|---|
Room Temperature | 1-2 days | Short-term storage |
Refrigerator | 3-4 days | Medium-term storage |
Freezer | 1-2 months | Long-term storage |