Table of Contents
Ever dreamed of baking those perfect, crusty-on-the-outside, fluffy-on-the-inside french rolls bread? You know, the kind that make your sandwiches sing and your dinner guests swoon? Well, stop dreaming and start baking! This isn't some fancy, intimidating recipe that requires a PhD in bread-making. No way! I'm going to walk you through a super easy, step-by-step guide that even a beginner can nail. We'll cover everything from the simple ingredients you need, to how to shape those beautiful rolls, and of course, how to bake them to golden perfection. We'll also tackle common questions, share some cool variations, and even take a peek at what other folks are saying about this recipe. So, if you're ready to ditch the store-bought bread and impress yourself (and maybe a few others), then let's get our hands floury and make some amazing french rolls bread together!
Baking the Perfect French Bread Rolls: A StepbyStep Guide
Baking the Perfect French Bread Rolls: A StepbyStep Guide
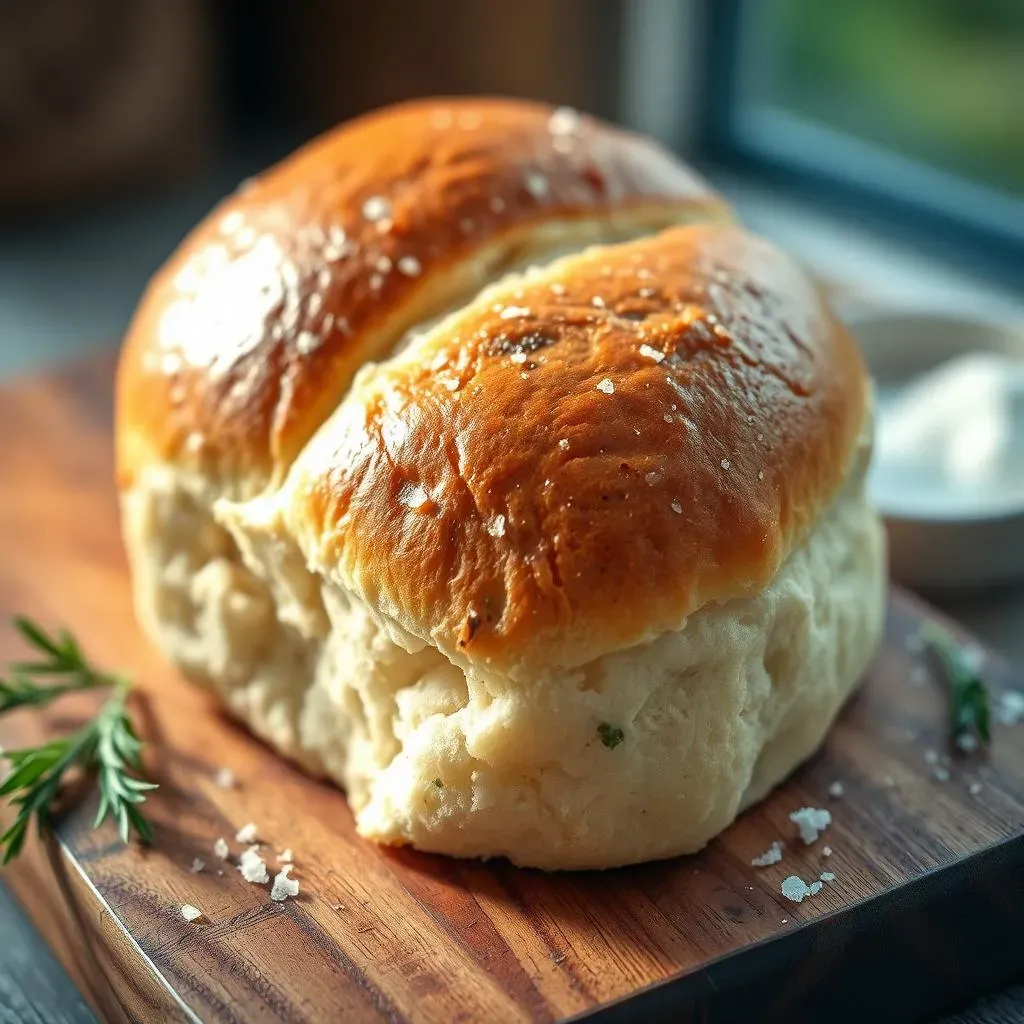
Okay, so you're ready to get started? Awesome! First things first, let's talk about what makes these french rolls bread so darn good. We're aiming for that perfect balance of a crispy, golden crust and a light, airy interior, right? It’s like a tiny cloud with a bit of a tan. The secret, and it's not really a secret, is all in the process. We're gonna take it nice and slow, letting the dough do its thing. Think of it like a little science experiment, but the kind that smells amazing and ends with you eating delicious bread. No crazy techniques here, just some basic steps that, when followed, will yield fantastic results. I'm not gonna lie, there's a bit of waiting involved, but trust me, it's totally worth it. Plus, you can totally binge-watch your favorite show while the dough rises; multitasking at its finest!
Ingredients and Instructions for Delicious French Rolls Bread
Ingredients and Instructions for Delicious French Rolls Bread
Gathering Your Arsenal: The Ingredients
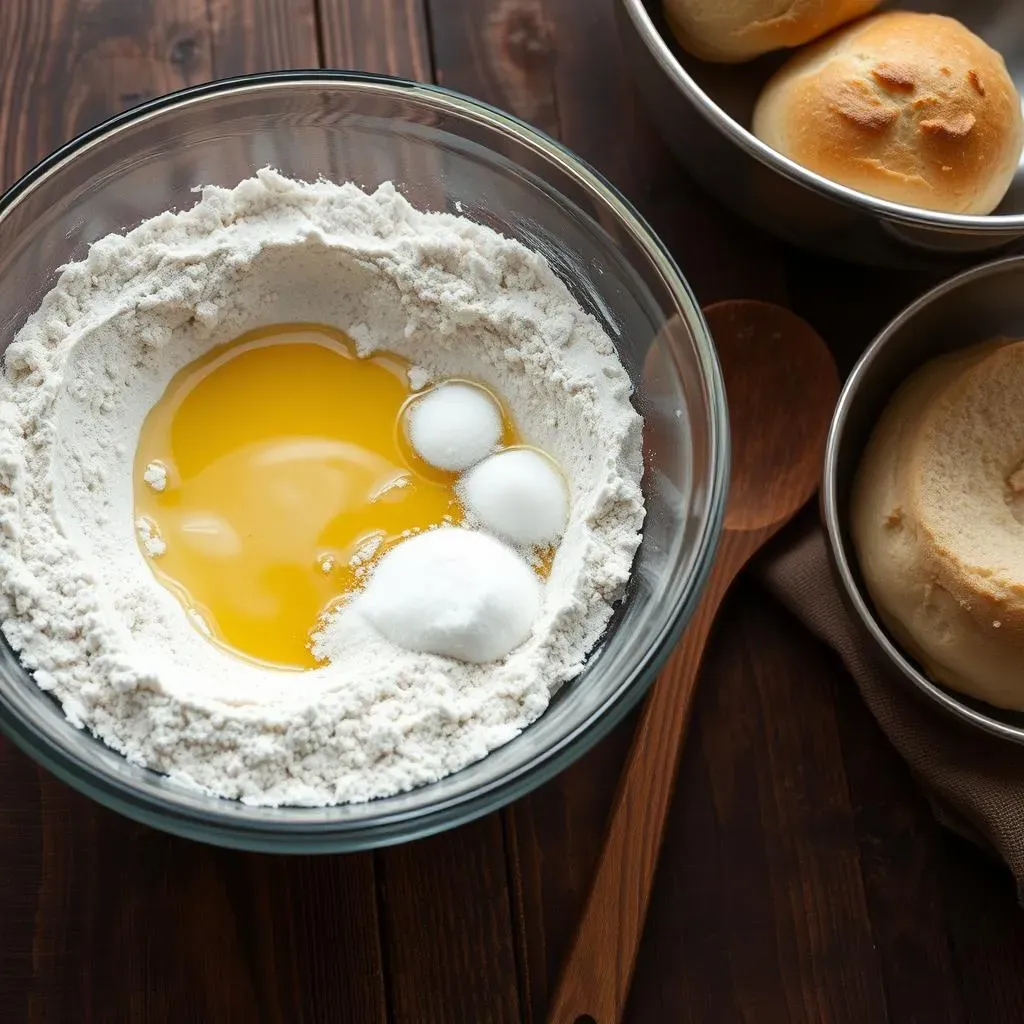
Alright, let's talk ingredients. We're not talking about a laundry list of hard-to-pronounce stuff here. Nope, just some simple, everyday pantry staples. You'll need: flour (the all-purpose kind works great), water (warm, not hot), yeast (the active dry stuff), a bit of sugar (just a pinch to get the yeast happy), some salt (for flavor, duh!), and maybe a touch of olive oil if you’re feeling fancy. That’s it! Seriously, that’s all it takes to make some magic happen. I love how such basic stuff can transform into something so delicious. It's like a mini-miracle in your kitchen!
Now, before you start dumping everything in a bowl, let's talk measurements. Baking is a bit of a science, so we need to be somewhat precise. Don't worry; I'm not going to ask you to break out your chemistry lab equipment. We'll stick to cups and spoons, the usual suspects. I've found that getting the ratios right is key to that perfect texture. Too much flour, and you'll end up with hockey pucks; too little, and you'll have a sticky mess. But don't sweat it; I've got the exact amounts listed out for you below, so you can’t go wrong. Trust me, with these measurements, you'll be baking like a pro in no time!
Mixing and Kneading: The Magic Begins
Okay, so we've got our ingredients lined up, ready to rock. Now it’s time to get our hands a little dirty. First, we're gonna "wake up" the yeast by mixing it with the warm water and a pinch of sugar. It’s like giving them a little energy boost. Let it sit for about five minutes, and you should see it get all foamy and bubbly. That’s how you know it’s alive and ready to do its thing. Then, we'll add the rest of the ingredients and start mixing. You can use a stand mixer if you have one, or just get in there with your hands! I personally love kneading dough, it's strangely therapeutic. It’s like a workout for your arms, and you get bread at the end!
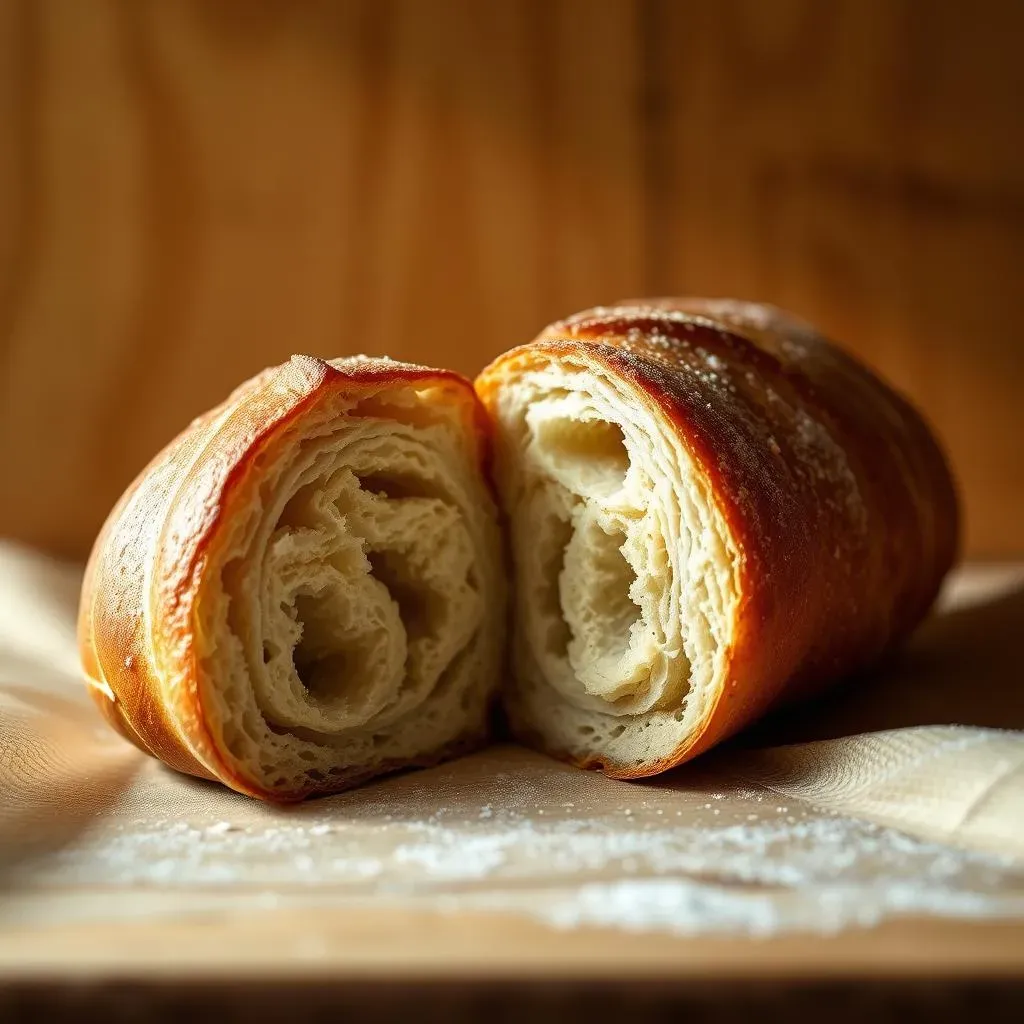
The goal is to get a nice, smooth dough that’s slightly tacky but not sticky. It should feel soft and elastic. If it’s too dry, add a tiny bit more water, and if it’s too sticky, add a bit of flour. Remember, it’s all about how the dough feels. It’s like having a conversation with it. Once you get it right, you'll know. Now, we'll let that dough rest and rise in a warm place. This part is crucial; it's where the magic really happens. The yeast will do its thing, making the dough all puffy and amazing. It’s like watching a little science experiment unfold right before your eyes.
Ingredient | Amount |
|---|---|
All-Purpose Flour | 3 cups |
Warm Water | 1 1/4 cups |
Active Dry Yeast | 2 1/4 teaspoons |
Sugar | 1 teaspoon |
Salt | 1 1/2 teaspoons |
Olive Oil (optional) | 1 tablespoon |
Shaping and Baking: The Final Stretch
Alright, our dough has risen, it's all puffy and ready to go. Now, we’re going to gently punch it down. It feels kinda fun, like a tiny boxing match against the dough. We’re just releasing the air bubbles, not trying to hurt it, haha! Then, we'll divide the dough into equal pieces. This part is where you get to decide how big or small you want your rolls to be. I usually go for about 8-10 rolls, but you do you. It’s like having your own personal bread factory!
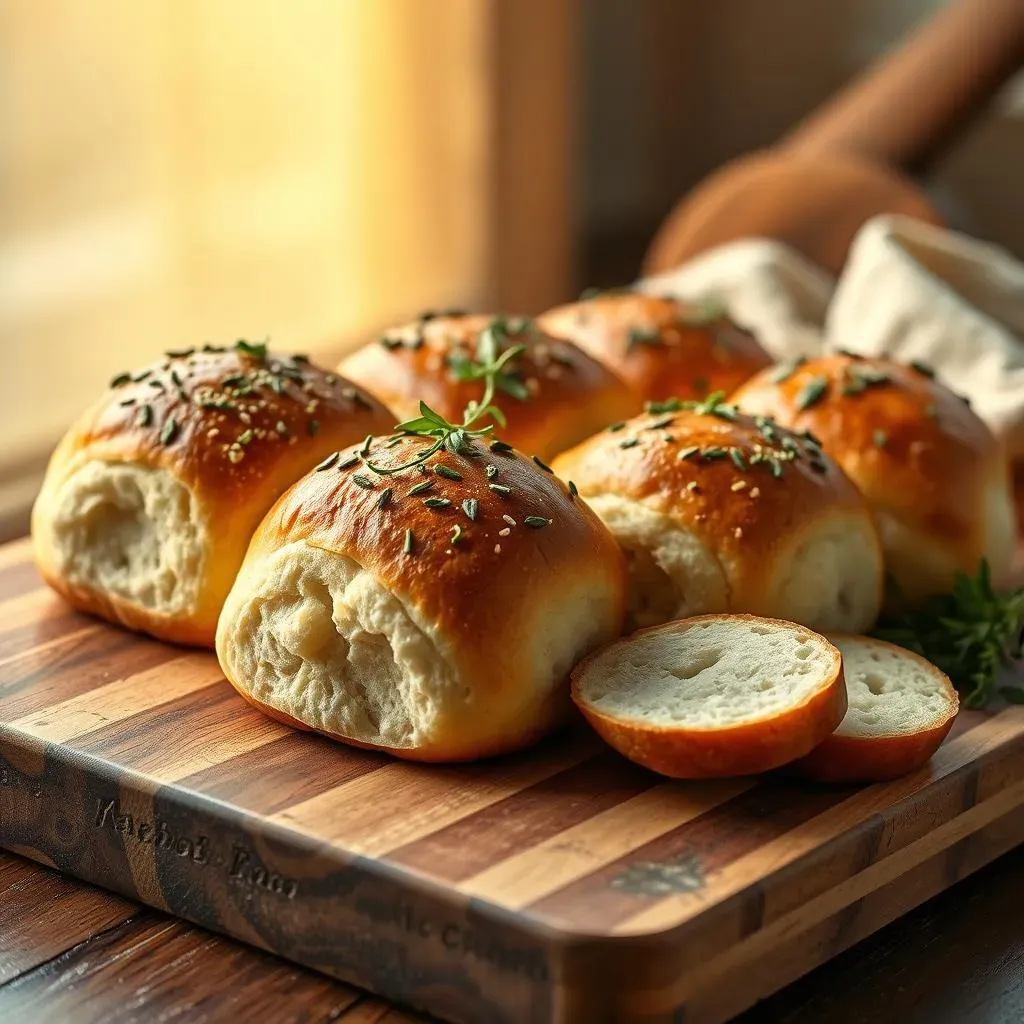
Next, we’ll shape each piece into a little oblong roll. It doesn't have to be perfect; rustic is totally in these days. Place them on a baking sheet, and let them rise again for a bit. This is the second rise, so be patient! Finally, pop them into a preheated oven, and let them bake until they're golden brown. The smell will be absolutely heavenly. And when they’re done, let them cool slightly before you dig in. Seriously, there's nothing like the taste of fresh-baked french rolls bread!
Tips, Variations, and Reader Reviews for French Bread Rolls
Tips, Variations, and Reader Reviews for French Bread Rolls
Baking Hacks for French Roll Perfection
Okay, so you've got the basic recipe down, but let's be real, there's always room for improvement, right? Here are a few little tips and tricks that I've picked up over time. First off, the temperature of your water is super important. It should be warm, like bathwater, not hot enough to poach an egg. Too hot, and you’ll kill the yeast, which is a major bummer. Also, don't be afraid to experiment with your flour. If you want a slightly nuttier flavor, try subbing in some whole wheat flour. Just don't go overboard, or your rolls will get a bit dense. Speaking of dense, if your rolls are coming out a little too heavy, it could be that you're adding too much flour. Remember, the dough should be slightly tacky, not a dry, crumbly mess. And hey, if you mess up, don’t sweat it! Baking is a journey, not a destination, and even the "failures" taste pretty good with butter.
Another pro tip? Score the tops of your rolls before baking. It helps them expand nicely and gives them that classic bakery look. Just a quick slash with a sharp knife or a razor blade will do the trick. If you're feeling fancy, you can also brush the tops with a little egg wash before baking for an extra golden crust. Oh, and one more thing! Don’t overbake your rolls. They should be a nice golden brown, but if they start to get too dark, they'll be dry and hard. It’s all about finding that sweet spot. And remember, it's okay if they're not perfect. Homemade is always better than store-bought, even if it's a little wonky.
Tip | Why it Works |
|---|---|
Warm water (not hot) | Activates yeast without killing it. |
Score the tops | Helps rolls expand evenly. |
Egg wash for crust | Creates a golden, shiny crust. |
Don't overbake | Keeps the rolls soft and moist. |
Variations on a Theme: Getting Creative
Now, let's talk about variations because, let's be honest, who doesn't love a little twist on a classic? If you're feeling adventurous, try adding some herbs to the dough. Rosemary, thyme, or even a little garlic powder can take your rolls to the next level. Or, if you're in the mood for something sweet, add a pinch of cinnamon and a few raisins for a breakfast treat. You could even make some cheesy rolls by adding some grated Parmesan or cheddar to the dough. The possibilities are endless! It's like a blank canvas, waiting for your culinary masterpiece.
Another fun variation is to play with the size and shape of the rolls. Instead of making them oblong, try making them into little knots or twists. Or, if you're feeling ambitious, you can even make one giant loaf instead of individual rolls. It's all about having fun and experimenting. Don't be afraid to try new things and see what you come up with. Who knows, you might just stumble upon your new favorite recipe! And hey, if it doesn't work out, you can always try again. That's the beauty of baking. It's all about learning and growing, one delicious mistake at a time.
- Herb-infused: Add rosemary, thyme, or garlic powder.
- Sweet rolls: Add cinnamon and raisins.
- Cheesy rolls: Mix in Parmesan or cheddar.
- Unique shapes: Try knots or twists.
Real Talk: Reader Reviews and Feedback
Alright, so I've shared my tips and tricks, but what do other people think? Well, I'm happy to report that the feedback has been overwhelmingly positive! I've had people tell me that this recipe is a total game-changer, that it's so easy even their kids can make it, and that the rolls are just plain delicious. One reader even said that these rolls are "better than any bakery" which is, honestly, the highest compliment I could ever hope for! I've also had people share their own variations and tweaks, which is super inspiring. It’s like we’re all part of a big bread-baking club!
Of course, not everyone has had a perfect first try. Some people have struggled with getting the dough right, or have had issues with the rolls not rising properly. But that’s totally okay. Baking is a process, and it takes practice. If you're having trouble, don't hesitate to reach out. I'm always happy to help and answer any questions you might have. And hey, if you’ve made this recipe, I’d love to hear from you too! Share your thoughts, your variations, and even your "oops" moments. It's all part of the journey. Let’s make this the best french rolls bread recipe on the internet, together!
"This recipe is amazing! I've tried so many bread recipes, and this one is by far the easiest and most delicious. My family loves these rolls!" - Happy Baker