Table of Contents
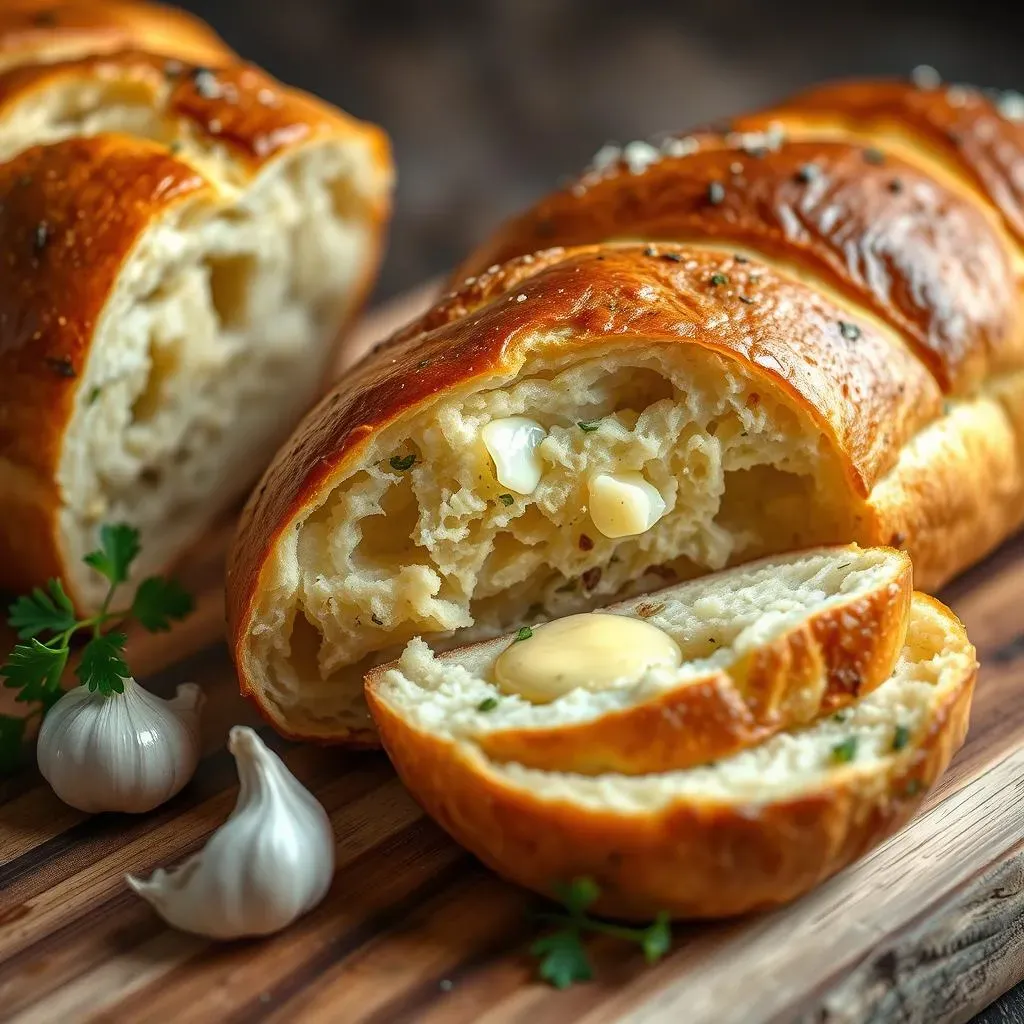
Ever craved that irresistible, garlicky, buttery goodness that is french garlic bread? I have too! It's that side dish that can make any meal feel special, and it's way easier to make at home than you might think. Forget those sad, store-bought versions; we're about to make something truly amazing. This isn't just any garlic bread; it’s a journey into the world of perfect textures and flavors. We'll start by selecting the ideal bread, then dive into creating a garlic butter so good you’ll want to eat it with a spoon. I'll guide you through the baking process to achieve that perfect golden crisp, and finally, I’ll share some tips on how best to serve and even store your creation. Whether you're a seasoned cook or just starting out, this french garlic bread recipe is about to become a new favorite. Get ready to impress yourself and everyone else at the table! Let's get started and make some delicious magic.
Choosing the Perfect Bread for Your French Garlic Bread Recipe

Choosing the Perfect Bread for Your French Garlic Bread Recipe
The Foundation: Why Bread Matters
Okay, so you're ready to make some seriously amazing garlic bread, right? Well, let's talk bread. Not all loaves are created equal, especially when it comes to soaking up all that delicious garlic butter. Think of the bread as the foundation of your garlic bread masterpiece. You wouldn't build a house on a wobbly base, would you? The same goes for your garlic bread. We need a loaf that's sturdy enough to hold its shape, but also has a nice, soft interior to soak up all that flavor. It's like finding the perfect balance between a comfy couch and a strong table.
I've seen people use all kinds of bread, and while some work okay, others just fall flat. We're not aiming for 'okay' we're aiming for spectacular! So, let's get specific about the best options for our french garlic bread recipe.
The Classic Choices: French and Italian Bread
When it comes to classic choices, you really can't beat a good ol' loaf of French or Italian bread. I mean, there's a reason they're the go-to for so many people. French bread, with its slightly crusty exterior and soft, airy interior, is great because it gets nice and toasty while still having that perfect chewiness. Italian bread, on the other hand, is a bit denser, which makes it a good choice if you want a sturdier base that can really hold up to a generous amount of garlic butter. It’s like choosing between a light, breezy summer dress and a more substantial, cozy sweater. Both are great, but they serve different purposes.
Bread Type | Texture | Best For |
|---|---|---|
French Bread | Crusty exterior, soft interior | Light, airy garlic bread |
Italian Bread | Denser, chewier | Heartier garlic bread |
Beyond the Basics: Other Bread Options
Alright, so maybe you're feeling a bit adventurous or you just don't have French or Italian bread on hand. That's totally fine! There are other options we can explore. Ciabatta, for example, is a good choice with its rustic texture and large air pockets that are perfect for trapping all that buttery goodness. Even leftover hot dog or hamburger buns can work in a pinch, especially if you're making a smaller batch and don't want to waste anything. It's like using what you have to make something awesome, kind of like a food-based superhero move. The key is to pick something that's not too soft, or it'll get soggy with all that butter. You want something that can stand up to the heat and hold all that delicious flavor without collapsing.
Remember, the best bread is the one you have available and that you enjoy. Don't be afraid to experiment a little and see what works best for you. After all, cooking should be fun, not stressful!
Crafting the Ultimate Garlic Butter for French Bread
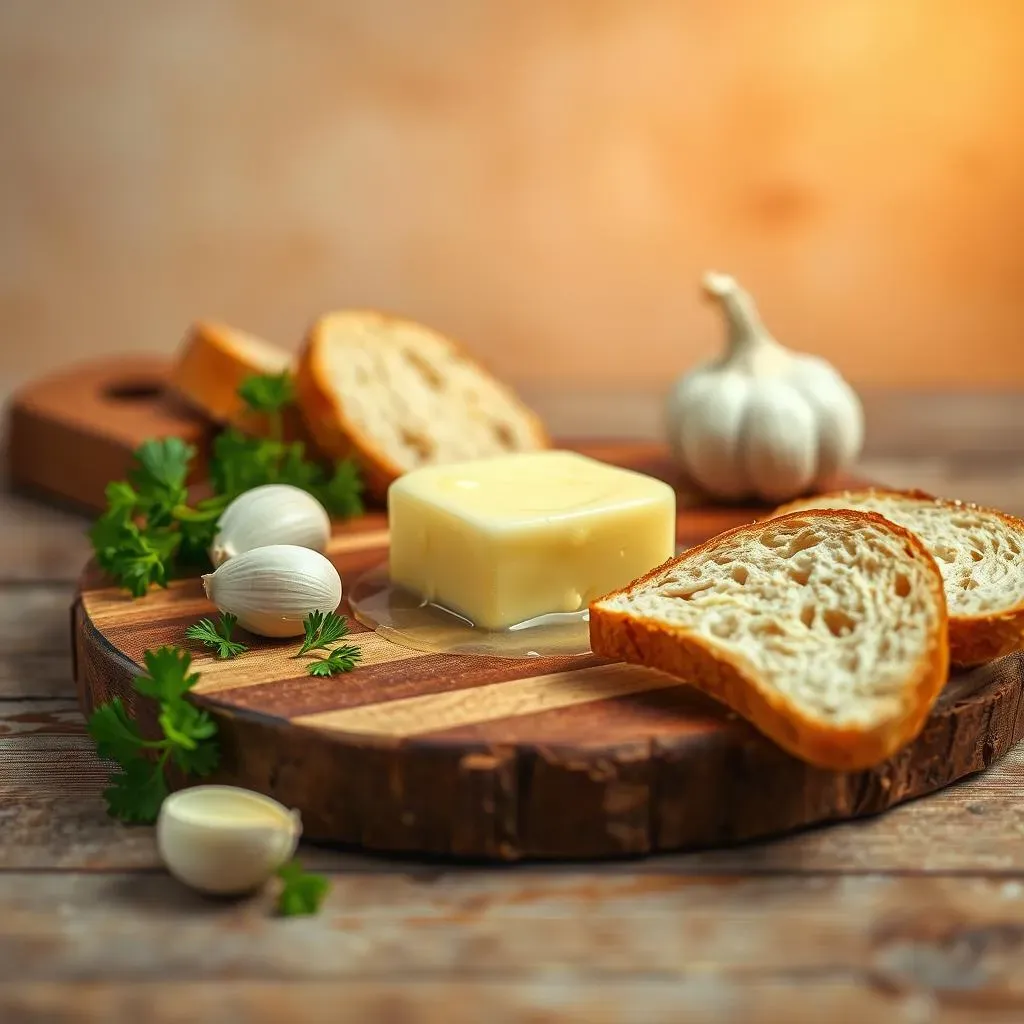
Crafting the Ultimate Garlic Butter for French Bread
The Magic of Garlic: Fresh vs. Powdered
Alright, let's get to the good stuff – the garlic butter. This is where the magic really happens, and it's so much more than just melting butter and throwing some garlic in. The type of garlic you use makes a huge difference. Fresh garlic is where it's at if you want that punchy, bold flavor. I mean, nothing beats the aroma of freshly minced garlic sizzling in butter. It's like a flavor explosion in your kitchen. On the other hand, garlic powder can be a good addition for a more mellow, background flavor. It’s like having a supporting actor that enhances the main star, which is the fresh garlic. I usually go for a combination of both to get the best of both worlds. It's like having a dynamic duo that just works perfectly together.
Don't skimp on the garlic, either! Be generous; you're making garlic bread, after all. It's like adding extra sprinkles to your ice cream – more is always better. I like to mince my garlic finely, so it really infuses the butter. Some people like to roast their garlic first for a sweeter, milder flavor, which is also a great option if you have the time. But for this recipe, we're going for that classic, bold garlic punch that we all know and love. It's like the difference between a whisper and a shout – both are effective, but one definitely makes a bolder statement.
Butter, Herbs, and Other Enhancements
Now, let's talk butter. It's the creamy canvas that holds all our flavors together, so using good quality butter is key. I always prefer salted butter for this recipe because it adds another layer of flavor, but if you only have unsalted, that's okay too, just add a pinch of salt. Let the butter soften at room temperature before you mix it with the garlic. It’s like letting ice cream melt a little to make it easier to scoop – it just makes the whole process smoother. I also like to add some fresh parsley for a pop of color and a bit of freshness. It’s like adding a little bit of green to a painting – it just makes everything look more vibrant.
Parmesan cheese is another must for me; it adds a nice salty, nutty flavor that complements the garlic perfectly. It’s like adding a little extra seasoning to your favorite meal – it just enhances everything. You can also add a pinch of red pepper flakes for a touch of heat if you're feeling adventurous. It’s like adding a little bit of spice to your life – it just makes things more interesting. The key is to experiment and find your perfect combination. It's your garlic butter, after all, so make it exactly how you like it. It's like creating your own signature dish – it should be something you’re proud of.
Ingredient | Purpose | Notes |
|---|---|---|
Fresh Garlic | Bold flavor | Mince finely |
Garlic Powder | Mellow flavor | Use as a supplement |
Salted Butter | Creamy base | Soften at room temperature |
Fresh Parsley | Freshness and color | Finely chopped |
Parmesan Cheese | Salty, nutty flavor | Freshly grated |
Baking Your French Garlic Bread to Golden Perfection
Baking Your French Garlic Bread to Golden Perfection
Prepping for the Oven: Slicing and Spreading
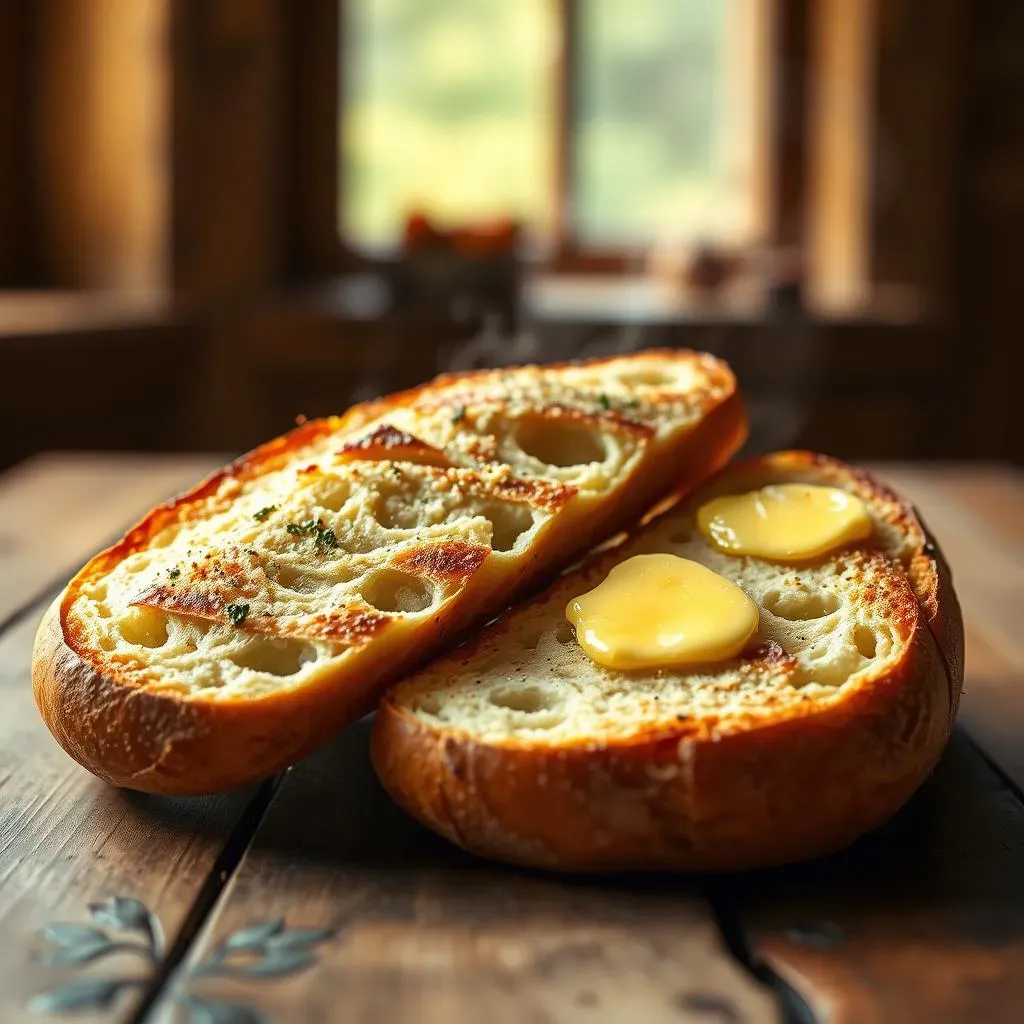
Okay, so we've got our bread and our amazing garlic butter, now it's time to get ready for the oven. First things first, slice your bread. I like to cut it on a slight diagonal, about an inch or so thick. This gives you nice, even pieces that are perfect for soaking up all that buttery goodness. It's like cutting a cake into slices that are just the right size – not too big, not too small, but just right. You want to make sure you don't cut all the way through, though. Leaving the bottom crust intact helps keep everything together, like a little garlic bread raft. It also helps prevent the butter from seeping to the bottom and burning.
Now, the fun part: spreading that amazing garlic butter. Don't be shy, slather it on generously, making sure to get into all the nooks and crannies of the bread. It’s like painting a masterpiece, except your masterpiece is edible and tastes like heaven. If you've got a lot of garlic butter, don't worry, just use it all. The more butter, the more flavor, right? It's like adding extra frosting to a cupcake – it's always a good idea. You want every bite to be packed with that garlicky goodness. I find using a butter knife or even a small spatula works best for getting an even spread. It’s all about making sure every bit of the bread is covered in that deliciousness.
Baking to Perfection: Time and Temperature
Alright, now for the main event: baking! Preheat your oven to 350°F (175°C). Once it's nice and hot, carefully place your buttered bread onto a baking sheet. I like to line mine with parchment paper for easy cleanup, because nobody likes scrubbing burnt butter off a pan. It’s like putting a protective layer on your phone screen – it just makes life easier. Bake for about 10-15 minutes, or until the bread is golden brown and crispy around the edges. Keep an eye on it, because ovens can vary, and you don't want your masterpiece to burn. It's like watching a pot of water boil – it takes patience, but it’s worth it. The smell alone will drive you crazy.
For extra crispiness, you can turn on the broiler for the last minute or two, but watch it like a hawk, because it can go from golden to burnt pretty quickly. It’s like turning up the volume on your favorite song – it can make it even better, but you have to be careful not to blow out the speakers. Once it's out of the oven, let it cool for a few minutes before you slice it all the way through and serve. It’s like letting a hot coffee cool down a bit before you drink it – it’s just more enjoyable. The key is to get that perfect balance of crispy edges and a soft, buttery interior. It’s all about the texture, and trust me, you'll know when it's just right.
Step | Action | Notes |
|---|---|---|
Slice Bread | Diagonal cuts, about 1 inch thick | Do not cut all the way through |
Spread Butter | Generously cover the bread | Use a butter knife or spatula |
Bake | 350°F (175°C) for 10-15 minutes | Watch carefully to prevent burning |
Broil (optional) | 1-2 minutes for extra crispiness | Watch closely to avoid burning |
Cool | Let cool for a few minutes | Before slicing through |
Serving and Storing Your Homemade French Garlic Bread
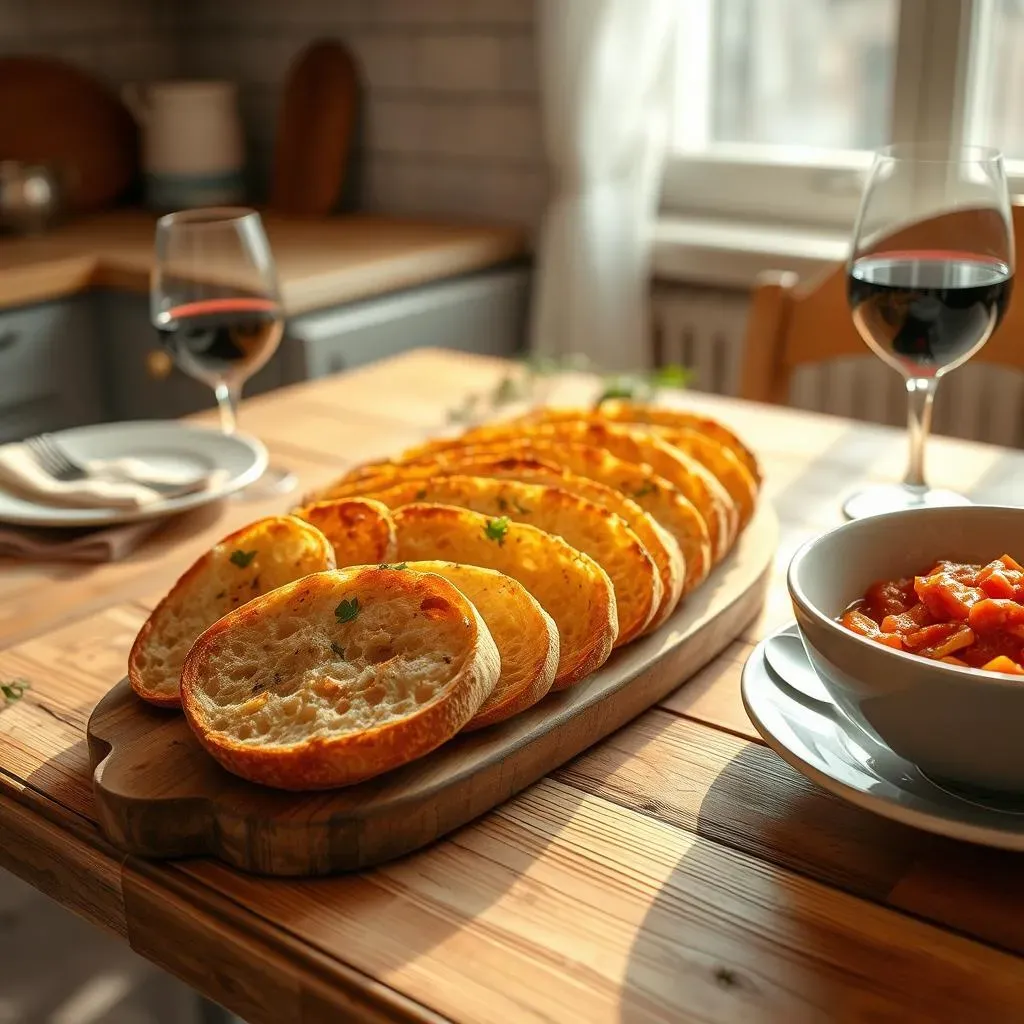
Serving and Storing Your Homemade French Garlic Bread
Serving Suggestions: Pairing with Perfection
Alright, you've just pulled your gorgeous, golden-brown french garlic bread from the oven, and the aroma is making everyone's mouth water. Now, how do you serve this masterpiece? Well, the beauty of garlic bread is that it goes with pretty much everything. It’s like that super versatile friend who fits in with any group. I love serving it alongside a big bowl of pasta, especially something with a rich tomato sauce. The garlic bread soaks up all that delicious sauce, making every bite even better. It's like dipping your fries in ketchup, but way more sophisticated. It also pairs perfectly with soups, salads, or even just as a side to a simple grilled chicken. It’s like adding a little bit of sparkle to any meal – it just makes everything feel more special.
Don't be afraid to get creative with your pairings. You can use it as the base for mini pizzas, or even as a side for a big family barbecue. It's like a blank canvas that you can use to create all sorts of culinary masterpieces. The key is to serve it while it's still warm and crispy for the best experience. It's like eating a freshly baked cookie straight from the oven - it’s just so much better when it's warm. And don't forget to slice it all the way through just before serving, unless you're using it as a base for something, of course. It's the final step that makes it perfect.
Storing for Later: Keeping it Fresh
Now, let's say you've made a big batch of french garlic bread and have some leftovers (if that's even possible!). How do you store it so it stays as delicious as the moment it came out of the oven? Well, the key is to keep it from getting soggy, because nobody likes soggy garlic bread. It’s like leaving a book in the rain – it just ruins it. I like to let it cool completely, then wrap it tightly in aluminum foil or plastic wrap. It’s like giving it a little sleeping bag to keep it cozy. Then, you can store it at room temperature for a day or two, or in the fridge for up to a week. It's like giving it a little vacation before it's ready to be enjoyed again.
If you want to keep it even longer, you can freeze it. Just make sure it’s wrapped tightly to prevent freezer burn. It's like putting it in a time capsule, ready to be enjoyed whenever you need a quick and delicious side. When you’re ready to eat it, you can just pop it back in the oven or toaster oven for a few minutes to crisp it back up. It’s like bringing it back to life – it’s just as good as the first time. Remember, the key is to keep it dry and sealed, so you can enjoy the best possible garlic bread experience, even days later. It’s all about preserving that deliciousness for as long as possible.
Freezing for Future Feasts: A Time-Saving Tip
Want to be even more prepared? You can actually freeze the garlic bread *before* baking it, which is a total game-changer for busy weeknights. It’s like having a secret weapon in your kitchen, ready to be deployed whenever you need it. Just prepare the bread as directed, slather it with that amazing garlic butter, and then wrap it tightly in foil or plastic wrap. It’s like putting a little bit of future joy in your freezer. When you're ready to bake it, you don’t even need to thaw it – just pop it straight into the oven and bake for a few extra minutes. It's like having a pre-made, delicious side dish ready to go whenever you need it. This method is also great if you’re making garlic bread for a party. You can prepare everything ahead of time, then just bake it when your guests arrive. It’s all about making life easier and tastier. It's a real time-saver, and it means you're always ready for a garlic bread emergency (because those are real, right?).
Storage Method | Time | Notes |
|---|---|---|
Room Temperature | 1-2 days | Wrap tightly to prevent drying out |
Refrigerator | Up to 1 week | Wrap tightly to prevent drying out |
Freezer (Baked) | Up to 2 months | Wrap tightly to prevent freezer burn |
Freezer (Unbaked) | Up to 3 months | Bake directly from frozen, add a few minutes to cooking time |