Table of Contents
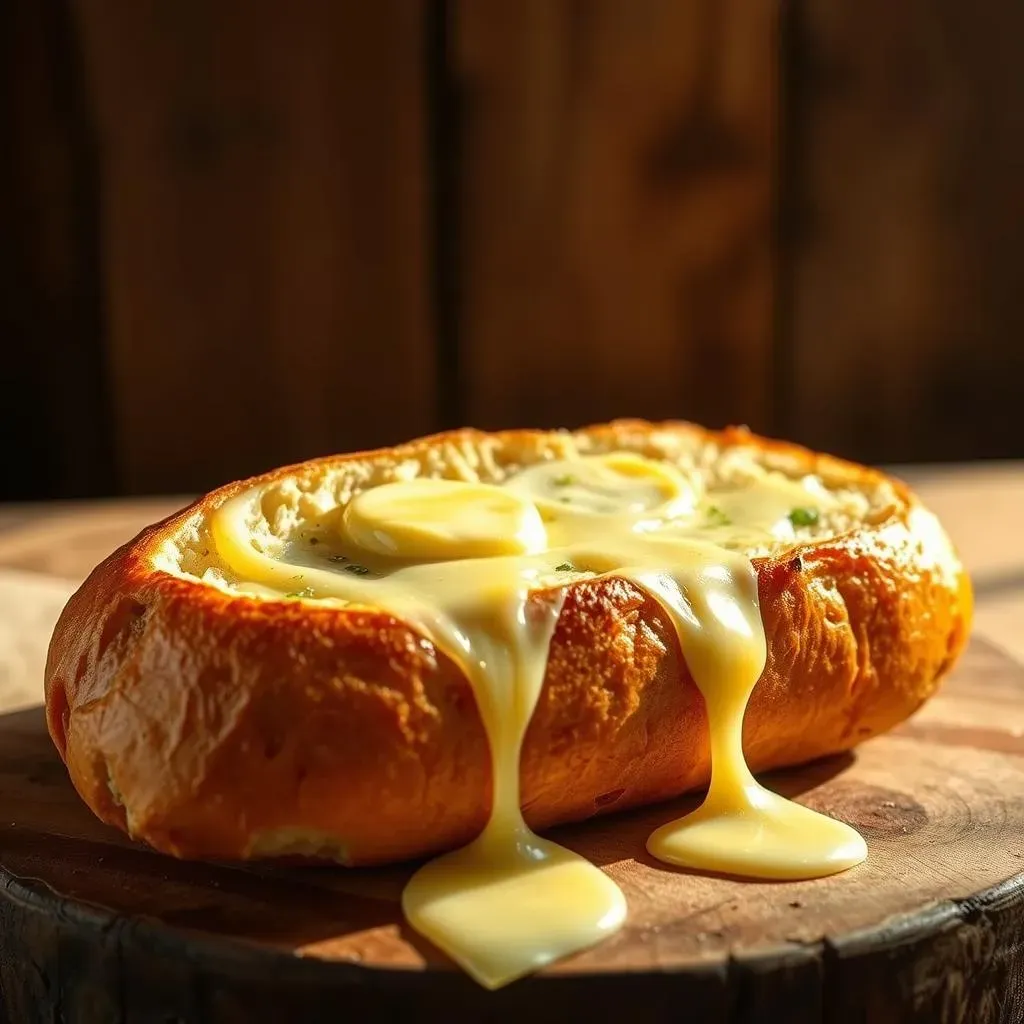
Ever dream of that perfect, warm, cheesy slice of garlic bread? You know, the kind where the garlic butter melts into every nook and cranny of the french bread, and the cheese pulls apart in glorious, gooey strands? Well, you're in for a treat! This isn't just any recipe; it's a journey to creating the ultimate french bread with garlic butter and cheese right in your own kitchen. We're talking about that irresistible aroma that fills the house, the satisfying crunch of the crust, and the explosion of flavor with every bite. Forget those sad, store-bought versions, we're making magic today. This article will walk you through each step, from crafting the ideal garlic butter to achieving that perfect golden-brown, cheesy top. Get ready to become a garlic bread master. We'll cover everything from the essential ingredients to pro tips, ensuring your french bread with garlic butter and cheese is always a crowd-pleaser. Let's get started!
Making the Best Garlic Butter for Your French Bread
Making the Best Garlic Butter for Your French Bread
The Butter Base
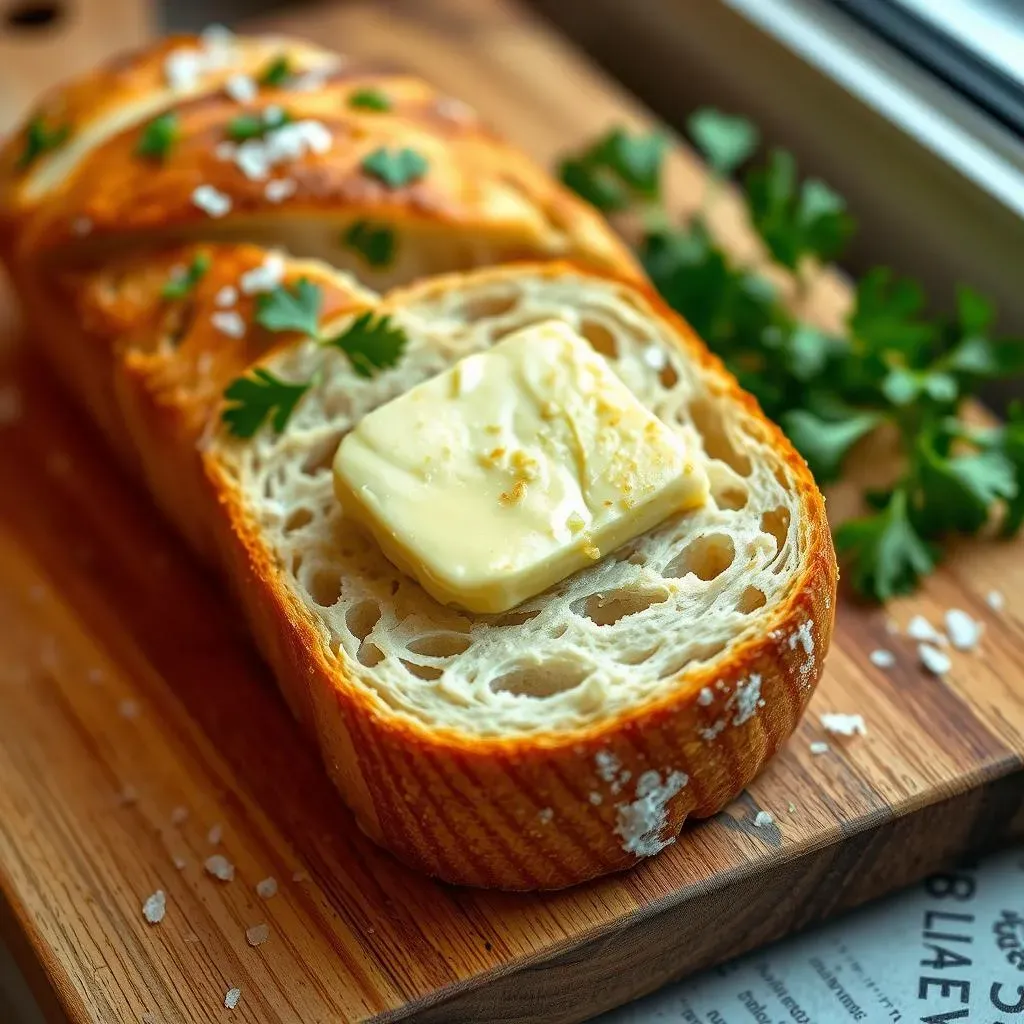
Okay, let's talk butter. This isn't the time for that sad, diet stuff lurking in your fridge. We need real, unsalted butter, softened to room temperature. Why unsalted? Because we're in charge of the salt level here, and we want to be precise. Think of it like the blank canvas for our masterpiece. You want it soft enough to easily mix with the other ingredients, but not so melted that it's a greasy mess. If you're in a hurry, you can microwave it in short bursts, but keep a close eye on it – nobody likes a puddle of butter.
I like to take mine out of the fridge about an hour before I start cooking, it's a great way to remember to start cooking too. You can also use salted butter, but I find that it is too salty for my taste, and I prefer to control the salt myself. If you do use salted, remember to adjust the salt in the recipe later.
Garlic Power
Now, for the star of the show: garlic. Fresh garlic is the way to go. I know, I know, garlic powder is convenient, but trust me, the flavor difference is huge. Mince it finely, or even better, use a garlic press. We want those little bits of garlicky goodness to infuse every inch of the butter. How much? Well, that depends on your level of garlic obsession. I usually go for about 3-4 cloves for a standard loaf of french bread, but feel free to add more if you’re a garlic fiend. You can also roast the garlic ahead of time for a sweeter, mellower flavor, but that's for another day. Today, we're keeping it simple and powerful.
Some people like to use garlic paste, but I find that it is too processed and doesn't have the same flavor as fresh garlic. I also find that it can be too strong, and it can overpower the other flavors in the butter. I prefer to use fresh garlic, and I think it makes a big difference in the final product.
Ingredient | Why it's Important | Tips |
|---|---|---|
Unsalted Butter | Provides the rich base for flavor | Soften to room temp, avoid melting |
Fresh Garlic | Adds that pungent, garlicky punch | Mince finely or use a press |
Layering Cheese and Baking French Bread to Perfection

Layering Cheese and Baking French Bread to Perfection
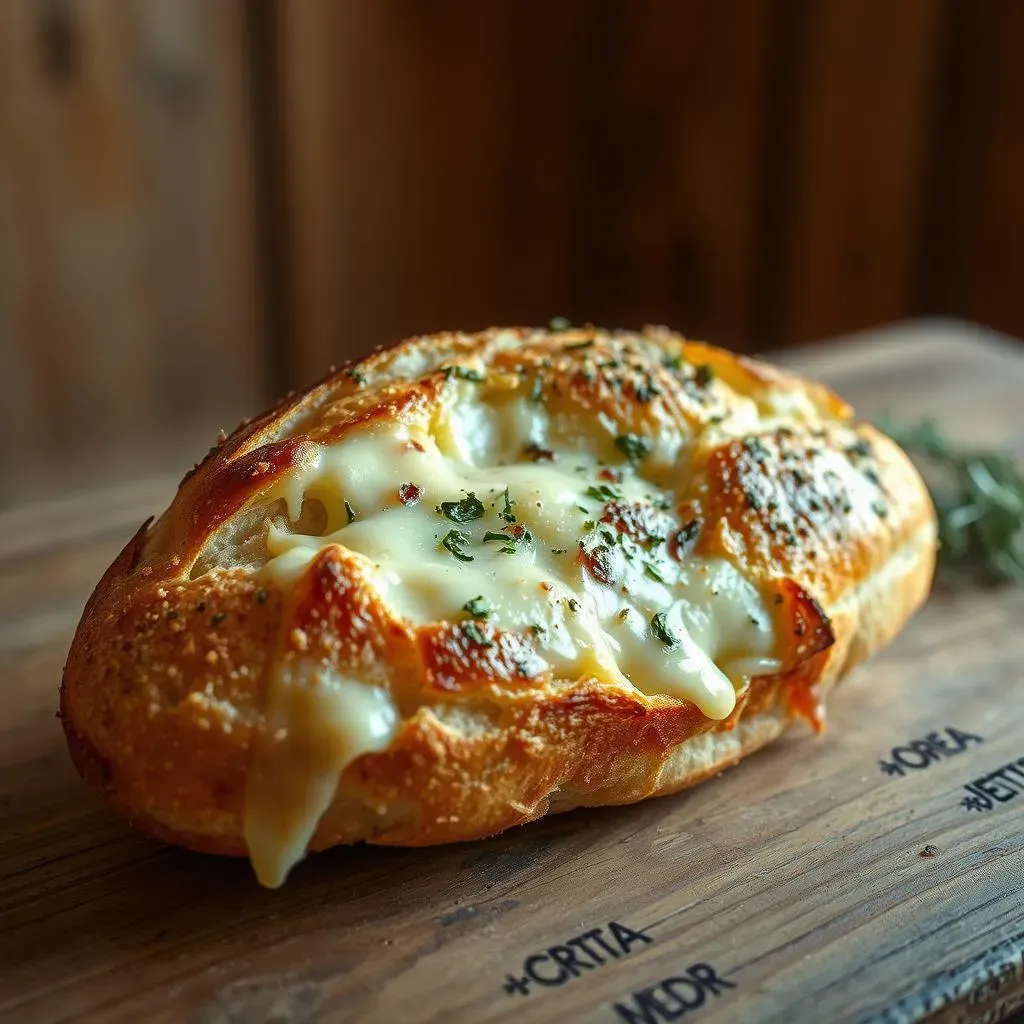
Alright, now that we've got our garlic butter ready, it's time for the cheese! This is where things get seriously good. You have a few options here, and honestly, it's hard to go wrong. I'm a big fan of a mix of mozzarella and parmesan. The mozzarella gives you that gooey, melty goodness, and the parmesan adds a salty, nutty flavor that just works perfectly. But don't let me limit you, feel free to add some cheddar, provolone, or even a little bit of asiago for extra zing. The key is to grate your cheese, not slice it. Grated cheese melts more evenly and covers the bread better. Don't be shy either, pile it on! We're not aiming for a light sprinkle here; we want a generous layer that will create those beautiful cheese pulls we all crave. Think of it as a delicious blanket of cheesy love.
I usually use about 2 cups of cheese for a standard loaf of french bread, but I'm always tempted to add more. The type of cheese you use is up to you, but I find that a mix of mozzarella and parmesan is the best. You can also add some cheddar, provolone, or even a little bit of asiago for extra zing. The key is to grate your cheese, not slice it. Grated cheese melts more evenly and covers the bread better.
Now, the moment of truth: baking. Preheat your oven to 400°F (200°C). Place your buttered and cheesed french bread directly on the baking sheet. No need to line it with parchment paper, we want that crust to get nice and crisp. Bake for about 12-15 minutes, or until the cheese is melted, bubbly, and starting to turn golden brown. Keep a close eye on it, ovens can vary, and you don't want to burn your precious creation. You'll know it's done when the cheese is irresistible and the crust has that perfect golden-brown hue. Once it's out of the oven, let it rest for a few minutes before slicing, this will help the cheese set up a bit. Trust me, patience is a virtue here, it’s worth the wait.
Some people like to bake their garlic bread in foil, but I find that it makes the crust soggy. I prefer to bake it directly on the baking sheet, it allows the crust to get nice and crisp. You can also add some herbs to the top of the cheese before baking, such as oregano, basil, or thyme. But I find that it is best to keep it simple.
- Cheese Choices: Mozzarella, Parmesan, Cheddar, Provolone, Asiago.
- Cheese Prep: Always grate, never slice.
- Oven Temp: 400°F (200°C) is your magic number.
- Baking Time: 12-15 minutes, keep an eye on it!
- Rest Time: Let it sit for a few minutes after baking.
Tips for Extra Flavor and Perfect Cheesy French Bread
Tips for Extra Flavor and Perfect Cheesy French Bread
Okay, let's talk about taking your cheesy garlic bread to the next level. It's already amazing, but we can make it even better. First off, consider adding a bit of heat. A pinch of red pepper flakes in the garlic butter can add a subtle kick that complements the richness of the cheese. Or, if you're feeling adventurous, try a few finely diced jalapeños. Another great trick is to use roasted garlic instead of fresh. Roasting mellows out the garlic's sharpness and brings out a sweeter, more complex flavor. Just roast a whole head of garlic in the oven with a bit of olive oil until it's soft and caramelized. Squeeze the cloves out of their skins and mash them into your softened butter. It's a bit more work, but the flavor payoff is huge. And don't forget about herbs! A sprinkle of dried oregano, basil, or Italian seasoning can add another layer of flavor. Fresh herbs are even better if you have them on hand, just chop them finely and mix them into the butter. Remember, the best cooking comes from experimentation, so don't be afraid to try new things and find what you like best.
I always like to experiment with new flavors, and I find that it is the best way to learn. You can also try adding some different types of cheese, such as gorgonzola or feta. Or even some sun-dried tomatoes for a Mediterranean twist. The possibilities are endless, so don't be afraid to get creative. Remember to taste as you go, and adjust the flavors to your liking. The best cooking comes from the heart, so cook with love and have fun!
Flavor Booster | Why it Works |
|---|---|
Red Pepper Flakes | Adds a subtle, pleasant heat |
Roasted Garlic | Brings a sweeter, mellow flavor |
Fresh or Dried Herbs | Adds complexity and aroma |
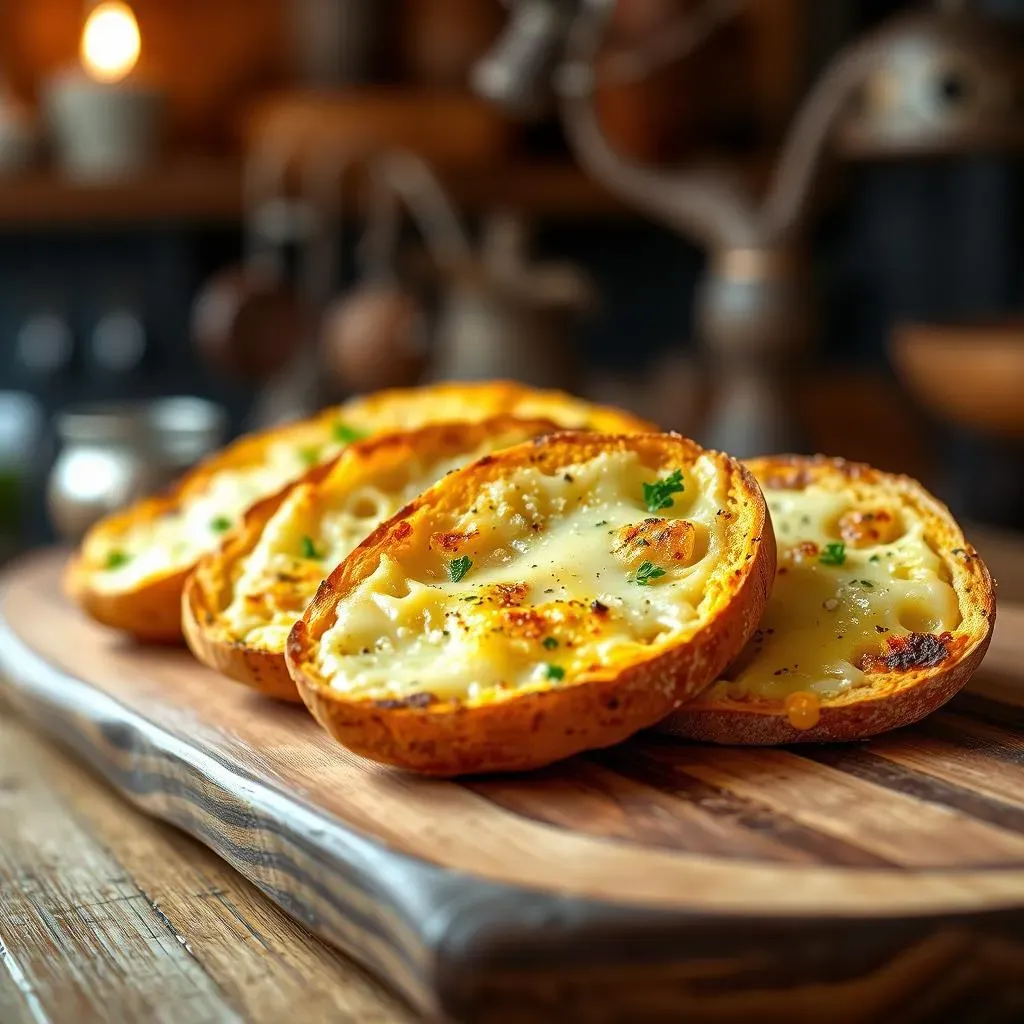
Now, let’s talk about getting that perfect cheesy top. One of my favorite tricks is to broil the bread for the last minute or two of baking. This will make the cheese extra bubbly and slightly browned, giving it a beautiful, slightly crispy texture. Just keep a close eye on it, broilers can be very powerful and you don't want to burn your bread. Another tip is to use a combination of cheeses with different melting points. Mozzarella is great for that gooey stretch, but a bit of provolone or Monterey Jack will add extra creaminess. Also, don't be afraid to add a little bit of grated Parmesan cheese on top of the other cheeses, it will get nice and crispy when broiled, adding a nice texture and flavor. Remember, the key to great cheesy garlic bread is to be generous with the cheese, and don't be afraid to experiment with different types. I've even tried adding a bit of cream cheese to the mix, which gives it an extra creamy texture, but that's a story for another time.
I always like to try new things, and I find that it is the best way to learn. You can also try adding some different types of cheese, such as gorgonzola or feta. Or even some sun-dried tomatoes for a Mediterranean twist. The possibilities are endless, so don't be afraid to get creative. Remember to taste as you go, and adjust the flavors to your liking. The best cooking comes from the heart, so cook with love and have fun!
- Broiling: Use for the last 1-2 minutes for a crispy top.
- Cheese Mix: Combine different melting points for texture.
- Parmesan Boost: Grate some on top for extra crispiness.
Serving and Storing Your Cheesy Garlic French Bread Creation
Serving and Storing Your Cheesy Garlic French Bread Creation
Alright, your cheesy garlic french bread is out of the oven, smelling absolutely divine, and the cheese is perfectly melted and bubbly. Now, how do we serve this masterpiece? First things first, let it rest for a few minutes. I know, I know, it's tempting to dive right in, but trust me, it's worth the wait. This allows the cheese to set up a bit, making it easier to slice and serve. You don't want a cheesy avalanche on your plate! Once it's rested, use a serrated knife to slice it into portions. I like to cut it into thick slices, about 1-2 inches wide, so you get a good balance of crust, garlic butter, and cheese in every bite. Serve it warm, and watch it disappear in minutes. It's the perfect side dish for pasta, salads, or any meal that needs a little extra cheesy, garlicky goodness. You can also serve it as an appetizer, it's always a crowd-pleaser. And don't forget, presentation is key, so arrange those slices on a platter and maybe sprinkle a little extra parmesan or fresh herbs on top for a fancy touch.
I always like to let my bread rest for a few minutes before slicing, it makes it easier to handle and the cheese doesn't slide off. You can also serve it with a side of marinara sauce for dipping, or with a simple salad for a light meal. The possibilities are endless, so don't be afraid to get creative. And remember to enjoy every bite, you've earned it!
- Rest First: Let it sit for a few minutes before slicing.
- Serrated Knife: Use for clean, even slices.
- Warm is Best: Serve while it's still warm and cheesy.
- Presentation: Arrange slices on a platter, add garnish.
Now, what about storing leftovers? Let's be real, sometimes there are leftovers, even with something this delicious. The key is to keep it from getting soggy. Once your cheesy garlic bread is completely cool, wrap it tightly in aluminum foil or plastic wrap. You can also store it in an airtight container. I prefer to wrap each slice individually, it makes it easier to grab one when the craving hits. You can store it in the fridge for up to 3 days, but it's always best when it's fresh. To reheat, you can pop it back in the oven at 350°F (175°C) for a few minutes, or even better, use a toaster oven to get it nice and crispy again. You can also reheat it in the microwave, but it might get a little soggy. For the best results, avoid storing it in the freezer, the texture will change and it won't be as delicious. But don't worry, with a little care, your leftover cheesy garlic bread will still be amazing. And let's face it, leftover cheesy garlic bread is never a bad thing. It is also a great way to have a quick snack.
I always try to make just enough so that there are no leftovers, but it is not always possible. When I do have leftovers, I make sure to store them properly. It is best to store them in the fridge, but you can also store them at room temperature for a few hours. Remember to always wrap them tightly, so that they don't dry out. And if you do happen to have some leftover bread that is not that fresh, you can always use it to make bread crumbs or croutons. It is a great way to avoid wasting food.
Storage Method | Best Use | Tips |
|---|---|---|
Aluminum Foil/Plastic Wrap | Short-term storage in the fridge | Wrap tightly to prevent drying |
Airtight Container | Short-term storage in the fridge | Keeps moisture in and odors out |
Oven Reheat | Best for crispy texture | Reheat at 350°F (175°C) for a few minutes |
Toaster Oven Reheat | Good for a small amount | Crispy and quick reheat |