Table of Contents
Ready to elevate your baking game? This article is your passport to crafting incredible French bread using a sourdough starter. We'll guide you through every step, from building a robust starter—the heart of any great sourdough—to perfecting the kneading, shaping, and baking techniques that produce a truly magnificent loaf. Forget those bland, store-bought loaves; this comprehensive French bread sourdough recipe will empower you to create crusty, airy bread with a tangy, complex flavor that'll leave you wanting more. We'll break down the process into easily digestible sections, covering essential starter preparation, a detailed step-by-step French bread sourdough recipe, expert tips and tricks for achieving perfection, and troubleshooting common issues. By the end, you'll not only have a delicious loaf but also the confidence to experiment and create your own signature sourdough masterpieces. So, let's embark on this delicious journey together and discover the magic of the perfect French bread sourdough recipe!
The Essential French Bread Sourdough Starter: Building Your Base
The Essential French Bread Sourdough Starter: Building Your Base
Understanding Your Starter
So, you want to bake amazing French bread? That starts with a fantastic sourdough starter! Think of your starter as a tiny, living ecosystem – a colony of wild yeasts and bacteria that will be your secret weapon for creating that signature tangy flavor and airy texture. It's a bit like cultivating a miniature garden, but instead of flowers, you're growing deliciousness. You'll need patience; building a strong starter takes time, but the rewards are well worth the wait. Don't get discouraged if it seems slow at first; it's a marathon, not a sprint!
The process involves feeding your starter regularly with flour and water, encouraging the growth of those beneficial microbes. As your starter matures, you'll notice a bubbly, active fermentation, indicating a happy and healthy colony. This active starter is key to achieving a light, airy crumb in your French bread. For more on starter care, check out our guide on for some extra tips!
Day | Feeding | Observations |
|---|---|---|
1-3 | Twice daily | Minimal activity, may smell slightly sour |
4-7 | Once daily | Increased bubbling, noticeable rise |
7+ | As needed | Consistent doubling in size after feeding |
The Starter Recipe
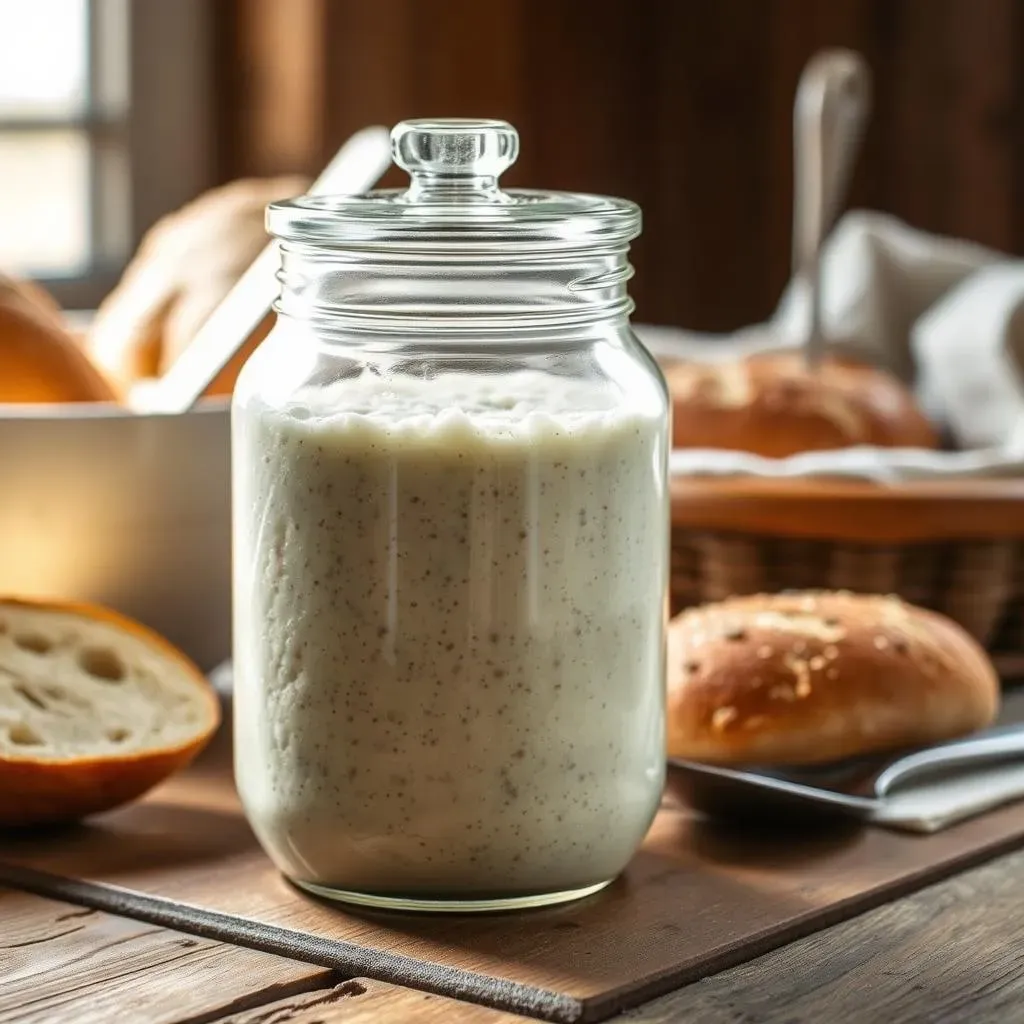
The most basic starter recipe is simple: equal parts flour and water. I usually use unbleached all-purpose flour, but you can experiment with different types – rye flour adds a lovely depth of flavor. Start with about 50 grams of flour and 50 grams of non-chlorinated water (chlorine can inhibit yeast growth). Mix thoroughly until you have a smooth, slightly thick paste. Store it in a clean jar, loosely covered with a lid or plastic wrap. Remember, consistency is key! You'll be feeding this starter regularly, so make sure to keep a log of your feeding schedule.
Regular feeding is crucial. The frequency depends on the activity of your starter, but generally, you'll feed it once or twice a day. Discard about half of the starter before feeding, then add fresh flour and water. Over time, you'll develop a feel for your starter's rhythm, learning to anticipate its needs. For more specific timing, look at our – it has a detailed schedule.
- 50g unbleached all-purpose flour
- 50g non-chlorinated water
- Mix well, loosely cover.
- Feed regularly (once or twice daily).
Maintaining Your Starter
Once your starter is active and bubbly, you can adjust the feeding schedule. Some people feed their starter daily, others every other day – it's all about finding what works best for your environment and your starter's personality. Don't be afraid to experiment; this is part of the fun! Over time, you’ll develop a deep understanding of your starter’s needs. It's a journey of discovery, really!
Remember, consistency is key. Keep your starter in a warm place, ideally around 70-75°F (21-24°C). Too cold, and it'll slow down; too hot, and it might get overwhelmed. You'll learn to read its signals – a sluggish starter needs more warmth or a more frequent feeding. For a more in-depth look at maintaining your starter, check out our post on
French Bread Sourdough Recipe: A StepbyStep Guide
French Bread Sourdough Recipe: A StepbyStep Guide
Mixing the Dough
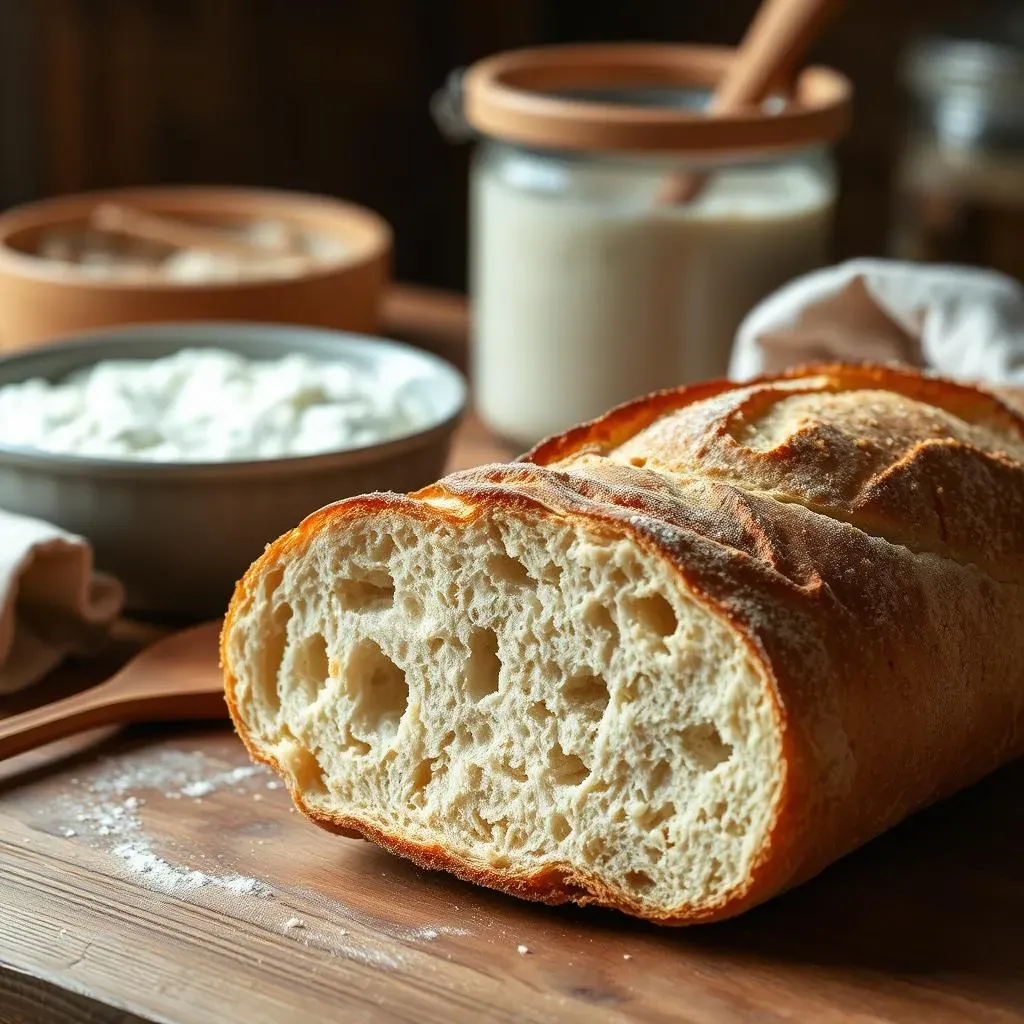
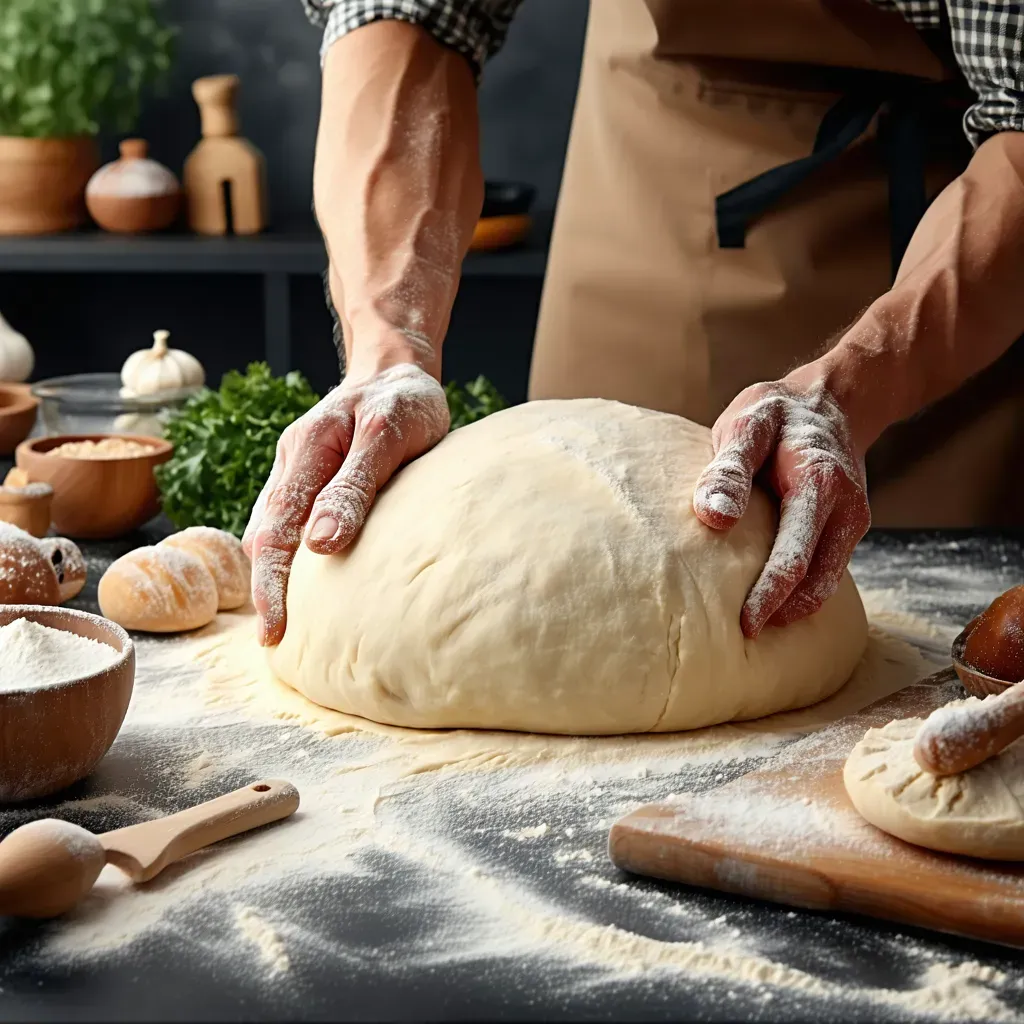
Now for the fun part: making the dough! In a large bowl, combine your active sourdough starter (fed about 4-6 hours prior), water, flour, and salt. The exact quantities will depend on your recipe, but a typical ratio is around 60% hydration. Mix everything thoroughly until it forms a shaggy mass. This is where the magic begins!
Next, we’ll use the “stretch and fold” method. This gentle kneading technique develops gluten, the protein network responsible for giving your bread structure. Gently stretch a portion of the dough, fold it over, and rotate the bowl. Repeat this process several times, then cover the bowl and let the dough rest for about 30 minutes. This allows the gluten to relax and strengthens it!
- Active sourdough starter (fed 4-6 hours prior)
- Water (60% hydration)
- Flour (bread flour or a blend)
- Salt
Bulk Fermentation
This is where the magic of fermentation happens. After the initial stretch and folds, you'll let the dough rise for several hours, allowing the yeast to produce carbon dioxide and create those beautiful air pockets. The length of bulk fermentation depends on the temperature of your environment and the activity of your starter. Keep an eye on your dough; it should roughly double in size. For more detailed information on fermentation times, check out our guide on
During bulk fermentation, perform a few more sets of stretch and folds at 30-minute intervals. This helps to further develop the gluten and distribute the yeast evenly throughout the dough. The goal is to build strength and structure while allowing the flavors to develop. Remember, patience is key. Don't rush this process, and you'll be rewarded with a superior loaf. For tips on improving your dough's structure, see our article on
Stage | Time | Temperature |
|---|---|---|
Bulk Fermentation | 4-6 hours | 70-75°F (21-24°C) |
Shaping and Proofing
Once your dough has doubled in size, it's time to shape it. Gently turn the dough out onto a lightly floured surface. Shape it into a long baguette or oval, depending on your preference. This step requires a bit of practice, but don't worry about getting it perfect the first time. See our post on for shaping tips.
After shaping, place the dough in a banneton (a proofing basket) or a bowl lined with a floured cloth. Cover it and let it proof in the refrigerator for 12-18 hours. This slow, cold proof develops flavor and enhances the bread's texture. The cold slows fermentation, allowing a more controlled rise and better flavor development. This long, slow proof is key to the final results.
Baking the Bread
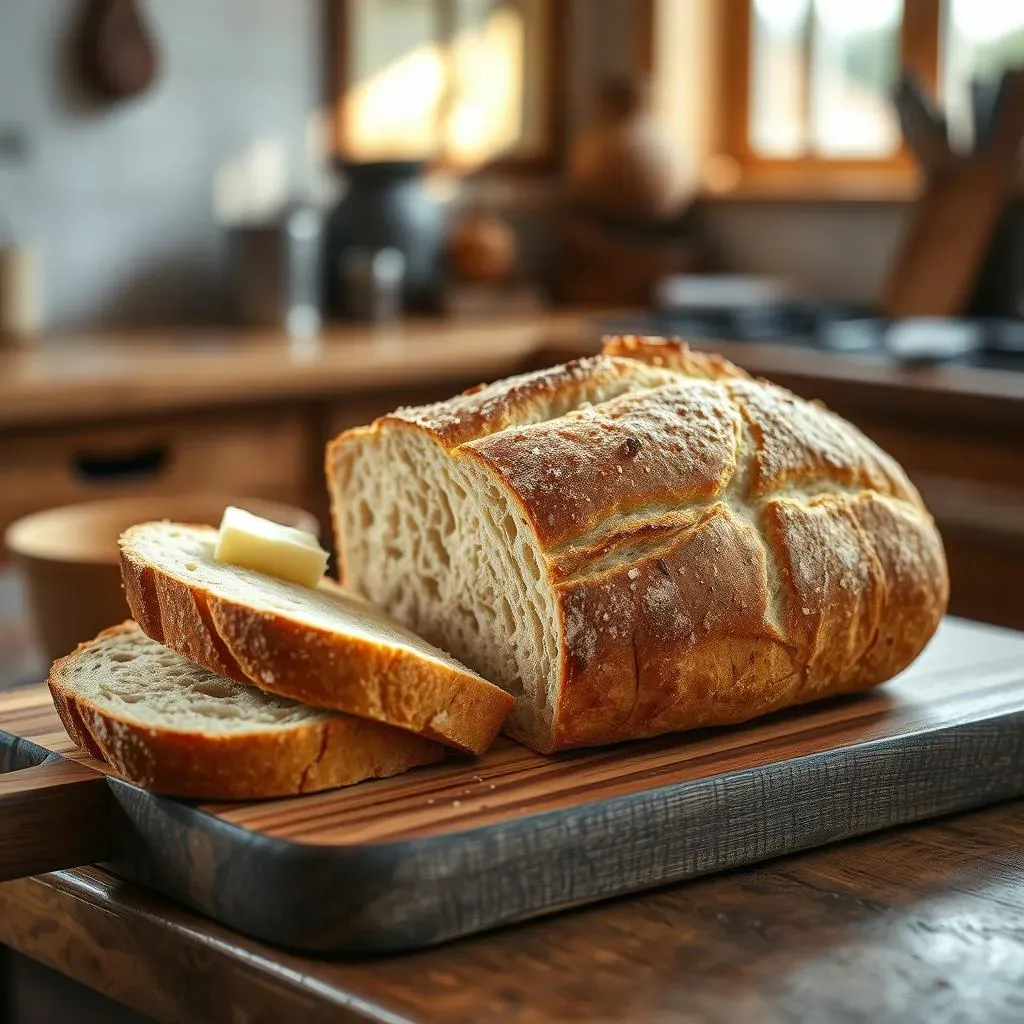
Preheat your oven to 450°F (232°C) with a Dutch oven inside. This will create a steamy environment that promotes a crispy crust. Carefully remove the hot Dutch oven from the oven, score the top of the dough (this allows for controlled expansion during baking), and place it in the Dutch oven. Cover and bake for 20 minutes.
After 20 minutes, remove the lid and bake for another 20-25 minutes, or until the crust is deeply golden brown and the internal temperature reaches 200-210°F (93-99°C). Remove the bread from the Dutch oven and let it cool completely on a wire rack before slicing and enjoying. For more on baking techniques, take a look at our recipe for .
- Preheat oven to 450°F (232°C) with Dutch oven inside.
- Score the dough.
- Bake covered for 20 minutes, then uncovered for 20-25 minutes.
- Cool completely before slicing.
Tips and Tricks for Perfect French Bread Sourdough

Tips and Tricks for Perfect French Bread Sourdough
Mastering Hydration
Getting the hydration right is crucial for a beautiful, airy crumb. Too little water, and your bread will be dense; too much, and it'll be sticky and difficult to handle. Aim for the recommended hydration percentage in your recipe, but don't be afraid to adjust slightly based on your flour's absorbency and the humidity in your environment. Remember, experience is your best teacher!
A good way to judge hydration is to perform the "windowpane test". Take a small piece of dough and stretch it gently. If it forms a thin, translucent sheet without tearing, you've achieved the right hydration. If it tears easily, you need to add more water; if it's too resistant, add a little more flour. For more on achieving that perfect texture, check out our guide on
Hydration Percentage | Dough Consistency |
|---|---|
60-65% | Slightly tacky, but manageable |
70-75% | Stickier, requires more careful handling |
The Art of Scoring
Scoring is more than just decoration; it controls how your bread expands during baking. A well-executed score allows for even rising and prevents the crust from cracking unpredictably. Practice different scoring patterns – simple slashes, complex designs – to see what you like best. This is your chance to get creative!
Consider the depth of your score. A shallow score will result in a gentler rise, while a deeper score will encourage a more dramatic expansion. Experiment with different depths to find what works best for your dough and oven. For inspiration, check out our post on It has some beautiful scoring examples.
- Practice different scoring patterns
- Experiment with score depth
- Aim for even expansion
Oven Spring and Steam
Oven spring, that dramatic rise your bread experiences in the oven, is a beautiful thing. To maximize oven spring, ensure your oven is properly preheated and that you use sufficient steam during the initial stages of baking. Steam helps to create a crispy crust and prevents the surface from drying out too quickly. A good crust is essential!
There are several ways to introduce steam into your oven, from using a Dutch oven to spraying the oven walls with water. Experiment to find what works best for your setup. A well-steamed loaf will have a beautiful, glossy crust and an airy interior. For more in-depth information on oven spring and steam, see our article on
Troubleshooting Common French Bread Sourdough Issues
Troubleshooting Common French Bread Sourdough Issues
Dough Too Sticky?
Ah, the dreaded sticky dough! This often happens if your hydration is too high, or if your flour is particularly absorbent. Don't panic; there are solutions. You can add a little more flour, a tablespoon at a time, until the dough becomes more manageable. Remember to work gently; over-mixing can make the situation worse. For more tips on managing hydration, check out our guide on .
Another reason for overly sticky dough could be your environment. If it's particularly humid, your flour might absorb more moisture than usual. You might need to adjust your hydration accordingly, reducing the water content slightly next time. Remember, consistency is key – keep notes on your baking environment and how it impacts your dough! For a helpful recipe that's less prone to stickiness, try our .
- Add flour gradually until manageable.
- Adjust hydration based on humidity.
- Keep detailed notes of your baking conditions.
Not Enough Rise?
If your dough isn’t rising as expected, there could be several culprits. First, check the temperature. A cold environment will slow down fermentation. Make sure your dough is in a warm spot (around 70-75°F or 21-24°C). If your starter isn't active enough, it won't produce enough carbon dioxide to create a good rise. Make sure you feed your starter regularly and that it's showing good activity before you use it in your recipe. For a detailed look at starter activity, see our guide.
Another common reason for poor rise is insufficient kneading. Proper kneading develops the gluten structure, which is essential for trapping gases and creating a light, airy crumb. Make sure you're performing enough stretch and folds during bulk fermentation. If you're still having trouble, you could try using a different type of flour – bread flour generally has higher protein content, leading to better gluten development. For some insights into flour types, take a look at our article on .
Possible Cause | Solution |
|---|---|
Cold environment | Warm up the dough's environment |
Inactive starter | Feed starter more frequently |
Insufficient kneading | Increase stretch and folds |
Crust Too Pale?
A pale crust usually indicates insufficient oven temperature or baking time. Make sure your oven is preheated to the correct temperature (450°F or 232°C) and that you're baking for long enough. You can check the internal temperature of the bread with a thermometer; it should reach 200-210°F (93-99°C) for a fully baked loaf. For great baking tips, check out our recipe for .
Insufficient steam during baking can also lead to a pale crust. Steam helps to create a crispy, golden-brown crust. If you're not using a Dutch oven, try spraying the oven walls with water during the first few minutes of baking. A darker crust is often a sign of a better-baked loaf. For more on achieving that perfect crust, we recommend our article on