Table of Contents
Ever dream of biting into a sandwich with a perfectly crusty yet soft roll? Forget store-bought bread, because today, we’re tackling the amazing french bread sandwich roll recipe! This isn't some complicated baking project; it's a straightforward guide to creating bakery-quality rolls in your own kitchen. We'll start by going through the basic recipe, ensuring you understand each step. Then, we’ll dive into the details, so you can nail the technique every time. Think of this as your personal masterclass to making the ideal french bread sandwich roll. Finally, we’ll wrap things up with some pro tips and tricks to elevate your baking game, and some ideas to add your own unique touch to this classic recipe. Get ready to impress your friends and family with your homemade sandwich rolls!
Crafting Your French Bread Sandwich Roll Recipe
Crafting Your French Bread Sandwich Roll Recipe
Okay, so you're ready to make some amazing french bread sandwich rolls, huh? It all starts with the right ingredients and a bit of patience. Think of it like building with LEGOs, but instead of plastic blocks, we are using flour, water, yeast and salt. The basic recipe is incredibly simple; it's the technique that makes all the difference. We're talking about creating that perfect balance between a crusty exterior and a soft, airy inside. It's not magic; it's just a matter of understanding how each ingredient interacts and how to handle the dough. You’ll need to activate the yeast, mix it with water, salt and flour and then knead it until it's nice and smooth. It's all about creating a foundation for those yummy rolls to come to life.
Ingredient | Amount | Purpose |
|---|---|---|
Warm Water | 2 cups | Activates yeast, hydrates flour |
Active Dry Yeast | 2 tablespoons | Leavens the dough |
Fine Salt | 2 teaspoons | Controls yeast, adds flavor |
Bread Flour | 19 ounces (about 4.5 cups) | Provides structure and chewiness |
StepbyStep Guide to Baking French Sandwich Rolls
StepbyStep Guide to Baking French Sandwich Rolls
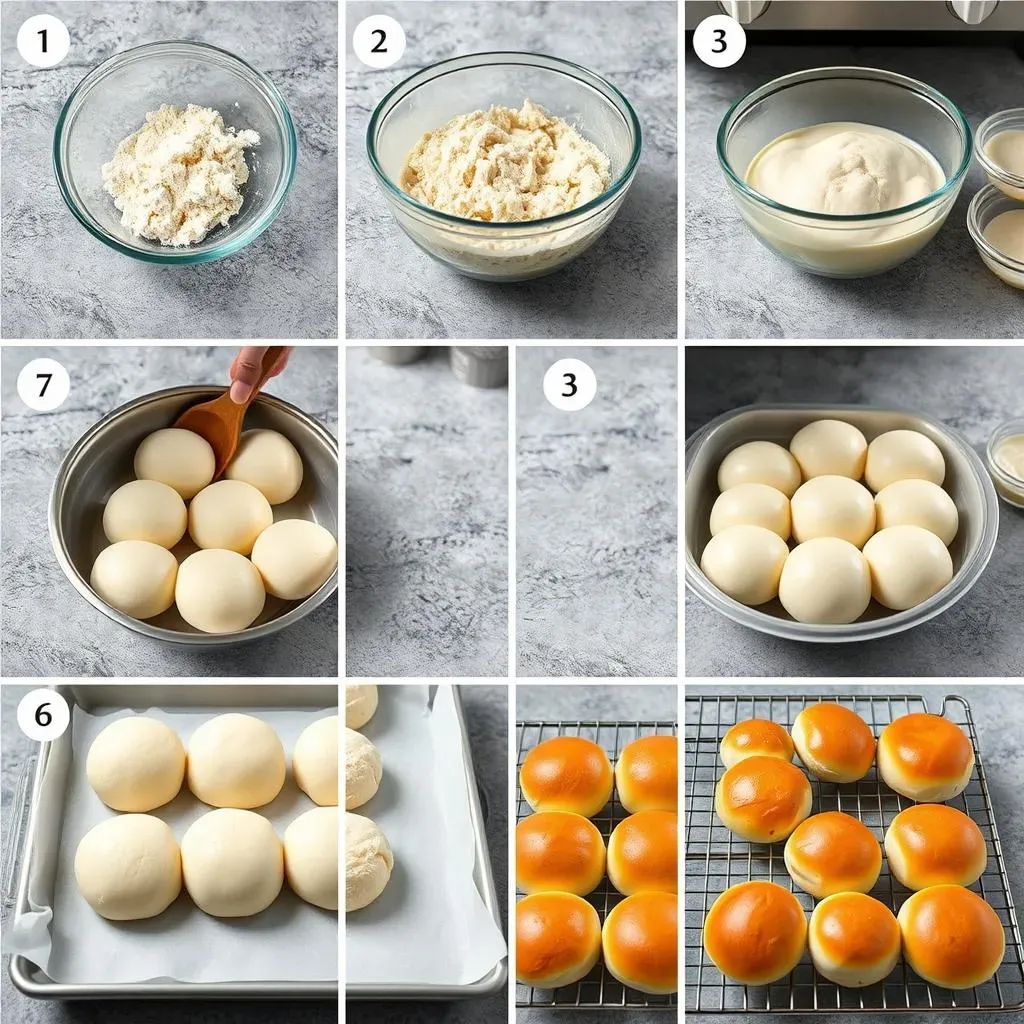
Alright, now that we've got our ingredients sorted, let's get into the nitty-gritty of how to actually make these french bread sandwich rolls. First things first, you need to activate your yeast. In a large bowl, mix your warm water (not too hot, or you'll kill the yeast!) and the yeast itself. Give it a little stir and let it sit for about 5-10 minutes, until it gets nice and foamy. It's like waking up the yeast so it can do its job of making the bread rise. Once that's done, add your salt and about half of your flour to the bowl. Mix this together until it forms a shaggy dough. Now, slowly add the rest of the flour, mixing continuously. This is where the kneading begins. If you have a stand mixer, that’s great, but if not, don’t worry, your hands will work just fine. Knead the dough for about 8-10 minutes, until it's smooth and elastic. It should feel like a soft, pliable ball.
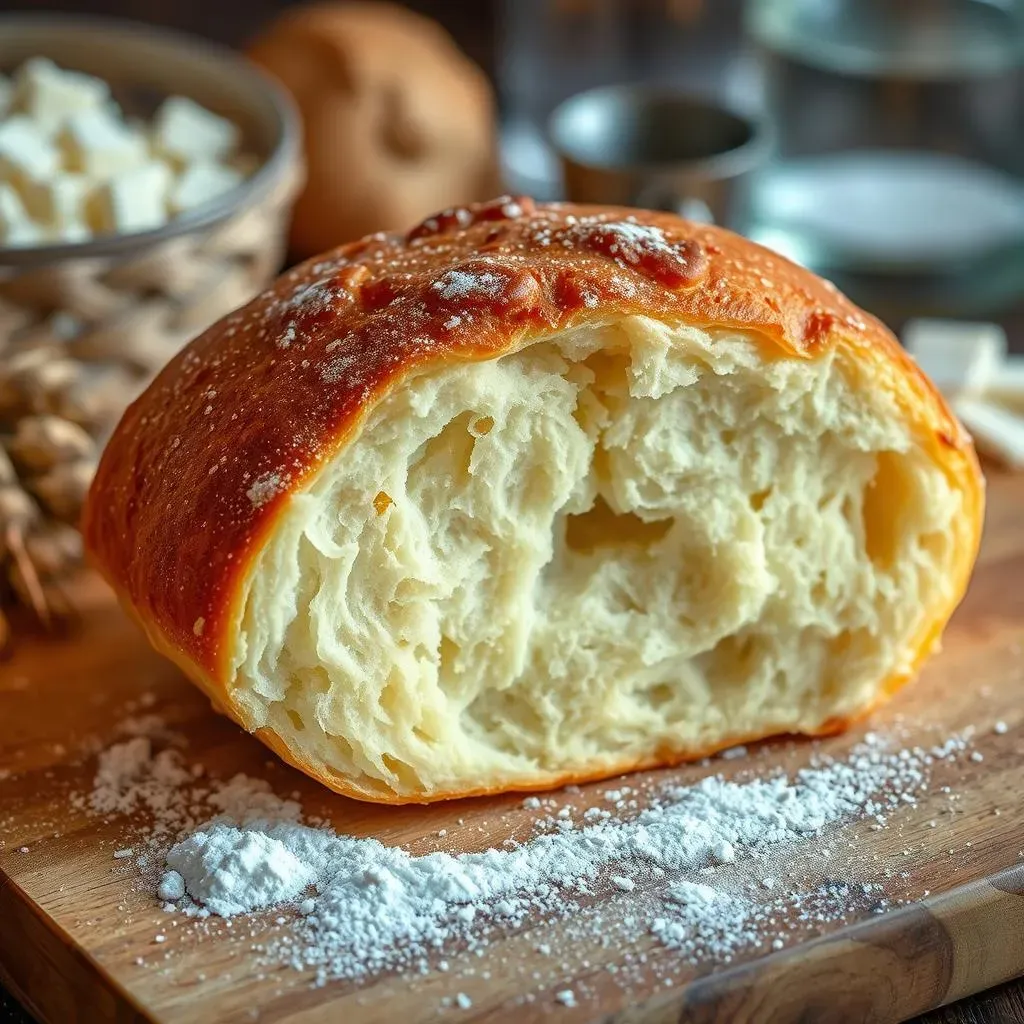
After kneading, place the dough in a lightly oiled bowl, turning it to coat. Cover the bowl with plastic wrap or a damp cloth and let it rise in a warm place for 60-90 minutes, or until it's doubled in size. This is the magic happening! The yeast is working hard, creating all those air pockets that make the bread light and fluffy. Once risen, gently punch down the dough to release some of the air, then turn it out onto a lightly floured surface. Divide the dough into six equal pieces, and roll each piece into a cylinder shape, tapering the ends for that classic french roll look. Place these on a baking sheet lined with parchment paper and cover loosely, letting them rise again for about an hour. This second rise is crucial for the final texture. While the rolls are rising, preheat your oven to 450°F (230°C). Just before baking, you can lightly brush the rolls with some water for a better crust. Bake for 20-30 minutes, or until they're golden brown. Let them cool on a wire rack before slicing and enjoying your perfectly baked french bread sandwich rolls.
"The best way to learn is by doing. Don't be afraid to experiment with the recipe. Baking is a science, but also an art." - Chef John
Tips and Tricks for the Best French Bread Roll Recipe
Tips and Tricks for the Best French Bread Roll Recipe
Mastering the Dough
So, you've got the basic recipe down, but how do we make these rolls truly amazing? It's all in the details, my friend. First, let's talk about that dough. The key here is to get it just right. If it's too sticky, add a little bit more flour, like a tablespoon at a time. If it's too dry, a tiny splash of water can help. Remember, dough is finicky; it changes with humidity and temperature. You want it to be smooth and elastic, not a sticky mess. Also, don't rush the kneading. It's like a workout for your dough; the more you knead, the better the structure. Think of it as developing the gluten, the stuff that gives your bread that chewy texture.
Also, the temperature of your water is crucial. Too hot, and you'll kill the yeast; too cold, and it won't activate properly. Lukewarm is your best bet, like baby bathwater temperature. And speaking of yeast, make sure it’s fresh. Old yeast is like a tired marathon runner, it just won’t perform. If your yeast isn't getting foamy after 10 minutes, it might be time to grab a new packet. Lastly, don't be afraid to experiment with different types of flour. Bread flour is great for structure, but you could mix in a little all-purpose for a softer crumb. It's all about finding what works best for you. This isn't an exact science, it's a journey.
Perfecting the Bake
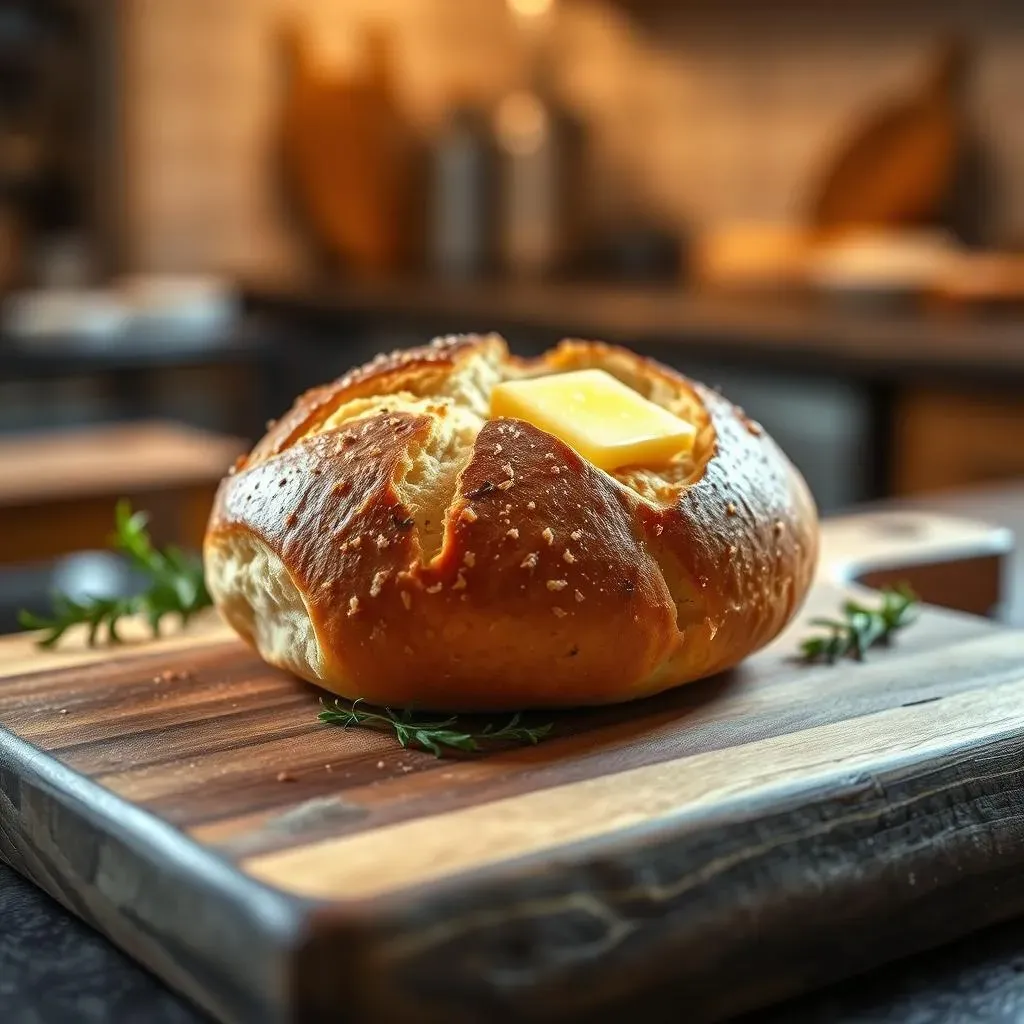
Now, let's chat about baking. The oven is where the magic really happens, but you need to treat it right. Preheat your oven thoroughly. This ensures a consistent temperature when your rolls go in. Also, consider using a baking stone or a baking steel if you have one. These will help to create a crispier crust by evenly distributing heat. If you don't have those, no worries, a regular baking sheet will work just fine.
Another trick? Steam. Adding steam to your oven during the first part of baking helps create that beautiful, shiny crust. You can do this easily by placing a small pan of water in the bottom of your oven while it preheats, or you can spray the walls of the oven with water a couple times in the first 10 minutes of baking. Watch your rolls carefully while they're baking. They should be a beautiful golden brown and sound hollow when you tap them on the bottom. Don't be afraid to adjust the baking time slightly if needed. Every oven is different. Finally, always let them cool completely before slicing. This prevents a gummy interior and makes it easier to cut. Patience, young baker, patience is key.
Tip | Benefit |
|---|---|
Use fresh yeast | Ensures proper rising |
Knead properly | Develops the gluten for texture |
Use steam in the oven | Crispier crust |
Let rolls cool | Prevents gummy insides |