Table of Contents
Ever dream of sinking your teeth into a warm, crusty roll, the kind that makes you close your eyes and sigh? You know, the kind that tastes like it came straight from a fancy bakery? Well, get ready, because this "french bread rolls to die for recipe" is about to make all your bread dreams come true. Forget those sad, store-bought rolls – we're talking homemade goodness that's surprisingly easy to whip up. I'm not kidding, even if you've never baked bread before, this recipe is so straightforward, it's practically foolproof. We'll walk through the magic of transforming simple ingredients into golden, fluffy rolls that are perfect for any meal. From the must-have ingredients to the super easy steps, and even some fun ideas to make them your own. So, grab your apron, let's get baking, and prepare to make french bread rolls that are truly to die for! You will learn to bake amazing french rolls, with this easy recipe, and make it your own with variations.
The Magic Behind These French Bread Rolls to Die For

The Magic Behind These French Bread Rolls to Die For
So, what’s the secret behind these heavenly rolls? It’s not some crazy, complicated technique, I promise. It's all about a few key things working together. First, there's the yeast – those little guys are the real heroes, they’re what gives the dough that amazing rise and airy texture. Then, there's the water, which needs to be just the right temperature, warm enough to wake up the yeast, but not so hot that it kills them. And let's not forget the kneading, that’s where the gluten develops, giving the rolls their structure and that satisfying chew. Finally, the baking, the heat transforms the dough into golden perfection. It's like a mini science experiment happening right in your kitchen, and the result is pure magic.
Think of it like this: you're building a tiny, delicious house. The yeast is your construction crew, the water is the cement, the kneading is like framing the walls, and the oven is the sun that bakes everything to perfection. Each part plays a vital role, and when they all come together, you've got a masterpiece. I remember the first time I tried making these, I was so nervous, worried I'd mess it up. But the process was so simple, and seeing those rolls puff up in the oven, it was like a tiny miracle. And the smell? Oh man, it's like a bakery exploded in the best way possible. So, don't overthink it, just trust the process, and you'll be amazed at what you can create.
Key Element | Why it Matters |
|---|---|
Yeast | Provides rise and airy texture |
Warm Water | Activates the yeast |
Kneading | Develops gluten for structure |
Baking | Transforms dough into golden rolls |
Ingredients You'll Need for French Bread Rolls to Die For
Ingredients You'll Need for French Bread Rolls to Die For
Alright, so you're ready to gather your supplies? Awesome! For this "french bread rolls to die for recipe," you don't need a bunch of fancy stuff. We're keeping it simple and straightforward. First up, you'll need some warm water – about 1 1/2 cups. Make sure it's not too hot, you want it lukewarm, like a baby's bath. Then we need a teaspoon of sugar, just a little to feed the yeast and get them going. Speaking of yeast, you'll need 2 1/4 teaspoons of active dry yeast. Now, for the flour, we're using bread flour, 4 cups to be exact. It makes a difference, trust me. Then, we'll add 2 tablespoons of vegetable oil, you can use whatever you have on hand, it’s not a big deal. And finally, 1 1/2 teaspoons of salt. That's it! Just a handful of basic ingredients, and you're on your way to bread heaven.
I remember when I first started baking, I was intimidated by all the different kinds of flour and yeast. But once I realized that it's really just about understanding what each ingredient does, it became so much easier. The bread flour, for example, has more protein, which helps create that chewy texture we all love in a good roll. And the yeast, well, they’re the tiny heroes that make the whole thing possible. Don't worry about getting everything perfect, baking should be fun, not stressful. Just gather your ingredients, and let's get started. You will see, it is very simple and easy.
- Warm Water: 1 1/2 cups
- Sugar: 1 teaspoon
- Active Dry Yeast: 2 1/4 teaspoons
- Bread Flour: 4 cups
- Vegetable Oil: 2 tablespoons
- Salt: 1 1/2 teaspoons
StepbyStep: Baking Your Own French Bread Rolls to Die For
StepbyStep: Baking Your Own French Bread Rolls to Die For
Getting Started: Activating the Yeast
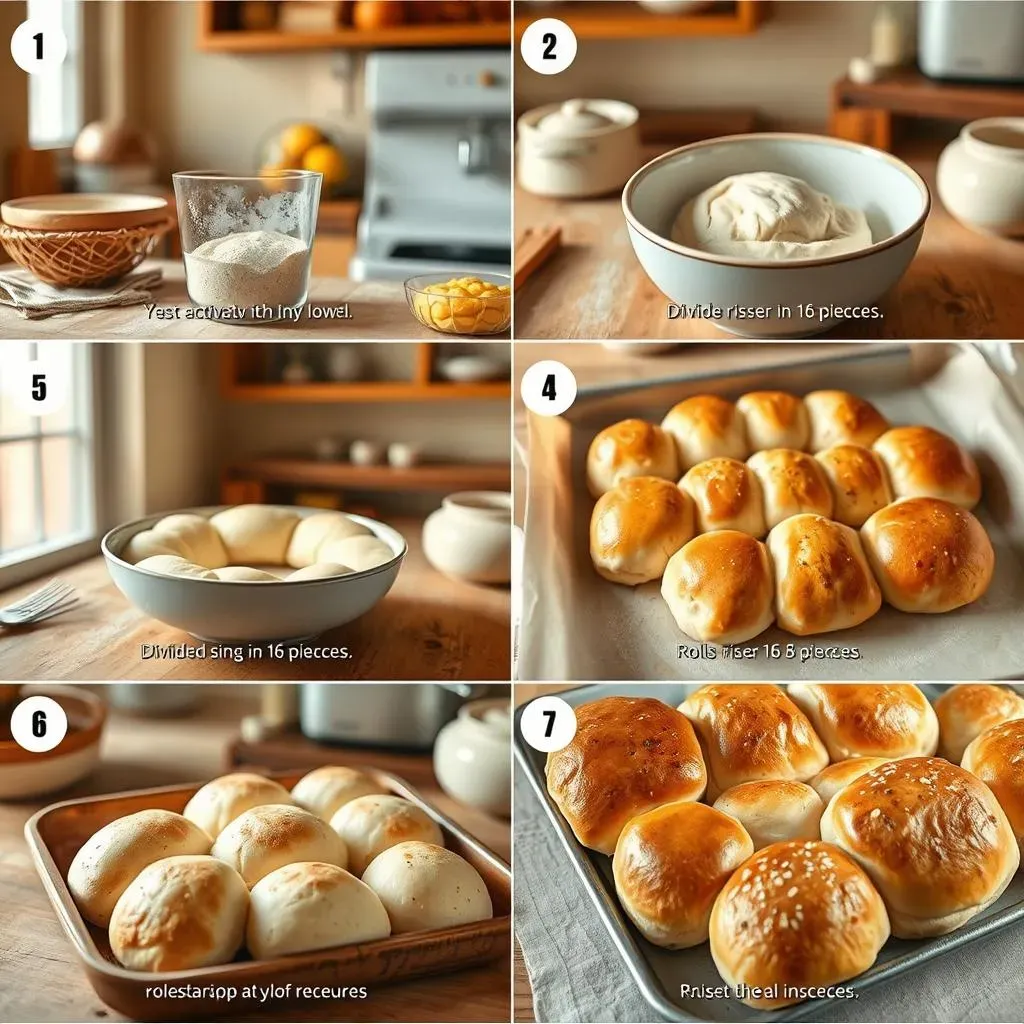
Okay, so you've got your ingredients ready? Let’s get this bread party started! First, grab a large bowl, or the bowl of your stand mixer if you’re fancy like that. Pour in the warm water, then sprinkle the sugar and the yeast right on top. Now, don’t go stirring it just yet, let it sit for about 5 to 10 minutes. You’ll know it's working when you see a foamy layer on top, that means the yeast is awake and ready to go. It’s like watching a tiny science experiment, it’s pretty cool. I remember the first time I saw that foam, I was so excited, like I'd just won a baking award. It's a simple step, but it’s super important for the dough to rise properly. Patience is key here, don't rush it.
While you're waiting for the yeast to do its thing, grab another bowl and measure out your bread flour. I know, it's tempting to just dump it in, but trust me, measuring is important for consistent results. You'll also want to get your oil and salt ready. Once the yeast is nice and foamy, it’s time to combine everything. Pour the yeast mixture into the bowl with the flour, then add the oil and salt. Now, it’s time to get your hands dirty, or let your mixer do the work, depending on your preference. We're going to knead this dough until it’s smooth and elastic. Don't worry if it feels a little sticky at first, that's normal. Just keep at it, and soon you’ll have a beautiful ball of dough.
Step | Action | Why |
|---|---|---|
1 | Combine warm water, sugar, yeast | Activates the yeast |
2 | Let sit for 5-10 minutes | Allows yeast to become foamy |
3 | Combine with flour, oil, salt | Forms the dough |
4 | Knead until smooth | Develops the gluten |
The Rise and Bake: Transforming Dough into Rolls
Alright, now that you have your smooth, elastic dough, it's time to let it rest and rise. This is where the magic really happens. Lightly grease a large bowl, place the dough inside, and turn it to coat it with the oil. Cover the bowl with plastic wrap or a clean kitchen towel, and let it sit in a warm place for about an hour, or until it’s doubled in size. It’s like watching a little balloon inflate, it’s so satisfying. I usually put mine near a sunny window, it seems to help. While the dough is rising, you can finally take a break, or clean up the kitchen, whatever you prefer. Just let the dough do its thing, it knows what to do.
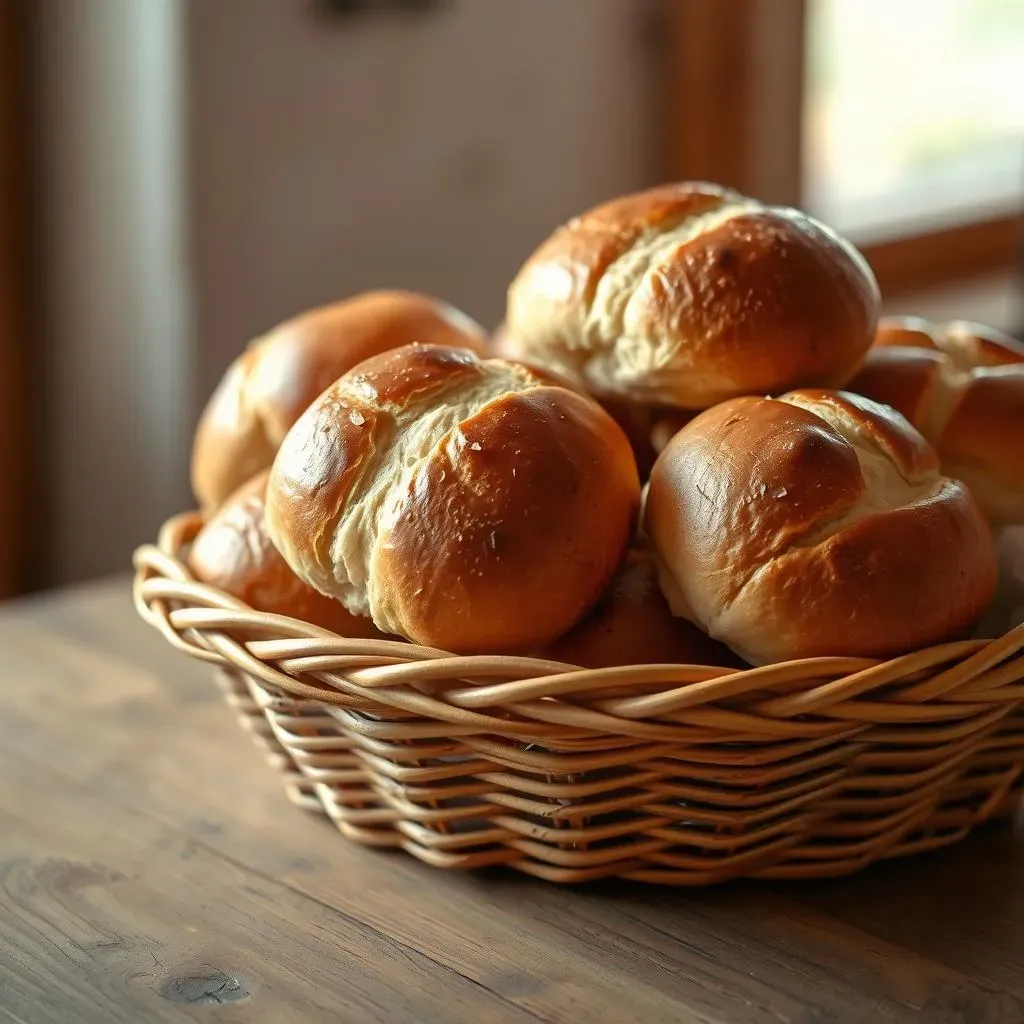
Once the dough has doubled, punch it down gently to release the air. Then, turn it out onto a lightly floured surface. Now, it's time to divide the dough into 16 equal pieces. You can use a knife or a bench scraper, whatever you have. Shape each piece into a small ball, and place them on a baking sheet lined with parchment paper. Cover them again and let them rise for another 30 minutes. While they’re resting, preheat your oven to 400°F (200°C). Finally, pop those rolls into the oven and bake for about 18 to 20 minutes, or until they’re golden brown. When they come out, you'll be greeted with the most amazing aroma, and you'll know you’ve created something truly special.
- Grease a large bowl
- Place dough in bowl, coat with oil
- Cover and let rise for 1 hour
- Punch down dough
- Divide into 16 pieces
- Shape into balls
- Place on baking sheet
- Cover and let rise for 30 minutes
- Bake at 400°F for 18-20 minutes
Serving Suggestions and Fun Twists on French Bread Rolls
Serving Suggestions and Fun Twists on French Bread Rolls
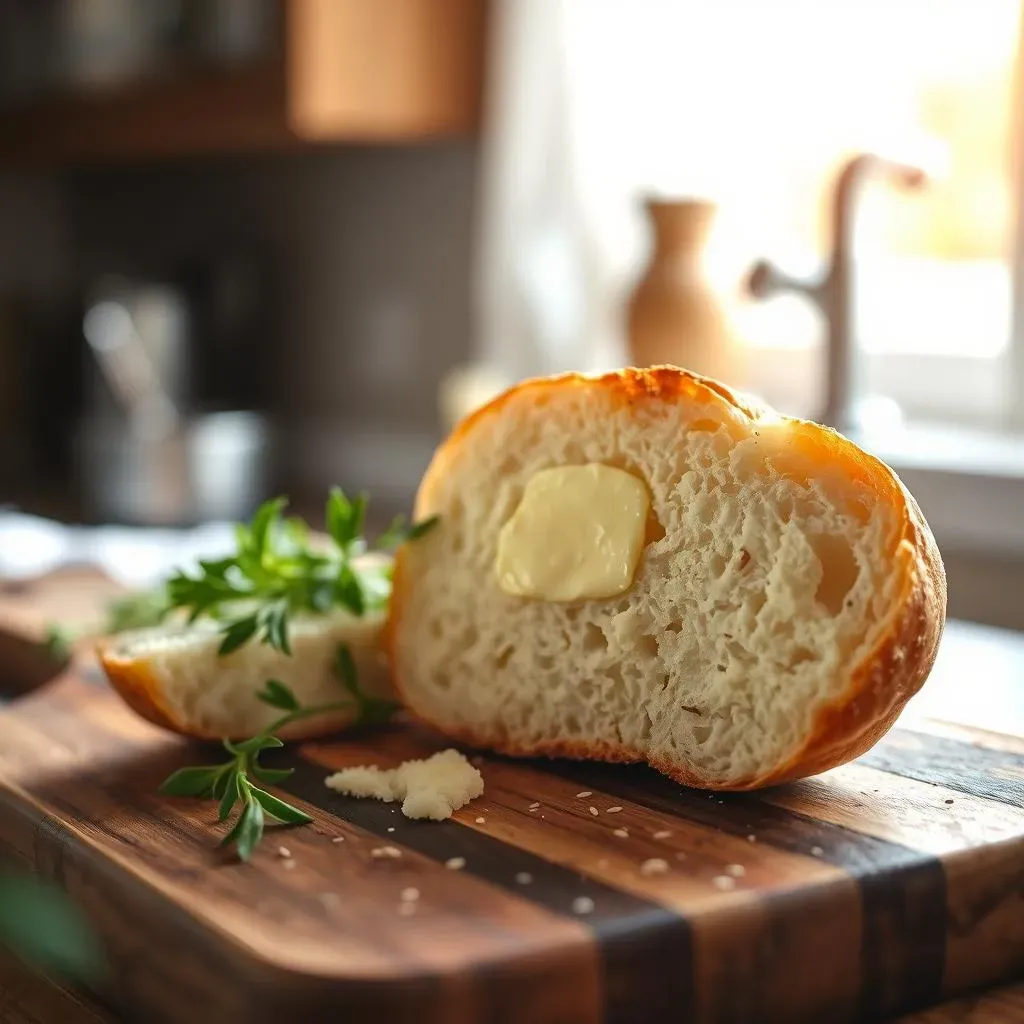
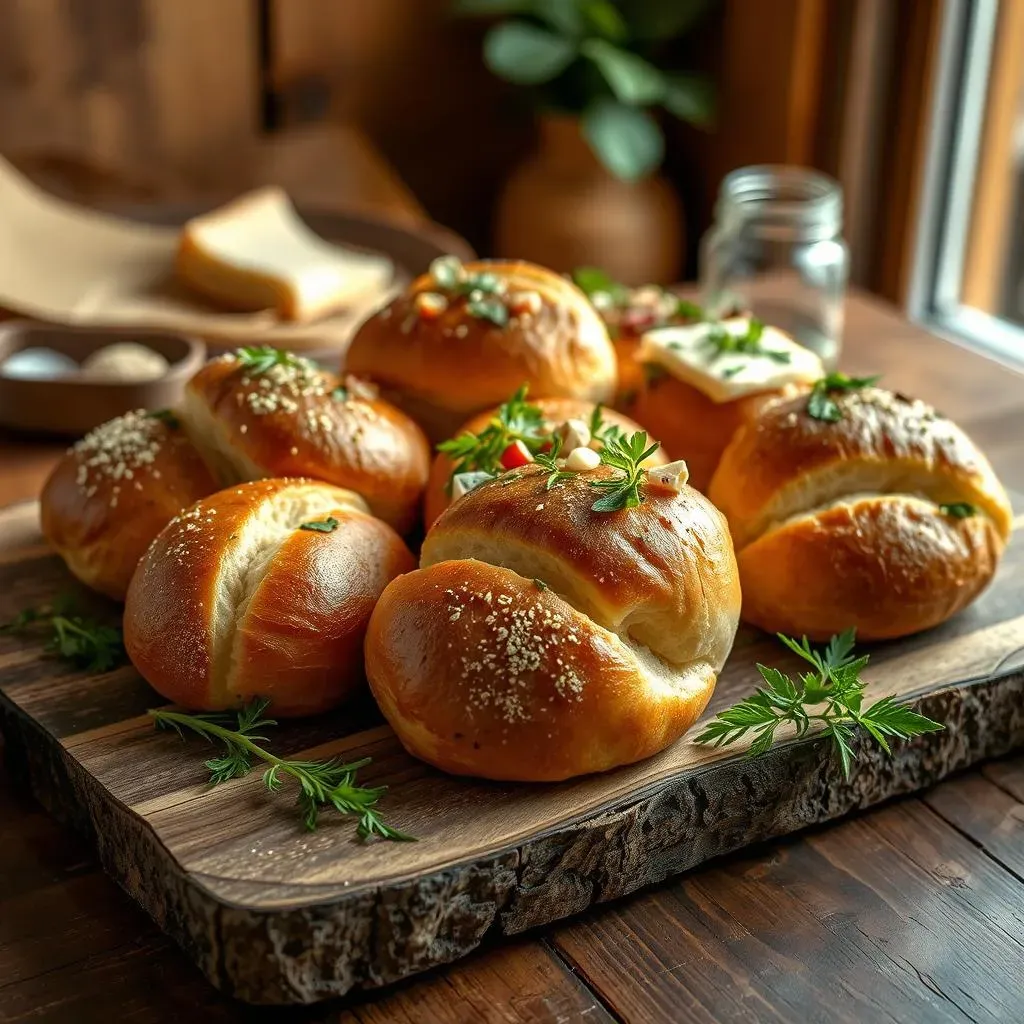
Okay, so you've baked these beautiful "french bread rolls to die for recipe," and now you're wondering, "What do I do with them?" Well, the possibilities are endless! These rolls are amazing served warm with a pat of butter, simple and classic. They're also fantastic as a side to any meal. Imagine them alongside a hearty bowl of soup or a vibrant salad. But, why stop there? You can totally get creative with these. They make amazing sliders or mini sandwiches. Think pulled pork, sliced ham, or even a veggie filling. And if you're feeling a bit fancy, you can use them as a base for bruschetta. Just top them with some tomatoes, basil, and garlic, and you've got an instant appetizer. I personally love using them for breakfast, toasted with some avocado and a sprinkle of salt and pepper, it is so delicious.
Let's talk about some fun twists. Have you ever thought about adding some herbs or spices to the dough? A little garlic powder or Italian seasoning can take these rolls to the next level. Or, how about cheese? You can add some shredded cheddar or parmesan to the dough for a cheesy surprise. You can even make them sweet by adding a bit of cinnamon and sugar. I once tried adding some everything bagel seasoning on top before baking, and it was incredible. The key is to have fun and experiment. These rolls are like a blank canvas, ready for your creative touch. Don't be afraid to try new things, you might just discover your new favorite way to enjoy them. I think that this recipe can be adapted in so many way, and that's the beauty of it.
Serving Suggestion | Description |
|---|---|
Classic Buttered Rolls | Warm rolls with a pat of butter |
Side Dish | Served with soup or salad |
Sliders/Mini Sandwiches | Filled with various meats or veggies |
Bruschetta Base | Topped with tomatoes, basil, and garlic |
Toasted Breakfast | With avocado and seasoning |
- Garlic Herb Rolls: Add garlic powder and Italian seasoning.
- Cheesy Rolls: Mix in shredded cheddar or parmesan.
- Sweet Cinnamon Rolls: Add cinnamon and sugar.
- Everything Bagel Rolls: Sprinkle with everything bagel seasoning.
- Stuffed Rolls: Add ham, brisket, and mozzarella cheese before baking.