
Table of Contents
Ever dream of pulling warm, crusty, incredibly soft rolls straight from your oven? Forget store-bought, because with this easy french bread roll recipe, you'll be baking like a pro in no time! I know, making bread can seem intimidating, like some kind of secret society stuff, but trust me, this recipe is so simple, even a complete beginner can nail it. We're talking light, fluffy insides and a satisfyingly crisp crust – the kind that makes you want to eat three in one sitting (don't worry, I've been there). This article will guide you step-by-step, from mixing the dough to that heavenly first bite. We will focus on how to make the dough, all the way to baking it to perfection, plus some fun variations to spice things up. I will also share some tricks I’ve picked up along the way to make sure your rolls are the best they can be. So, grab your apron, let's get baking!
The Easiest French Bread Roll Recipe You'll Ever Make
The Easiest French Bread Roll Recipe You'll Ever Make
Why This Recipe Is a Game Changer
Okay, let's be real, some recipes are just a pain. You know, the ones with a million steps and ingredients you've never even heard of? This french bread roll recipe? Not one of those. It's ridiculously simple, using ingredients you probably already have in your pantry. I'm talking flour, water, yeast, salt, and maybe a touch of sugar. That's it! And the best part? The dough is super forgiving, so even if you're a little rough around the edges in the kitchen (like I sometimes am), you'll still end up with amazing rolls. No complicated techniques or fancy equipment needed, just pure, delicious bread goodness.
I remember the first time I tried making bread. It was a disaster. The dough was either too sticky or too dry, and the final result was basically a rock. But this recipe? It's like the bread-making gods finally decided to throw me a bone. The simplicity is what makes it so great, it's a recipe that's hard to mess up, which is a huge relief for a beginner like me.
Ingredient | Why It's Important |
|---|---|
Flour | Provides structure and forms the gluten. |
Water | Hydrates the flour, activates the yeast. |
Yeast | Makes the dough rise and become fluffy. |
Salt | Controls yeast activity and adds flavor. |
Sugar | Feeds the yeast and enhances flavor. |
The Magic of Minimal Effort
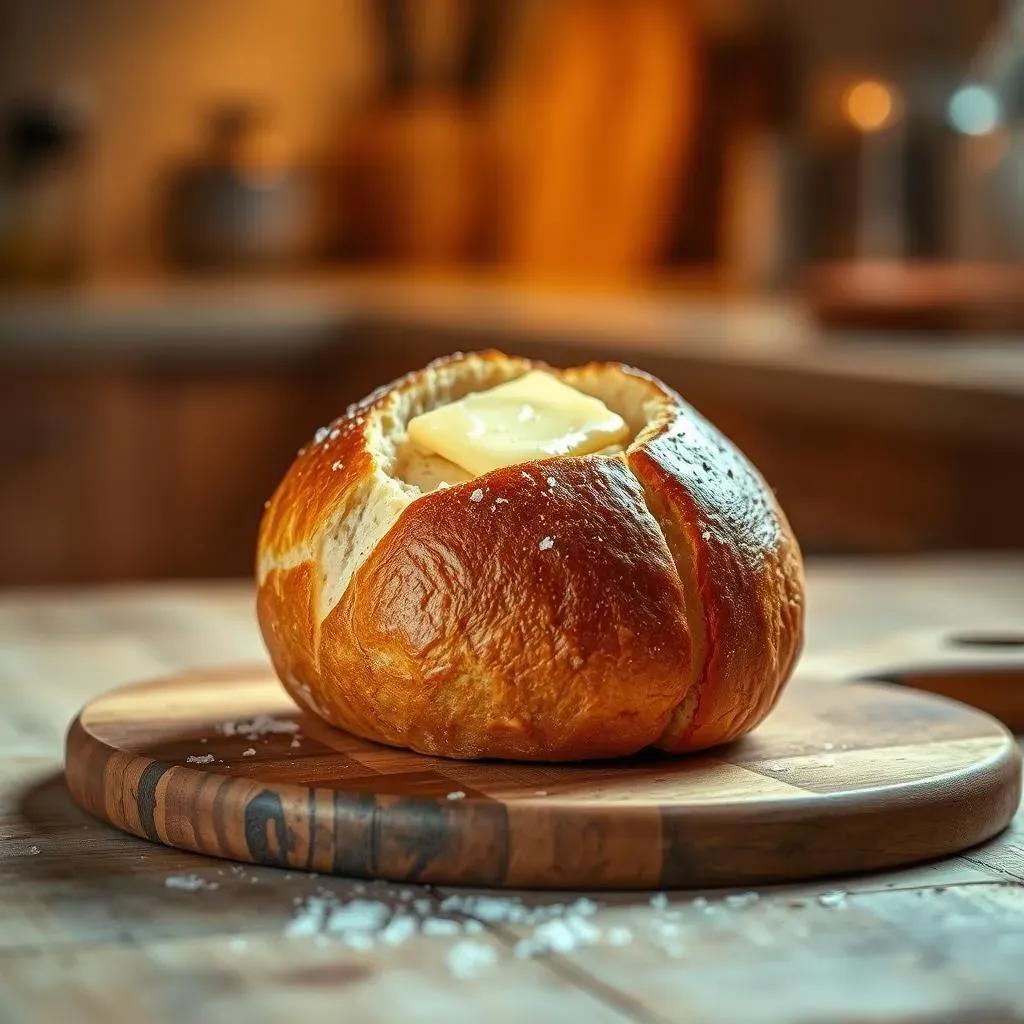
You might be thinking, "Easy bread? It must taste like cardboard." Nope! These rolls are incredibly light and airy on the inside, with a nice, crispy crust. The secret? It's all in the simplicity of the ingredients and the method. We're not overworking the dough, we’re not using a million different proofing techniques. We're keeping it simple and letting the ingredients do their job. The result is a roll that's perfect for sandwiches, dipping in soup, or just slathering with butter and enjoying all on its own. And honestly, the minimal effort needed is a huge win in my book. I mean, who doesn't love a recipe that's quick, easy, and tastes amazing?
I've made these rolls for potlucks, family dinners, and even just a regular Tuesday night, and they're always a hit. People are always surprised when I tell them how easy they are to make. It's like I'm sharing a secret bread-making hack that's been hiding in plain sight all along. I’m telling you, this recipe is a keeper.
Perfect for Beginners and Busy Bees
Whether you're a total newbie in the kitchen or a seasoned baker who's short on time, this recipe is for you. The steps are straightforward, the ingredients are basic, and the results are always impressive. This recipe is so versatile, too. You can make the dough in the morning and bake it later that day, or even make the dough the night before and bake fresh rolls in the morning. It’s the perfect recipe for those of us who want that fresh-baked bread taste without spending hours in the kitchen. Plus, there's nothing quite like the smell of fresh bread baking in the oven, it fills your home with the most amazing aroma.
StepbyStep Guide to Baking Your Own French Bread Rolls
StepbyStep Guide to Baking Your Own French Bread Rolls
Mixing the Dough: The Easy Part
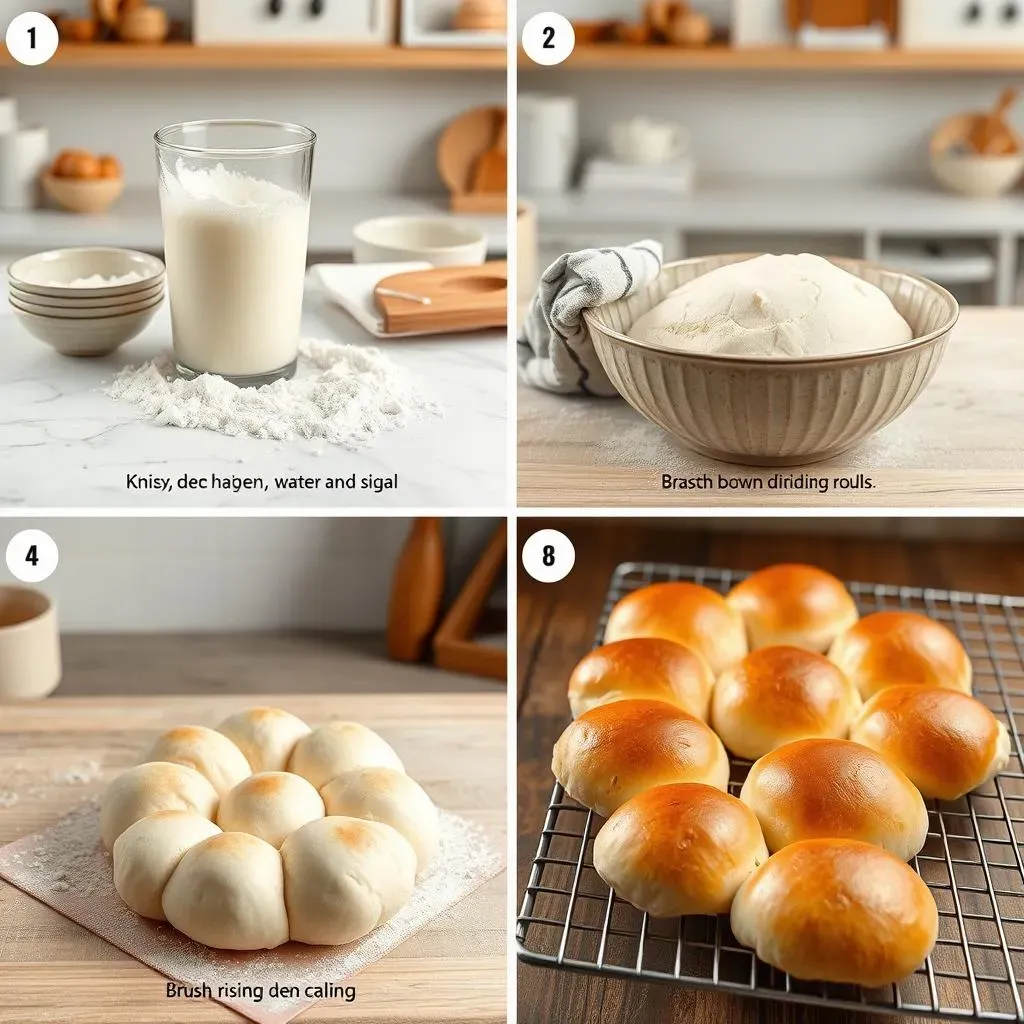
Alright, let's get into it! First, you're going to grab a big bowl. It does not need to be fancy, any old bowl will do. In it, you'll mix your warm water, a pinch of sugar, and the yeast. Now, this is important: make sure your water isn't too hot, or it'll kill the yeast. Think lukewarm, like bathwater for a baby. Let that sit for about 5-10 minutes until it gets all bubbly, that’s how you know the yeast is alive and ready to go. Once it's foamy, add in the flour and salt. Now, you can mix it with a spoon or your hands, whichever you prefer. I like using my hands, it gets me in touch with the dough in a way that a spoon just doesn't. You're looking for a shaggy dough that comes together, don't worry about it being perfect at this point. You just want everything mixed and combined.
Don't stress about getting it perfect, this dough is very forgiving. I remember when I first started, I was so worried about overmixing or undermixing, but with this recipe, it's pretty hard to mess up. It's all about the feel, the dough should be soft and slightly sticky, but not so sticky that it's glued to your hands. If it's too sticky, add a tiny bit more flour, a tablespoon at a time. If it's too dry, add a teaspoon of water at a time. It’s like a dance, you add a little, see how it feels, and then adjust.
Kneading and First Rise: Patience is Key
Okay, now for the kneading part. Turn that shaggy dough out onto a lightly floured surface. I like to use a big cutting board, it gives me plenty of space to work. You don't need to go crazy here, just knead for about 5-7 minutes. The dough should start to become smooth and elastic. It's like a workout for your arms, but a fun one! Once it's smooth, form it into a ball and place it back in your bowl. Cover it up with a clean towel or some plastic wrap and let it rise in a warm place for about an hour, or until it’s doubled in size. It's really amazing to watch the dough grow, it's like it has a life of its own. I usually put mine in the oven with the light on, it creates a nice warm environment for the yeast to do its thing.
Shaping, Second Rise, and Baking: The Grand Finale
Once your dough has doubled, punch it down gently to release the air. Turn it out onto your lightly floured surface again and divide it into 8 equal pieces. Roll each piece into a ball and then shape it into a small roll. Place the rolls on a baking sheet lined with parchment paper. Cover them up again and let them rise for another 30 minutes. While they are rising, preheat your oven to 400°F (200°C). Once they've puffed up nicely, brush them with a little bit of water. This will help them get that lovely crust. Bake for about 15-20 minutes, or until they are golden brown. The smell that will fill your kitchen is simply amazing. When they are done, let them cool on a wire rack, if you can resist them for that long!
I always have a hard time waiting for them to cool, I usually end up burning my fingers trying to sneak a bite before they are ready. But trust me, the wait is worth it. When they come out of the oven, they are so beautiful, all golden brown and puffy. It’s like a work of art that you get to eat. And the taste? Oh man, the taste is just incredible. Freshly baked bread is one of the best things in the world, in my opinion.
Step | Action |
|---|---|
1 | Mix water, sugar, and yeast. Let it foam. |
2 | Add flour and salt. Mix until shaggy. |
3 | Knead for 5-7 minutes until smooth. |
4 | Let it rise for 1 hour. |
5 | Punch down, divide, and shape rolls. |
6 | Let them rise for 30 minutes. |
7 | Brush with water and bake at 400°F for 15-20 minutes. |
Tips, Tricks, and Variations for the Best Homemade French Bread Rolls
Tips, Tricks, and Variations for the Best Homemade French Bread Rolls
Secrets to Crusty Perfection
Alright, so you've got the basic french bread roll recipe down, but what about taking it to the next level? Let's talk about that amazing crust. One trick I learned is to create some steam in the oven while baking. You can do this by placing a pan of hot water on the bottom rack of your oven when you put the rolls in. The steam helps the crust get nice and crispy. Another thing I do is to brush the rolls with water right before they go into the oven. This also helps with that golden-brown, crunchy exterior. It’s like giving the rolls a little spa treatment before they get all toasty.
I have experimented a lot with oven temperatures and baking times, and I found that a slightly higher temperature at the start, followed by a lower temperature, works wonders. I start at 400°F (200°C) for about 10 minutes and then drop it to 375°F (190°C) for the last 10 minutes, or until they are golden brown. It’s all about finding the sweet spot for your oven. Every oven is a little different, so you might have to play around with it a bit. But the results are so worth the effort.
Tip | Why It Works |
|---|---|
Steam in the oven | Creates a crispier crust. |
Water brush before baking | Promotes a golden-brown color. |
Slightly higher temperature at the start | Helps the rolls rise quickly. |
Flavor Boosters and Creative Twists
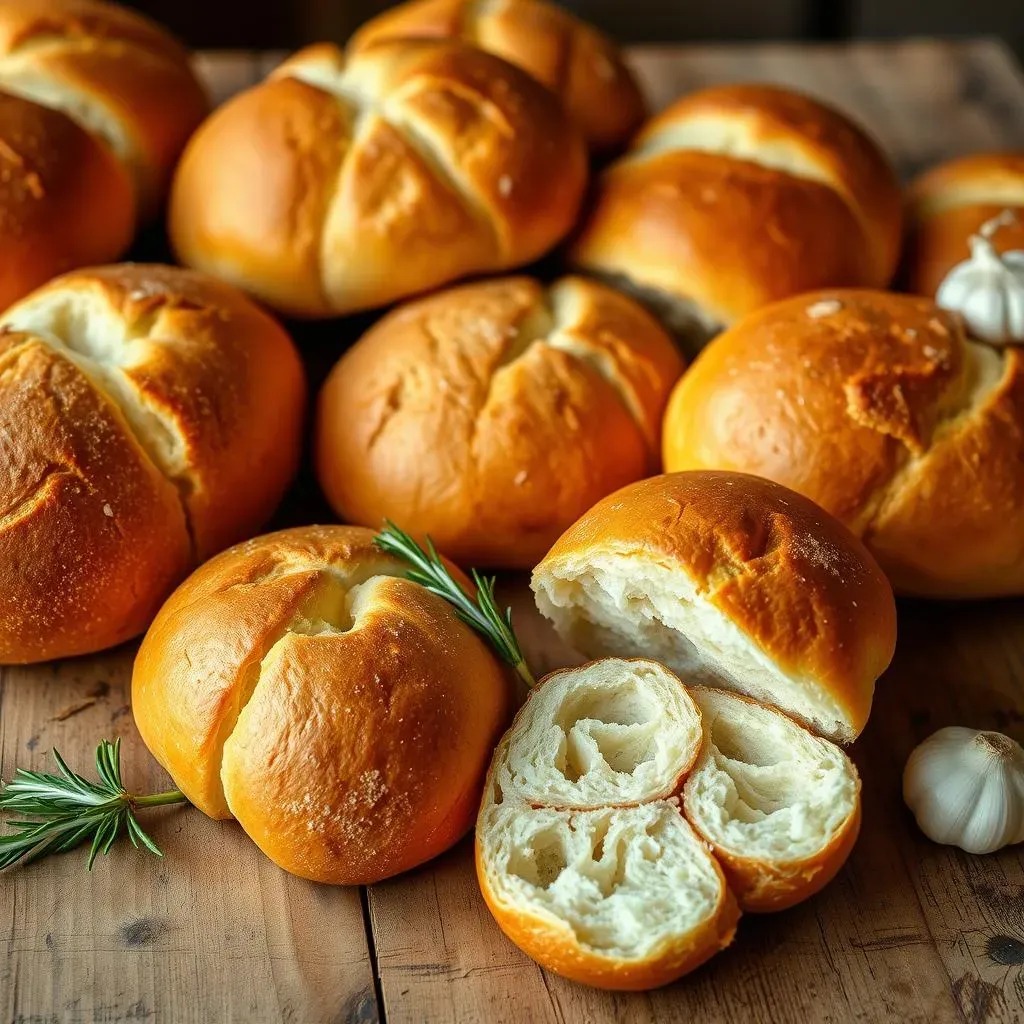
Now, let's get creative! These rolls are a blank canvas for flavor. Want to add some herbs? Go for it! Mix in some dried rosemary, thyme, or even some garlic powder into the dough. You can also try adding a bit of cheese, like parmesan or cheddar, for an extra cheesy kick. I love making garlic bread rolls by brushing them with a mixture of melted butter, garlic, and parsley after they come out of the oven. It’s a simple way to elevate them to the next level. Don't be afraid to experiment with different flavors, the possibilities are endless.
I once tried adding some sun-dried tomatoes and olives to the dough, and it turned out amazing. It was like a little taste of the Mediterranean in every bite. The key is to not overdo it, a little bit of flavor goes a long way. You can also try different types of flour, like whole wheat or spelt, for a different flavor and texture. I’m telling you, the humble french bread roll can be so versatile, you just need to let your imagination run wild.
Freezing and Reheating Like a Pro
Okay, here's a pro tip: these rolls freeze beautifully. Once they've cooled completely, you can pop them in a freezer bag and store them for a few weeks. When you're ready to eat them, you can thaw them out at room temperature and then reheat them in the oven for a few minutes. I like to sprinkle them with a little water before reheating to give them that freshly baked taste again. It’s like having a stash of fresh bread at your fingertips, perfect for those times when you need a quick and easy meal. I often make a double batch just to have some on hand for later.
I've been freezing bread for years, and it’s honestly a lifesaver. It's especially useful when I want to have fresh bread but don't have the time to make it from scratch. These rolls reheat so well that you would never guess they had been frozen. They are just as delicious as the day they were baked. I'm telling you, this recipe is a must-have for any home baker.
- Add dried herbs (rosemary, thyme)
- Mix in cheese (parmesan, cheddar)
- Try different flours (whole wheat, spelt)
- Add sun-dried tomatoes and olives