
Table of Contents
Ever dream of biting into a warm, fluffy french bread roll, the kind that makes you close your eyes and sigh? Forget the store-bought stuff; we're diving into the world of homemade goodness. This isn't some complicated baking science experiment, I promise. We’re talking simple steps, easy-to-find ingredients, and a result that will have everyone thinking you’re a culinary genius. This article is your roadmap to creating the most amazing french bread roll you've ever tasted, from the first mix to the final, golden-brown bake. We’ll cover everything – from the basic ingredients and how to mix them just right, to the best tips for getting that perfect crust and fluffy inside. Think of this article as your personal baking buddy, guiding you through each step. We’ll also explore fun variations and even tackle some common questions that might pop up along the way. So, grab your apron, preheat that oven, and let’s get baking! Get ready to master the art of the perfect french bread roll.
The Magic Behind Perfect French Bread Rolls
The Magic Behind Perfect French Bread Rolls
The Core Ingredients
Okay, so what's the deal with these seemingly simple rolls? It's not magic, but it's close. It all starts with the basics: flour, water, yeast, a touch of sugar, some oil, and salt. Each ingredient plays a crucial role. The flour provides the structure, the water hydrates everything, the yeast is our little rising agent, sugar feeds the yeast, the oil keeps the dough soft, and salt controls the yeast and enhances the flavor. It’s like a well-choreographed dance where each part needs to be just right for the show to be a hit. And yes, even the type of water matters – warm, not hot, to keep the yeast happy and active.
Think of it like building with Lego. Each piece, while simple on its own, is essential for the final creation. If you use too much or too little of one, the whole thing might crumble or not look quite right. The same goes for your dough. It's all about balance, precision, and a little bit of patience.
The Kneading Process
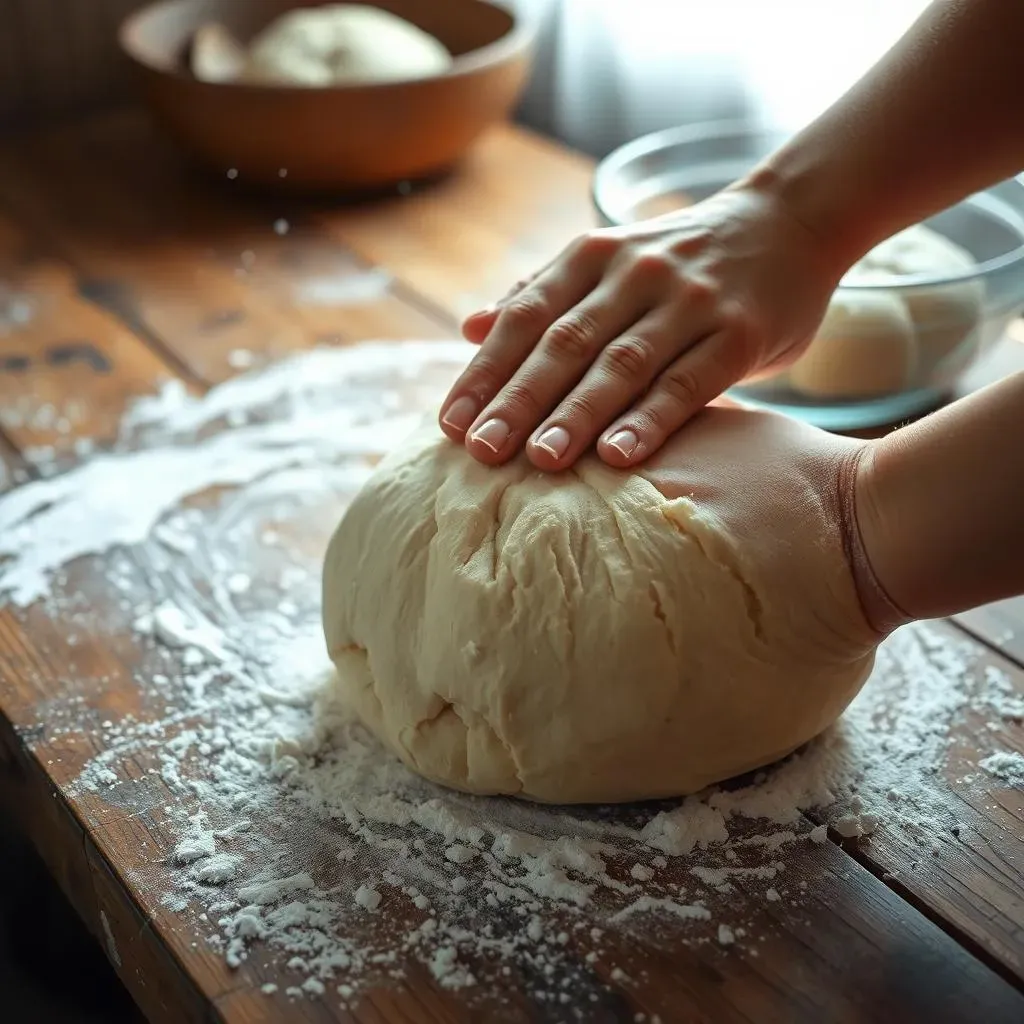
Kneading, ah, that’s where the real work begins, but it’s also where the magic happens. It’s not just about mixing; it’s about developing the gluten, which is the protein in flour that gives the bread its elasticity and structure. Imagine stretching a rubber band - the more you work it, the more it changes. That’s what we're doing with the dough. You're not just pushing it around; you're building the very framework of your french bread roll. And you don’t need to be a bodybuilder to do it, just a good rhythm and a bit of elbow grease.
If you are using a stand mixer, it’s a bit of a different story, but the principle is the same. You are still working the dough to develop that gluten. The dough will start out shaggy and sticky, but as you knead, it will become smoother and more elastic. This process takes time, usually around 5-10 minutes by hand or 4-6 minutes in a mixer. It’s like giving your dough a good massage, and it will thank you for it later with a light, airy texture.
The Rise and Bake
Now, the rise. This is where time does its thing, and believe me, it's worth the wait. The dough needs a warm and cozy spot to puff up, doubling in size. Think of it like letting a balloon inflate; the yeast is working its magic, creating those air pockets that will make your rolls so light and airy. This part is crucial; rushing it will result in dense, sad rolls. Be patient! Once it’s risen, we punch it down ( it is so satisfying, i promise). Then it's time to shape them into rolls, let them rise again, and then bake them until they're golden brown and irresistibly fragrant. The baking process is the final act where all the previous steps come together. The heat transforms the dough, creating a beautiful crust and a soft interior.
Step | Description |
|---|---|
Mixing | Combine all ingredients |
Kneading | Develop the gluten |
First Rise | Allow dough to double in size |
Punch Down | Release the air |
Shaping | Form into rolls |
Second Rise | Let rolls puff up |
Baking | Bake until golden brown |
Easy Steps to Homemade French Bread Rolls

Easy Steps to Homemade French Bread Rolls
Mixing the Dough Like a Pro
Alright, let's get down to the nitty-gritty of mixing. It's simpler than you think. Grab a large bowl, and let's get started. Warm water goes in first, not too hot, just lukewarm, like a baby's bath. Then, sprinkle in the yeast and sugar; it’s like giving them a little snack to get them going. Let that sit for about five minutes until it gets foamy, it is like watching a science project happening right in your bowl! After that, add the oil and salt, mix it a bit, and then slowly start adding the flour. It’s like a slow dance, adding flour bit by bit, until it all starts to come together. Don’t dump it all at once, or you’ll end up with a flour cloud, and trust me, nobody wants that. Once you have a shaggy dough, it is time to knead.
Now, some people use a stand mixer for this, and that’s totally fine, but I like the feel of the dough between my fingers. It makes you feel more connected to the process. Kneading is not about brute force; it’s about rhythm and patience. Push, fold, turn, repeat. It’s like giving the dough a good workout and it will start to transform from sticky mess to a smooth ball. Don’t worry if it feels a little sticky at first; it will come together. Think of it like playing with playdough, but this time you get to eat it later. After kneading, place the dough in a greased bowl, cover it, and let it rise. That is the easy part, let the yeast do its job.
Shaping and Baking Your Rolls
Okay, so you've waited patiently while your dough has doubled in size, good job. Now, punch it down gently to release the air. Don't be shy, it's strangely satisfying. Now, divide that dough into 12 equal pieces. I like to use a kitchen scale to make sure they are all the same size, but eyeballing it is also okay. Take each piece and roll it into a smooth ball. Think of it like making meatballs, but for bread. Place them in a greased 9x13 inch pan, cover them with plastic wrap, and let them rise again for about 30 minutes. This second rise will give them that nice, light texture. Don't skip it!
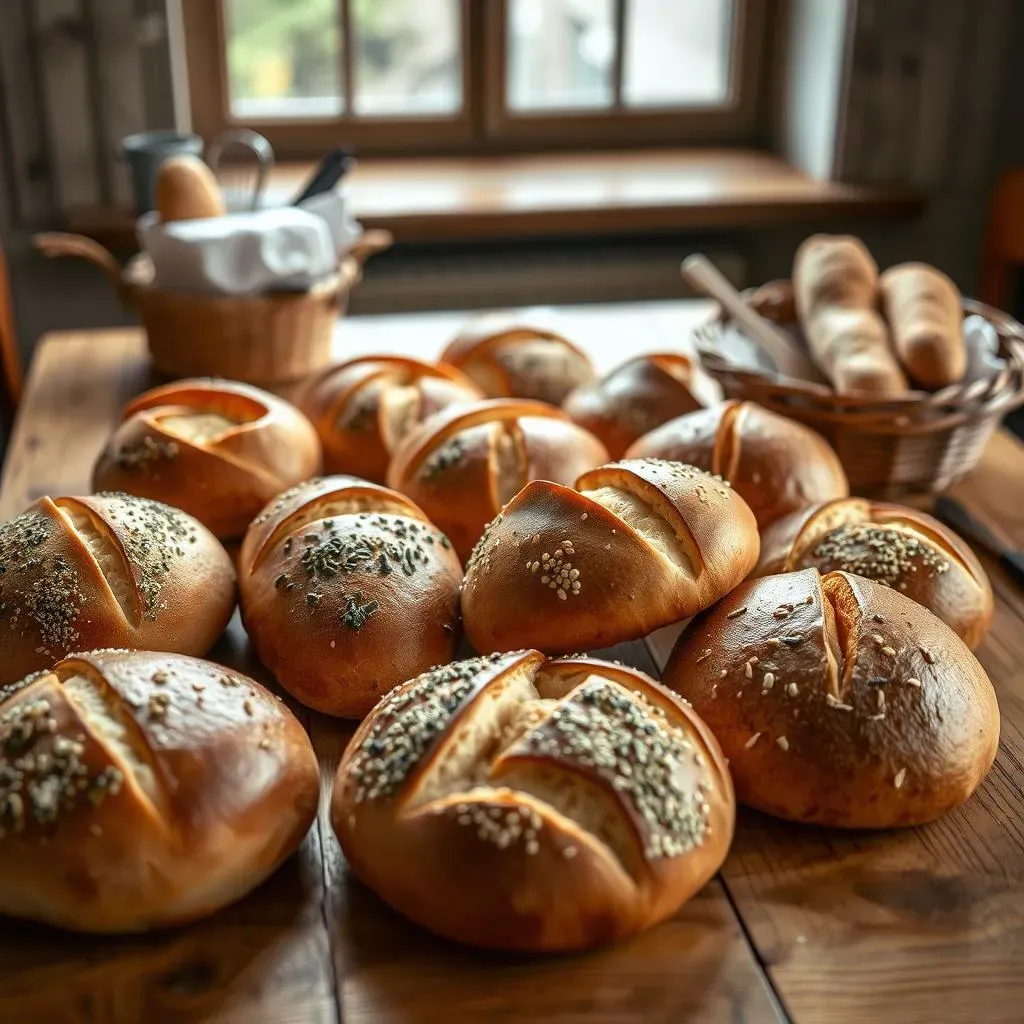
Once they’ve puffed up, it's time to bake. Preheat your oven to 400°F (200°C). Pop the pan into the oven and bake them for 15-20 minutes, or until they’re golden brown on top. The smell will be amazing. Take them out and let them cool slightly before you try to eat them because they are super hot. I always have a hard time waiting, but it is worth it. These rolls are best served warm with a little butter. Enjoy the fruits of your labor. You did it! You made french bread rolls.
Tips for the Best French Bread Roll and Variations
Tips for the Best French Bread Roll and Variations
Perfecting Your Bake
So, you've got the basics down, but what about taking your french bread roll game to the next level? It's all about the little tweaks. First off, make sure your oven is preheated correctly. An oven that is not hot enough will result in flat rolls. I like to use an oven thermometer to make sure it is at the right temperature. And when you are baking, resist the urge to open the door too often. Every time you open the door, the temperature drops, and it can affect how your rolls rise. Also, a little trick: try adding a pan of hot water to the bottom of your oven while baking. The steam helps create a super crusty exterior and a soft, chewy inside. It’s like having your own mini bakery at home. And don't forget to let them cool on a wire rack – this prevents them from getting soggy on the bottom.
Another thing to consider is the flour. While all-purpose flour works great, you can also experiment with bread flour for a chewier texture or whole wheat flour for a nuttier flavor. Just remember that whole wheat flour can sometimes make the dough a bit denser, so you may need to adjust the amount of water. Also, don't be afraid to experiment with different shapes. Instead of making round rolls, you can try making longer, thinner rolls, or even shaping them into knots. It's all about having fun and making them your own. Baking is not about following rules, is about expressing your creativity.
Variations to Explore
Now, let's talk variations. Once you’ve mastered the basic french bread roll, the possibilities are endless. You can add herbs like rosemary, thyme, or oregano to the dough for a savory twist. A handful of grated cheese, like Parmesan or cheddar, can also elevate the flavor. Or, if you’re feeling sweet, try adding a bit of cinnamon and raisins for a breakfast roll. Another fun idea is to make garlic bread rolls by brushing them with garlic butter right after they come out of the oven. It's like having garlic bread but in a fun, bite-sized form. You could also sprinkle the tops with sesame seeds, poppy seeds, or everything bagel seasoning before baking for added flavor and texture.
Don't be afraid to get creative! Baking is all about experimenting and having fun. Try adding different types of flour, different spices, or different toppings. You can even try making stuffed rolls by adding cheese, ham, or vegetables before baking. The world is your oyster! These small changes can make a big difference and will keep your baking adventures exciting. So, go ahead, try something new, and who knows, you might stumble upon your signature french bread roll recipe.
Variation | Ingredients |
|---|---|
Herb Rolls | Add 1-2 teaspoons of dried herbs to the dough |
Cheese Rolls | Add 1/2 cup of grated cheese to the dough |
Sweet Rolls | Add 1/4 cup of raisins and 1 teaspoon of cinnamon to the dough |
Garlic Rolls | Brush with garlic butter after baking |
Seeded Rolls | Sprinkle with seeds before baking |
French Bread Roll: Reader's Thoughts and Serving Ideas
French Bread Roll: Reader's Thoughts and Serving Ideas
What People Are Saying
Okay, so you've baked your amazing french bread roll, and now you're probably wondering what others think about it. Well, let me tell you, the reviews are in, and they are glowing! People are loving how easy this recipe is, even if they are beginners in the kitchen. They are also raving about the texture, the perfect balance of a crusty outside and a soft, fluffy interior. And the best part? It's so versatile! Some people are using them for sandwiches, others are pairing them with soup, and some, like me, are just eating them warm with butter. It's like a blank canvas for your culinary adventures. The best feedback I've gotten is that they’re just as good, if not better, than the ones you’d get at a fancy bakery. And that's the kind of compliment that makes all the effort worthwhile. It's so rewarding to see your hard work pay off and to know that you've created something that people genuinely enjoy. It’s like sharing a little bit of happiness, one roll at a time.
One common question I get is about freezing the rolls. Yes, you can totally freeze them! Once they've cooled completely, wrap them tightly in plastic wrap and then place them in a freezer bag. They'll keep for up to three months. When you're ready to eat them, just thaw them at room temperature and then pop them in the oven for a few minutes to warm them up. They'll taste as good as the day you baked them. Also, many people have shared their variations, from adding different herbs to experimenting with various types of flour. It's amazing to see how one recipe can inspire so much creativity. It just proves that baking is not just about following instructions, it's about making it your own. And that’s what makes it so fun.
Serving Suggestions
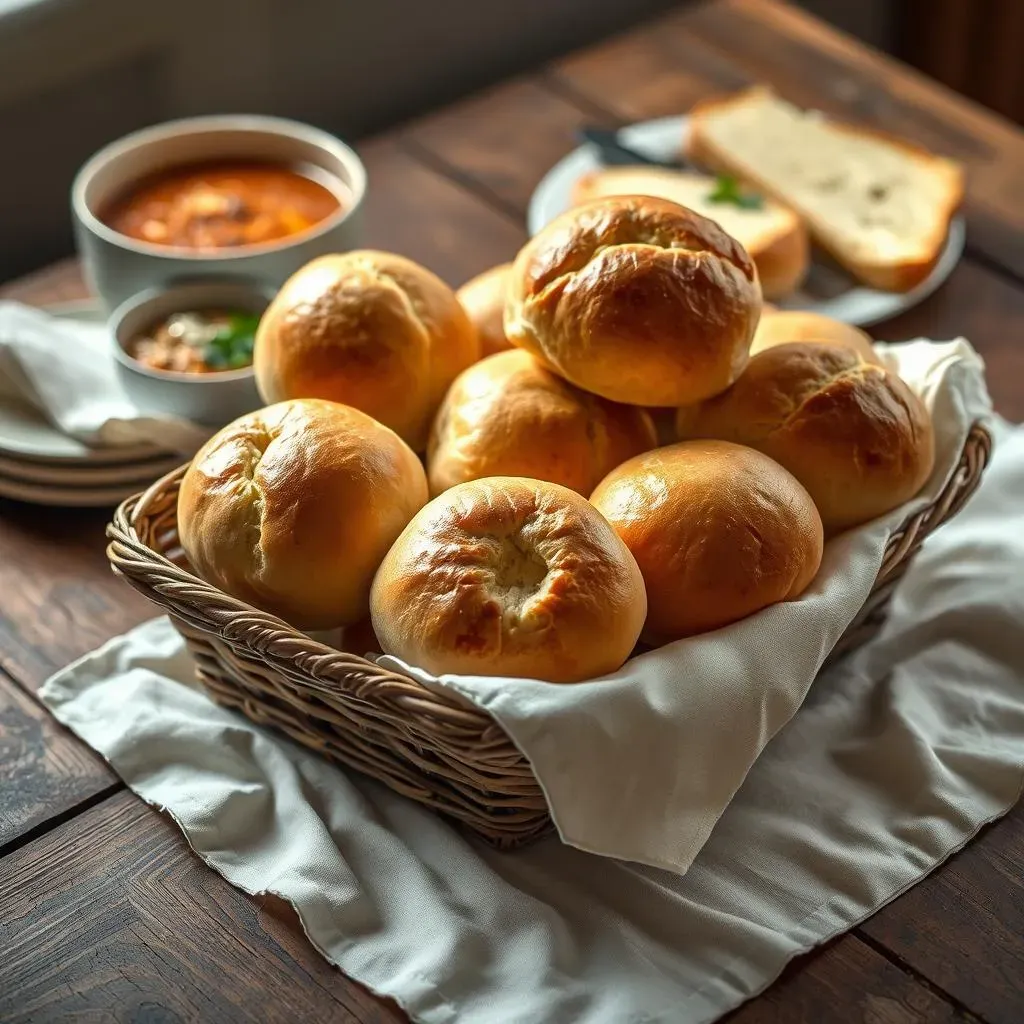
Now that you've got these beautiful french bread roll, what are you going to do with them? The possibilities are endless! For a simple yet satisfying meal, try pairing them with a hearty soup or a warm stew. They’re perfect for dipping and soaking up all the delicious flavors. Or, you can slice them open and make some amazing sandwiches. I love a good turkey and cheese sandwich on a freshly baked roll, or a classic BLT. If you are feeling fancy, you can use them as a base for bruschetta, topping them with fresh tomatoes, garlic, and basil. They are also amazing with a simple spread of butter or jam for breakfast or a quick snack.
And don’t forget about those special occasions! These rolls are a crowd-pleaser at any gathering, from holiday dinners to weekend barbecues. You can even use them to make mini sliders or as a side for your favorite pasta dish. And If you are having a dinner party, place a basket of warm rolls on the table, and everyone will be happy. The best part is that they are so versatile, they can be adapted to any meal or occasion. So, go ahead, get creative, and enjoy your homemade french bread roll in whatever way you like. They are your creation, so eat them how you want!
- Pair with soup or stew for dipping
- Make delicious sandwiches
- Use as a base for bruschetta
- Serve with butter or jam for breakfast
- Enjoy as a side with pasta
- Use for sliders