Table of Contents
Ready to elevate your baking game? This article is your passport to the wonderful world of french bread made with sourdough starter. Forget bland, store-bought loaves; we're diving deep into the art of creating a truly exceptional crusty masterpiece from scratch. We'll start by guiding you through building a robust and active sourdough starter – the heart and soul of this delicious bread. Then, we'll walk you step-by-step through the process of making sourdough French bread, covering essential techniques like kneading, shaping, and achieving that perfect balance of a crisp crust and a light, airy interior. But we won't stop there! We'll also explore exciting variations and helpful tips to ensure your sourdough French bread is not only delicious but also uniquely your own. Get ready to impress yourself and your loved ones with the fragrant aroma and satisfying texture of homemade sourdough French bread. Let's embark on this flavorful journey together!
Crafting the Perfect Sourdough French Bread Starter
Crafting the Perfect Sourdough French Bread Starter
Understanding Your Starter
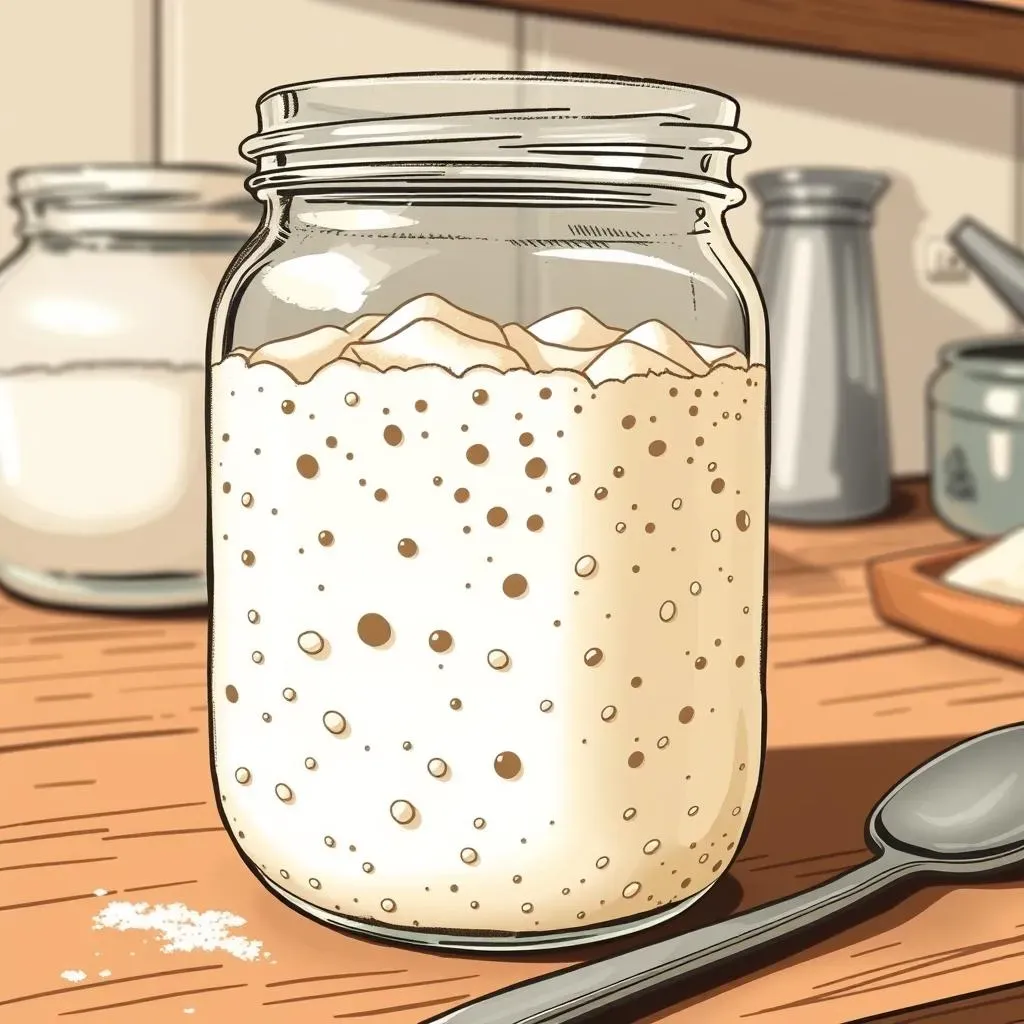
So, you're ready to bake amazing french bread using a sourdough starter? Fantastic! Let's start with the foundation: your starter. Think of it as a tiny, bubbly ecosystem of wild yeasts and bacteria, patiently waiting to transform simple flour and water into something magical. A healthy, active starter is key to a successful bake. It's all about consistency; regular feedings are crucial to keeping your starter happy and thriving. You'll notice a noticeable rise and bubbly activity – these are signs of a well-fed and lively starter, ready to take on the challenge of leavening your bread. Remember, the more you practice, the better you'll understand your starter's personality and needs. Don't be afraid to experiment and learn from each bake.
Starting a sourdough starter might seem daunting, but it's surprisingly simple. You just need flour and water! You'll find detailed instructions in our comprehensive guide, the , where we explore different feeding schedules and troubleshooting common issues. Once your starter is bubbling away happily, you'll understand why it's the secret weapon behind truly delicious sourdough. It's all about patience and observation; don't rush the process. A well-established starter will reward you with bread that's light, airy, and bursting with flavor.
Day | Activity | Observation |
|---|---|---|
1-3 | Initial Mix & Observation | Minimal activity is normal |
4-7 | Regular Feedings | Increased bubbling, slight rise |
7+ | Consistent Rise & Activity | Ready for bread baking! |
Maintaining Your Starter
Once you've established your happy little sourdough starter, the next step is keeping it alive and kicking! Regular feedings are essential; think of it as providing the fuel for your starter's microscopic inhabitants. The frequency of feeding depends on your environment and the type of flour you use. Some bakers feed their starters daily, while others opt for less frequent feedings. Experiment to find what works best for you and your starter. Keep a close eye on its activity; a bubbly, risen starter is a happy starter. If it seems sluggish, a more frequent feeding might be in order. Remember, a healthy starter is the cornerstone of fantastic sourdough bread.
Storing your starter properly is just as important as feeding it. Many bakers keep their starters in the refrigerator between uses. This slows down the fermentation process, reducing the need for frequent feedings. When you're ready to bake, simply take your starter out of the fridge and give it a few feedings to re-activate it. This process is detailed in our handy guide: . With proper care, your starter will be a reliable companion in your baking adventures for years to come, providing the base for countless delicious loaves. It's a rewarding process, watching your starter grow and evolve over time.
- Feed regularly (daily or every other day)
- Store in the refrigerator between uses
- Observe for bubbling activity
- Discard excess starter as needed
Mastering the Art of Sourdough French Bread Baking
Mastering the Art of Sourdough French Bread Baking
Mixing and Kneading Your Dough
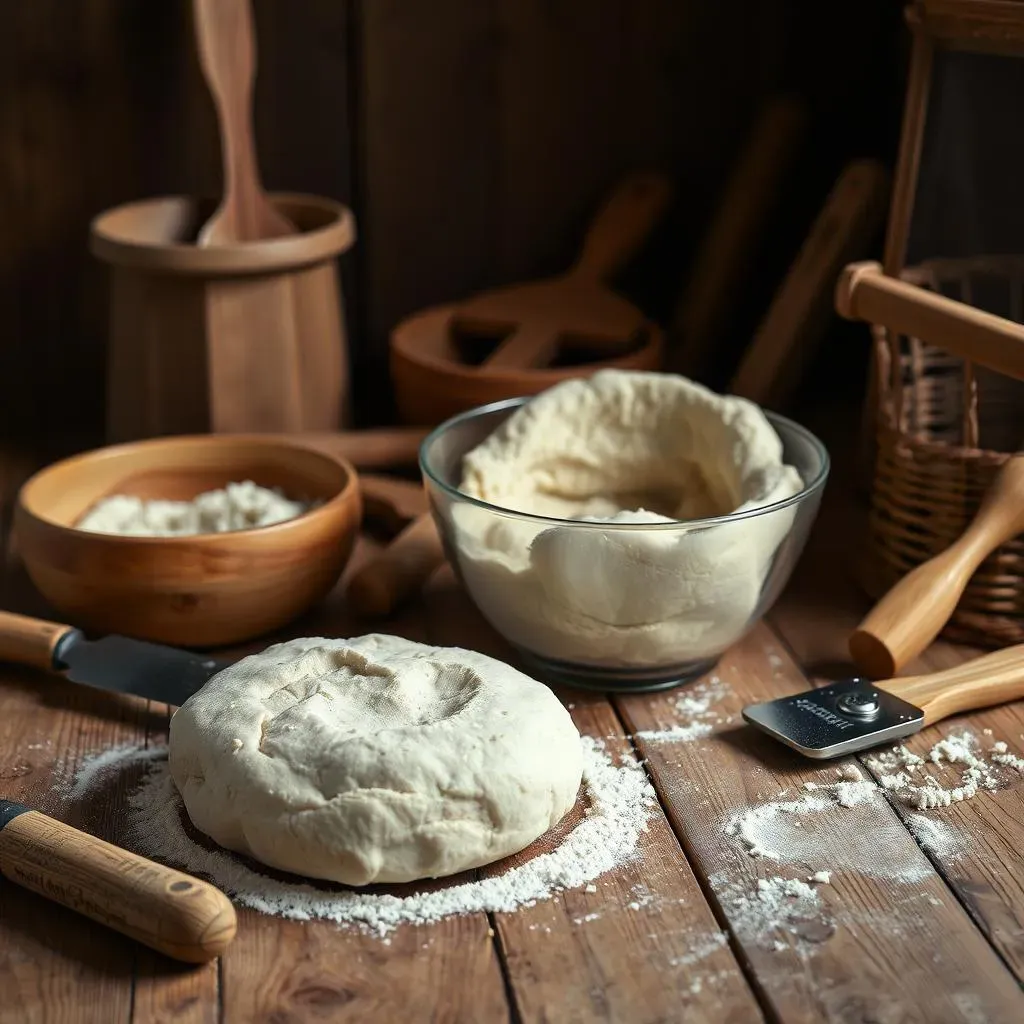
Now that you've got your thriving sourdough starter, it's time to bring your french bread to life! The mixing and kneading process is crucial for developing the gluten structure, which gives your bread that beautiful, airy texture. We'll cover the proper techniques for both hand-kneading and using a stand mixer. Remember, the goal is to create a smooth, elastic dough, but don't be afraid to get a little messy in the process – it's all part of the fun! You can find a helpful guide on our page for visual learners.
Proper hydration is key. Too much water, and your dough will be sticky and difficult to handle. Too little, and it will be dry and tough. Aim for a dough that is slightly tacky but still manageable. During kneading, the gluten strands develop, creating a strong network that traps the carbon dioxide produced by the yeast, leading to that signature light and airy crumb. Don't skip this step; it's the secret to a perfect loaf. For more tips and tricks, check out our detailed guide on .
Technique | Description | Tips |
|---|---|---|
Hand Kneading | Requires patience and elbow grease! | Add flour gradually to prevent stickiness |
Stand Mixer | Faster and less strenuous | Use a dough hook attachment |
Bulk Fermentation and Shaping
After kneading, it's time for bulk fermentation – a crucial step that allows your dough to rise and develop flavor. During this period, the yeast in your starter diligently works, producing carbon dioxide that inflates the dough. The length of bulk fermentation depends on several factors, including the temperature of your environment and the activity of your starter. Warm temperatures accelerate fermentation, while cooler temperatures slow it down. You'll notice the dough increasing in volume and becoming lighter and airier. A good way to check for doneness is the poke test: gently poke the dough with your finger – if the indentation slowly springs back, your dough is ready for shaping. For more on this, read our guide on .
Shaping your sourdough French bread is an art form in itself. There are several different techniques, ranging from simple rolls to elegant batards. The key is to handle the dough gently to avoid deflating it. Proper shaping ensures even baking and a beautiful, consistent loaf. After shaping, the dough needs a final proof (rise) before baking. This step allows the dough to fully expand, creating that lovely open crumb structure. You'll know it's ready when it's puffy and slightly jiggly. For detailed instructions and visual demonstrations, refer to our article on .
- Bulk fermentation time varies
- Use gentle shaping techniques
- Final proof before baking
Baking and Cooling Your Loaf
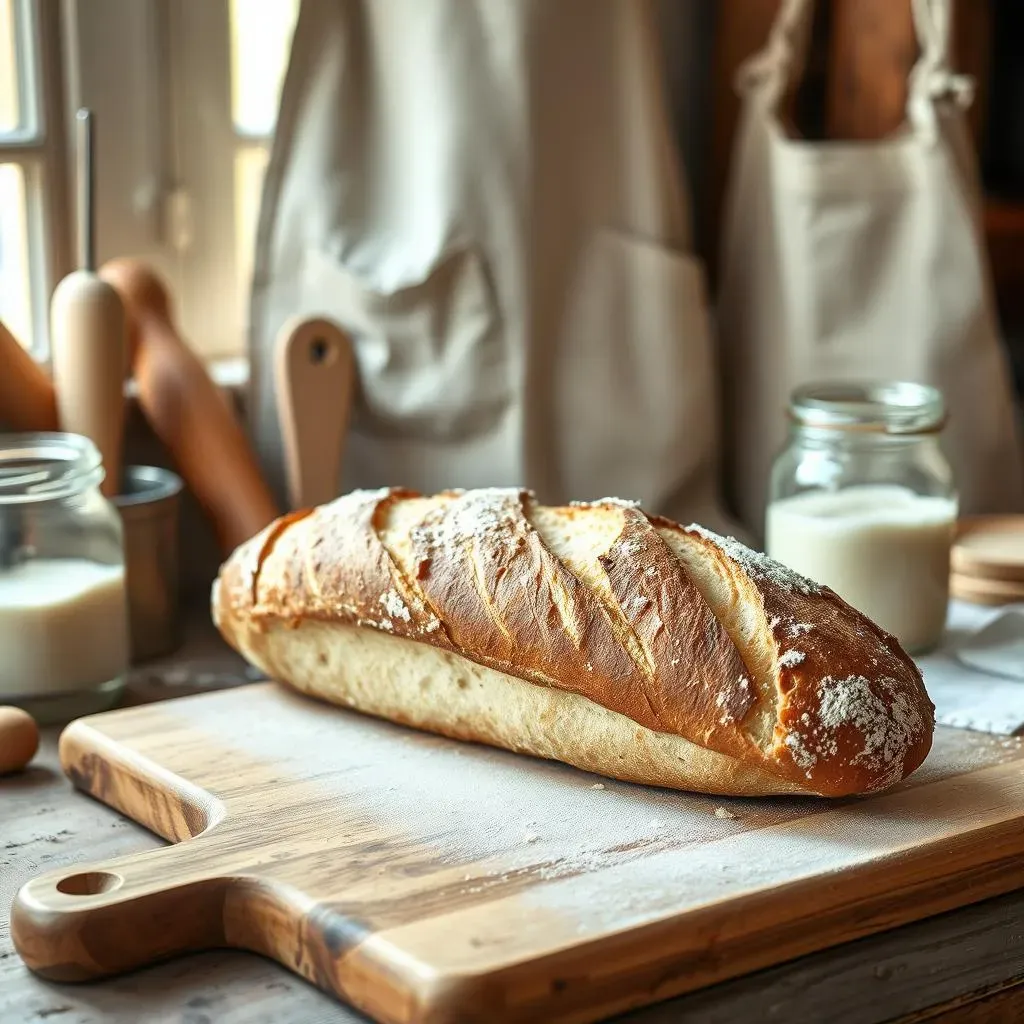
The moment of truth has arrived – baking your sourdough French bread! Preheat your oven to a high temperature, ideally with a Dutch oven or baking stone to create a crisp crust. Scoring the dough before baking helps control the expansion and creates a beautiful pattern. Use a sharp lame or knife to make shallow cuts. Baking time varies depending on your oven and the size of your loaf, but you'll know it's done when it's golden brown and sounds hollow when tapped on the bottom. For extra crusty goodness, consider adding steam to the oven during the initial baking phase. Check out our for more details.
Once baked, resist the urge to slice into your bread immediately! Allow it to cool completely on a wire rack. This step allows the crumb to set properly and prevents a soggy interior. Patience is key here; it's worth the wait for that perfect texture. Once cooled, your sourdough French bread is ready to be enjoyed! Slice it thick, spread with butter, and savor the fruits of your labor. We hope you enjoy the delicious reward of your hard work. For more variations and advanced techniques, explore our other articles on .
Elevating Your Sourdough French Bread: Tips and Variations
Elevating Your Sourdough French Bread: Tips and Variations
Exploring Flavor Profiles
Let's talk flavor! The beauty of sourdough French bread is its adaptability. You can easily tweak the recipe to create unique flavor profiles. Adding herbs like rosemary or thyme during the mixing phase imparts an earthy aroma and subtle herbal notes. A touch of sweetness can be introduced with honey or maple syrup, balancing the tanginess of the sourdough. For a bolder flavor, consider incorporating seeds like sunflower or poppy seeds for added texture and nutty undertones. Don't be afraid to experiment!
Want to go beyond the basics? Incorporate different types of flour. Whole wheat flour adds a deeper, nuttier flavor and a denser crumb, while rye flour contributes a distinctive tang. Mixing and matching flours allows for a wide range of flavor profiles, from subtly sweet to intensely robust. Remember, the key is to experiment and discover your personal preferences. For more ideas, check out our for inspiration.
- Herbs (rosemary, thyme)
- Sweeteners (honey, maple syrup)
- Seeds (sunflower, poppy)
- Different flours (whole wheat, rye)
Mastering the Crust
The crust is what makes sourdough French bread so irresistible! A perfectly crisp, golden-brown crust is the result of several factors: oven temperature, baking time, and the presence of steam. A hotter oven and longer baking time will generally result in a crispier crust. Adding steam to the oven during baking helps to create that signature crackly exterior. This can be achieved by placing a pan of water in the bottom of your oven or using a steam injection system. Experiment to find what works best for your oven.
Beyond steam, the type of flour you use can also impact your crust's texture. Bread flour, with its higher protein content, generally produces a chewier crust. For a particularly crisp crust, try a blend of bread flour and all-purpose flour. Don't be afraid to experiment! For a visual guide on achieving the perfect crust, check out our article on . It’s all about finding the perfect balance between a crispy crust and a soft, airy interior.
Factor | Effect on Crust |
|---|---|
Oven Temperature | Higher temp = crispier crust |
Baking Time | Longer time = crispier crust |
Steam | Adds moisture, enhances crispness |
Flour Type | Bread flour = chewier crust |
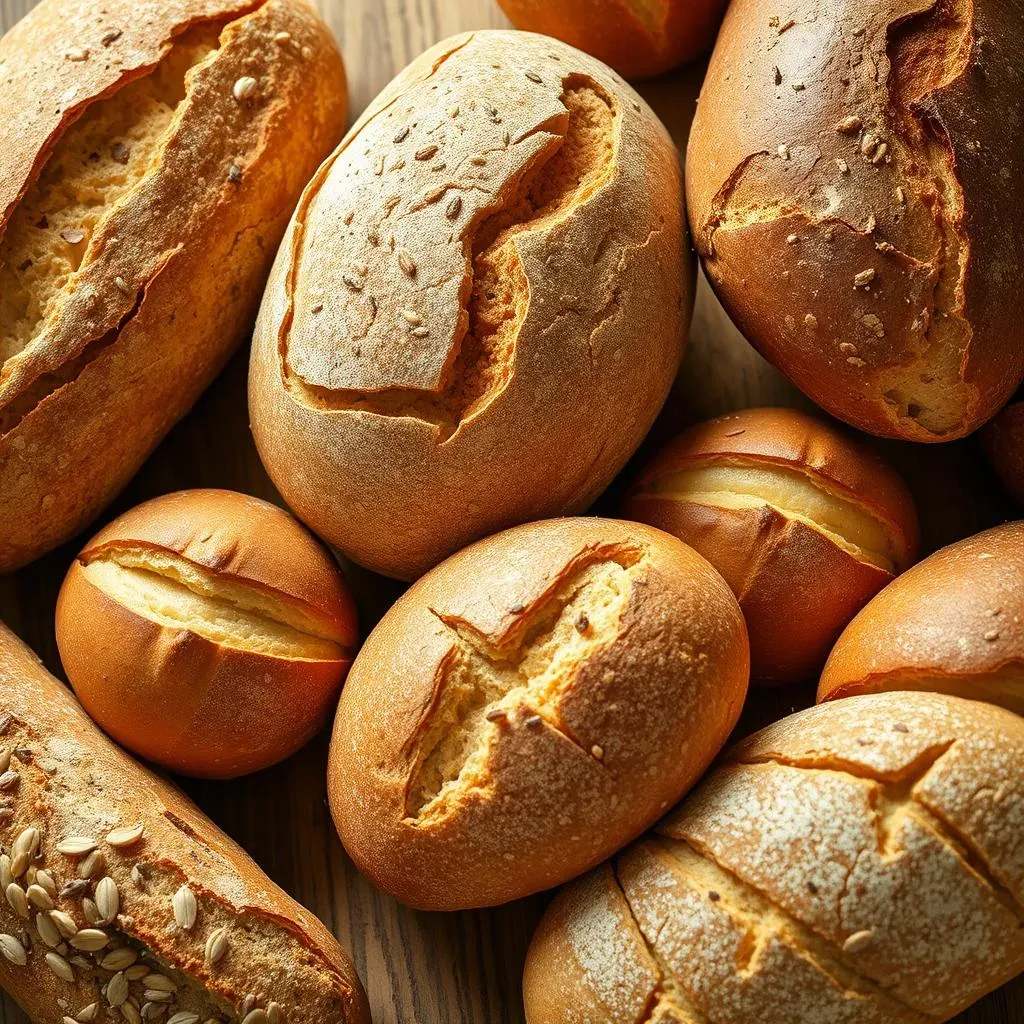
Beyond the Basic Loaf
Once you've mastered the art of baking a basic sourdough French bread loaf, the possibilities are endless! Experiment with different shapes, like baguettes or rolls. These variations not only look stunning but also offer unique textural experiences. Baguettes, with their long, slender shape, develop a wonderfully crisp crust, while rolls provide a delightful combination of soft interior and slightly crispy exterior. For detailed shaping instructions, check out our guide on .
Consider adding other ingredients to your dough to create unique flavor and texture combinations. Cheese, herbs, nuts, and even dried fruits can be incorporated to create truly personalized loaves. The possibilities are endless! Don't be afraid to get creative and experiment with different combinations to find your favorite flavors. For some delicious inspiration, check out our recipe. Each bake is a chance to discover new flavors and textures.