Table of Contents
Ever find yourself craving that perfect, crispy garlic toast, but don't want to spend ages in the kitchen? I get it! That's why I'm sharing my super simple method for making the best french bread garlic toast in the oven. Forget about complicated recipes; we're talking about a quick, easy, and incredibly flavorful way to achieve that golden-brown, garlicky goodness. We'll explore how to make a killer garlic oil that'll make your taste buds sing, how to bake your french bread to the perfect level of crispiness, and even how to store any leftovers (if there are any!). This isn't just about following steps; it's about understanding the simple magic behind turning a humble baguette into a star side dish. Whether you're a seasoned cook or a kitchen newbie, this guide will have you whipping up fantastic french bread garlic toast in the oven in no time, ready to impress your family, or just enjoy all by yourself. So, let's get started, shall we?
Garlic Toast: The Quick and Easy Way

Garlic Toast: The Quick and Easy Way
Why This Recipe Is a Game Changer
Let's be real, sometimes you just want something delicious without all the fuss. That's where this garlic toast recipe comes in. It's not about spending hours in the kitchen; it's about getting maximum flavor with minimal effort. I'm talking about that perfect balance of crispy edges and a soft, chewy inside, all infused with the glorious taste of garlic. Forget complicated methods, we're keeping it simple and fast, so you can spend more time enjoying your meal and less time cooking it. This is the kind of recipe that's perfect for those busy weeknights or when you just need a quick and satisfying snack.
I remember one time, I was having a last-minute dinner party. Panic mode was kicking in but I didn't have enough time to prepare complicated dishes. So, I whipped up a batch of this garlic toast, and it was a total hit! It was so easy, and everyone was asking for the recipe. That's when I knew this was a keeper.
The Power of Simple Ingredients
The magic behind this quick garlic toast is in the simplicity of the ingredients. You don't need a pantry full of fancy herbs or complicated sauces. We're talking about basic pantry staples that, when combined, create something truly special. Fresh garlic, olive oil, and salt are the stars of the show, working together to infuse every bite with that irresistible garlicky flavor. And the best part? You probably already have everything you need in your kitchen right now. This recipe proves that sometimes, the simplest things are the most satisfying.
It's funny, I've tried all sorts of complicated garlic bread recipes before, with tons of ingredients, and they never tasted as good as this simple one. It's all about using quality ingredients and letting their flavors shine.
Ingredient | Why it's Important |
|---|---|
Fresh Garlic | Provides that pungent, unmistakable garlic flavor. |
Olive Oil | Helps the garlic flavor infuse the bread and creates a crispy crust. |
Salt | Enhances all the flavors and balances the garlic. |
Time-Saving Tips and Tricks
Alright, let's talk about making this even quicker. One of my go-to moves is to prep the garlic oil in advance. I usually mix a big batch and keep it in the fridge, so it's ready to go whenever the garlic toast craving hits. Also, don't be afraid to use pre-minced garlic from a jar if you're really short on time. It's not quite as potent as fresh, but it'll still do the trick. And for those days when you’re feeling extra lazy, you can even brush the garlic oil on the bread and bake it without preheating the oven - it may take a little longer to bake but it is still delicious.
I once was in a rush, and I forgot to preheat the oven. I was sure my garlic toast would be a disaster, but it turned out just fine! It just took a few extra minutes. That's the beauty of this recipe; it's pretty forgiving.
Making the Perfect Garlic Oil for French Bread

Making the Perfect Garlic Oil for French Bread
The Foundation of Flavor
Okay, so you want truly amazing french bread garlic toast? It all starts with the garlic oil. This isn't just some afterthought, it's the heart and soul of the whole operation. We're not just talking about throwing some garlic in oil; we're talking about creating an infusion that's bursting with flavor. Think of it like making a really good cup of tea; you need the right ingredients and the right method to get that perfect taste. The oil acts as a carrier, pulling out the pungent goodness of the garlic and ensuring that every nook and cranny of your bread is coated with deliciousness. It's this step that really sets this recipe apart from the rest.
I remember once I tried using some cheap olive oil for my garlic bread, and it was a huge mistake! The garlic flavor didn't really come through, and the bread tasted kind of dull. That's when I realized the quality of the oil matters just as much as the garlic.
Choosing Your Garlic and Oil
Now, let's get down to the specifics. For the garlic, fresh is always best. I like to use about 4-5 cloves for a standard baguette, but you can adjust that to your preference. If you're a garlic fiend, go wild! Just be sure to mince it finely so it releases all its flavor. As for the oil, extra virgin olive oil is my go-to. It has a rich flavor that complements the garlic perfectly. But if you don't have any on hand, you can use any neutral-flavored oil, like canola or vegetable oil. Just make sure it's fresh; nobody wants rancid oil ruining their garlic toast.
I've seen some people use garlic powder in their garlic oil, but honestly, it's not the same. Fresh garlic gives you that vibrant, punchy flavor that you just can't get from a powder.
Ingredient | Why It Matters |
|---|---|
Fresh Garlic Cloves | Provide a strong, pungent flavor that infuses the oil. |
Extra Virgin Olive Oil | Acts as the flavor carrier, adding richness and depth. |
The Infusion Technique
Once you've got your garlic and oil ready, it's time to make the magic happen. I like to gently warm the oil in a small saucepan over low heat. Then, I add the minced garlic and let it simmer for a few minutes, just until it becomes fragrant. You don't want to burn the garlic, or it will taste bitter. The goal is to infuse the oil with that garlicky goodness. After a few minutes, remove it from the heat and let it cool slightly. This gives the garlic flavor a chance to fully develop. And there you have it; your flavorful garlic oil is ready to transform your french bread into a taste sensation.
I remember the first time I made garlic oil, I got impatient and heated the oil too much. The garlic burned, and it tasted awful. I learned the hard way that low and slow is the key!
Baking Your French Bread Garlic Toast to Perfection
Baking Your French Bread Garlic Toast to Perfection
Prepping Your Bread for the Oven
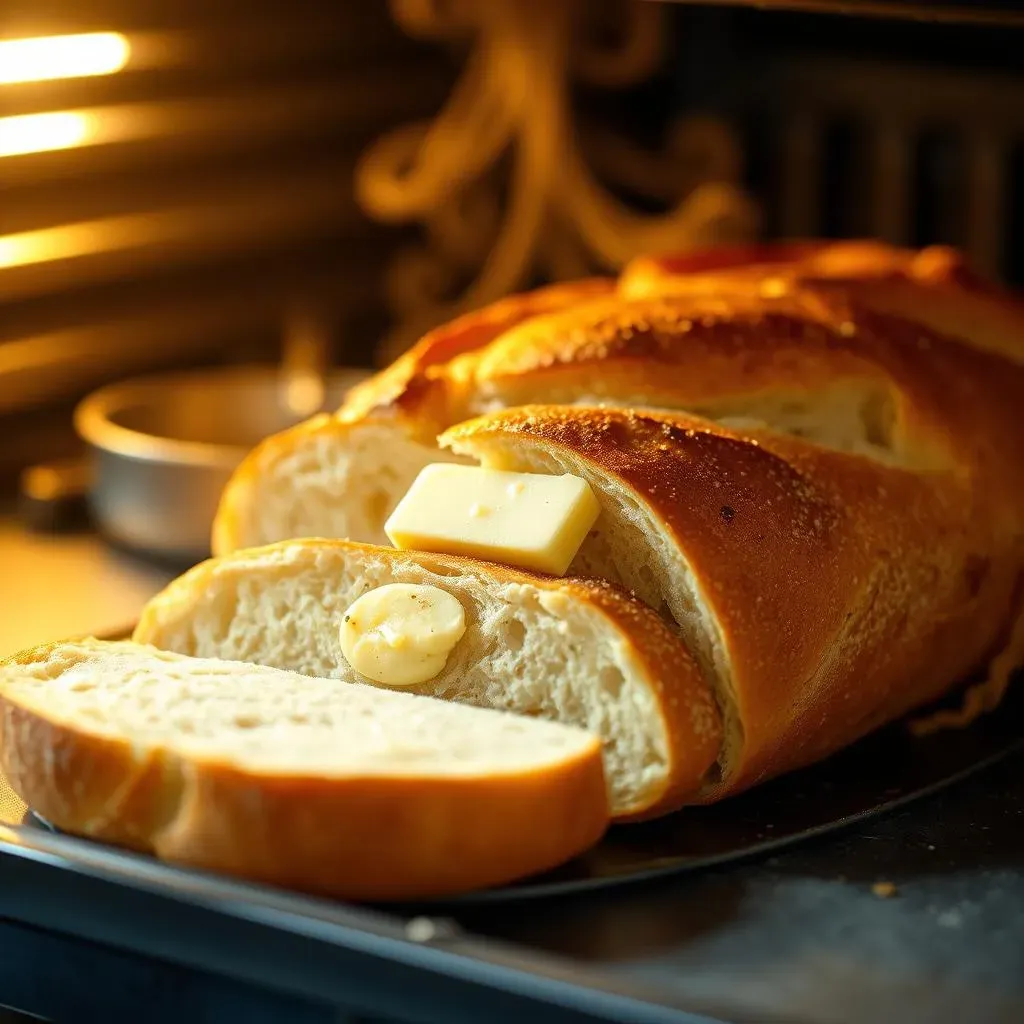
Alright, so you’ve got your amazing garlic oil, and now it's time to get that french bread ready for its transformation. First things first, slice your baguette lengthwise. I like to do this so you have two long halves. This gives you more surface area for that delicious garlic oil. Now, take your garlic oil and brush it generously all over the cut sides of the bread, making sure to get into all those nooks and crannies. Don't be shy with it; this is where all that flavor is going to come from. If you're feeling fancy, you can sprinkle a pinch of dried garlic powder on top for an extra garlicky kick. It’s all about creating that perfect canvas for baking, setting you up for that golden, crispy perfection we’re aiming for.
I once made the mistake of not brushing enough oil on the bread, and it came out dry and kind of sad. That's when I learned that generosity with the garlic oil is key!
Oven Temperature and Timing
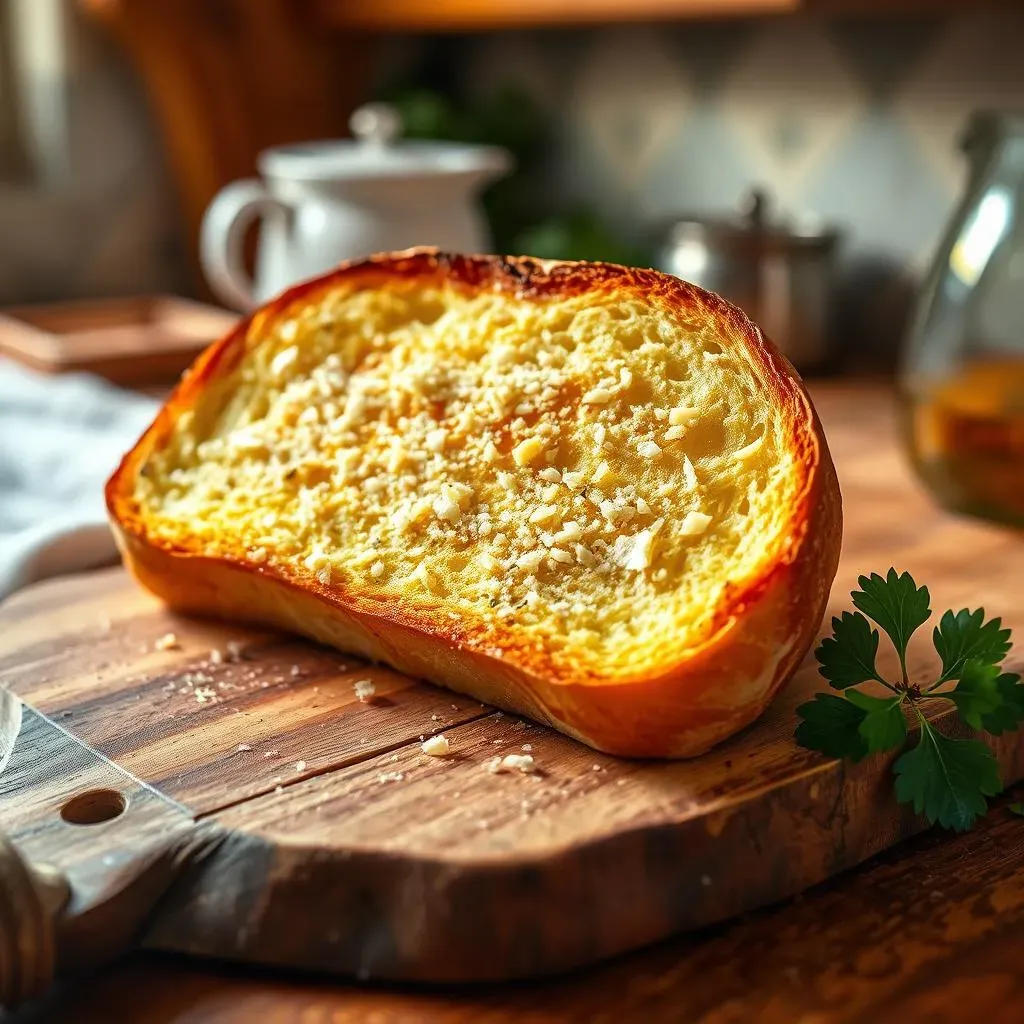
Okay, let's talk temperature. We're aiming for a nice, toasty 350°F (175°C). This is the sweet spot for getting that perfect balance of crispy crust and soft interior. Now, pop your oiled bread halves directly onto the oven rack. This helps the bottom of the bread get nice and crispy. Bake for about 5 minutes. Then, keep a close eye on it. You want the edges to turn golden brown, but you don't want it to burn. The timing might vary a bit depending on your oven, so just keep an eye on it. It's all about achieving that perfect level of toastiness. Once it's done, pull it out and let it rest for a minute before slicing it up.
I remember one time I got distracted and left the garlic toast in the oven too long. It was a bit too dark, but surprisingly, it still tasted amazing! It just had a bit more of a crunch. It's a pretty forgiving recipe, even if you have a mishap.
Baking Step | Details |
|---|---|
Preheat oven | 350°F (175°C) for even baking. |
Bake time | About 5 minutes, or until golden brown. |
Placement | Directly on the oven rack for optimal crispiness. |
Achieving the Perfect Crisp
Getting that perfect crisp is all about technique. Don't overcrowd the oven. This can prevent the heat from circulating properly and result in soggy bread. If you want an extra crispy texture, you can also try broiling the bread for a minute or two at the end of the baking time, but keep a very close eye on it, as it can burn very quickly. The key is to find that sweet spot between a crispy exterior and a soft, chewy interior. It's that contrast that makes this french bread garlic toast so irresistible. And if you have a convection oven, even better! The circulating air will help create an even more golden and crispy result.
I have a friend who insists on using a pizza stone to bake her garlic bread. She says it makes the crust extra crispy. I've tried it, and it does make a difference. It's all about finding what works best for you.
Serving and Storing Your Delicious Garlic Toast

Serving and Storing Your Delicious Garlic Toast
Serving Suggestions: The Perfect Pairings
Alright, you've baked your french bread garlic toast to golden perfection, now what? Well, the beauty of this recipe is that it goes with just about anything! Seriously, it's like the chameleon of side dishes. I love serving it alongside a big bowl of pasta, especially lasagna or spaghetti. The garlicky goodness pairs so well with the rich tomato sauce. It's also fantastic with creamy soups, like tomato or potato soup, where the crispiness of the toast provides a lovely contrast. And if you're having a casual get-together, it's the perfect addition to a charcuterie board or a spread of dips. Don't be afraid to experiment; this garlic toast is a crowd-pleaser no matter how you serve it.
I remember one time I served my garlic toast with some hummus and it was a hit! It was the perfect light appetizer. It’s so versatile, you can really get creative with it.
Dish Type | Pairing Suggestion |
|---|---|
Pasta | Lasagna, spaghetti, any tomato-based sauce. |
Soup | Creamy tomato, potato, or vegetable soups. |
Appetizers | Charcuterie boards, hummus, dips. |
Storing Leftovers: Keeping the Crunch
Okay, let's talk about storing leftovers, because sometimes, even with the best intentions, you end up with a few extra slices. The key to maintaining that perfect crunch is to store them correctly. I recommend letting the garlic toast cool completely, then wrapping it tightly in foil or placing it in an airtight container. This will help keep it from getting soggy. You can store it at room temperature for a day or two, but for longer storage, the fridge is your best bet. When you're ready to enjoy it again, you can pop it back in the oven for a few minutes to reheat and crisp it up. Just keep an eye on it to make sure it doesn't burn. I wouldn’t recommend microwaving it; it tends to get a bit soggy.
I once tried to store my garlic toast in a plastic bag, and it was a soggy mess the next day. I learned the hard way that airtight containers are a must!
"The best way to store leftover garlic toast is to wrap it tightly in foil or place it in an airtight container."
Wrapping Up: Your Go-To Garlic Toast
So, there you have it – the easiest, tastiest way to make french bread garlic toast in the oven. From creating that flavorful garlic oil to baking it to crispy perfection, this method is all about simplicity without sacrificing taste. It's perfect for those nights when you need a quick side, a crowd-pleasing appetizer, or just a comforting snack. Remember, the key is in the quality of your bread and the boldness of your garlic. Now you're armed with the know-how to whip up incredible garlic toast anytime. Go forth and make some garlic toast!