Table of Contents
Ever bite into a piece of garlic bread so good it makes your eyes roll back? I have, and it's usually when it's homemade. Today, I'm sharing my secrets to the most amazing french bread garlic butter recipe. Forget those sad, store-bought loaves, we're talking about the real deal: crispy on the outside, soft on the inside, and bursting with garlicky, buttery flavor. We'll start by uncovering the magic of using french bread as the perfect base for this garlicky goodness, then we'll explore how to make the best garlic butter. I'll guide you step-by-step through the process, ensuring even a beginner can nail this. Finally, I'll drop some pro tips and tricks to elevate your garlic bread game. Get ready to transform simple ingredients into something truly spectacular. Let's get baking!
The Magic of French Bread and Garlic Butter
The Magic of French Bread and Garlic Butter
The Perfect Pair
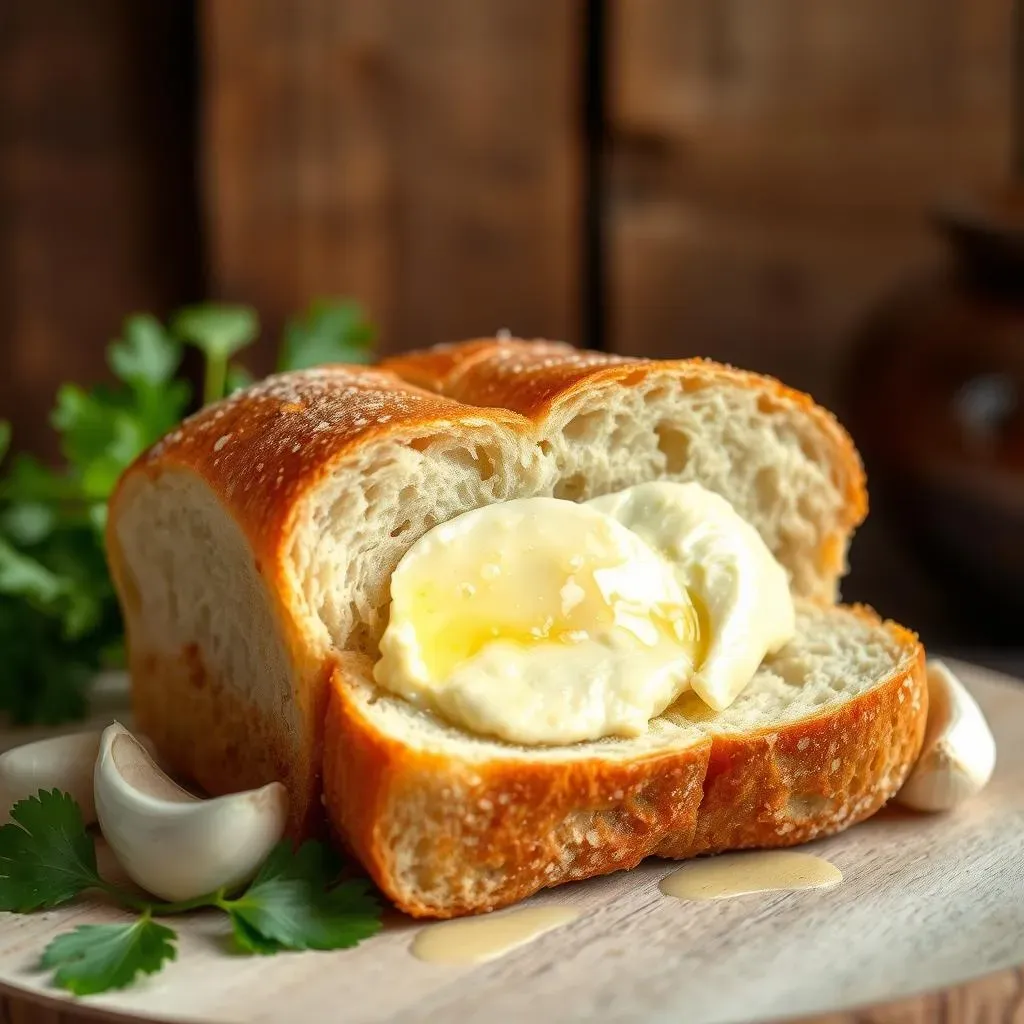
Let's be real, some things are just meant to be together, like peanut butter and jelly, or a sunny day and a cold drink. But for me, french bread and garlic butter are a culinary match made in heaven. The slightly chewy, yet airy texture of french bread is like a blank canvas, waiting to be painted with the bold, savory flavors of garlic and butter. It's not just about the taste; it's the whole experience. The way the bread soaks up the melted butter, becoming all soft and yielding, and the crispiness that develops when it hits the heat. It's pure magic.
I've tried other breads, trust me. Baguettes are okay, ciabatta is alright, but they just don't have that same magic as a classic loaf of french bread. French bread has these lovely big air pockets, perfect for catching all that garlic butter. It's like they were designed for this purpose. The crust gets this incredible crunch, which is a nice contrast to the soft, buttery inside. It's the ideal vessel for flavor, and that's what makes it so special. It's the foundation of a truly great garlic bread experience.
Bread Type | Texture | Garlic Butter Absorption | Overall Experience |
|---|---|---|---|
French Bread | Chewy, airy, soft interior, crunchy crust | Excellent | Superior |
Baguette | Crusty, denser interior | Good | Good |
Ciabatta | Chewy, large holes | Good | Good |
A Flavor Explosion
The beauty of this combo isn't just about the bread; it's also about how garlic butter transforms it. Garlic, when sautéed or roasted, becomes this sweet and pungent flavor bomb. When you mix it with creamy, melted butter, it creates this rich, savory sauce that seeps into every crevice of the french bread. It’s not just butter with garlic thrown in. It’s a union of flavors that complement each other perfectly, creating an irresistible taste.
I’ve seen people use garlic powder or garlic salt, and while those are okay in a pinch, fresh garlic is the way to go. It gives a much more robust and complex flavor. It's like the difference between a simple drawing and a masterpiece painting. The fresh garlic adds depth and warmth. The butter, of course, is the perfect vehicle for all of that flavor, and helps to create that luscious texture we all crave. When they come together, it's like a symphony of taste and texture that you just can't get enough of. So yes, the magic is real.
Crafting the Perfect Garlic Butter for Your French Bread
Crafting the Perfect Garlic Butter for Your French Bread
The Butter Base
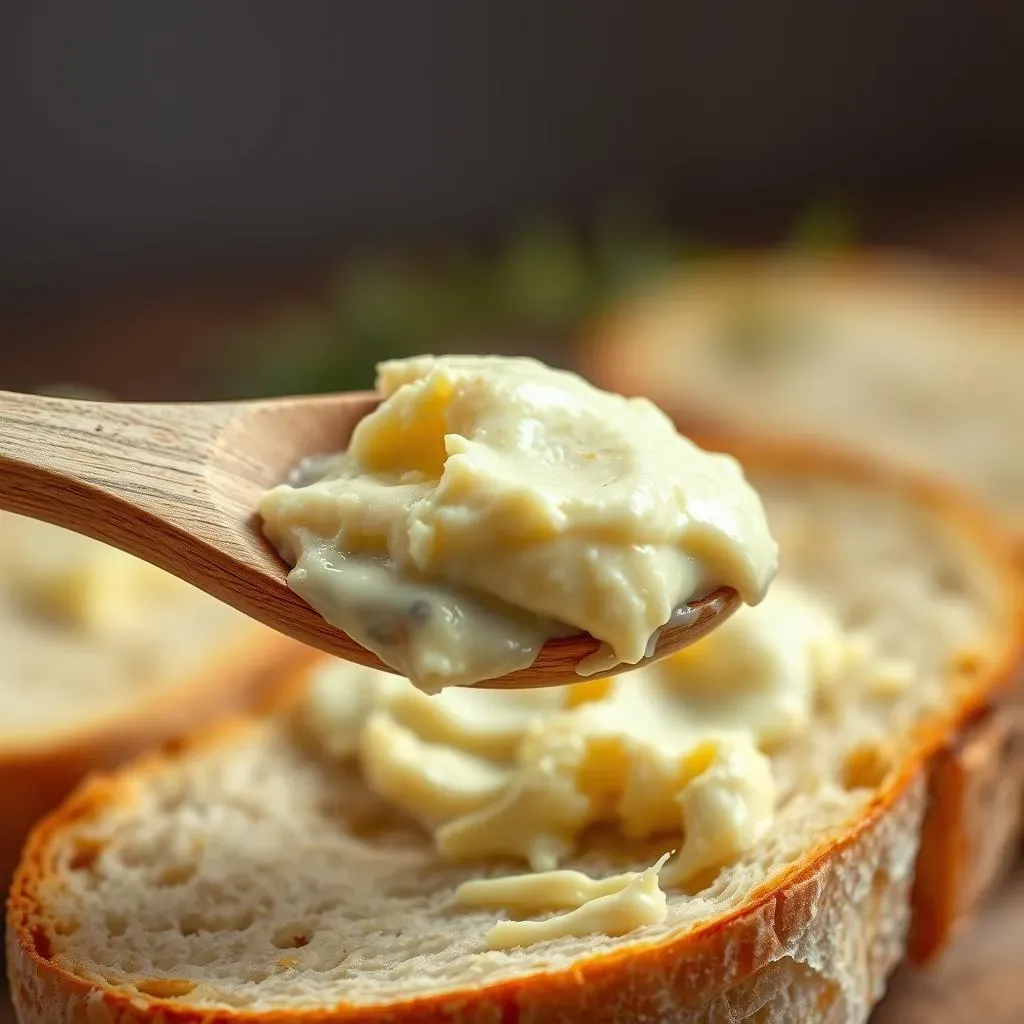
Okay, let's talk butter. It's the foundation of our garlic masterpiece, so we can't just grab any old stick from the fridge. I prefer using unsalted butter for this recipe, that way we can control the salt level. It lets the garlic flavor shine without getting overshadowed. Think of it like a blank canvas that's ready for the garlic to paint all over it. You want it to be soft, not melted, just soft enough to easily mix. You know, when you can press it with your finger and it gives a little? That's the sweet spot. Using softened butter makes it easier to mix with the garlic and other ingredients, ensuring everything blends together nicely.
Now, about the amount. I usually go for about half a cup of butter for a standard loaf of french bread. This gives you enough to generously coat the bread without making it soggy. But if you are a hardcore garlic butter lover, feel free to add a little bit more. Just don't go too crazy, you want the bread to be the star of the show too. It's also important to take the butter out of the fridge about 30 minutes before you start. This will make the mixing process much easier. Trust me, this step is important for getting that perfect, creamy garlic butter.
Garlic Power
Alright, let's get to the star of the show: the garlic. Fresh garlic is non-negotiable here. I know some folks might be tempted to use the pre-minced stuff in a jar, but honestly, it just doesn't compare. Fresh garlic has this amazing pungency and sweetness that you just can't get from the jar. I usually use about 4-6 cloves, depending on how much of a garlic fiend I'm feeling like that day. But remember, the more garlic, the stronger the flavor, so if you are not a big fan, you can use less. It's all about personal preference here.
Now, how you prep the garlic matters too. I like to mince it finely, so it distributes evenly throughout the butter. Some people like to roast the garlic first, which brings out a sweeter, mellow flavor. If you have the time, go for it! It adds a new layer of complexity. But for a quick and easy garlic butter, mincing it finely works just fine. Whether you roast it or mince it, make sure you do not burn it. Burnt garlic tastes bitter and is not pleasant. It's all about the technique here, and with the right technique, you'll have the best garlic butter for your french bread.
Ingredient | Purpose | Notes |
|---|---|---|
Unsalted Butter | Base for the garlic butter | Soften to room temperature |
Fresh Garlic | Main flavor component | Mince finely or roast for a sweeter taste |
Salt | Enhances flavors | Add to taste |
StepbyStep Guide to Making French Bread Garlic Butter Recipe

StepbyStep Guide to Making French Bread Garlic Butter Recipe
Prep Your Ingredients
Alright, let's get down to business. First things first, you've gotta gather your supplies. Grab that loaf of French bread, and slice it lengthwise. I like to use a serrated knife for this, it makes it easier to cut through that crust without squishing the bread. Now, take your softened butter and put it in a medium-sized bowl. Next, mince your garlic. Remember, fresh is best! Now, grab a small bowl and gather your salt and any other herbs you might want to use. I sometimes like to add a pinch of dried parsley for color, but that's totally optional. Having everything prepped and ready to go makes the whole process so much smoother. It's like setting the stage for a great show, you want everything in its place before the curtain rises. This is the first step to garlic bread perfection, so don't rush it!
Mix and Spread the Garlic Butter
Now for the fun part: mixing the garlic butter! In the bowl with your softened butter, add your minced garlic, salt, and any other herbs you're using. Grab a fork or a spoon and start mixing everything together. You wanna make sure that the garlic is evenly distributed throughout the butter. It should look like a creamy, garlicky cloud. Once it's all mixed, it's time to spread it on the bread. Generously spread the garlic butter over the cut sides of your French bread. Make sure you get every nook and cranny. Don't be shy with it! The more garlic butter, the better in my book. This step is where the magic happens, where the bread starts its transformation into a golden, garlicky masterpiece.
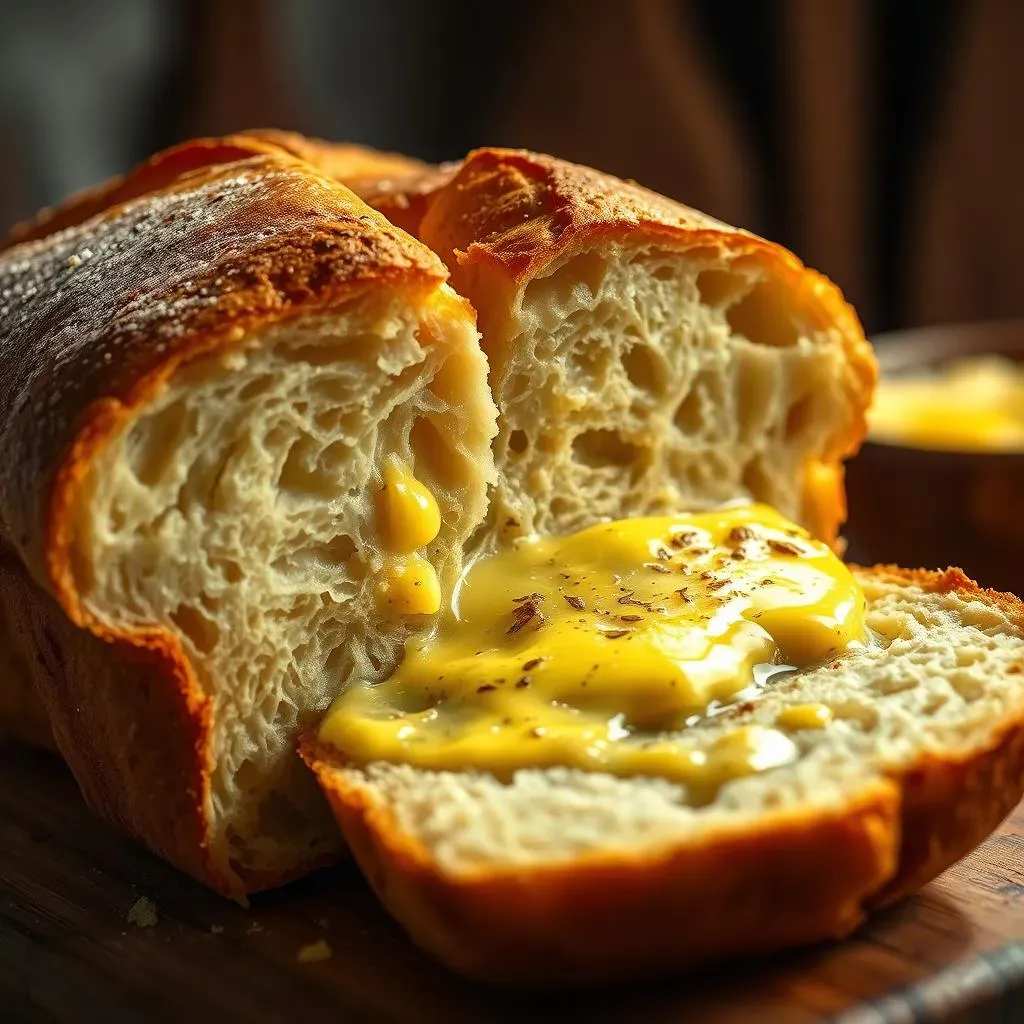
Bake to Golden Perfection
Okay, almost there! Preheat your oven to 400°F (200°C). Place the buttered bread on a baking sheet and pop it in the oven. Now, the baking time can vary depending on your oven, so keep a close eye on it. You're looking for that golden brown color and for the butter to be melted and bubbly. Usually, it takes about 10-15 minutes. Once it's done, take the bread out of the oven and let it cool for a few minutes before slicing and serving. The smell alone is enough to make your mouth water. The bread will be crispy on the outside, soft on the inside, and bursting with that amazing garlic butter flavor. And there you have it: perfect garlic bread, ready to be devoured.
Step | Action | Notes |
|---|---|---|
1 | Prep Ingredients | Slice bread, soften butter, mince garlic |
2 | Mix Garlic Butter | Combine butter, garlic, salt, herbs |
3 | Spread Butter | Generously coat bread with garlic butter |
4 | Bake | Bake at 400°F (200°C) for 10-15 minutes |
Tips and Tricks for the Best French Bread Garlic Butter

Tips and Tricks for the Best French Bread Garlic Butter
Elevate Your Garlic Butter Game
Okay, so you've got the basics down, but let's be real, there's always room to level up. One of my favorite tricks is to add a little bit of olive oil to the butter. It makes the butter even more spreadable and adds a nice richness. I'm talking a tablespoon or two, not a whole glug. Another tip? Don't be afraid to experiment with herbs. While parsley is classic, try adding some fresh thyme or rosemary. It gives a whole new dimension of flavor. And if you're feeling adventurous, a pinch of red pepper flakes adds a lovely kick. It's like adding a secret ingredient to your favorite dish, it just makes it that much better. It's all about finding those small tweaks that make a big difference. You know, the difference between good and great.
Another game-changer is broiling the bread for the last minute or two. This gets the top extra crispy and adds this amazing toasted flavor. Just keep a very close eye on it, because it can go from golden brown to burnt in a matter of seconds. It's like a final flourish, the last brushstroke on a masterpiece. It gives it that extra crunch that makes it irresistible. And speaking of extra, don't be shy with the garlic. If you're a garlic lover like me, add a few extra cloves, you won't regret it. It's all about making it your own. It's your garlic bread, so make it exactly how you love it.
Tip | Benefit |
|---|---|
Add Olive Oil | Increases spreadability and richness |
Experiment with Herbs | Adds depth and complexity |
Broil for the last minute | Extra crispiness and toasted flavor |
Serving Suggestions and Storage
Alright, so your garlic bread is out of the oven, smelling incredible, and you're ready to dig in. But wait, there are a few things to consider. First, let it cool for a few minutes before slicing. This will prevent you from burning your fingers and also lets the flavors meld together a bit more. I like to slice it into thick pieces and serve it warm. It's perfect as a side dish with pasta, soup, or even just on its own. And if you're having a party, it's a total crowd-pleaser. Who doesn't love garlic bread? It's like the ultimate comfort food. It's a dish that's perfect for any occasion.
Now, what if you have leftovers? I mean, if you're like me, there might not be any, but in the off chance that you do, you can store it in an airtight container at room temperature for a day or two. If you want to keep it longer, you can wrap it tightly in foil and freeze it. When you're ready to eat it, you can reheat it in the oven for a few minutes. It won't be quite as good as fresh, but it'll still be pretty darn tasty. But let's be honest, garlic bread is best enjoyed fresh out of the oven. So, my advice? Make enough to eat, maybe a little extra, and enjoy every single bite. It's a treat that's worth every single calorie, in my humble opinion.
- Serve warm
- Store in airtight container at room temperature for a day or two
- Freeze wrapped tightly in foil for longer storage