Table of Contents
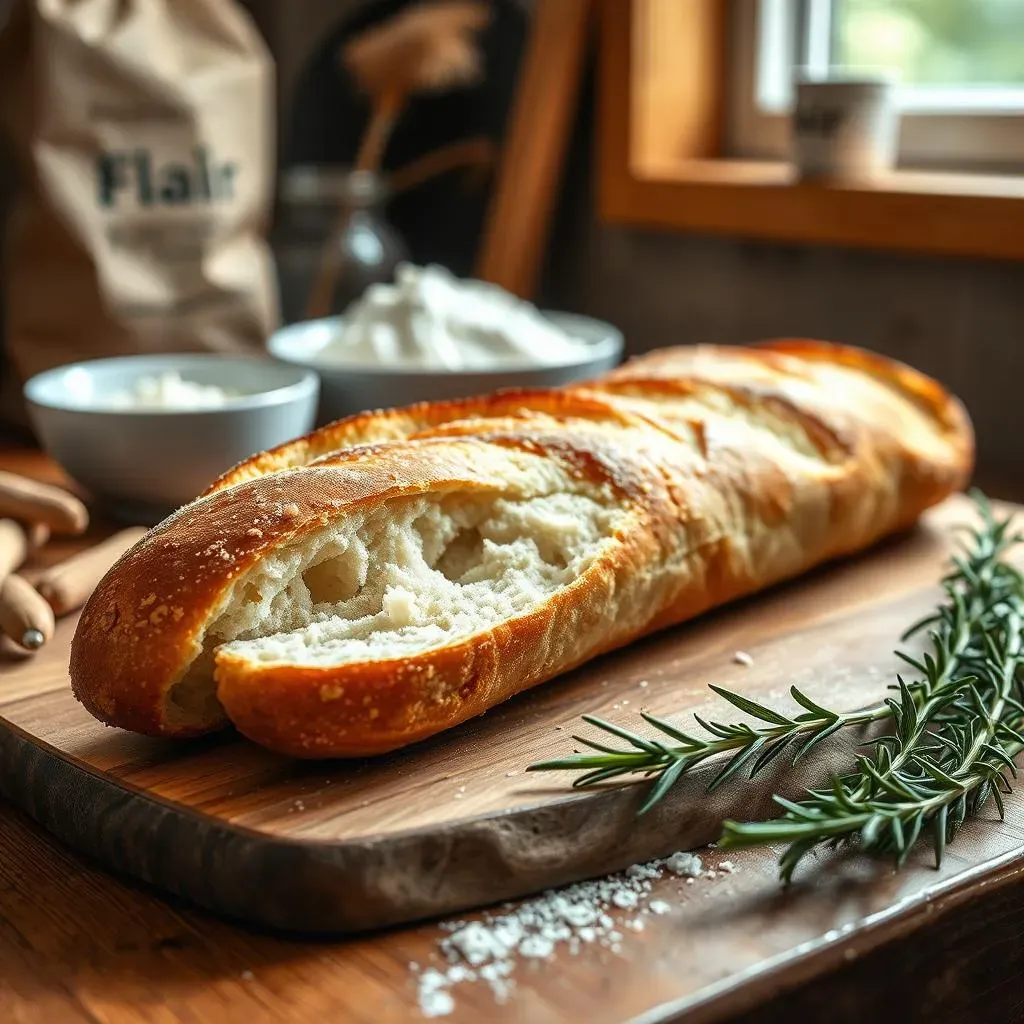
Ever dreamed of enjoying the crisp crust and chewy interior of a perfect French baguette without the hours of kneading and shaping? Your dream is about to come true! This article is your passport to effortless baguette baking, using the magic of your bread machine. We'll explore a foolproof french baguette recipe for bread machine, guiding you through each step, from selecting the right ingredients to achieving that signature golden-brown crust. Forget complicated techniques and lengthy processes; this recipe simplifies the art of baguette making, letting you focus on the delicious results. Inside, you'll discover essential ingredient choices, a clear, step-by-step baking guide tailored for your bread machine, and expert tips and tricks to elevate your baguettes to the next level. Prepare to impress your friends and family with authentically delicious, homemade baguettes—effortlessly crafted in your own kitchen. Get ready to unlock the secrets to bakery-quality bread, all from the convenience of your bread machine. Let's get baking!
Mastering the French Baguette Recipe for Your Bread Machine
Mastering the French Baguette Recipe for Your Bread Machine
Understanding the Magic of Bread Machines
So, you're tackling the French baguette—that iconic symbol of Parisian bakeries—but you want the convenience of a bread machine? Brilliant! Think of your bread machine as your personal, tireless assistant. It handles all the heavy lifting—the mixing and kneading—leaving you free to focus on the artistry of shaping and baking. It's not about shortcuts; it's about smart strategies. This recipe leverages the bread machine's power to create a perfectly developed dough, the foundation for a truly great baguette. You'll still need to shape your baguette, and that's where the fun begins!
Bread Machine Advantage | Traditional Method |
|---|---|
Consistent kneading, saves time and effort | Requires manual kneading, can be strenuous |
Precise control over mixing and fermentation | Relies on experience and feel for dough consistency |
Adapting a Classic Recipe for Bread Machine Success
The key to mastering this recipe lies in adapting a classic French baguette technique to suit your bread machine. Don't just throw all the ingredients in and hope for the best! The order of ingredients matters, as does the liquid temperature. We'll use a slightly modified hydration level to ensure the dough is perfect for machine kneading. Too wet, and the dough will be a sticky mess; too dry, and it’ll be tough. We’ll walk through the precise measurements and steps needed for optimal results in your specific bread machine model. This isn't about changing the essence of the baguette; it's about optimizing the process.
- Use lukewarm water (around 105-115°F) for optimal yeast activation.
- Don't over-flour during the initial mixing phase; the machine will handle it.
- Pay close attention to the dough's final consistency before the shaping stage.
From Dough to Delightful Baguette: The Shaping and Baking
The bread machine does the heavy lifting, but you're the artist who brings the baguette to life. Once the dough cycle finishes, the real fun begins! This is where you’ll shape your dough into those classic elongated loaves, score the surface for expansion, and bake it to a perfect golden-brown finish. We'll cover different shaping techniques, from the classic long baguette to shorter, more rustic variations. We'll also explore the crucial role of scoring—those elegant slashes across the top—in creating a beautiful crust and controlling the rise. Remember, practice makes perfect! Your first few attempts might not be flawless, but keep experimenting; you'll get there.
Essential Ingredients for Perfect Bread Machine French Baguettes
Essential Ingredients for Perfect Bread Machine French Baguettes
The Power of Flour: Choosing the Right One
Let's talk flour—the backbone of any great baguette. You can't just grab any old flour and expect magic. For that authentically crisp crust and chewy crumb, you need a strong bread flour with a high protein content (around 12-14%). This high protein content gives the gluten the strength to trap gases produced during fermentation, leading to a light and airy interior. Avoid all-purpose flour; it simply won't provide the same structure. Think of it like building a house: you wouldn't use flimsy materials for the foundation, would you? Bread flour is your strong foundation for a magnificent baguette.
Using bread flour ensures that your baguette won't collapse during baking. The high protein content leads to a strong gluten network, which is crucial for trapping the carbon dioxide produced during fermentation. This results in a light, airy crumb, a characteristic of good baguettes. Don't be tempted to substitute—it's a crucial ingredient for success!
Flour Type | Protein Content (%) | Suitable for Baguettes? |
|---|---|---|
Bread Flour | 12-14% | Yes |
All-Purpose Flour | 10-11% | No (not ideal) |
Yeast: The Rising Star of Your Recipe
Next up: yeast! This tiny powerhouse is responsible for the magic of rising. We're using active dry yeast, a readily available and reliable option for bread making. Make sure your yeast is fresh; old yeast can lead to a flat, disappointing loaf. Check the expiration date—it's crucial! When you open the packet, it should have a pleasant yeasty aroma. If it smells off, toss it. Fresh yeast is key to a successful baguette.
The amount of yeast you use influences the rise and flavor. Too little, and your baguette will be dense and under-risen. Too much, and it might rise too quickly, leading to a slightly sour taste. We've carefully balanced the yeast quantity in this recipe to ensure a perfect rise and delicious flavor profile. Following the recipe will ensure a perfect outcome.
- Always check the expiration date of your yeast.
- Store yeast in an airtight container in a cool, dark place.
- Use lukewarm water (not hot!) to activate the yeast.
Water, Salt, and a Touch of Sugar: The Supporting Cast
While flour and yeast are the stars of the show, water, salt, and a touch of sugar play vital supporting roles. The water activates the yeast and hydrates the flour, forming the gluten network. Use lukewarm water—too hot, and you'll kill the yeast; too cold, and it won't activate properly. Salt controls yeast activity, enhances flavor, and strengthens the dough's structure. Finally, a tiny bit of sugar provides food for the yeast, giving it a boost. These seemingly minor ingredients are essential for the final product.
Don't underestimate the importance of measuring accurately. Using a kitchen scale is highly recommended for precise measurements, especially for the water and flour. Small variations in these ingredients can significantly impact the final dough consistency and the overall success of your baguette. Accurate measurement is key for a perfect baguette.
StepbyStep Guide: Baking French Baguettes in Your Bread Machine
StepbyStep Guide: Baking French Baguettes in Your Bread Machine
Preparing Your Bread Machine and Ingredients
First things first: gather your ingredients! Make sure everything's measured accurately—a kitchen scale is your best friend here. Then, check your bread machine’s manual for the correct order of adding ingredients. Most machines recommend liquids first, followed by dry ingredients. This ensures even mixing and prevents clumps. Once everything's ready, load your bread machine according to the manufacturer's instructions. It’s that simple!
- Ensure all ingredients are at room temperature, except for the water (lukewarm).
- Double-check measurements to ensure accuracy.
- Consult your bread machine's manual for specific instructions.
The Dough Cycle: Let the Machine Do Its Work
Select the "dough" cycle on your bread machine. This is usually a setting that only kneads and rises the dough, without baking it. The exact time will vary depending on your machine, but it typically lasts around 1.5-2 hours. During this time, the machine will mix, knead, and let the dough rise. Resist the urge to open the lid too often, as this can disrupt the process and affect the final rise. Let the machine work its magic, and you’ll be rewarded with a beautifully risen dough.
Bread Machine Setting | Description |
|---|---|
Dough Cycle | Kneads and rises the dough without baking. |
Bake Cycle (Not used in this step) | Bakes the fully shaped dough. |
Shaping Your Baguettes: From Dough to Loaf
Once the dough cycle is complete, gently remove the dough from the bread machine. It should be smooth and slightly sticky. Lightly flour your work surface. Gently punch down the dough to release any trapped gases. Divide the dough into the desired number of baguettes. Shape each piece into a long, oval shape, tapering the ends slightly. This takes practice, but don't worry—it'll get easier with each attempt.
Scoring and Rising: The Final Touches
Before baking, score the top of each baguette with a sharp knife or lame (a special baking tool). These slashes control the direction of expansion during baking, preventing the baguette from bursting unevenly. Place the shaped baguettes on a baking sheet lined with parchment paper. Cover loosely with plastic wrap and let them rise for another 30-45 minutes in a warm place. This final rise allows the baguettes to puff up beautifully before baking.
- Make shallow, diagonal cuts approximately 1/2 inch deep.
- Avoid deep cuts, which can cause the dough to collapse.
- A warm, humid environment promotes better rising.
Baking Your Masterpiece: To the Oven!
Preheat your oven to 450°F (232°C). For extra crispiness, you can place a pan of water on the bottom rack of the oven. Bake the baguettes for 20-25 minutes, or until they are golden brown and sound hollow when tapped on the bottom. Remove them from the oven and let them cool completely on a wire rack before slicing and enjoying. The aroma alone will be worth the effort!
Tips and Tricks for the Best Bread Machine French Baguette Recipe
Tips and Tricks for the Best Bread Machine French Baguette Recipe
Achieving that Perfect Crust
The hallmark of a great baguette is its crust—crisp, golden-brown, and slightly crackly. To achieve this, consider these tips. First, ensure your oven is adequately preheated. A hot oven is crucial for creating that initial burst of steam that helps the crust set properly. Second, consider adding steam to your oven during baking. This can be done by placing a pan of hot water on the bottom rack or using a steam injection system if your oven has one. The steam creates a humid environment, which helps the crust develop beautifully. Finally, don't overcrowd your baking sheet. This allows for proper air circulation, crucial for even browning and crust development. Remember, a little extra attention to detail goes a long way!
- Preheat your oven thoroughly.
- Add steam to the oven during the first 10-15 minutes of baking.
- Avoid overcrowding the baking sheet.
Inside Scoop: Mastering the Crumb
While the crust is important, the crumb—the interior texture—is equally crucial. A good baguette has a light, airy, and slightly chewy crumb. To achieve this, focus on the proper hydration of your dough. Too much water, and the dough will be sticky and gummy. Too little, and it will be dry and dense. Also, ensure your yeast is fresh and active, as this is key to creating a light and airy crumb. Finally, don't over-knead the dough; this can lead to a tough crumb. The bread machine does most of the work, but it's essential to monitor the dough's consistency. The right technique and attention to detail results in a perfect crumb.
Crumb Characteristic | Cause | Solution |
|---|---|---|
Gummy | Over-hydration | Reduce water slightly next time |
Dry & Dense | Under-hydration, old yeast | Increase water, use fresh yeast |
Troubleshooting Common Issues
Even with the best recipe, things can sometimes go wrong. A flat baguette? This often indicates old yeast or improper kneading. A sticky dough? You may have added too much water. A tough crumb? Over-kneading or using the wrong type of flour are common culprits. Don't be discouraged! Baking is a learning process. Pay attention to your dough's consistency throughout the process. If something seems off, don't hesitate to adjust. Experimentation is key. Remember, even experienced bakers have their share of mishaps. The process of learning from mistakes is part of the joy of baking.