Table of Contents
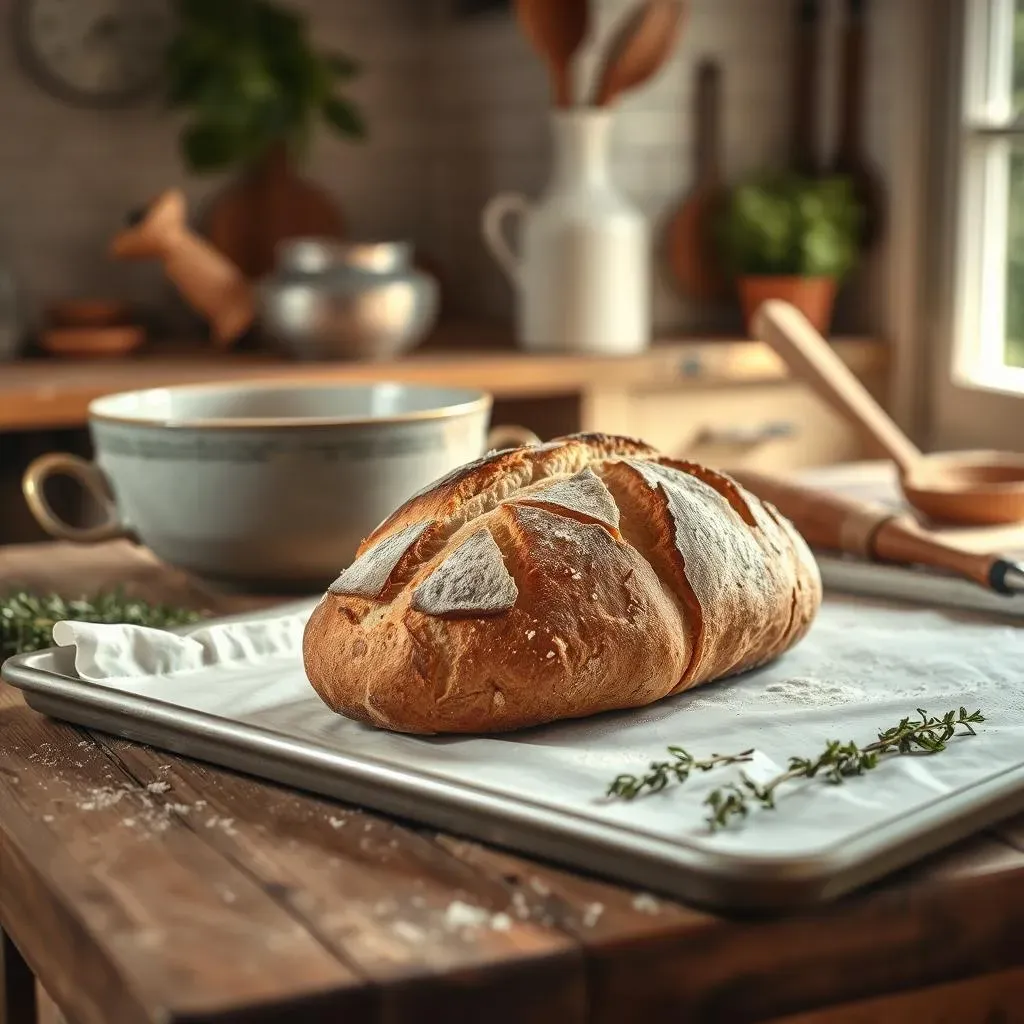
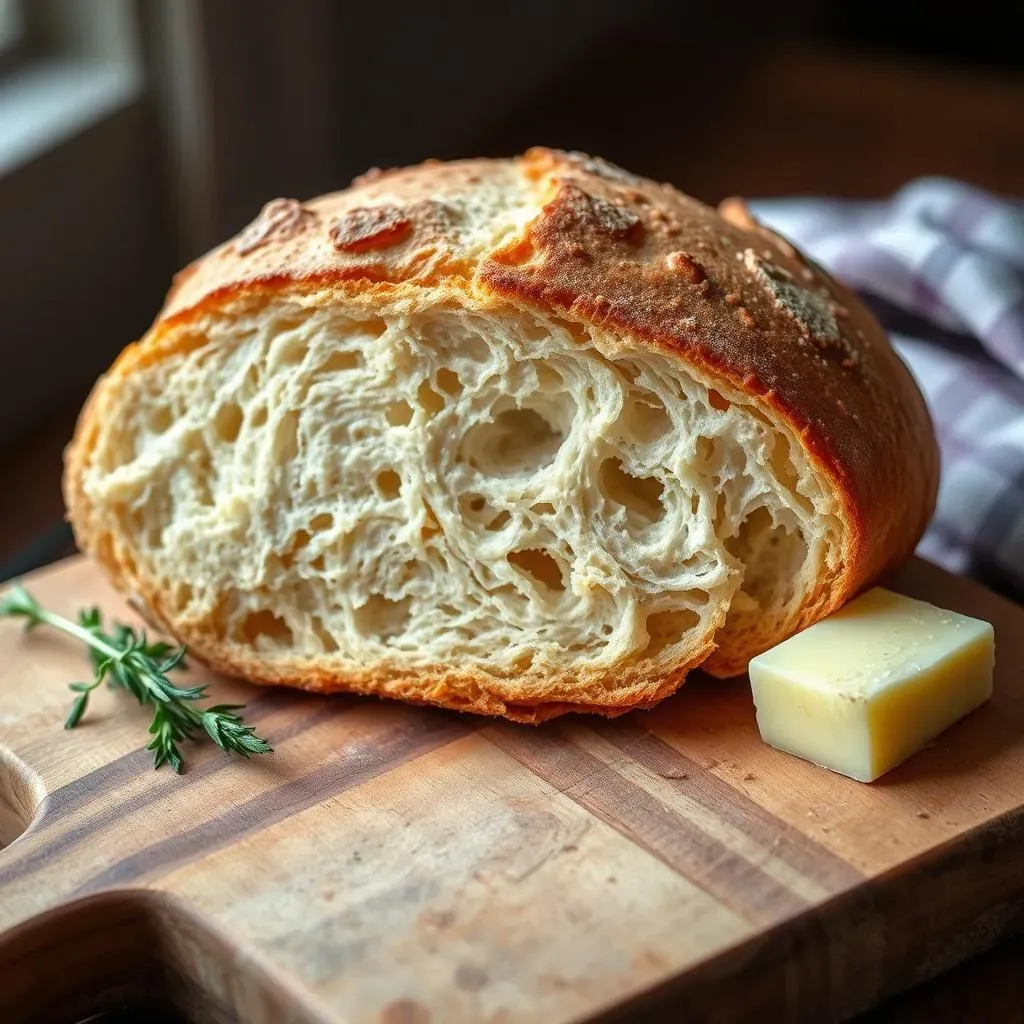
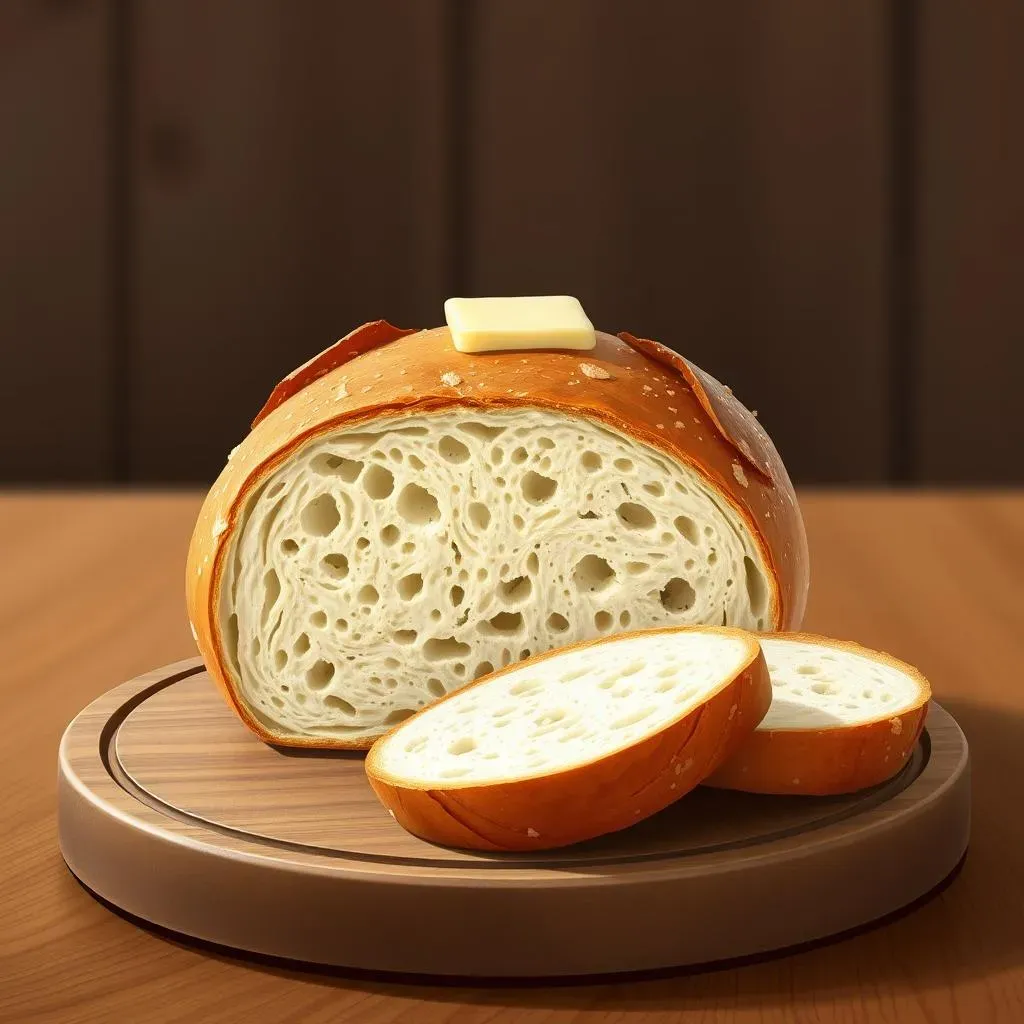
Ever dreamed of biting into a perfectly crusty sourdough French bread, that golden-brown exterior giving way to a light and airy interior? That’s the magic we’re unlocking today with our comprehensive guide to the ultimate crusty sourdough french bread recipe. This isn't just another recipe; it's a journey into the heart of sourdough baking, where we'll demystify the process and empower you to create artisan-quality bread in your own kitchen. We'll walk you through each step of this crusty sourdough french bread recipe, from preparing your starter to achieving that coveted crackling crust. Along the way, we'll share invaluable tips and tricks gleaned from years of baking experience, helping you avoid common pitfalls and troubleshoot any challenges you might encounter. Get ready to transform simple ingredients into a culinary masterpiece – a loaf so delicious, it'll become the star of any meal. Prepare to be amazed as we reveal the secrets to achieving that perfect crusty texture and unforgettable flavor. This crusty sourdough french bread recipe is your passport to baking success!
The Ultimate Crusty Sourdough French Bread Recipe: A StepbyStep Guide

The Ultimate Crusty Sourdough French Bread Recipe: A StepbyStep Guide
Getting Started: The Ingredients
Let's dive right into the heart of this amazing crusty sourdough french bread recipe! First, gather your ingredients. You'll need a robust sourdough starter – fed and bubbly, of course! Then, you'll need bread flour (for that perfect texture), water (lukewarm is key), salt (to enhance the flavors), and a touch of honey or sugar (for feeding the yeast). Don't worry, we'll cover all the specifics in detail, ensuring you have everything you need for baking success. Remember, using high-quality ingredients makes a significant difference in the final product.
The precise measurements will vary depending on the size of loaf you desire. A smaller loaf might use half the amounts listed, while a larger one will need more. But don't panic! We'll provide clear instructions and visual guides to help you through the process. Once you have your ingredients together, the fun begins. The next step is mixing your dough. This recipe is designed to be adaptable, so feel free to experiment with variations as you gain confidence.
- Active Sourdough Starter
- Bread Flour
- Water
- Salt
- Honey or Sugar
Mixing and Kneading the Dough
Now, let's mix the dough! This is where the magic happens. Combine your ingredients in a large bowl, or even better, use a stand mixer with a dough hook. Mix until everything is well combined, then knead the dough until it becomes smooth and elastic. This step develops the gluten, which is crucial for that chewy texture we all crave. If you're kneading by hand, be prepared for a bit of a workout, but the result is well worth the effort! Remember to check out our for more information.
Once you've achieved that perfectly smooth and elastic dough, it's time for the first rise, also known as bulk fermentation. This is a crucial stage where the yeast works its magic, creating those beautiful air pockets in your bread. Place your dough in a lightly oiled bowl, cover it, and let it rise in a warm place for several hours, or even overnight. The exact time will depend on the temperature of your environment and the activity of your starter. The dough should roughly double in size. This is a great time to start thinking about your shaping technique – more on that later!
Step | Description | Time |
|---|---|---|
Mixing | Combine ingredients | 10-15 minutes |
Kneading | Develop gluten | 10-15 minutes |
Bulk Fermentation | First rise | 4-6 hours |
Shaping and Proofing
After the first rise, gently deflate the dough and divide it into the number of loaves you desire. Then comes the fun part: shaping! You can create classic batards (oval loaves) or round boules. This is where you can get creative and personalize your bread. There are tons of techniques available online and in books, but the basic principle is to gently stretch and fold the dough into the desired shape. A well-shaped loaf will rise more evenly and beautifully in the oven. Check out our for some handy tips.
Once you've shaped your loaves, place them in bannetons (rattan baskets) or simply on a floured surface, seam-side up. Cover them loosely and let them proof (second rise) for several more hours. During proofing, the dough will rise again, developing its final structure. The proofing time will depend on your environment and the activity of your starter, but you'll know they are ready when they gently spring back when poked with a finger. Remember, patience is key here.
Baking and Enjoying Your Crusty Loaf
Preheat your oven to a high temperature (around 450°F or 230°C). This is crucial for developing that magnificent crust. You might even consider adding a baking stone or Dutch oven for even better results. Before baking, score your loaves. This is a crucial step that helps control the expansion of the dough during baking, creating beautiful patterns and preventing the crust from cracking unevenly. Take a look at our for scoring techniques.
Bake your loaves until they are deeply golden brown and sound hollow when tapped on the bottom. The exact baking time will depend on your oven and the size of your loaves. Once they're done, carefully remove them from the oven and let them cool completely on a wire rack before slicing and serving. And there you have it – your own crusty sourdough french bread, ready to be enjoyed! Remember to share your baking journey with us! We'd love to see your creations.
- Preheat oven to high temperature
- Score the loaves
- Bake until golden brown and hollow-sounding
- Cool completely on a wire rack
Tips and Tricks for Perfect Crusty Sourdough French Bread
Tips and Tricks for Perfect Crusty Sourdough French Bread
Mastering the Crust
So, you've nailed the basics of our crusty sourdough french bread recipe, fantastic! Now let's talk about elevating your game. Getting that perfect crust is all about controlling moisture and oven spring. A super-hot oven is your best friend here – think 450°F (230°C) or even higher. Consider using a Dutch oven or baking stone to trap heat and create a steamy environment, which helps the crust develop beautifully. Don't be afraid to experiment with different baking times and temperatures to find what works best in your oven. Remember, every oven is unique!
Another crucial element is scoring. Proper scoring allows the dough to expand during baking without tearing, creating those lovely, rustic cracks. There are tons of scoring techniques, from simple slashes to more intricate designs. Practice makes perfect, and don't worry if your first few loaves aren't picture-perfect. The taste will still be amazing! Check out our guide on for more details.
Tip | Description |
|---|---|
High Oven Temperature | 450°F (230°C) or higher for optimal crust development. |
Dutch Oven or Baking Stone | Traps heat and creates steam for a crispier crust. |
Scoring | Controls expansion and creates beautiful patterns. |
Hydration and Flour Power
The hydration of your dough plays a massive role in the final texture. A wetter dough will generally yield a softer crumb, while a drier dough leads to a more compact loaf. Finding the right balance is key – too wet, and your bread might collapse; too dry, and it might be dense. Experiment with different hydration levels to discover your preferred texture. Remember to consider the type of flour you're using; some flours absorb more water than others. For a really detailed guide, check out our .
Flour choice significantly impacts the final result. Bread flour, with its higher protein content, is ideal for sourdough because it develops strong gluten, leading to that signature chewy texture. However, you can experiment with other types of flour, like whole wheat or rye, to add unique flavors and textures. Just keep in mind that these alternative flours might require adjustments to the hydration levels in our crusty sourdough french bread recipe. For more flour-related insights, check out our .
- Experiment with hydration levels
- Bread flour is ideal for strong gluten development
- Consider using alternative flours for unique flavors
Starter Strength and Timing
The condition of your sourdough starter is paramount. A healthy, active starter, bubbly and full of life, is essential for a successful bake. Make sure to feed your starter several hours before you begin mixing the dough. The activity level of your starter will influence the rising times, so be prepared to adjust accordingly. A more active starter will lead to faster fermentation.
Timing is everything in sourdough baking. Allow ample time for bulk fermentation and proofing. Don't rush the process! The longer fermentation times allow the flavors to develop fully and create a more complex, nuanced taste. While our crusty sourdough french bread recipe provides estimated times, pay close attention to your dough. It will tell you when it's ready. For more information on sourdough timing, check out our .
Troubleshooting Common Crusty Sourdough French Bread Problems
Troubleshooting Common Crusty Sourdough French Bread Problems
Why is my crust too soft?
A soft crust is a common sourdough woe! The culprit is often insufficient oven spring. This happens when the dough doesn't expand enough during baking, leading to a less developed crust. Several factors contribute to this. First, your oven temperature might be too low. Remember, a scorching hot oven (450°F or higher) is key for that crackle. Second, your dough might be under-proofed. Ensure your dough has doubled in size during both bulk fermentation and proofing. Finally, insufficient steam can also lead to a less crispy crust. Try adding ice cubes to your oven or using a Dutch oven to create a steamy environment. For more steamy baking tips, check out our for more details.
Another reason for a lackluster crust could be your hydration levels. Too much water in your dough can result in a softer crust. Strive for a balance – the dough should be slightly sticky but not overly wet. Experiment with reducing the amount of water gradually until you find the perfect consistency. The type of flour you use also plays a role. Bread flour, with its higher protein content, is typically best for a good crust, but experimenting with different flours can give you a range of textures. For more insights on flour choices, see our guide on .
Problem | Possible Cause | Solution |
|---|---|---|
Soft Crust | Low oven temperature | Increase oven temperature |
Soft Crust | Under-proofed dough | Proof longer |
Soft Crust | Insufficient steam | Add ice cubes or use a Dutch oven |
My bread collapsed during baking!
A collapsed loaf is heartbreaking, but it's often fixable! The most likely culprit is under-developed gluten. Gluten is the protein network in your dough that gives it structure and allows it to rise properly. Insufficient kneading or a weak starter can both lead to weak gluten. Make sure you're kneading your dough until it's smooth and elastic, passing the windowpane test (you can stretch a small piece of dough thin enough to see light through it). If you're using a stand mixer, ensure you're kneading for an adequate time, and if kneading by hand, be patient and thorough. For a more detailed explanation of kneading, see our .
Over-proofing can also cause collapse. While you want your dough to rise nicely, over-proofing weakens the gluten structure, making it susceptible to collapse during baking. Learn to recognize the signs of a properly proofed dough: it should spring back gently when poked with a finger. If the dough feels too puffy or jiggly, it's likely over-proofed. Another factor is your oven temperature – too low, and your dough might not have the strength to hold its shape. A very hot oven is essential for good oven spring. Check out this for more timing tips.
- Insufficient kneading
- Weak starter
- Over-proofing
- Low oven temperature
My bread is too dense or gummy.
A dense, gummy loaf often indicates issues with fermentation or hydration. If your starter is weak or inactive, the fermentation process won't be robust enough to create a light, airy crumb. Make sure your starter is bubbly and active before you start baking. Proper feeding and maintenance are crucial; consult our for starter care.
Over-hydration is another common cause of gummy bread. If your dough is too wet, the gluten structure won't develop properly, leading to a dense loaf. Try reducing the amount of water gradually until you achieve a slightly sticky but manageable consistency. The type of flour you use also plays a part. Bread flour, with its higher protein content, is generally better for sourdough, but experimenting with other flours might require adjustments to the hydration levels. For more information on different types of flours and their properties, take a look at our .