Table of Contents
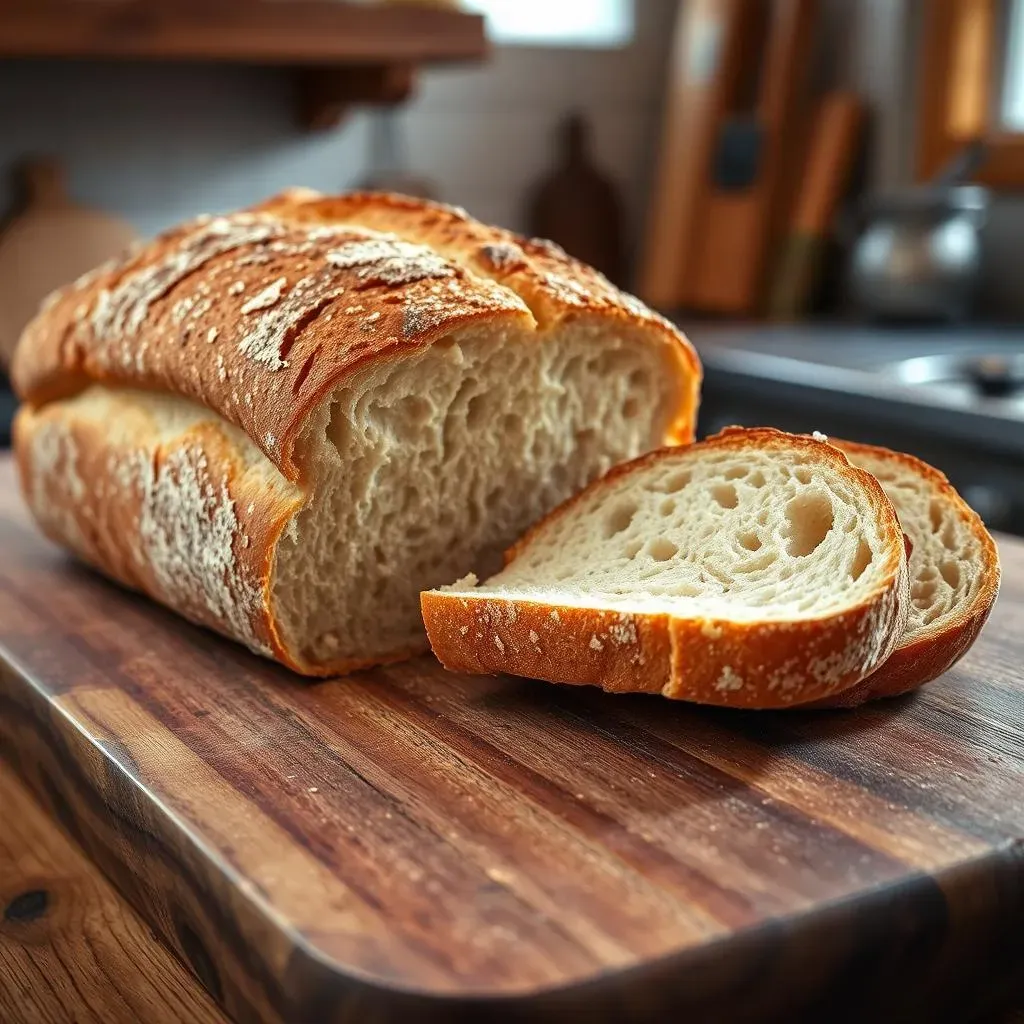
Have you ever dreamed of biting into a perfectly crusty sourdough French bread, that irresistible crackle giving way to a fluffy, airy interior? This isn't just a culinary fantasy; it's achievable! This article is your comprehensive guide to mastering the art of making crusty sourdough French bread. We'll unravel the secrets behind that perfect crust, starting with building a robust sourdough starter – the heart of any great sourdough. Then, we'll explore the nuances of shaping and scoring your dough, techniques that directly impact the final crust's texture and appearance. Finally, we'll delve into baking techniques, including steam management, to ensure your crusty sourdough french bread emerges golden brown and gloriously crisp. Get ready to embark on a delicious journey, transforming simple ingredients into a masterpiece of baking.
Secrets to a Perfectly Crusty Sourdough French Bread
Secrets to a Perfectly Crusty Sourdough French Bread
Understanding Hydration
The key to a fantastic crust lies in the hydration of your dough. Too little water, and you'll end up with a dense, tough loaf. Too much, and you might have a sticky mess. Aim for a dough that's slightly tacky but still manageable. This balance is crucial for developing the right gluten structure, which contributes to both the airy crumb and the crisp exterior. Think of it like building a house: you need a strong foundation (gluten) to support a beautiful facade (crust).
Don't be afraid to experiment with hydration levels. Start with a recipe's suggested amount, but keep notes on the dough's consistency. Over time, you'll learn what works best for your flour, your environment, and your personal preferences. Remember, even experienced bakers adjust their hydration based on the weather – a humid day might call for slightly less water.
The Power of Steam
Steam plays a vital role in creating that signature crackly crust. During the initial phase of baking, steam creates a protective layer around the dough, preventing the surface from drying out too quickly. This slow drying process allows the dough to expand properly and develop a strong, well-defined crust. Once the crust has set, reducing the steam encourages browning and crispness.
There are several ways to introduce steam into your oven. You can place a pan of hot water on the bottom rack, use a steam injection system (if your oven has one), or even throw a few ice cubes into the hot oven at the start of baking. Experiment to find what works best in your kitchen. Think of steam as a secret weapon in your baking arsenal – use it wisely!
Method | Pros | Cons |
|---|---|---|
Hot Water Pan | Simple, readily available | Requires careful handling |
Ice Cubes | Quick, easy | Can be messy |
Steam Injection | Consistent, even steam | Requires special oven feature |
Mastering the Sourdough Starter for Crusty Bread
Mastering the Sourdough Starter for Crusty Bread
The Importance of a Healthy Starter
So, you're ready to bake amazing crusty sourdough French bread? Fantastic! But before we even think about flour and water, let's talk about the unsung hero: your sourdough starter. This isn't just some random blob of dough; it's a living ecosystem of wild yeasts and bacteria, and its health directly impacts the flavor and texture of your final loaf. A vibrant, active starter is essential for achieving that signature sourdough tang and a beautifully open crumb. A sluggish starter, on the other hand, can lead to a dense, flavorless loaf. Think of it as the foundation of your baking – a strong starter equals a strong loaf.
Feeding your starter regularly is key to keeping it happy and active. This involves providing it with fresh flour and water at regular intervals, allowing it to feed and multiply. The frequency of feeding depends on the temperature and the type of flour you use. A warmer environment might require more frequent feedings, while a colder one might allow you to stretch things out a bit. Pay close attention to your starter's activity; a bubbly, risen starter is a happy starter.
Recognizing a Thriving Starter
How do you know if your starter is truly thriving? Look for several key indicators. First, there should be significant bubbling activity – a sign that the yeasts and bacteria are happily munching away on their floury feast. The starter should also double (or even triple) in size after feeding, a clear indication of healthy fermentation. Finally, the aroma should be pleasant and slightly sour, not unpleasant or off-putting. A strong, pleasant smell is a good sign that the right bacteria and yeasts are thriving.
If your starter isn't showing these signs, don't panic! Sometimes starters go through periods of less activity. Try adjusting your feeding schedule or the temperature of its environment. If the problem persists, you might need to refresh your starter with a small amount of fresh flour and water. Remember, patience is key when working with sourdough. Think of it like nurturing a delicate plant – it needs care and attention to flourish.
Indicator | Description | Significance |
|---|---|---|
Bubbling | Visible bubbles throughout the starter | Active fermentation |
Rise | Significant increase in volume after feeding | Healthy yeast growth |
Aroma | Pleasant, slightly sour smell | Proper fermentation process |
Starter Consistency and its Impact
The consistency of your starter also plays a role in the success of your crusty sourdough French bread. A starter that's too thick or too thin can affect the hydration of your dough, leading to issues with gluten development or baking. Aim for a consistency somewhere between pancake batter and thick yogurt. Too thick, and it might not incorporate well into the dough. Too thin, and it might make your dough too wet.
Remember, consistency is influenced by the type of flour you use, the amount of water you add during feeding, and the temperature of your environment. Keep detailed notes on your starter's behavior. This will help you understand its nuances and adjust your feeding practices accordingly. Don't be afraid to experiment and find what works best for you. With time and observation, you'll become a sourdough starter whisperer!
Shaping and Scoring Techniques for Crusty Sourdough French Bread
Shaping and Scoring Techniques for Crusty Sourdough French Bread
Shaping Your Dough: From Blob to Beauty
Alright, friend, let's talk shaping! You've got this amazing, bubbly dough – the result of all that hard work with your starter. Now it's time to transform it into something beautiful. The way you shape your dough directly impacts the final look and even the texture of your crusty sourdough french bread. A gently handled, properly shaped loaf bakes more evenly, resulting in a more consistent crust. Think of it as sculpting – you're coaxing the dough into its final form.
For a classic baguette shape, gently stretch and fold the dough into a rough rectangle. Then, roll it up tightly from one of the long sides, pinching the seam to seal it. For a round boule, simply tuck the edges of the dough underneath, creating a smooth, tight ball. Practice makes perfect here, so don't be discouraged if your first few attempts aren't picture-perfect. Remember, even the most experienced bakers started somewhere! You can always refer to our amazing sourdough French bread recipe for visual guidance.
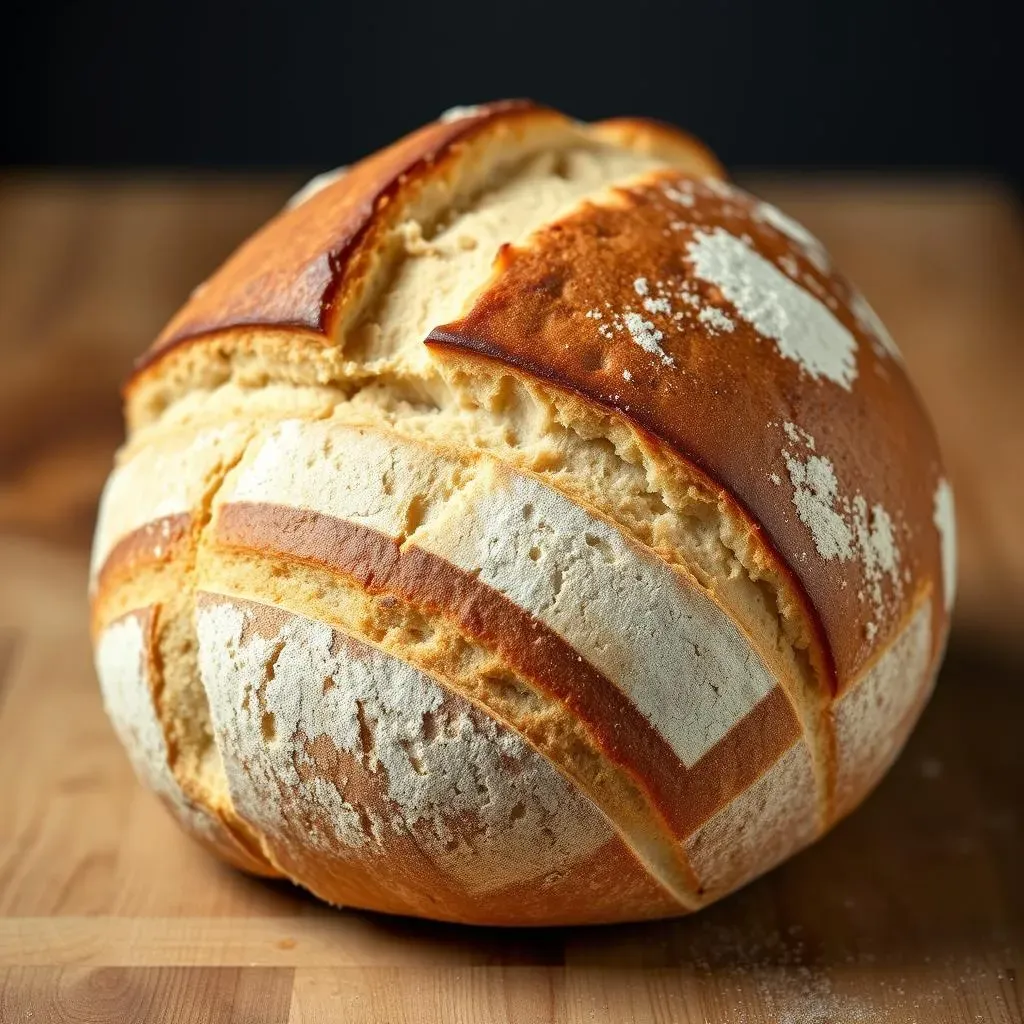
Scoring: The Art of the Slash
Scoring, or slashing, your dough before baking isn't just for show; it's a crucial step in controlling the expansion of your loaf during baking. Proper scoring allows the dough to rise evenly and prevents it from bursting unpredictably. The slashes also create that signature crusty texture and visual appeal. Think of it as giving your loaf breathing room – it allows for controlled expansion during baking.
The depth and direction of your slashes influence the final look of your crusty sourdough french bread. Shallow slashes create a more subtle effect, while deeper cuts result in dramatic openings. Experiment with different patterns – classic diagonal slashes, crosshatches, or even more artistic designs. There’s no right or wrong way. Our ultimate guide to sourdough baking covers scoring in detail, with plenty of visual examples.
Slash Type | Description | Effect |
|---|---|---|
Diagonal | Simple, angled cuts | Even expansion, classic look |
Crosshatch | Intersecting diagonal cuts | More dramatic openings |
Artistic | Creative designs | Unique visual appeal |
Tools of the Trade: Lame and Razor Blade
Now, you might be wondering, what kind of tool do I use for scoring? A lame, a specialized razor-blade tool designed for scoring bread dough, is the ideal choice. Its sharp, thin blade creates clean, precise cuts that prevent tearing. However, if you don't have a lame, a very sharp razor blade or even a very sharp knife will do the trick. Just make sure your blade is incredibly sharp to avoid tearing the dough. A dull blade will create ragged cuts and potentially damage the dough.
Practice your scoring technique on a piece of scrap dough before you tackle your precious loaf. This allows you to get a feel for the blade and develop a consistent hand. Remember, a little practice goes a long way in achieving beautiful and even scoring. Check out our post on the ultimate guide to sourdough for more tips and tricks on tools and techniques.
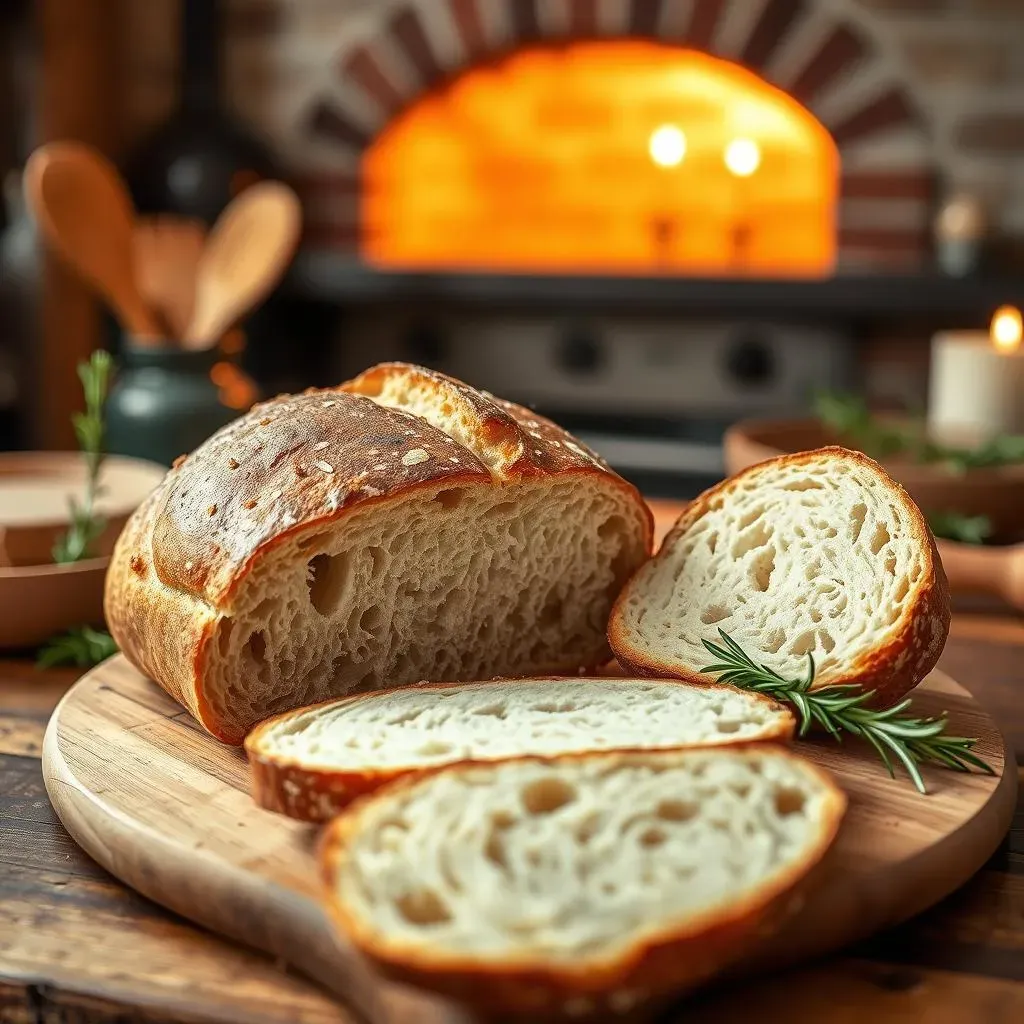
Baking and Finishing Touches for the Perfect Crusty Sourdough Loaf
Baking and Finishing Touches for the Perfect Crusty Sourdough Loaf
Oven Spring and Temperature
The oven spring, that dramatic rise your loaf experiences in the first few minutes of baking, is crucial for creating a beautiful, airy crumb and a crisp crust. This is where the magic happens! Proper oven temperature is key here. Too low, and your loaf might not spring enough. Too high, and the outside will burn before the inside is cooked through. A preheated oven, ideally at 450°F (232°C), provides the intense heat needed for a powerful oven spring. Think of it as a rocket launch – you need that initial burst of energy to get things moving.
Monitoring the oven temperature is critical, especially in older ovens that might have hot spots. A reliable oven thermometer is a great investment. You can also rotate your loaf halfway through baking to ensure even browning. This is especially important if you notice one side browning faster than the other. Remember, consistent heat is your best friend when it comes to baking a perfect crusty sourdough French bread. For more in-depth tips on oven temperatures and baking times, check out our .
- Use an oven thermometer
- Rotate the loaf for even baking
- Maintain consistent heat
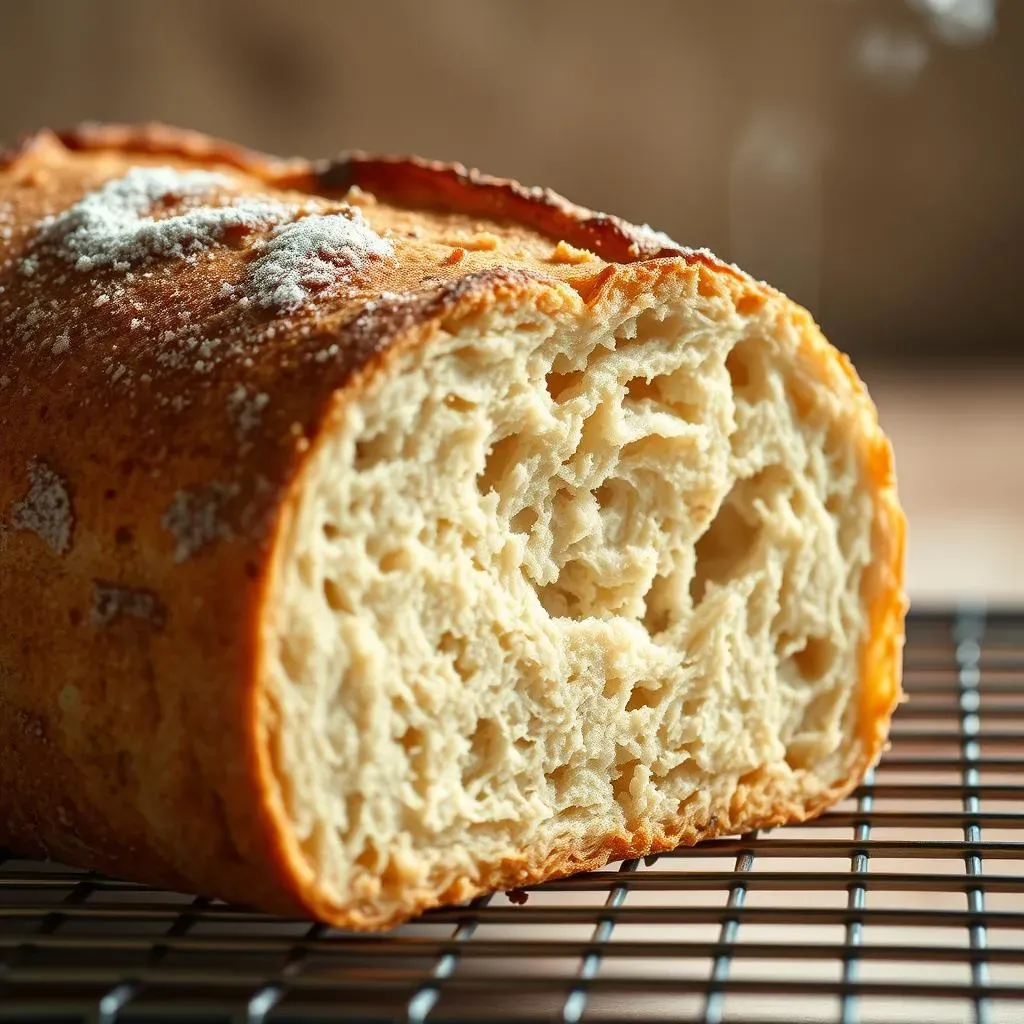
Cooling and Storage: Preserving that Crispness
Once your crusty sourdough French bread is baked to perfection, resist the urge to slice into it immediately! Allow it to cool completely on a wire rack before slicing. This is essential for preserving that beautiful crisp crust. Slicing a warm loaf will result in a soggy crust, defeating all your hard work. Think of it as giving your bread time to settle – it’s like letting a perfectly poured cocktail sit before savoring it.
Once cooled, store your loaf in an airtight container at room temperature for up to 3 days or in the freezer for longer storage. To refresh a frozen loaf, simply reheat it in a low oven until warmed through. This will help restore some of its initial crispness. For more tips on storing your bread and keeping it fresh, take a look at our which includes storage recommendations.
Storage Method | Duration | Notes |
|---|---|---|
Room Temperature | Up to 3 days | Airtight container |
Freezer | Several weeks | Wrap tightly in plastic wrap or foil |