Table of Contents
Ever dream of that perfect, golden-brown garlic bread, the kind that makes your mouth water just thinking about it? Well, you're in the right spot! We're not talking about those sad, store-bought loaves that taste like cardboard. We're talking about the real deal, the "best garlic french bread recipe" that'll have everyone begging for seconds. This isn't just any recipe; it's a journey to garlic bread perfection, and it's easier than you might think. Forget complicated techniques and fancy ingredients; we're keeping it simple and delicious. In this article, I'll walk you through the secrets to achieving that perfect balance of crispy crust, soft interior, and bold garlic flavor. We'll cover everything from choosing the right bread to making the most flavorful garlic butter. We'll then assemble, bake, and finally explore tips on how to serve and store this amazing creation so you can enjoy it anytime. So, grab your apron, and let's get baking!
The Secret to the Best Garlic French Bread
The Secret to the Best Garlic French Bread
Choosing the Right Bread
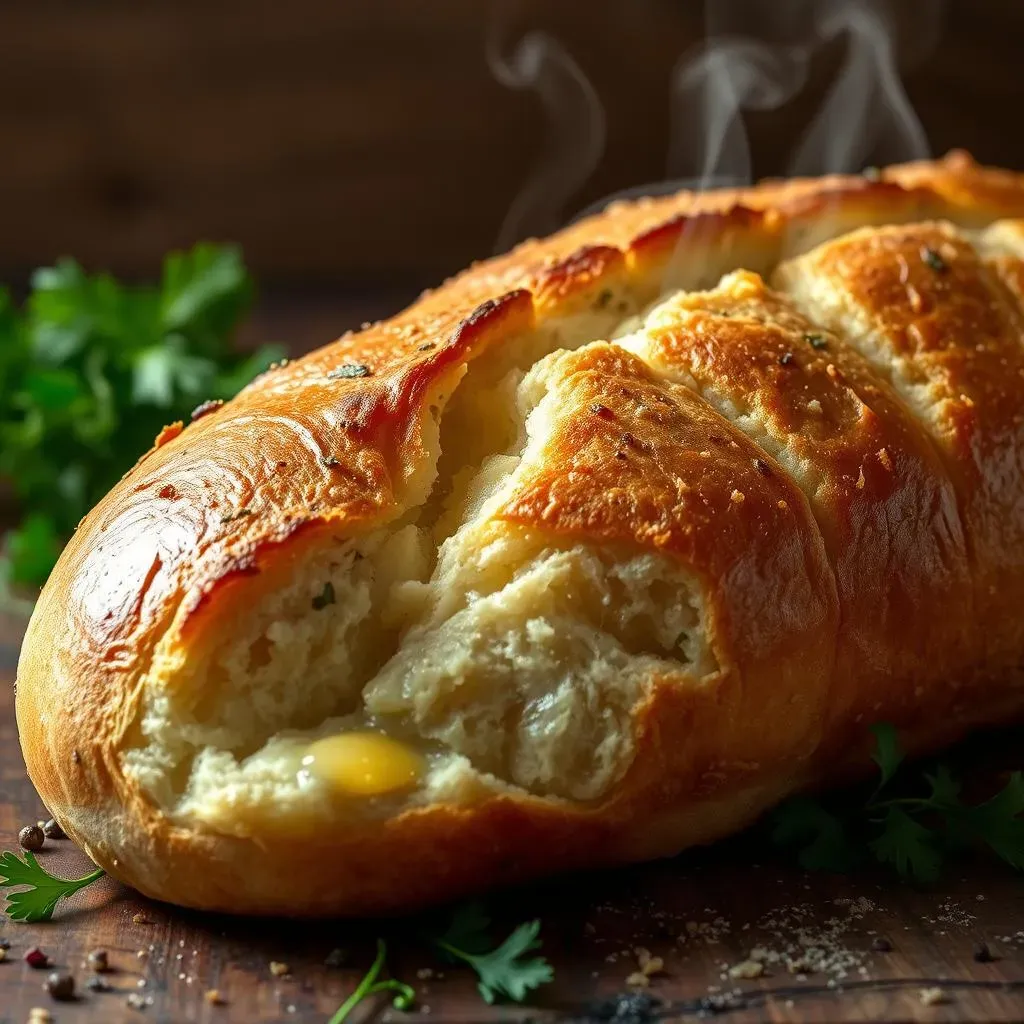
Okay, so you want the best garlic bread, right? It all starts with the bread. Forget those flimsy, pre-sliced loaves. We're aiming for a sturdy French bread, the kind that's got a nice, thick crust and a soft, chewy inside. Think of it as the foundation of your garlic bread masterpiece. The bread needs to be able to hold up to all that buttery, garlicky goodness without turning to mush. A good French loaf will have those lovely air pockets that soak up flavor like a sponge. Don't be shy, grab the freshest loaf you can find; it'll make a world of difference.
Ever wondered why some garlic bread is just…meh? It's often because the bread is too dense or too soft. We need that perfect balance of crust and crumb. A great french loaf should feel firm and have a slight give when you press it. And hey, if you're feeling adventurous, try a sourdough or Italian loaf, but for this recipe, french is the way to go. It's classic, reliable, and always a crowd-pleaser. Trust me, the bread is not just a vehicle for garlic butter; it's a star in its own right.
The Power of Fresh Garlic
Now, let's talk about garlic. This is where the magic really happens. We're not using garlic powder or pre-minced stuff from a jar. Nope, we're going for fresh, glorious garlic cloves. The difference is night and day. When you use fresh garlic, you get that pungent, slightly spicy kick that makes garlic bread so irresistible. It's like a tiny explosion of flavor in every bite. Think about it, the aroma alone is enough to make you hungry.
Don't be afraid to use a lot of garlic either. I like to use about 4-6 cloves for a standard loaf, but if you're a true garlic lover, go wild! Just make sure you mince it finely so that the flavor is evenly distributed. And remember, fresh garlic doesn't just taste better; it smells better too. It's the kind of smell that makes your kitchen feel like a cozy Italian trattoria. It's this attention to detail that elevates your garlic bread from good to unforgettable.
Ingredient | Why It Matters |
|---|---|
Fresh French Bread | Provides the perfect texture and structure. |
Fresh Garlic | Delivers a robust and authentic garlic flavor. |
The Butter Factor
Last but not least, let's talk about butter. This isn't the time to skimp. We're using real, unsalted butter. You need that creamy, rich base to carry all that garlic goodness. Salted butter can sometimes throw off the balance, so we're sticking with unsalted so we can control the salt ourselves. The butter should be softened enough to spread easily, but not melted. Think of it like the glue that binds all the flavors together.
The butter also helps create that beautiful golden-brown crust we all love. When it melts in the oven, it interacts with the bread to create that perfect, slightly crispy texture. It's all about the details, people! The right bread, fresh garlic, and good butter – that's the holy trinity of amazing garlic bread. It's simple but effective. It's all about using quality ingredients and letting them shine.
Making Your Own Garlic Butter and Assembling the Bread
Making Your Own Garlic Butter and Assembling the Bread
Garlic Butter: The Flavor Bomb
Alright, now for the fun part: making the garlic butter. This is where we turn simple ingredients into a flavor explosion. Take that softened, unsalted butter and put it in a bowl. Then, add your finely minced garlic, and a pinch of sea salt. You can also add some fresh parsley, if you like that herby touch, but it's completely optional. I personally love the bright flavor that fresh parsley gives, but sometimes I leave it out if I want a more intense garlic hit.
The key is to mix everything really well so the garlic is evenly distributed. You don't want one bite to be a garlic bomb and the next to be bland. The consistency should be creamy and spreadable. If your butter is too cold, you can warm it up slightly, but be careful not to melt it completely. This garlic butter is the heart and soul of our garlic bread, so give it the attention it deserves. Think of it as the secret sauce that transforms ordinary bread into something extraordinary.
Spreading the Love (aka Garlic Butter)
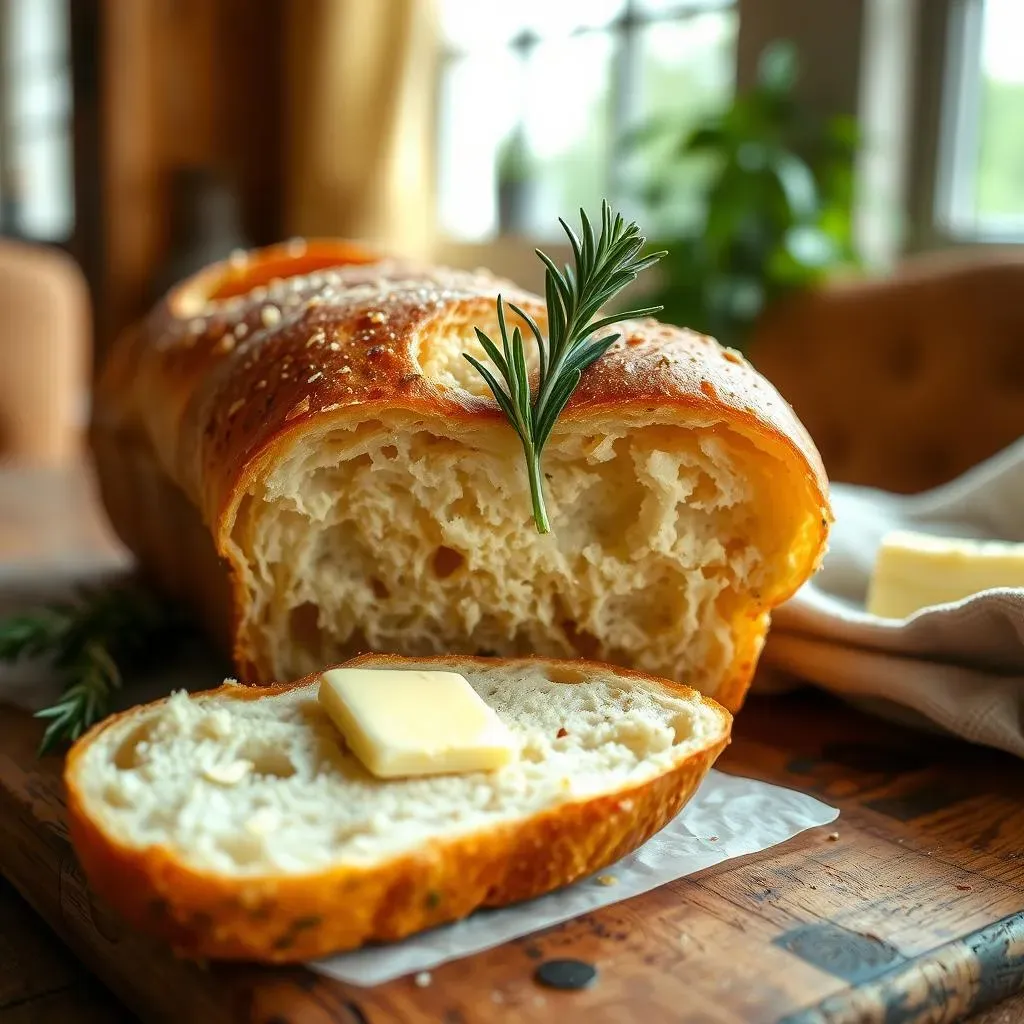
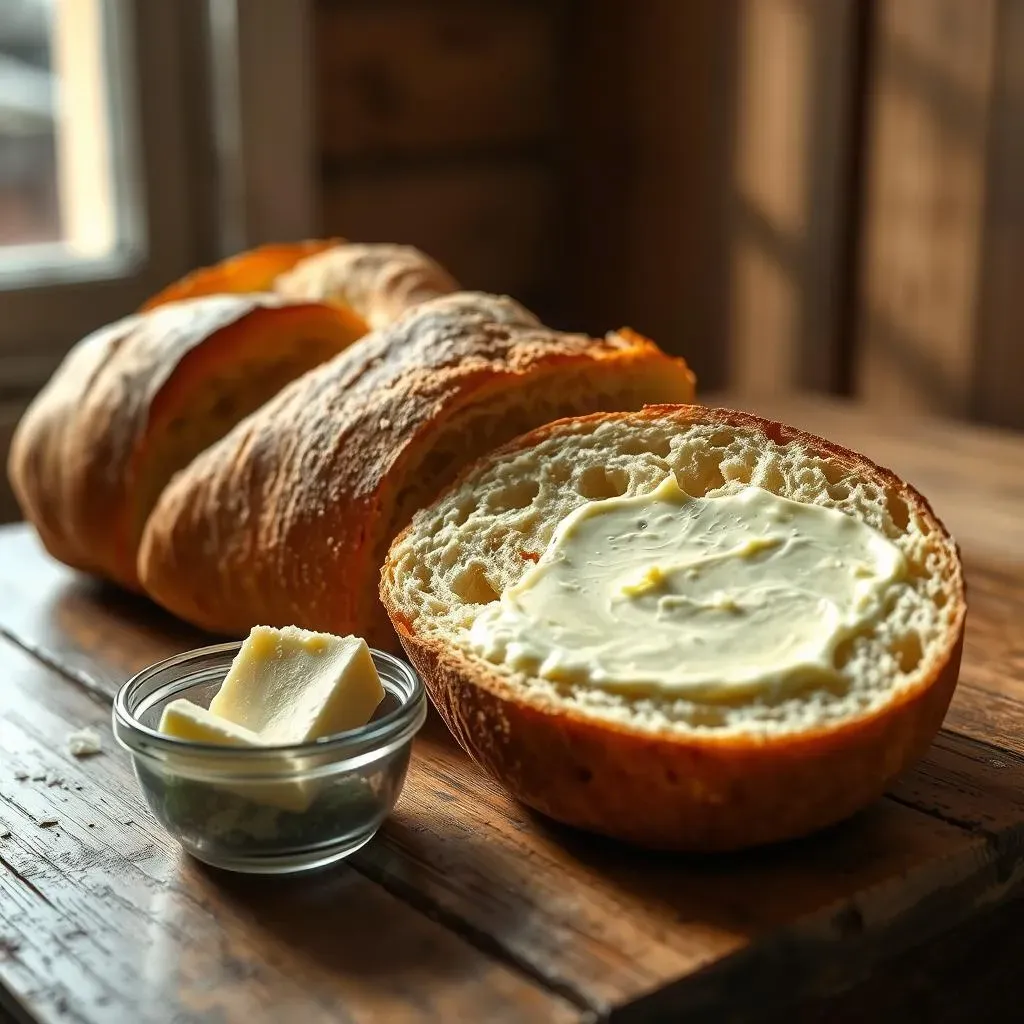
Now that our garlic butter is ready, it's time to get it on the bread. Take your French loaf and slice it lengthwise. You can either cut it all the way through or leave a hinge, like a book. I usually go for the hinge method, because it’s easier to manage. Now, take a generous amount of your garlic butter and spread it evenly over the cut sides of the bread. Don't be shy, we want every nook and cranny to be covered in that deliciousness. This isn't the time for minimalism.
Make sure you get all the way to the edges, because that's where the crust gets extra crispy and flavorful. Think of it like painting a masterpiece, but instead of paint, you’re using garlic butter. If you're feeling fancy, you can sprinkle a little extra sea salt and maybe even some parmesan cheese on top. But honestly, the garlic butter is so good on its own you don't really need much else. We’re building layers of flavor here, and this step is key to making sure every bite is packed with garlic goodness.
Step | Description |
|---|---|
Mix | Combine softened butter, minced garlic, and salt. |
Spread | Apply the garlic butter evenly on the cut sides of the bread. |
Ready for the Oven
Once your bread is slathered in garlic butter, it's ready for the oven. Place it on a baking sheet and get ready for some serious deliciousness. The oven does its magic at 400 degrees, not too hot, not too cold. It needs about 10 to 15 minutes, or until the edges are golden brown and the butter is bubbly. Keep a close eye on it, because you don't want it to burn. The smell alone will make your kitchen feel like a gourmet bakery.
Remember, the key is to get the bread nice and toasty without drying it out. The best part is watching the butter melt and soak into the bread, creating all those amazing flavors and textures. This is where the magic happens. When it comes out of the oven, it should be golden, fragrant, and completely irresistible. Think of it like the final act of a culinary performance. And trust me, it’s going to be a showstopper.
Baking, Serving and Storing Your Garlic French Bread
Baking, Serving and Storing Your Garlic French Bread
Baking to Golden Perfection
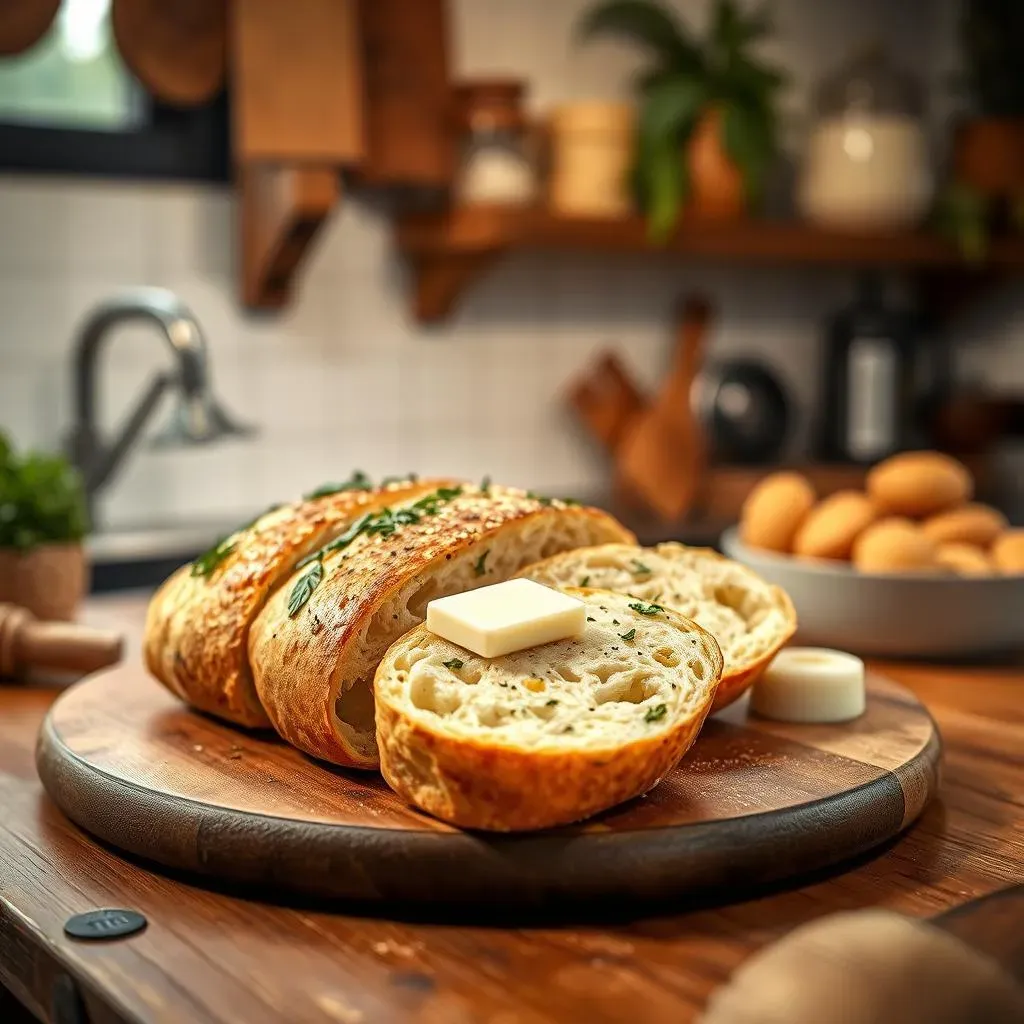
Alright, so your garlic bread is all prepped and ready to go. Now, it’s time to bake it to golden perfection. We've already got the oven preheated to 400 degrees Fahrenheit, so slide that baking sheet in. We're not just tossing it in there and hoping for the best; we want to keep an eye on it. The goal is to get that crust crispy and golden brown, while keeping the inside soft and chewy. It's a delicate balance, but totally achievable. You'll start to smell that incredible garlic aroma filling your kitchen, and that's a good sign! The butter will melt and bubble, and the bread will start to transform into something truly special.
Keep a close watch, because depending on your oven, it could take anywhere from 10 to 15 minutes. You're looking for that perfect shade of golden brown, and the edges should be nice and crispy. Don't let it burn, because nobody wants a charred piece of garlic bread. Once it’s done, take it out of the oven and let it cool for a few minutes. This will make it easier to slice and serve. You don't want to serve it straight out of the oven, or you will burn your mouth. We want to make sure every bite is perfect. It is really is an art and a science to baking.
Baking Step | Description | Time |
|---|---|---|
Preheat Oven | Set oven to 400°F (200°C). | 10 minutes |
Bake Bread | Place bread on baking sheet and bake. | 10-15 minutes |
Cool | Let the bread cool before slicing. | 5 minutes |
Serving Suggestions
Okay, your garlic bread is baked, golden, and smelling amazing. Now, it's time to think about serving it up. You can serve it as a side dish with pasta, as an appetizer before a meal, or even just as a snack. The possibilities are endless! I love to serve mine with a little bowl of garlic olive oil for dipping. It adds an extra layer of flavor and makes it even more irresistible. You could also dip it in some warm marinara sauce, especially if you're serving it with Italian food.
Don't be afraid to get creative with it. You could sprinkle some extra parmesan cheese on top, or add some fresh herbs like basil or oregano. The beauty of garlic bread is that it goes with almost anything. It's the perfect comfort food, and everyone will love it. And let's be real, who doesn't love a good piece of garlic bread? It's the ultimate crowd-pleaser, and it's guaranteed to be a hit at any gathering. You can serve it whole, or slice it for easier serving, it all depends on your preference.
Storing Your Garlic French Bread
So, you’ve made this amazing garlic bread, but maybe you have some leftovers. No worries, storing it is super easy. If you plan to eat it within a day or two, you can just keep it at room temperature. Wrap it tightly in foil or plastic wrap to keep it from getting stale. But if you want to keep it longer than that, freezing is the way to go. When I freeze my garlic bread, I usually wrap each slice individually in plastic wrap, and then put them in a freezer bag. This makes it easy to grab a slice or two whenever you're craving some garlic bread.
When you're ready to eat it, you can either thaw it out completely, or just toss it in the oven straight from the freezer. If you’re baking it from frozen, you will probably need to add a few extra minutes to the baking time to make sure it heats all the way through. You can also reheat it in a toaster oven or even a skillet on the stovetop. The goal is to get it nice and warm without making it soggy. With proper storage, your garlic bread will stay delicious for a long time. It’s all about being prepared and knowing how to keep the flavor fresh.
- Room Temperature: Store in foil for 1-2 days.
- Freezer: Wrap slices individually and freeze for up to 3 months.