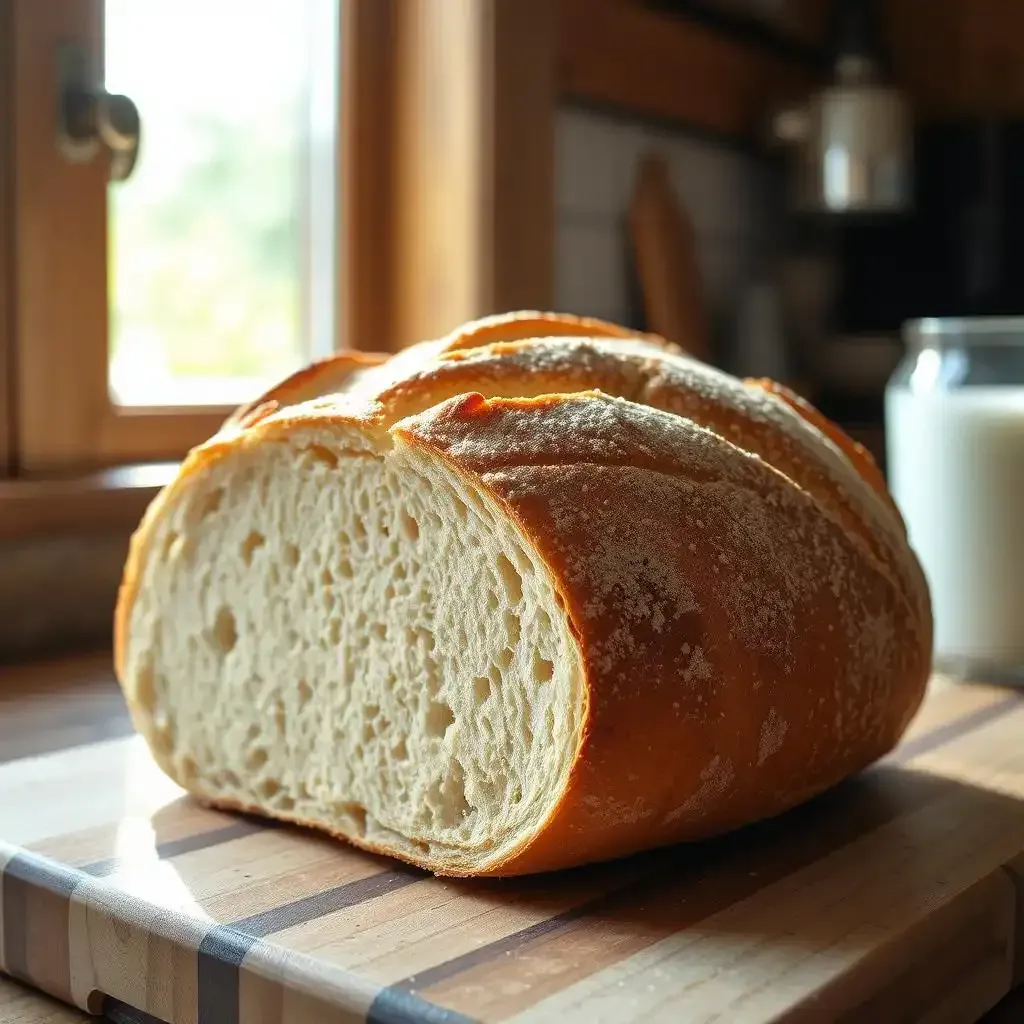
Want to bake delicious, crusty sourdough French bread without the fuss of traditional methods? Then get ready to uncover the magic of the bread machine! This article will guide you through every step of making incredible bread machine sourdough french bread, from preparing your starter to achieving that perfect golden-brown crust. We'll cover essential techniques, troubleshoot common problems, and explore exciting variations to raise your baking game. Whether you're a seasoned baker or just starting out, this guide will help you transform your kitchen into a French bakery. Prepare to impress your friends and family with your newfound bread-making prowess, all thanks to the convenience of your bread machine! Learn more and start baking amazing bread machine sourdough French bread today at frenchbread.homes.
Aspect | Tip |
|---|---|
Starter Preparation | Maintain a consistently active sourdough starter. |
Flour Selection | Experiment with different types of flour for varied textures. |
Hydration | Adjust water levels based on your flour and starter activity. |
Kneading | Bread machines handle kneading; ensure proper dough consistency. |
Baking Time | Adjust baking time based on your bread machine and desired crust. |
Cooling | Allow bread to cool completely before slicing. |
Storage | Store bread properly to maintain freshness. |
Troubleshooting | Address issues like gummy interiors or uneven baking. |
Variations | Explore additions like herbs, seeds, or cheeses. |
Resources | Visit frenchbread.homes for more recipes and tips. |
Mastering Bread Machine Sourdough French Bread: A Step-by-Step Guide
Getting Started: The Sourdough Starter
Okay, let's talk sourdough starter! Think of your starter as a tiny, bubbly pet that needs feeding. You'll need to feed it regularly (usually once a day, sometimes twice!), mixing flour and water into it to keep those little yeast buggers happy and active. It's a bit like taking care of a goldfish, but instead of flakes, you use flour. A healthy starter will be bubbly and slightly tangy – it's a magical transformation of simple ingredients! Don't worry if it seems finicky at first; it's all about finding the right rhythm and getting to know your starter's personality. It's like learning to play an instrument: it takes practice, but the rewards are amazing.
Day | Action | Observation |
|---|---|---|
1 | Mix 50g flour, 50g water | Observe for bubbles (sign of life!) |
2-7 | Feed daily (discard half, add 50g flour, 50g water) | Note the rise and activity; it should get more bubbly. |
Mixing and Kneading (the Easy Part!):
Now comes the fun part – making the dough! This is where your bread machine truly shines. I used to dread the messy task of kneading dough by hand, but with a bread machine, it's a breeze. Seriously, I'm pretty sure my bread machine is secretly judging my hand-kneading attempts. You simply toss all the ingredients (flour, starter, water, salt) into the bread machine's pan, select the dough cycle, and let the machine do its thing. It's like having a personal dough-making assistant! Remember to check your recipe for precise measurements – that's crucial for getting the perfect texture. It's like following a recipe for cake, but instead of a cake, you get delicious bread!
- Measure ingredients accurately.
- Add ingredients to the bread machine pan in the correct order (check your recipe).
- Select the dough cycle on your machine.
- Let the machine do the work!
The Final Rise and Bake:
Once the dough cycle is complete, you’ll gently shape your dough into a rough loaf. This isn't a beauty contest; focus on getting a good, even shape. Then, place the dough into a greased loaf pan. The bread machine will do the second rise and baking. This is the crucial part where the magic happens – the slow rise, the gentle heat, and the transformation from dough to golden brown perfection. This is what creates that amazing sourdough flavor and that satisfying crust. It's like watching a caterpillar transform into a butterfly—quite literally a magical transformation!
"The simplest things are often the most profound." - Leonardo da Vinci (Okay, he wasn't talking about bread machines, but it fits!)
Troubleshooting Common Bread Machine Sourdough French Bread Issues

Troubleshooting Common Bread Machine Sourdough French Bread Issues
The Case of the Gummy Interior
Okay, so you’ve followed the recipe perfectly (or at least, you *think* you have!), and your bread emerges from the bread machine looking… well, a bit sad. Instead of that beautiful, airy crumb, you’ve got a gummy, dense interior. What gives? This often happens if your dough was too wet, like trying to bake a cake with too much milk. The extra moisture simply didn't bake off during the baking cycle. Next time, try reducing the liquid slightly – maybe a tablespoon or two less water. Think of it as Goldilocks and the Three Bears, but with dough: you want it *just* right, not too wet, not too dry.
- Check your recipe for accurate measurements.
- Reduce water if dough is too sticky.
- Ensure your starter is active and bubbly.
Uneven Baking: The Bread Machine's Hot Spots
Sometimes, your bread machine might have a mind of its own, producing a loaf that’s perfectly golden brown on one side and pale on the other, like a sunbather who forgot to turn over. This uneven baking often comes from inconsistencies in the bread machine’s heating element. Rotating your loaf pan halfway through the baking process can help distribute the heat more evenly. It’s like giving the bread a little sunbath flip to avoid getting burnt on one side. It’s a simple tweak that can make a world of difference in achieving consistent baking.
Problem | Possible Cause | Solution |
|---|---|---|
Uneven browning | Uneven heat distribution | Rotate the pan halfway through baking. |
Burnt bottom | Too much heat or long baking time | Reduce baking time slightly, or use a lower setting. |
The Mystery of the Flat Loaf
You’re expecting a majestic, tall loaf of sourdough French bread, but instead, you get a flat, deflated pancake. Bummer! This often happens if your starter wasn't active enough. A weak starter means your dough didn't rise properly. Before you even start mixing, make sure your starter is bubbly and has a nice, tangy aroma. It's like checking the yeast in your regular bread recipe; if it's dead, your bread won't rise! A healthy, active starter is the key to a beautifully risen loaf. Think of it as the foundation – if the foundation is weak, the entire structure will crumble.
"The best things in life are worth waiting for." – A wise baker, probably. (and that means waiting for a properly active starter!)
Elevating Your Bread Machine Sourdough French Bread: Tips and Variations

Elevating Your Bread Machine Sourdough French Bread Tips And Variations
Playing with Flours: Beyond the Basics
So, you've mastered the basic bread machine sourdough French bread recipe. Fantastic! But let's get adventurous. Think of your standard recipe as a blank canvas. You can totally change it up! Instead of sticking to just all-purpose flour, try adding some whole wheat flour for a nuttier taste and a more textured crumb. It's like adding spices to a stew; each flour brings its unique flavor profile. I even experimented with rye flour once – it gave the bread a wonderfully tangy kick, like a surprise burst of citrus in your usual bread. Don't be afraid to experiment! You might just uncover your new favorite bread-flour combination.
Flour Type | Flavor Profile | Texture Impact |
|---|---|---|
Whole Wheat | Nutty, earthy | Denser, chewier |
Rye | Tangy, slightly sour | Denser, more compact |
Oat | Subtle sweetness | Slightly moist, tender |
Adding Flavor: Herbs, Seeds, and More!
Want to take your bread to the next level? Let's talk add-ins! Imagine sprinkling some sesame seeds on top before baking – it adds a lovely crunch and a nutty aroma. Or how about some dried herbs like rosemary or thyme? It's like adding a secret ingredient to your favorite pizza. I once added chopped sun-dried tomatoes and some parmesan cheese – the result was a bread that tasted like a party in my mouth! The possibilities are endless. It's all about experimenting and finding your perfect flavor combinations; it's like creating your own unique pizza topping! Remember, a little goes a long way. Don't overdo it; you want to enhance the flavor, not overpower it.
- Sesame seeds: Crunchy and nutty
- Dried herbs (rosemary, thyme): Aromatic and savory
- Sun-dried tomatoes and cheese: Savory and umami
- Walnuts or pecans: Nutty and rich
- Cracked black pepper: Spicy kick
Shaping Up: Beyond the Basic Loaf
Your bread machine might make a standard loaf, but that doesn’t mean your bread has to look boring! Try shaping your dough into a rustic boule (a round loaf) before the final rise. It's like sculpting with dough! Or, try making smaller rolls. It's a fun way to change things up, and it’s a great way to impress your friends. For a fun twist, score the top of your loaf with a sharp knife before baking – it adds a nice aesthetic touch and helps the bread rise evenly. It’s like creating a design on a cake; it's all about presentation! And honestly, who doesn’t love a beautifully shaped loaf of bread?
"The proof is in the pudding (or, in this case, the bread)." – An anonymous, yet incredibly wise, baker.
Final Thought
Baking bread machine sourdough French bread might seem daunting at first, but with practice and a little patience, you'll be crafting delicious, crusty loaves in no time. Remember, the key is understanding your bread machine and starter, and don't be afraid to experiment with different flours and techniques to find your perfect recipe. Happy baking!