Table of Contents
Ever dreamed of crafting a perfectly crusty, tangy sourdough loaf with minimal fuss? Prepare to be amazed! This article is your passport to the world of 3 ingredient sourdough bread, a culinary adventure that proves exceptional results don't require endless ingredients or complicated techniques. We'll unravel the simplicity and elegance of this baking method, guiding you through each step with crystal-clear instructions. Forget intimidating recipes; this guide focuses on a streamlined approach, making 3 ingredient sourdough bread accessible to even the most novice bakers. We'll explore the magic behind this recipe, explaining the science of sourdough fermentation and providing practical tips for perfect loaves every time. Discover how to troubleshoot common issues, ensuring your baking journey is smooth and rewarding. Finally, we'll unleash your creativity with exciting variations and delicious ideas for using your freshly baked 3 ingredient sourdough bread. Get ready to elevate your baking game and experience the joy of creating this simple yet extraordinary bread.
The Allure of 3 Ingredient Sourdough Bread
The Allure of 3 Ingredient Sourdough Bread
Simplicity and Elegance
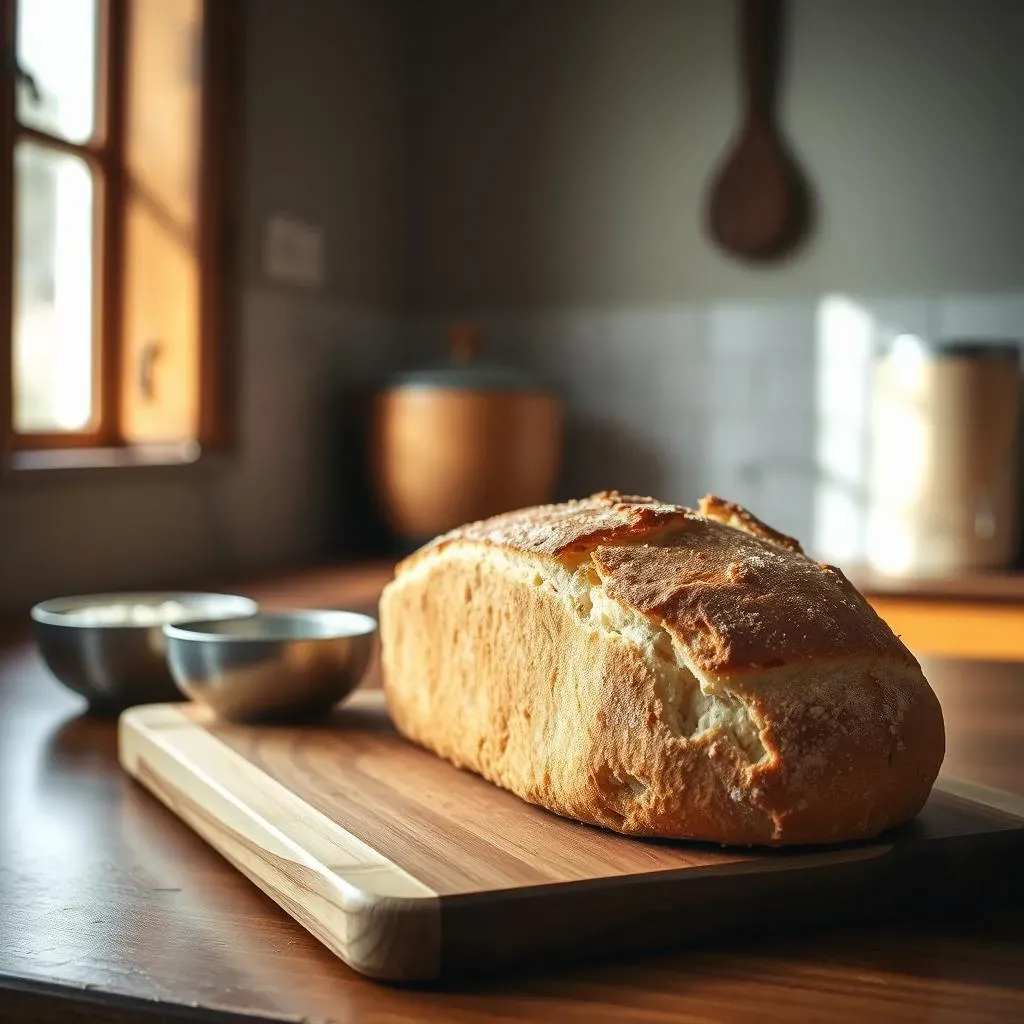
Let's be honest, sourdough bread often gets a reputation for being complicated. Images of bubbling starters, precise measurements, and hours of kneading fill our minds. But what if I told you that you could achieve that incredible sourdough flavor and texture with just three ingredients? That's the magic of 3 ingredient sourdough bread. This stripped-down approach removes the intimidation factor, making it accessible to anyone who dreams of baking their own bread. It's a testament to the power of simple ingredients and the magic of fermentation.
Think of it as a minimalist masterpiece. You're focusing on the core elements: flour, water, and salt. This allows you to truly appreciate the natural flavors and textures that emerge from the fermentation process. It's a return to the basics, a celebration of the fundamental building blocks of bread making. And the best part? The results are stunning! You'll achieve a delicious loaf with a satisfying crust and a wonderfully airy crumb. Ready to dive in? Let's explore this recipe further.
Ingredient | Role |
|---|---|
Flour | Provides structure and flavor |
Water | Activates yeast and gluten development |
Salt | Enhances flavor and controls fermentation |
Unexpectedly Delicious
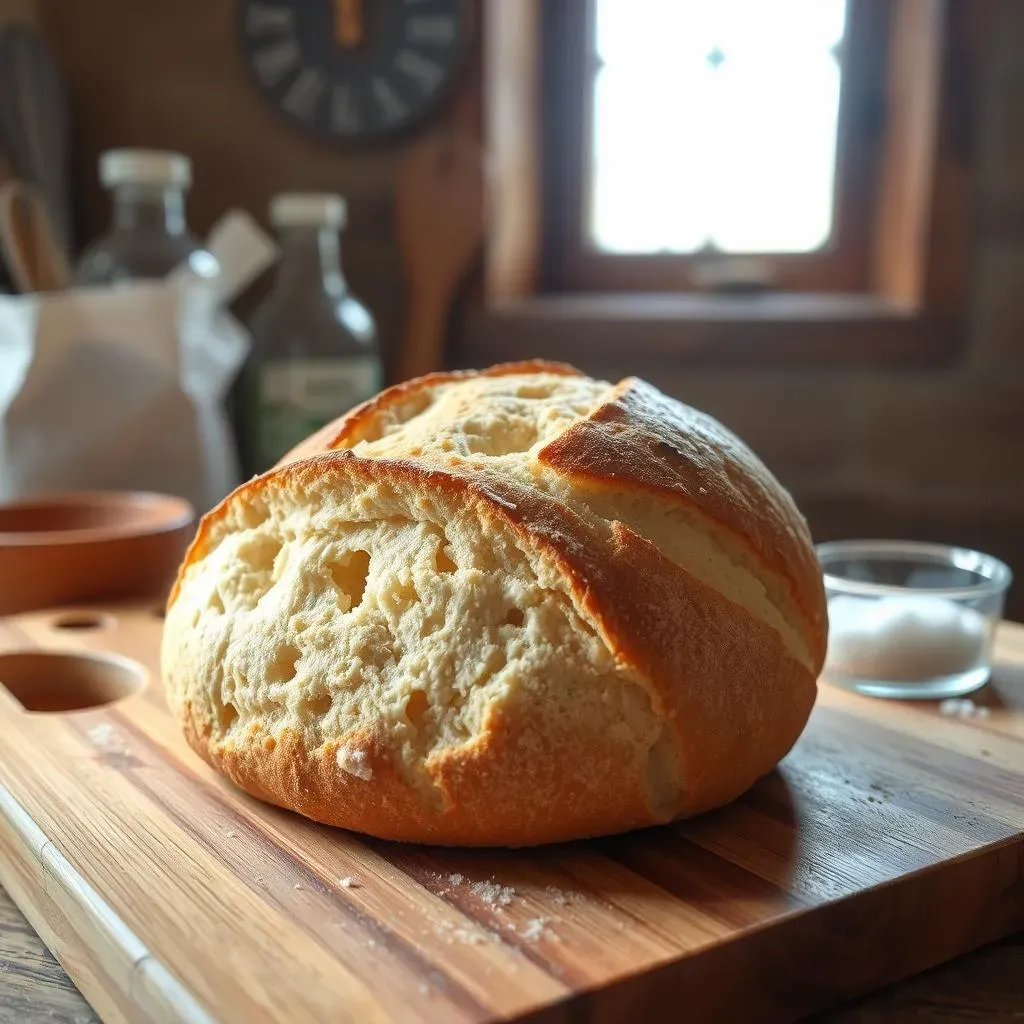
The beauty of 3 ingredient sourdough bread lies not only in its simplicity but in the surprisingly complex flavors that develop during the fermentation process. The natural yeasts and bacteria in the flour interact with the water and salt, creating a unique tangy profile that's both satisfying and irresistible. This isn't your average, bland loaf; it's bursting with character and depth, a testament to the artistry of nature's own leavening process. And the taste? Oh, the taste! It's a truly rewarding experience, far surpassing what you might expect from such a simple recipe.
Beyond its delicious flavor, this bread offers a satisfying sense of accomplishment. Creating something so delicious from just three simple ingredients is a true testament to the power of baking. It's a rewarding experience that connects you to the ancient art of bread making, a tradition that has been passed down through generations. And with its versatility, you can easily adapt this recipe to suit your tastes, adding seeds, nuts, or herbs for a personalized touch. For more inspiration, check out our guide on making amazing sourdough French bread!
Mastering the 3 Ingredient Sourdough Bread Recipe: A StepbyStep Guide

Mastering the 3 Ingredient Sourdough Bread Recipe: A StepbyStep Guide
Mixing the Dough: The Foundation of Flavor
Let's embark on our baking journey! The first step in mastering this recipe is creating the perfect dough. Begin by combining your flour and water. The ratio is crucial; experiment to find what works best for your flour. A wetter dough will generally yield a more open crumb, while a drier dough creates a denser loaf. Don’t be afraid to get your hands in there – it’s a tactile experience that connects you to the process. Once you have a shaggy mixture, gently incorporate the salt. The salt not only enhances flavor but also plays a role in gluten development and controlling fermentation.
After mixing, let the dough rest (autolyse). This allows the flour to fully hydrate and the gluten to start developing. This step isn't strictly necessary, but it can improve the final texture of your bread. While it rests, prepare your container for bulk fermentation. A wide-mouth container is ideal for easy access. After the autolyse, gently fold the dough a few times to ensure everything is combined. This is a gentle process; avoid overmixing. For more information on achieving that perfect dough consistency, check out our guide on .
Step | Action | Timing |
|---|---|---|
1 | Combine flour and water | Immediately |
2 | Add salt | After initial mix |
3 | Autolyse (Rest) | 30 minutes - 1 hour |
4 | Gentle folds | After autolyse |
Bulk Fermentation: The Rise to Deliciousness
Now comes the crucial bulk fermentation step. This is where the magic of sourdough happens. The natural yeasts and bacteria in the flour start to work their magic, producing gases that cause the dough to rise. Cover your container and let the dough rise in a warm place, free from drafts. The ideal temperature is around 75°F (24°C). However, depending on your environment, this may take longer or shorter. The rise is complete when the dough has increased in volume by about 50-75%. This is a visual cue; don’t rely solely on time.
During bulk fermentation, you may perform a series of stretches and folds. This strengthens the gluten structure, resulting in a better oven spring. These folds are gentle, and typically done every 30-45 minutes for the first few hours. The number of folds depends on your dough and environment. Remember, patience is key! For a more detailed look at the bulk fermentation process, see our guide on for more tips.
- Observe dough for rise
- Perform stretch and folds (optional)
- Avoid drafts
Shaping and Proofing: Preparing for the Oven
Once the bulk fermentation is complete, it’s time to shape your dough. Gently turn the dough out onto a lightly floured surface. Shape it into a round or oblong loaf, depending on your preference. This is a gentle process; handle the dough with care to avoid deflating it. After shaping, allow the dough to rest (bench rest) for about 20-30 minutes. This allows the gluten to relax, making it easier to handle during the final shaping.
Following the bench rest, perform the final shaping. Gently shape the dough into its final form. Place the shaped loaf into a banneton basket (or a bowl lined with a floured cloth). This helps the loaf retain its shape during the final proof. Cover the banneton and place it in the refrigerator for a cold proof (ideally 12-24 hours). This slow, cold fermentation develops more complex flavors and results in a lighter crumb. For more information on bannetons and shaping techniques, check out our article on .
Baking: The Moment of Truth
Preheat your oven to 450°F (232°C) with a Dutch oven inside. The hot Dutch oven creates steam, which helps the bread develop a crisp crust. Carefully remove the hot Dutch oven from the oven. Gently turn the proofed loaf out of the banneton onto parchment paper. Score the top of the loaf with a sharp knife or lame. This creates controlled expansion during baking, resulting in a beautiful loaf.
Place the scored loaf into the preheated Dutch oven. Cover the Dutch oven with the lid and bake for 30 minutes. After 30 minutes, remove the lid and continue baking for another 15-20 minutes, or until the crust is deeply golden brown and the internal temperature reaches 200-210°F (93-99°C). Remove the bread from the oven and let it cool completely on a wire rack before slicing and enjoying. For detailed baking instructions and tips on achieving the perfect crust, we recommend checking out our .
Step | Action | Timing |
|---|---|---|
1 | Preheat oven & Dutch oven | 30-45 minutes |
2 | Score loaf | Before baking |
3 | Bake covered | 30 minutes |
4 | Bake uncovered | 15-20 minutes |
5 | Cool completely | At least 1 hour |
Troubleshooting Your 3 Ingredient Sourdough Bread: Common Issues and Solutions
Troubleshooting Your 3 Ingredient Sourdough Bread: Common Issues and Solutions
Dough Too Sticky?
One common issue is a dough that's too sticky. This often happens when the hydration is too high (too much water relative to the flour). Don't panic! You can usually salvage this by gradually adding more flour, a tablespoon at a time, until the dough becomes manageable. However, be careful not to add too much, as this can result in a dense loaf. The key is to find a balance – a dough that’s slightly sticky but not unworkable. For more tips on achieving the perfect consistency, check out our comprehensive guide on .
Another reason for overly sticky dough could be an overly active starter. If your starter is incredibly bubbly and active, it may produce more gas than your recipe accounts for, leading to a wetter dough. You might consider reducing the amount of starter slightly in your next attempt. Remember, even a small adjustment can make a big difference! If you find yourself struggling with this, you might want to try a recipe that uses less water, like our .
- Gradually add flour
- Reduce starter amount
- Adjust hydration
Lack of Rise or Oven Spring?
A flat loaf is a baker's nightmare! Several factors can contribute to a lack of rise or oven spring (the final rise in the oven). One common culprit is under-fermentation. If your dough hasn't risen sufficiently during bulk fermentation, it won't have the gas needed for a good rise in the oven. Ensure your dough has doubled in size (or at least increased by 50-75%) before shaping. For a more detailed explanation of fermentation times and techniques, take a look at our guide.
Another possibility is over-proofing. If you leave your dough in the fridge for too long, it can lose its strength and not rise properly. Aim for the recommended proofing time (12-24 hours), but keep an eye on your dough. Also, ensure your starter is healthy and active. A weak or inactive starter won’t produce enough gas for a good rise. For troubleshooting your sourdough starter, consider consulting our guide on . The right starter is key!
Problem | Possible Cause | Solution |
|---|---|---|
Lack of Rise | Under-fermentation | Allow longer bulk fermentation |
Lack of Rise | Over-proofing | Reduce proofing time |
Lack of Rise | Weak Starter | Feed and strengthen starter |
Beyond the Basics: Variations and Creative Uses for Your 3 Ingredient Sourdough Bread
Beyond the Basics: Variations and Creative Uses for Your 3 Ingredient Sourdough Bread
Flavor Adventures: Beyond the Basic Loaf
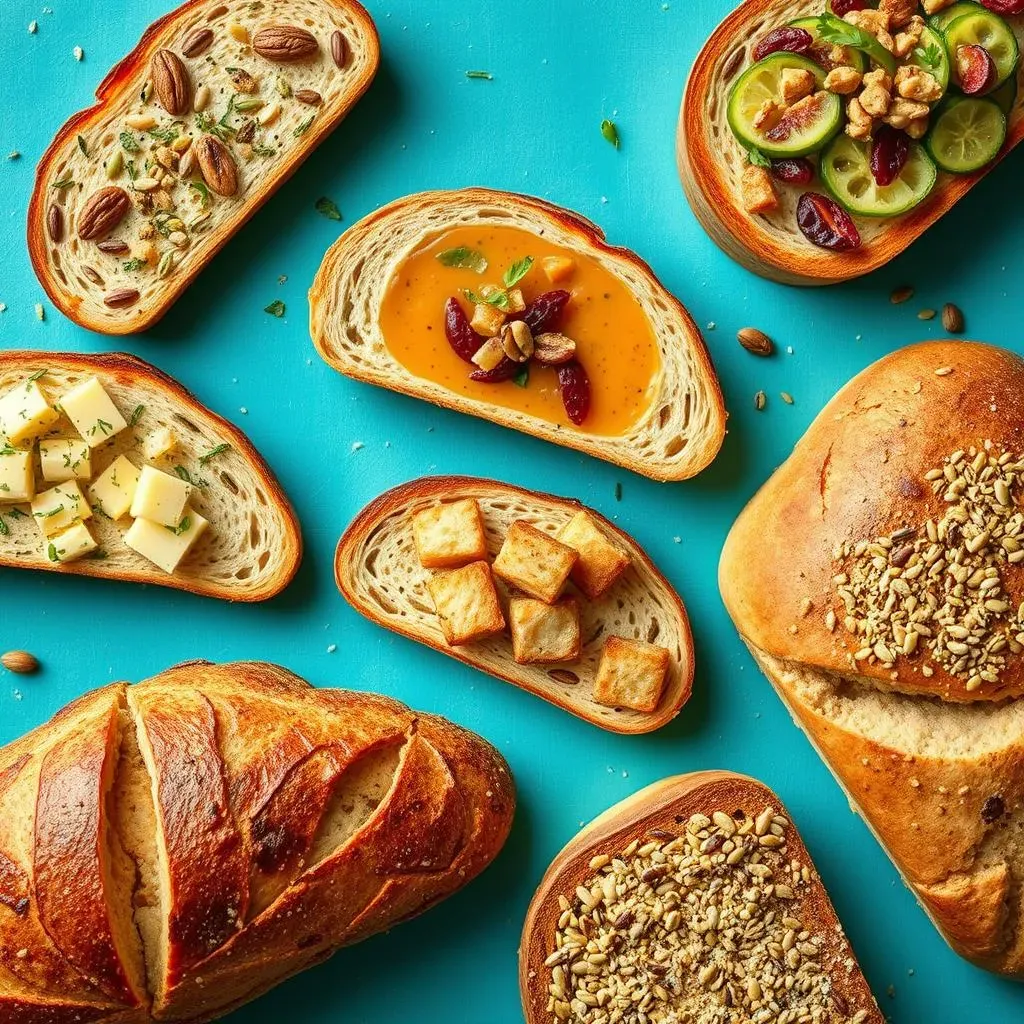
Once you've mastered the fundamental 3-ingredient sourdough recipe, the possibilities are endless! Think of this basic loaf as your blank canvas, ready for your creative flourishes. Experiment with different types of flour – whole wheat, rye, or even a blend – to discover unique flavor profiles and textures. Adding seeds like sunflower, poppy, or flax adds a delightful crunch and nutritional boost. Chopped nuts, dried fruits, or herbs provide another layer of complexity and deliciousness. Don't be afraid to get creative and let your taste buds guide you!
Imagine the possibilities! A nutty sourdough with toasted walnuts and pecans, a fruity sourdough with dried cranberries and cherries, or a herby sourdough with rosemary and thyme. The variations are practically limitless, allowing you to tailor your bread to suit any occasion or mood. And the best part? These additions don't complicate the process; they simply enhance the already delicious base recipe. For more inspiration on flavor combinations, check out our guide on for some exciting ideas.
- Experiment with different flours
- Add seeds for crunch
- Incorporate nuts, fruits, or herbs
From Loaf to Culinary Creation: Beyond the Sandwich
While a simple slice of 3-ingredient sourdough bread with butter is pure bliss, this versatile loaf is far more than just a sandwich staple. Its dense yet airy crumb and slightly tangy flavor make it perfect for countless culinary applications. Imagine thick slices toasted and topped with your favorite cheeses and savory spreads, creating a delightful appetizer or light lunch. Croutons made from leftover bread add a delightful texture and flavor to soups and salads. And if you're feeling adventurous, try making French toast with your sourdough! Believe it or not, it takes on a whole new level of deliciousness.
The possibilities extend beyond the plate! Use your sourdough to create bread pudding, stuffing, or even croutons. Its versatility is truly unmatched. The slightly sour flavor of sourdough adds a unique depth that complements both sweet and savory dishes. For even more creative ideas, check out our collection of — you can even use leftover sourdough starter to make delicious treats!
Application | Description |
|---|---|
Toast with toppings | Cheese, spreads, avocado |
Croutons | Soups, salads |
French Toast | A delightful breakfast treat (see our ) |