Table of Contents
Ever dreamed of baking delicious, crusty sourdough bread without the fuss? Prepare to be amazed! This article is your passport to the surprisingly simple world of "3 ingredient sourdough." We'll unravel the mystique surrounding sourdough baking, proving that creating this artisanal bread can be easier than you think. Forget complicated recipes and endless ingredient lists; we'll focus on a core formula using just three key components: flour, water, and your very own sourdough starter. Get ready to learn how to cultivate a thriving starter, a crucial step in this journey. We'll then explore the straightforward process of transforming those humble ingredients into a magnificent loaf. But the adventure doesn't stop there! We'll delve into exciting variations, showing you how to personalize your 3-ingredient sourdough with different flours and add-ins. Finally, we'll tackle common baking hurdles, offering practical solutions to ensure your baking triumphs. So, grab your apron, and let's embark on this delicious journey together!
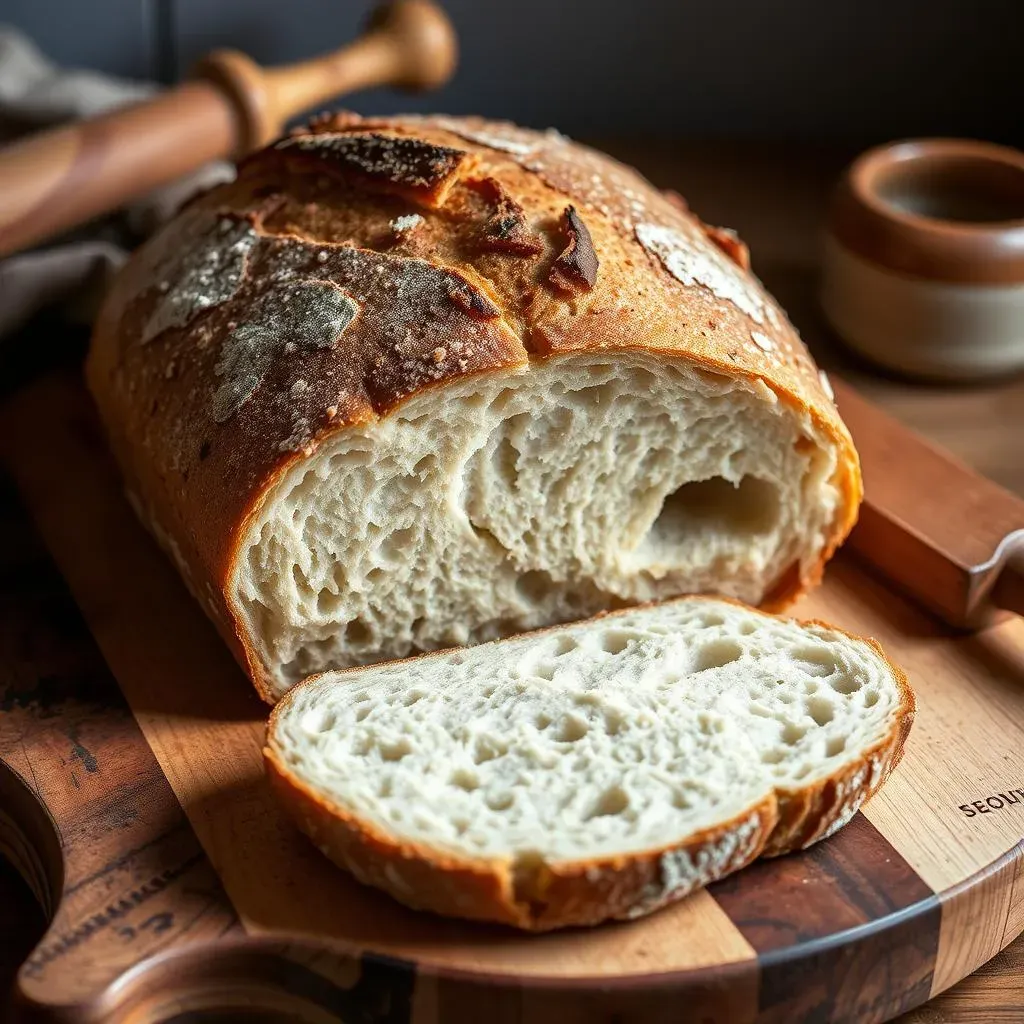
The Allure of 3Ingredient Sourdough
The Allure of 3Ingredient Sourdough
Simplicity at its Finest
Let's face it, sourdough bread has a reputation for being complicated. Images of bubbling starters, intricate folds, and precise timing often deter beginners. But what if I told you that you could achieve that same amazing sourdough flavor and texture with just three ingredients? That's the magic of 3-ingredient sourdough – a delightful rebellion against the perceived complexity of traditional sourdough recipes. It's a gateway to the world of artisanal bread, offering a fantastic introduction to the art of sourdough baking without the steep learning curve. This approach allows you to focus on the fundamental elements of flavor and texture development, mastering the core principles before exploring more advanced techniques.
Think of it as a culinary blank canvas. You're not overwhelmed by a long list of ingredients that might be difficult to source or expensive. You're concentrating on the essence of sourdough—the interplay of flour, water, and your starter. This simplicity makes 3-ingredient sourdough incredibly accessible, perfect for busy individuals or those just starting their sourdough journey. It’s a fantastic way to learn the basics and build confidence before tackling more elaborate recipes. And don't worry, the results are anything but basic. You'll be surprised by the depth of flavor and the satisfying chewiness you can achieve with this minimalist approach. Want to try a truly amazing crust? Check out our guide on making !
Ingredient | Role | Impact on Flavor/Texture |
|---|---|---|
Flour | Provides structure and nutrients for the yeast | Affects crumb, chewiness, and overall flavor profile |
Water | Hydrates the flour and activates the yeast | Influences the dough's consistency and final texture |
Sourdough Starter | Provides the leavening agent (wild yeasts and bacteria) | Contributes to the unique tangy flavor of sourdough |
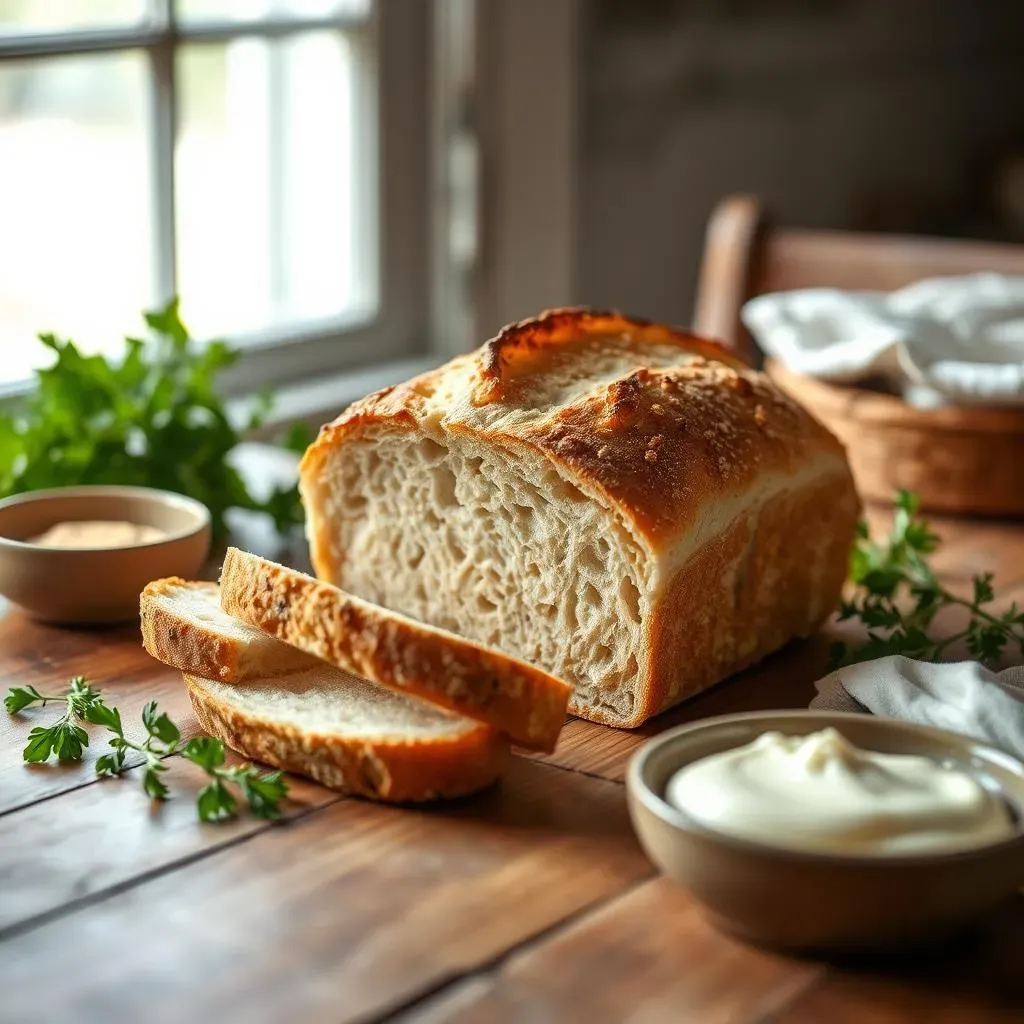
Unleashing the Flavor Potential
The beauty of 3-ingredient sourdough lies in its versatility. While the basic recipe is remarkably simple, it's a springboard for endless experimentation. You can easily adapt it to your taste preferences and dietary needs. Explore different types of flour, from the classic all-purpose to hearty whole wheat or even nutty rye, to discover how each flour impacts the final product's texture and flavor. The possibilities are as vast as your imagination! Imagine the possibilities: a rustic loaf with whole wheat flour, a light and airy loaf with bread flour or a dense and flavorful loaf with rye flour.
Moreover, this minimalistic approach allows you to truly appreciate the nuances of sourdough flavor. The tanginess, the complexity, the subtle notes that develop during fermentation—all become more pronounced when you're not masking them with other ingredients. It’s a journey of discovery, a chance to cultivate your palate and deepen your understanding of sourdough bread. This is a fundamental skill that can be applied to more complex recipes. For example, if you're looking for a quicker bake, check out our .
- Experiment with different flours (whole wheat, rye, etc.)
- Add seeds, nuts, or herbs for extra flavor and texture
- Adjust hydration levels for varying crumb structures
Mastering the 3Ingredient Sourdough Starter: A StepbyStep Guide
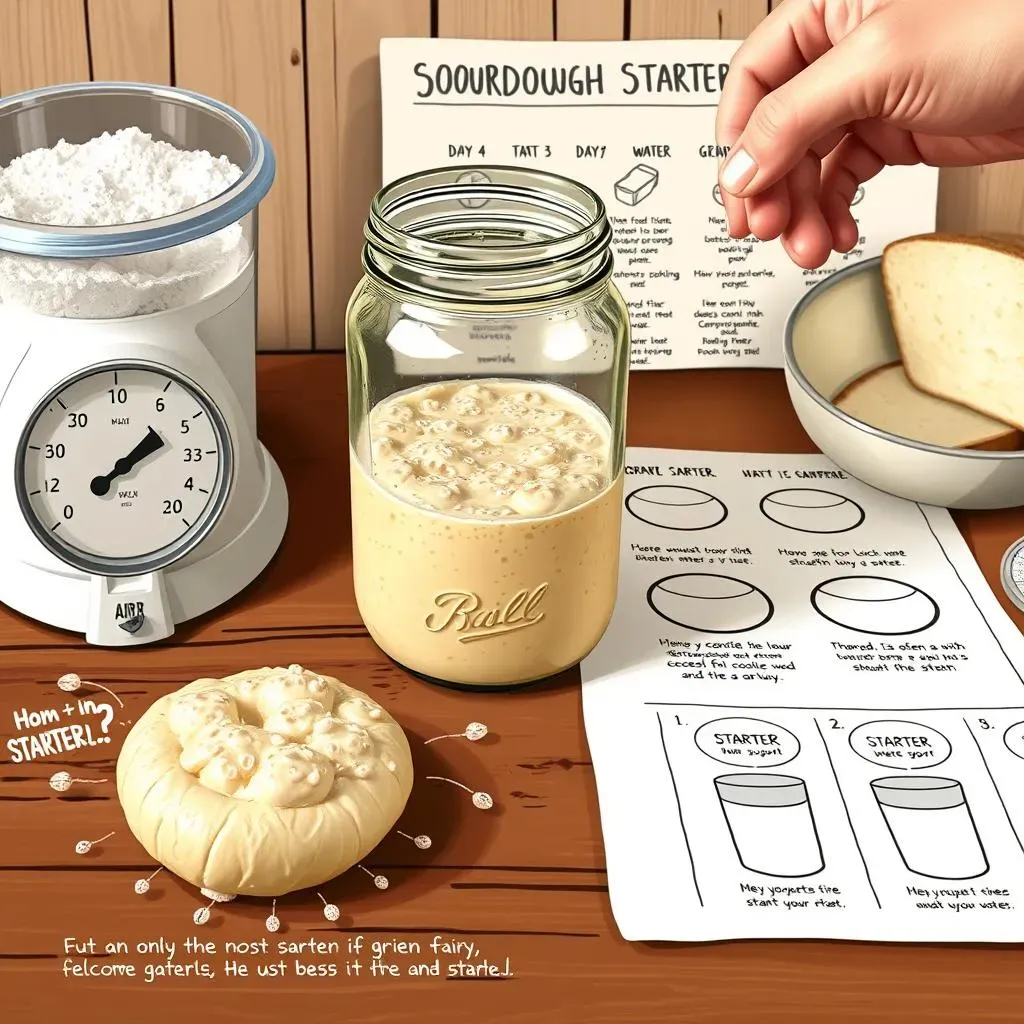
Mastering the 3Ingredient Sourdough Starter: A StepbyStep Guide
Getting Started: The Initial Mix
So, you're ready to embark on the sourdough adventure? Fantastic! The first step is creating your starter, the heart and soul of your 3-ingredient sourdough. Don't be intimidated; it's simpler than you think. You'll need just two ingredients: flour (typically unbleached all-purpose or bread flour works best) and water (filtered or spring water is ideal). The ratio is usually 1:1, meaning equal parts flour and water by weight (a kitchen scale is your best friend here!). Combine these in a clean jar, stir well to ensure no dry flour remains, and cover loosely with a lid or cheesecloth.
Now comes the waiting game, but it's not as passive as it sounds! Over the next few days, you'll be observing your starter's progress, feeding it regularly to encourage the growth of beneficial wild yeasts and bacteria. You'll notice some bubbling activity, indicating that fermentation is underway. This is exciting! Keep a close eye on your starter and note any changes in smell, texture, and activity. If you're a visual learner, you might find a video helpful. Check out our for a visual aid.
Day | Observation | Action |
|---|---|---|
1-3 | Minimal activity, possible slight increase in volume | Observe, maintain loose cover |
4-7 | Increased bubbling, sour aroma | Feed daily; discard half before feeding |
Feeding Your Starter: Nurturing the Microbes
Feeding your starter is crucial for maintaining its vitality. Think of it as providing nourishment for the microscopic organisms that do the hard work of fermentation. The typical feeding schedule is once or twice a day, depending on the starter's activity. To feed, discard about half of your starter (you can use this in recipes!), then add fresh flour and water in a 1:1 ratio by weight. Mix thoroughly, cover loosely, and allow it to ferment at room temperature (ideally around 70-75°F). Remember, consistency is key – regular feeding and observation help you understand your starter's rhythm.
Over time, you'll develop an intuitive understanding of your starter's needs. Some days, it may be more active than others, requiring more frequent feedings. This is perfectly normal! The environment, temperature, and even the type of flour you use can all influence your starter's behavior. Don't be afraid to experiment and adjust your feeding schedule accordingly. The key is to maintain a healthy balance – a bubbly, slightly tangy starter that doubles in size after a feeding is your goal. For more tips on maintaining a happy starter, check out our guide on .
- Discard about half of the starter before each feeding.
- Add equal parts fresh flour and water (by weight).
- Mix thoroughly and cover loosely.
- Observe for bubbling and a slightly sour aroma.
Maintaining Your Starter: Long-Term Care
Once your starter is established and consistently active, you can transition to a less frequent feeding schedule. If you're planning to bake regularly (say, once a week), you can simply feed it once a day or even every other day. If you bake less often, you can store your starter in the refrigerator. Before refrigerating, give it a good feeding to boost its vitality. In the fridge, you’ll only need to feed it once a week. When you're ready to bake, remove it from the refrigerator a couple of days before, and feed it daily to bring it back to its peak activity.
Remember, your starter is a living organism, and it requires consistent care. But the effort is well worth it! A healthy, active starter is the foundation of delicious 3-ingredient sourdough bread. It’s a testament to your patience and dedication, a living connection to baking traditions spanning centuries. With a little practice and observation, you'll become intimately familiar with your starter's personality and develop a rhythm that works for both of you. Check out our for more information!
Beyond the Basics: Variations on Your 3Ingredient Sourdough
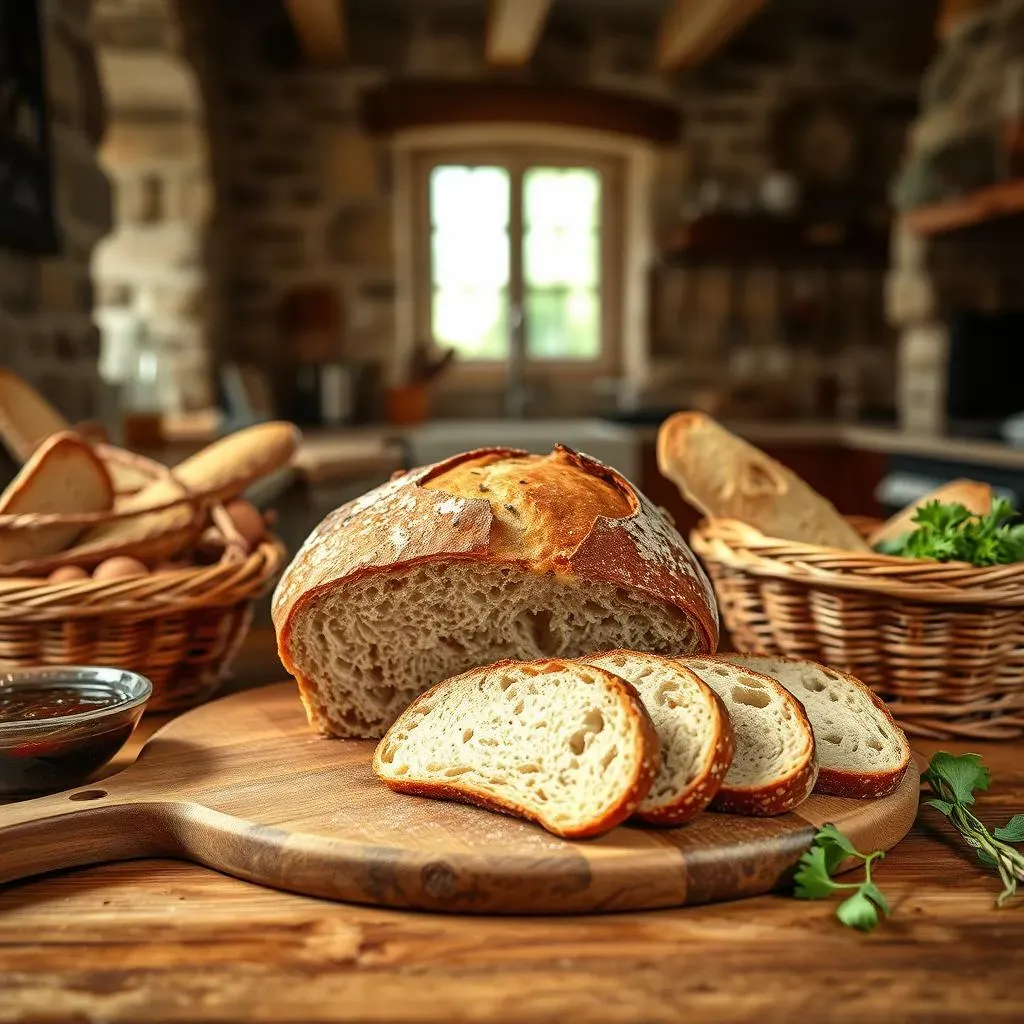
Beyond the Basics: Variations on Your 3Ingredient Sourdough
Flour Power: Exploring Different Grains
Okay, so we've mastered the magic of 3-ingredient sourdough with basic all-purpose flour. But the fun doesn't stop there! The world of flour is vast and varied, each type offering unique characteristics to your bread. Think of the possibilities: the nutty depth of rye, the hearty texture of whole wheat, the light and airy lift of bread flour, or even the subtle sweetness of spelt. Each flour will subtly alter your bread's crumb structure, color, and flavor profile. Experimenting with different flours is a fantastic way to personalize your 3-ingredient sourdough and discover your own signature loaf. For a truly unique experience, why not try a blend of flours? For instance, combining whole wheat and rye creates a complex flavor profile that's both rustic and satisfying. Ready for a new challenge? Check out our !
Imagine the possibilities: a rustic loaf with whole wheat flour, a light and airy loaf with bread flour, or a dense and flavorful loaf with rye flour. Don't be afraid to experiment! Start by substituting 25% of your all-purpose flour with a different type and see how it affects the outcome. You can gradually increase the percentage of the new flour until you find your perfect balance. Remember to adjust the hydration accordingly, as different flours absorb water at different rates. Need a quicker bake? Our is a great option!
- Whole Wheat: Nutty, hearty flavor and denser crumb
- Rye: Tangy, complex flavor and dense crumb
- Bread Flour: Light and airy crumb, good for shaping
- Spelt: Slightly sweet flavor, chewy texture
Beyond the Basics: Adding Flavor and Texture
While the simplicity of 3-ingredient sourdough is appealing, it's also a fantastic base for adding extra flair. Think of seeds—sunflower, pumpkin, or poppy—adding delightful bursts of texture and subtle flavors. Nuts like walnuts or pecans can introduce a rich, earthy note and satisfying crunch. Herbs like rosemary or thyme can bring a fragrant, aromatic dimension. The possibilities are truly endless! You can even add dried fruits, such as raisins or cranberries, for a touch of sweetness and chewiness. These additions not only enhance the taste but also create visually appealing loaves, making your baking even more rewarding. For a truly special treat, consider incorporating cheese into your dough for a savory twist. For inspiration, check out our guide on !
Remember, the key is to start small and experiment gradually. Begin by adding a small amount of your chosen add-in, then adjust the quantity to your liking in subsequent bakes. Observe how each ingredient impacts the final result—the texture, the flavor, the overall look of your loaf. This is a process of discovery, a fun way to learn more about sourdough and develop your unique baking style. If you're looking for a truly amazing crust, check out our guide on achieving !
Add-in | Flavor Profile | Texture Impact |
|---|---|---|
Seeds (sunflower, pumpkin) | Nutty, earthy | Adds crunch |
Nuts (walnuts, pecans) | Rich, earthy | Adds crunch |
Herbs (rosemary, thyme) | Aromatic, savory | Subtle flavor enhancement |
Dried fruit (raisins, cranberries) | Sweet, fruity | Adds chewiness |
Troubleshooting Your 3Ingredient Sourdough: Common Problems and Solutions
Troubleshooting Your 3Ingredient Sourdough: Common Problems and Solutions
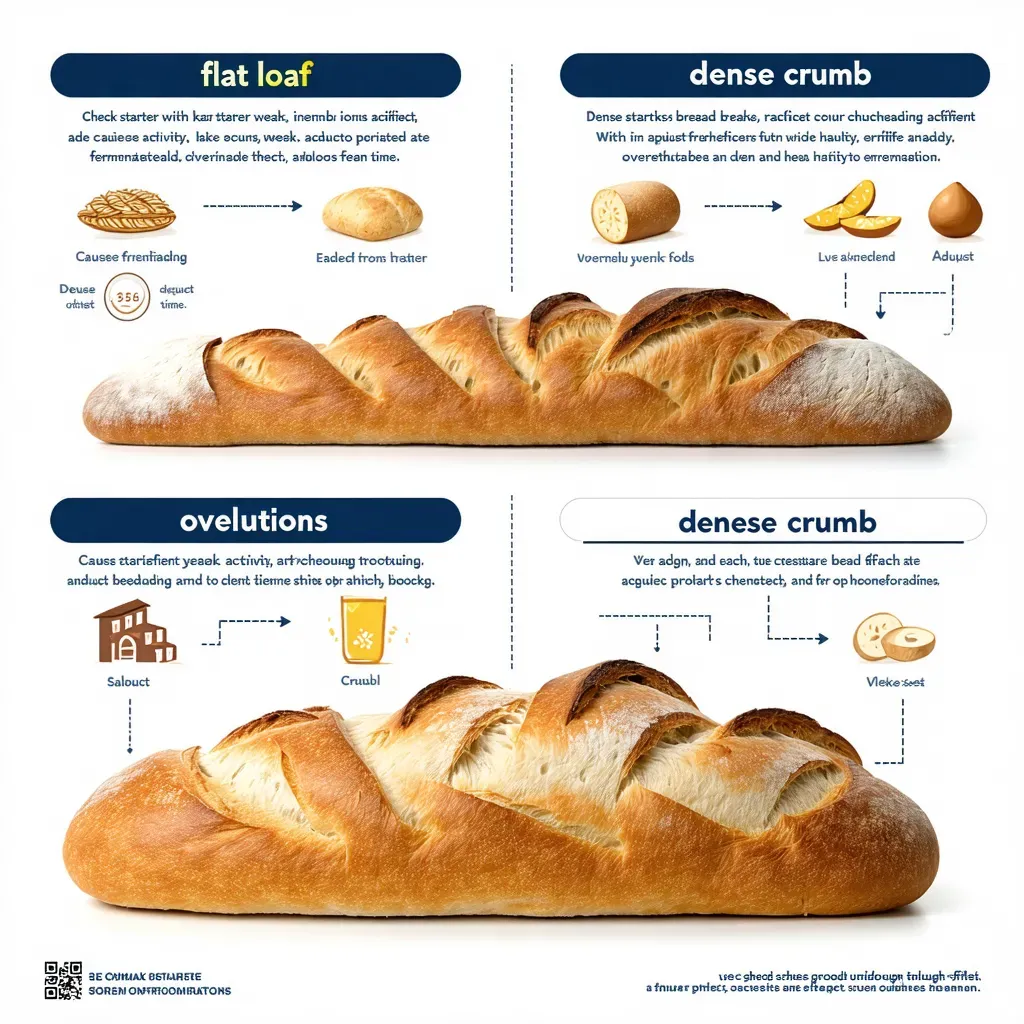
A Flat Loaf: The Case of the Missing Rise
Let's talk about that dreaded flat loaf – the sourdough baker's nemesis. Several factors can contribute to a lack of rise. A weak or inactive starter is a common culprit. Make sure your starter is bubbly and has a pleasant sour aroma before you begin. Insufficient fermentation time is another possibility. Ensure your dough has enough time to develop its structure and rise properly. And don't forget about the temperature! A cold environment will slow down fermentation significantly. Aim for a warm spot (70-75°F) for optimal results. Finally, improper shaping can also hinder your loaf's rise, so handle your dough gently, avoiding excessive kneading.
If your loaf is consistently flat, consider adjusting your recipe or technique. Try increasing the fermentation time, ensuring your starter is active and vigorous, or perhaps warming your kitchen environment. If you are using a different type of flour, you may need to adjust your water ratio. Remember, practice makes perfect! Don't be discouraged by a few flat loaves; each bake is a learning opportunity. For a visual guide to shaping your dough, check out our !
- Check starter activity (bubbly, sour aroma)
- Ensure sufficient fermentation time
- Maintain optimal temperature (70-75°F)
- Handle dough gently during shaping
A Dense Crumb: The Quest for Airiness
A dense crumb can be just as disheartening as a flat loaf. Overkneading is a common cause – sourdough dough is delicate and doesn't require aggressive kneading. Gentle folds are sufficient to develop gluten structure. Insufficient hydration can also lead to a dense crumb – make sure your dough is sufficiently moist but not overly wet. Finally, improper fermentation can result in a dense crumb. Ensure your dough ferments for the appropriate amount of time, allowing the wild yeasts to do their work. If you are baking in a Dutch oven, ensure that the lid is removed during the last part of the baking process to allow the crust to properly form.
To remedy a dense crumb, focus on gentle handling of your dough, ensuring adequate hydration, and allowing sufficient fermentation time. Experiment with your hydration levels, and don't be afraid to add a little extra water if necessary. Remember, different flours absorb water differently. If you're still struggling, consider using a different type of flour, such as bread flour, which is known for its ability to create a light and airy crumb. For more tips and tricks, check out our !
Problem | Possible Cause | Solution |
|---|---|---|
Dense crumb | Overkneading | Use gentle folds |
Dense crumb | Insufficient hydration | Increase water slightly |
Dense crumb | Improper fermentation | Adjust fermentation time |