Table of Contents
Tired of complicated sourdough recipes that yield more frustration than delicious bread? This article is your shortcut to baking success! We'll demystify the art of sourdough with a foolproof, focused guide to crafting the perfect 1 loaf sourdough recipe. Forget endless hours of research and confusing terminology; this guide provides clear, concise instructions and helpful tips for bakers of all skill levels. We'll walk you through selecting the right ingredients and tools, mastering the essential steps – from preparing your levain to achieving that perfect crusty exterior – and troubleshooting common problems. Whether you’re a complete beginner or looking to refine your technique, this 1 loaf sourdough recipe will empower you to confidently create a delicious, artisanal loaf every time. Prepare to be amazed by how simple and rewarding making your own sourdough bread can be. Get ready to embark on your sourdough journey, one perfectly risen loaf at a time!
Understanding the 1 Loaf Sourdough Recipe: A Beginner's Guide
Understanding the 1 Loaf Sourdough Recipe: A Beginner's Guide
So, you're diving into the wonderful world of sourdough, but the sheer volume of information out there can be overwhelming. Don't worry, we're here to simplify things! This beginner's guide focuses on a single loaf—perfect for those starting their sourdough journey. We'll break down the process into manageable steps, explaining each stage clearly and concisely. Forget those complicated multi-loaf recipes; we're keeping it simple and manageable. Our goal is to give you the confidence to bake a delicious, crusty loaf of sourdough without the usual learning curve. You'll learn about the essential components of a successful sourdough, understanding the role of the starter, the importance of proper fermentation, and the techniques needed for shaping and baking.
One common question beginners have is about the sourdough starter itself. A healthy, active starter is the foundation of any good sourdough loaf. Make sure yours is bubbly and at its peak before you begin. If you're still working on cultivating your starter, check out our post on for more details. Getting the starter right is half the battle! Once you've got that down, the rest of the process becomes much easier to manage.
Stage | Key Task | Tips |
|---|---|---|
Starter Preparation | Ensure active, bubbly starter | Feed starter 4-6 hours before |
Mixing | Combine ingredients thoroughly | Avoid overmixing |
Bulk Fermentation | Allow dough to rise | Perform stretch and folds |
Next, we'll cover the mixing process. This is where you bring together your starter, flour, water, and salt. The ratios are crucial for achieving the right texture and flavor. We'll provide precise measurements and techniques to ensure your dough is perfectly consistent. Don't worry about making mistakes; sourdough is forgiving, but accuracy in this stage helps!
After mixing, the dough needs time to rise, a process known as bulk fermentation. This is where the magic happens—the yeast and bacteria in your starter work their wonders, creating those lovely air pockets that give sourdough its characteristic texture. We'll show you how to perform stretch and folds, a simple technique that strengthens the dough and promotes even rising. For a deeper dive into this crucial step, read our detailed guide on .
- Accurate measurements are key
- Gentle handling prevents tearing
- Patience is key to success
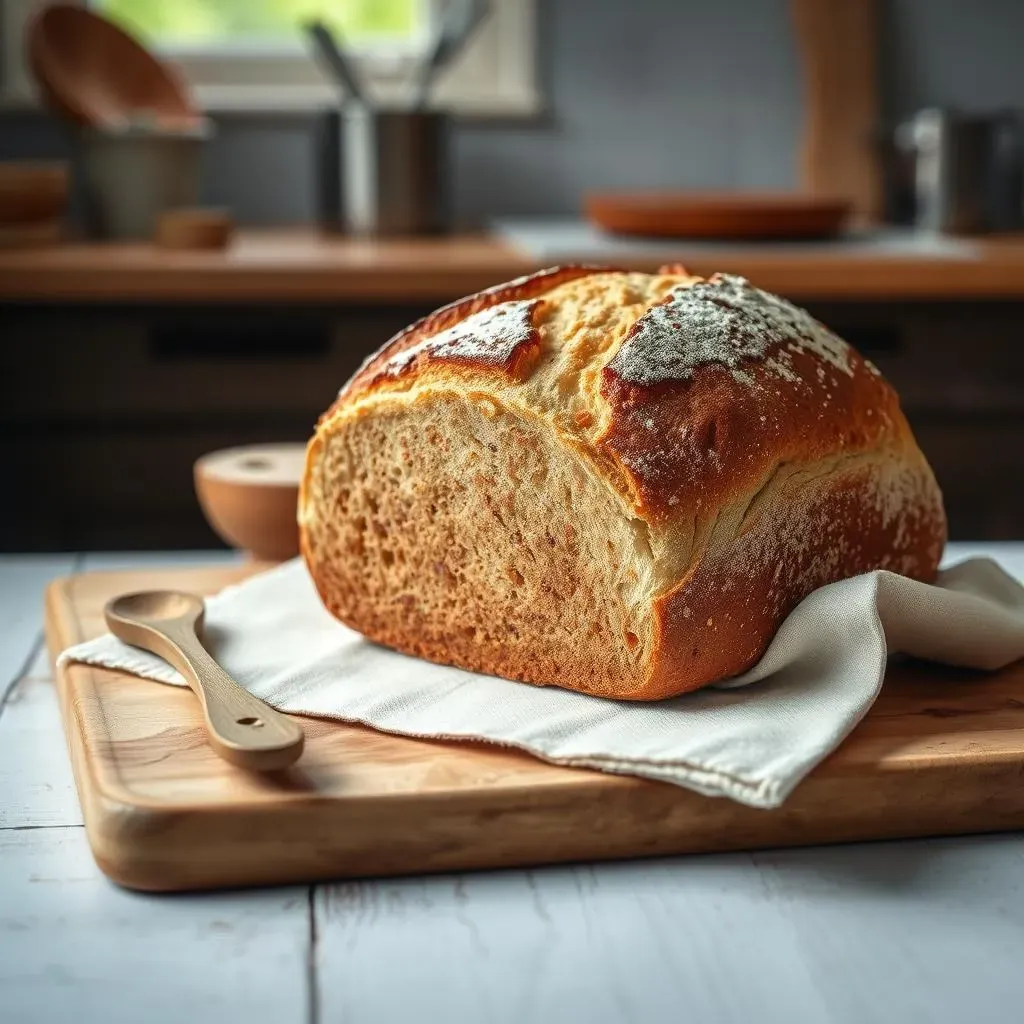
Finally, we'll cover shaping and baking your loaf. This might seem intimidating, but with our step-by-step instructions and helpful visuals, you'll master it in no time. We'll cover different shaping techniques and provide tips for achieving a beautiful, evenly baked loaf with a perfectly golden-brown crust. Proper shaping ensures even baking and a beautiful final product.
For those who want to explore variations, we have many more recipes available! Explore our to discover new possibilities and expand your baking skills. You'll find numerous options to suit your taste and experience level.
Essential Tools and Ingredients for Your 1 Loaf Sourdough Bread
Essential Tools and Ingredients for Your 1 Loaf Sourdough Bread
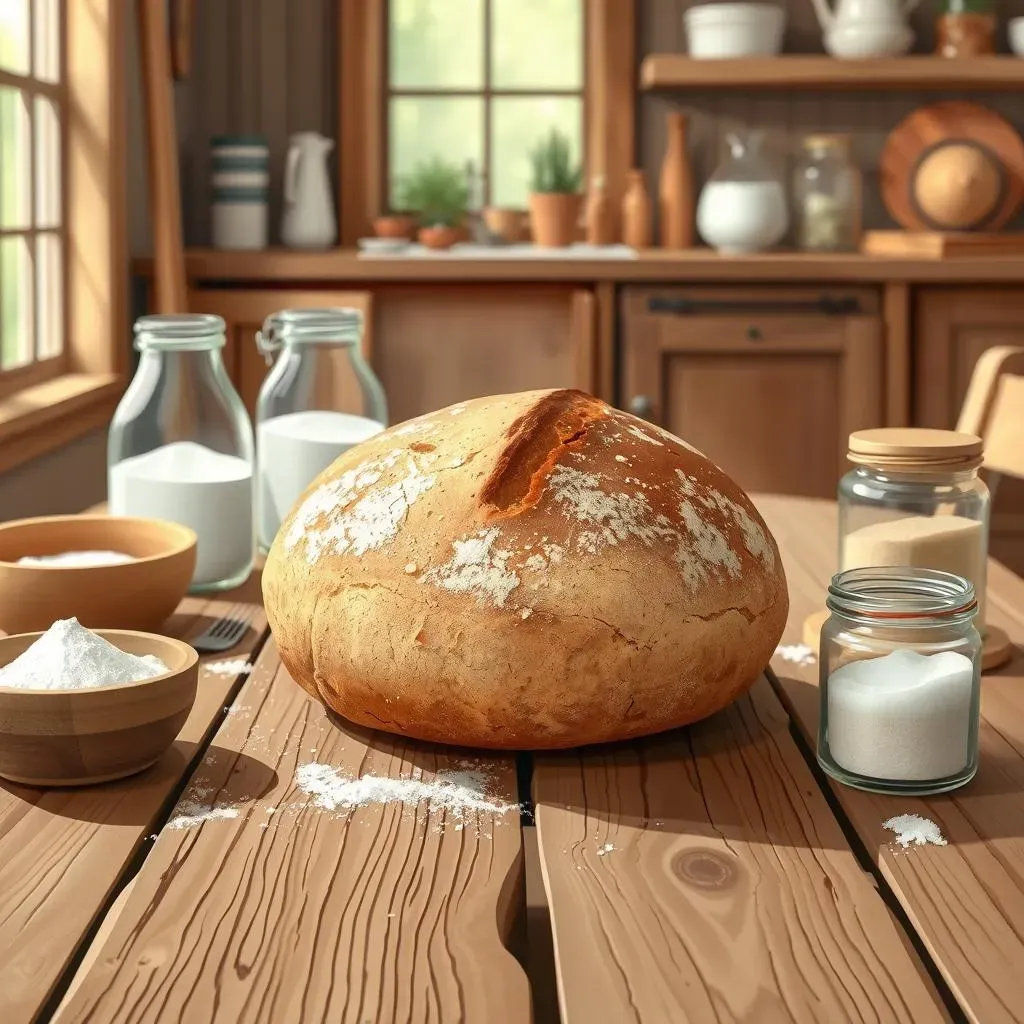
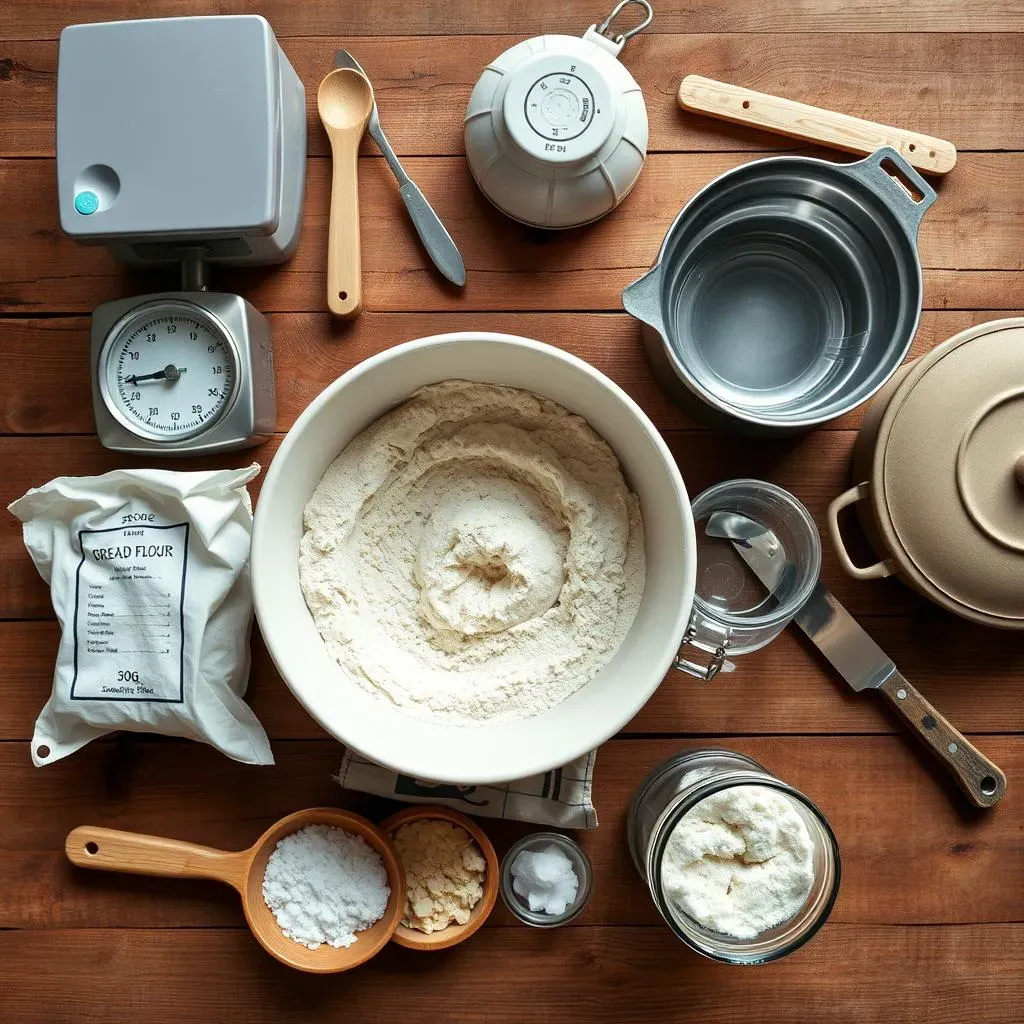
Before we get our hands floury, let's talk about the essential equipment and ingredients you'll need for your 1 loaf sourdough adventure. Having the right tools makes the whole process much smoother, trust me! We're focusing on a single loaf here, so you won't need a massive arsenal of baking equipment. This keeps things simple and accessible for everyone, especially beginners. A well-equipped kitchen doesn't need to be an expensive one; many items you might already own will work perfectly.
First, let's talk about the star of the show: your sourdough starter. A healthy, active starter is absolutely crucial for a successful loaf. Make sure yours is bubbly and at its peak, showing signs of fermentation. If you're still nurturing your starter, our guide on is a must-read. Remember, a happy starter equals happy bread!
Ingredient | Quantity (Approximate) | Notes |
|---|---|---|
Active Sourdough Starter | 50-100g | Bubbly and at its peak |
Bread Flour | 500g | High protein content is ideal |
Water | 300-350g | Filtered or spring water preferred |
Salt | 10g | Fine sea salt recommended |
Beyond your starter, you'll need a few key ingredients. High-protein bread flour is ideal for sourdough, providing the strength needed for a good rise. Use filtered or spring water for the best results—tap water can sometimes contain minerals that affect fermentation. And finally, fine sea salt enhances the flavor and controls yeast activity. Don't be tempted to substitute; each ingredient plays a vital role in the final product. For more sourdough inspiration, check out our !
Now, for the tools! You don't need fancy equipment; most of these are probably already in your kitchen. A kitchen scale is essential for accurate measurements in grams—this is crucial for consistent baking results. A large mixing bowl, a dough scraper, and a proofing basket or banneton are also very helpful. A Dutch oven is highly recommended for baking, as it creates a perfect environment for steam baking, leading to a beautiful crust. If you don't have a Dutch oven, a well-fitting lidded pot will work. Lastly, a sharp knife or lame is needed for scoring your loaf before baking. This allows for controlled expansion during baking. For more tips and tricks, take a look at our .
- Kitchen Scale (grams)
- Large Mixing Bowl
- Dough Scraper
- Proofing Basket/Bannetons
- Dutch Oven (or large pot with lid)
- Sharp Knife or Lame
Gathering your ingredients and tools in advance is a great way to streamline the baking process. Having everything ready to go before you start will make the entire experience more enjoyable and less stressful. Remember, even with a simple 1 loaf recipe, preparation is key to success. And with that, let's move on to the next exciting stage of your sourdough journey! For those who want an even quicker recipe, take a look at our .
StepbyStep Guide: Baking Your 1 Loaf Sourdough Masterpiece
StepbyStep Guide: Baking Your 1 Loaf Sourdough Masterpiece
Mixing the Dough: The Foundation of Your Loaf
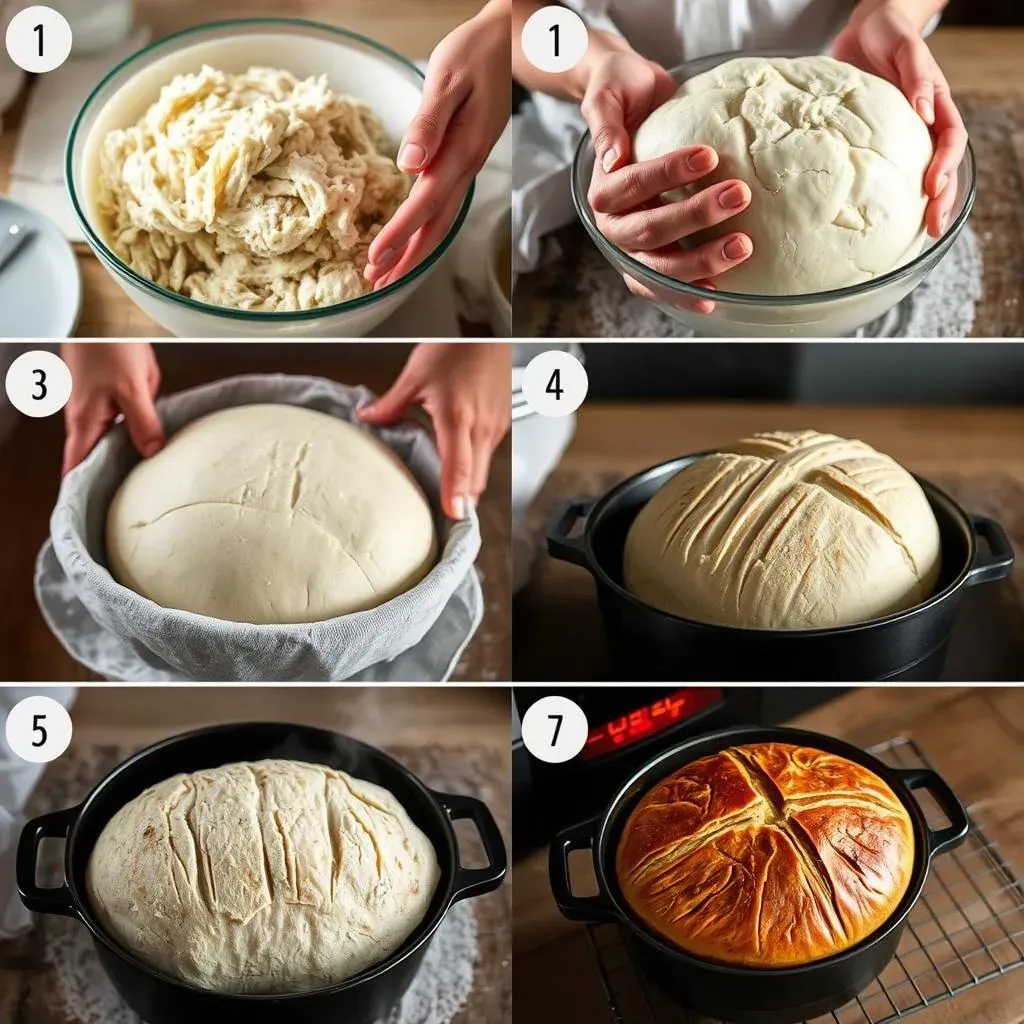
Now for the fun part – mixing your dough! This is where all the ingredients come together to create the magic. Start by gently combining your active sourdough starter with the water in your mixing bowl. Make sure your starter is truly bubbly and at its peak for optimal fermentation. For a deeper dive into starter care, check out our comprehensive guide on . A happy starter is essential for a delicious loaf!
Next, add your flour. Gradually incorporate it into the wet ingredients, mixing until a shaggy dough forms. Avoid overmixing at this stage; we want to keep the dough relatively loose. Overmixing can lead to a tough final product. Then, add your salt. Gently fold it into the dough until it's evenly distributed. For tips on working with different flour types, take a look at our .
- Gentle mixing is key
- Avoid overmixing
- Ensure even salt distribution
Bulk Fermentation: Letting Your Dough Rise
After mixing, it's time for bulk fermentation – the crucial period where your dough will rise and develop flavor. Cover your bowl and let the dough rest at room temperature for several hours. During this time, you'll perform "stretch and folds," a technique that gently strengthens the dough and promotes even rising. These folds are done at regular intervals, typically every 30-45 minutes, for a total of 3-4 sets. For more detailed instructions on stretch and folds, see our .
The length of bulk fermentation depends on factors like your room temperature and the activity of your starter. You'll know your dough is ready when it's significantly increased in volume and shows signs of bubbly fermentation. The dough should be puffy and airy, exhibiting a significant rise. For a quicker bulk fermentation, consider using a slightly warmer room temperature. For more ideas on fermentation, see our .
Time | Action | Observation |
|---|---|---|
0-1 hour | Initial rest | Dough should begin to relax |
1-3 hours | Stretch and folds | Dough becomes more elastic |
3-4 hours | Final rise | Dough doubles in size |
Shaping and Proofing: Preparing for the Oven
Once your dough has completed bulk fermentation, it's time for shaping. Gently turn the dough out onto a lightly floured surface. Shape it into a round boule or an oval batard, depending on your preference. Our guide on offers detailed shaping instructions and visuals. Proper shaping ensures even baking and helps create a beautiful final product.
After shaping, place your dough into a well-floured banneton or bowl. Cover it and let it proof in a cool place (around 70-75°F) for several hours, or even overnight in the refrigerator. Cold proofing, also known as retarding, allows for slower fermentation and enhances flavor development. During this stage, the dough will continue to rise slowly. For a similar recipe with a slightly different proofing approach, look at our .
Baking Your Loaf: The Final Stage
Preheat your oven to 450°F (232°C) with a Dutch oven inside for at least 30 minutes. The Dutch oven creates a steamy environment that promotes a beautiful crust. Carefully remove the hot Dutch oven from the oven, and gently place your shaped dough into it. Score the top of your dough with a sharp knife or lame to allow for controlled expansion during baking. For more information on scoring, see our . This step is crucial for a beautiful loaf.
Cover the Dutch oven and bake for 20 minutes. Then, remove the lid and bake for another 25-30 minutes, or until the crust is deeply golden brown and the internal temperature reaches 205-210°F (96-99°C). Use an instant-read thermometer to check the internal temperature. Once baked, carefully remove the loaf from the Dutch oven and let it cool completely on a wire rack before slicing and enjoying your delicious, homemade sourdough bread. If you're looking for a slightly faster bake, try our .
Step | Time | Temperature |
|---|---|---|
Preheat oven | 30 minutes | 450°F (232°C) |
Covered bake | 20 minutes | 450°F (232°C) |
Uncovered bake | 25-30 minutes | 450°F (232°C) |
Troubleshooting Common 1 Loaf Sourdough Problems and Tips for Success

Troubleshooting Common 1 Loaf Sourdough Problems and Tips for Success
My Sourdough Won't Rise!
One of the most common sourdough woes is a loaf that refuses to rise properly. This can stem from several issues. Firstly, your starter might not be active enough. Ensure it's bubbly and at its peak before starting your recipe. If your starter is lacking, our guide on will help. Secondly, the dough's temperature is critical. Too cold, and fermentation slows; too hot, and it can kill the yeast. Aim for a consistent, comfortable room temperature. Lastly, inaccurate measurements can also impact the rise. A kitchen scale is indispensable for consistent results. Using a scale ensures the correct ratio of ingredients, which is essential for proper fermentation.
Another common problem is a dense, heavy loaf. This often indicates insufficient fermentation. Make sure your dough has enough time to rise during bulk fermentation. Perform your stretch and folds diligently to develop gluten strength, which is key for trapping gas bubbles and creating a light texture. If you're unsure about your dough's readiness, our provides detailed instructions and visual cues to help you assess the dough's condition. Remember, patience is key in sourdough baking!
- Check starter activity
- Monitor dough temperature
- Use a kitchen scale for accuracy
My Crust Isn't Crusty Enough!
A lackluster crust is another common sourdough disappointment. This often results from insufficient oven spring or inadequate steam during baking. Ensure your oven is preheated to a high temperature (450°F/232°C) and use a Dutch oven to trap steam, creating a moist environment that promotes a beautiful, crisp crust. For detailed instructions on achieving that perfect crust, explore our . It's all about creating the right baking environment.
Another factor affecting crust development is the scoring of your loaf. Proper scoring allows for controlled expansion during baking, resulting in a more attractive and evenly baked crust. If your crust is unevenly browned, consider adjusting your oven temperature or baking time. Our offers further guidance on achieving a perfect crust. Remember, even a small change in technique can make a big difference!
Problem | Possible Cause | Solution |
|---|---|---|
Pale crust | Insufficient oven spring | Increase oven temperature |
Uneven crust | Poor scoring | Practice scoring techniques |