Table of Contents
Ready to bake the perfect loaf of sourdough bread? Forget complicated recipes and confusing instructions! This article provides a straightforward, easy-to-follow "1 loaf sourdough bread recipe" perfect for beginners and experienced bakers alike. We'll break down the process into manageable steps, ensuring you understand every stage, from selecting the right ingredients to achieving that satisfying crusty finish. First, we'll explore the essential components of a successful sourdough loaf, ensuring you have a solid foundation before we even begin mixing. Then, we'll walk you through a detailed, step-by-step guide to baking your own delicious bread, clarifying any potential confusion along the way. Finally, we'll equip you with valuable tips and tricks to troubleshoot common issues, guaranteeing your baking success. Get ready to transform simple ingredients into a beautiful, flavorful loaf you'll be proud to share. Let's embark on this baking adventure together and unlock the secrets of the perfect sourdough!
Understanding the 1 Loaf Sourdough Bread Recipe

Understanding the 1 Loaf Sourdough Bread Recipe
The Allure of the Single Loaf
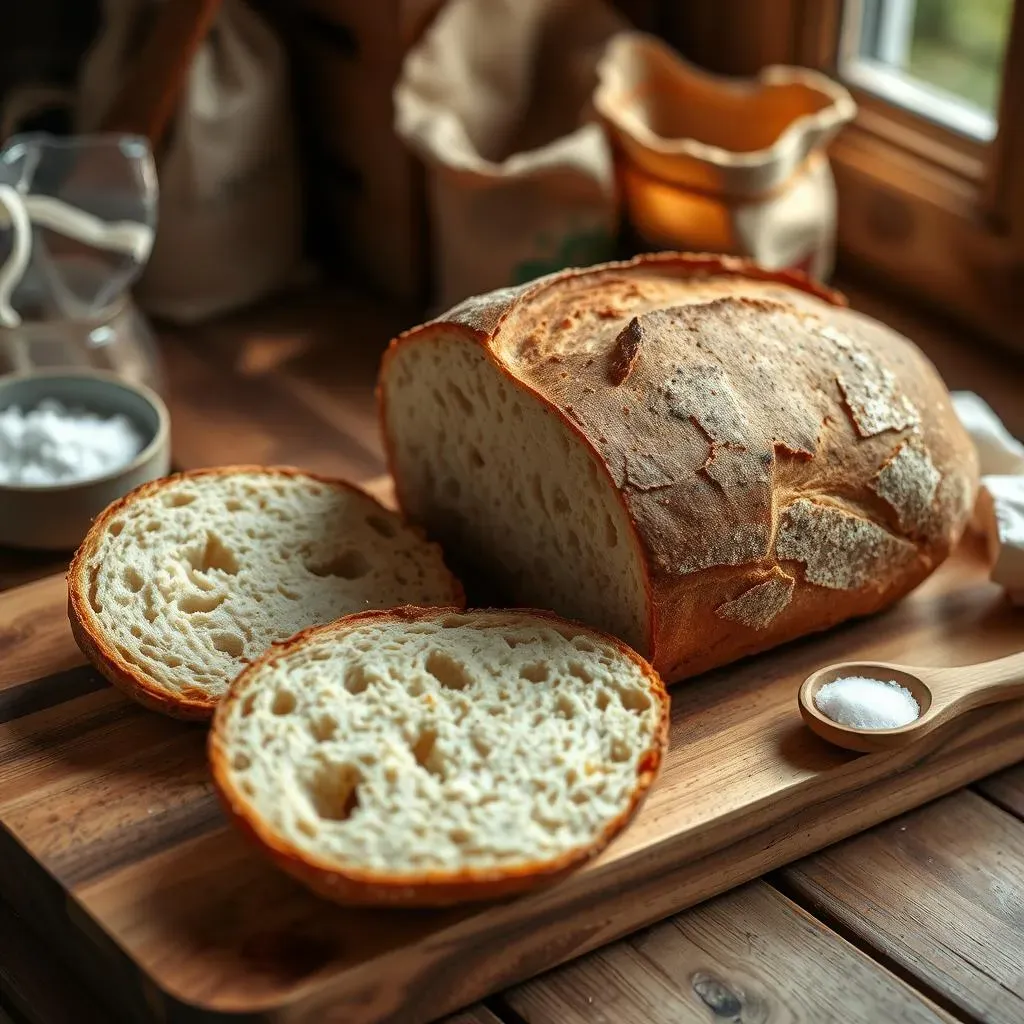
Let's be honest, sometimes less is more. A single loaf of sourdough, perfectly crafted, is a thing of beauty. It's manageable, less intimidating than a larger batch, and perfect for smaller households or those just starting their sourdough journey. It's a fantastic way to practice your technique and hone your skills without feeling overwhelmed by a huge amount of dough. Plus, the satisfaction of creating that one perfect loaf is unparalleled!
Think of it as a culinary meditation. You're not just baking bread; you're nurturing a culture, coaxing life from flour and water, and transforming simple ingredients into something extraordinary. The focus on a single loaf allows you to truly appreciate the nuances of the process, from the gentle folds to the satisfying crackle of the crust as it emerges from the oven. It's a mindful experience, and the results are incredibly rewarding. Want to explore other single-loaf wonders? Check out this amazing 1-loaf sourdough recipe.
Aspect | Benefit of a Single Loaf |
|---|---|
Practice | Perfect for honing technique |
Yield | Ideal for smaller households |
Mindfulness | Focus on the process, not quantity |
Understanding the Fermentation Process
Sourdough baking is all about fermentation – the magic that transforms simple flour and water into something delicious. This process relies on the wild yeasts and bacteria present in your sourdough starter. These microorganisms feed on the sugars in the flour, producing carbon dioxide (which makes the bread rise) and organic acids (which give sourdough its characteristic tangy flavor). Understanding the nuances of fermentation helps you predict how your dough will behave and adjust your baking process accordingly. It's a fascinating world, and once you grasp the basics, you'll feel more empowered in the kitchen.
The fermentation process is influenced by a number of factors, including the temperature of your environment, the hydration of your dough, and the activity of your starter. A warmer kitchen will lead to faster fermentation, while a cooler one will slow things down. Similarly, higher hydration doughs tend to ferment more quickly. Learning to read your dough—observing its rise, its texture, and its aroma—is crucial to mastering sourdough. Ready to delve deeper into the world of sourdough starters? Check out this ultimate guide.
- Yeast and bacteria create carbon dioxide (rise)
- Organic acids produced contribute to flavor
- Temperature and hydration affect fermentation rate
Key Variables in Your 1 Loaf Sourdough Recipe
While a "1 loaf sourdough bread recipe" might seem simple on the surface, there are actually several key variables that can significantly impact the final product. Understanding these variables allows you to fine-tune the recipe to your preferences and your kitchen environment. These variables often include the type of flour used, the hydration level of the dough, the temperature of your proofing environment, and the activity of your starter. Each of these factors can influence the rise, texture, and flavor of your sourdough.
For example, using a higher protein flour like bread flour will result in a stronger dough capable of holding more gas, leading to a more substantial rise. Similarly, a higher hydration dough will create a more open crumb structure, while a lower hydration dough will result in a denser loaf. The temperature of your proofing environment also plays a crucial role. A warmer environment will speed up the fermentation process, while a cooler environment will slow it down. Finally, the activity of your starter will dictate how quickly your dough ferments. A very active starter will ferment quickly, and a less active starter will ferment more slowly. This guide to sourdough starters can help you improve your baking.
Essential Ingredients for Your 1 Loaf Sourdough Bread
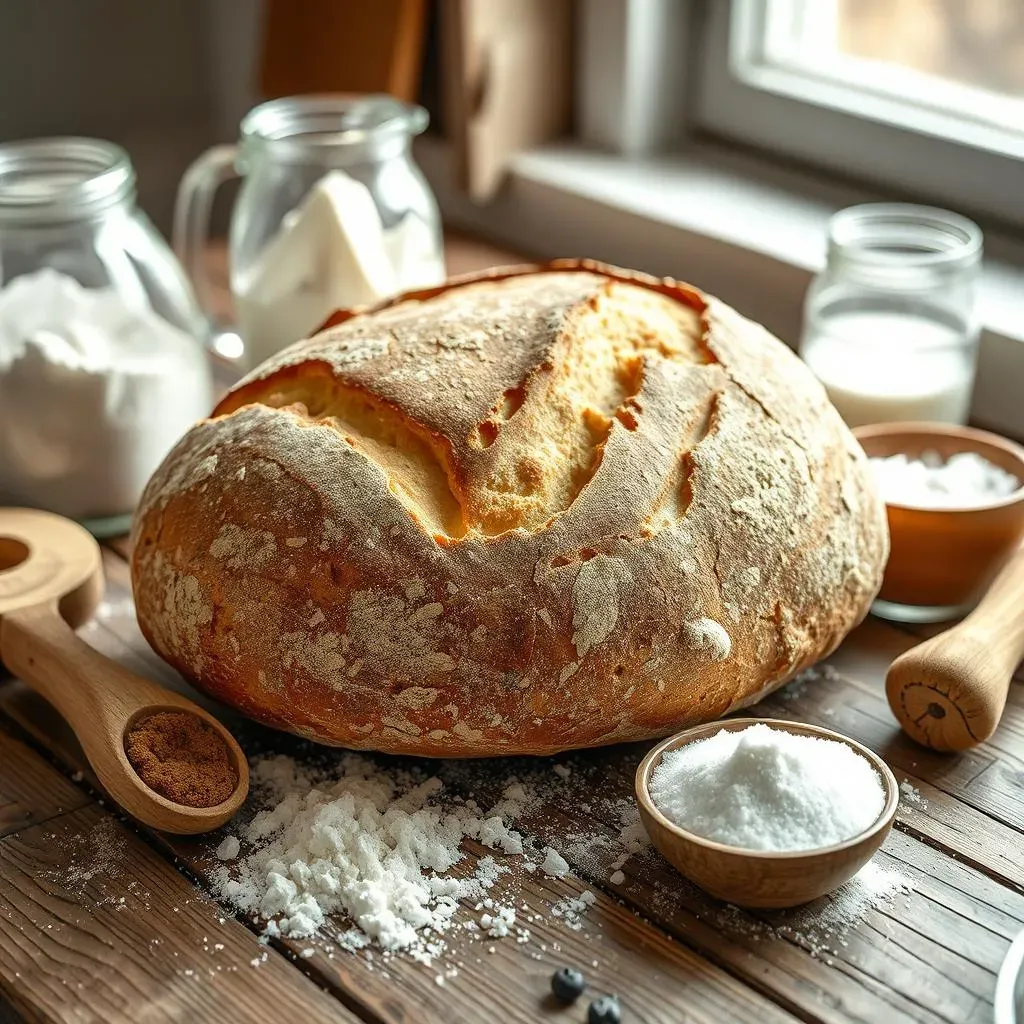
Essential Ingredients for Your 1 Loaf Sourdough Bread
The Power of Flour
Flour forms the very foundation of your sourdough loaf, contributing significantly to its texture and flavor. For a 1 loaf sourdough bread recipe, bread flour is generally recommended due to its higher protein content. This higher protein content translates to stronger gluten development, resulting in a better rise and a chewier crumb. However, you can experiment with other flours, such as whole wheat or rye, to add complexity and depth to your bread. Just remember that different flours will impact the dough's behavior and may require adjustments to your hydration levels. Want to explore flour options further? Check out this guide on different types of flour.
The type of flour you choose will profoundly affect the final outcome of your bread. Bread flour, with its higher protein content, creates a strong gluten network that traps gases produced during fermentation, leading to a taller, airier loaf. Whole wheat flour, on the other hand, adds nutty flavor and a denser texture. Rye flour contributes a unique tanginess and a darker color. Experimenting with flour blends can create a wide range of flavors and textures, allowing you to customize your sourdough to your personal preferences. For instance, a blend of bread flour and whole wheat flour can offer a good balance between rise and flavor. For a more in-depth look at different flour choices, see this article on selecting the right flour.
Flour Type | Characteristics | Impact on Loaf |
|---|---|---|
Bread Flour | High protein | Strong rise, chewy crumb |
Whole Wheat Flour | Nutty flavor | Denser texture |
Rye Flour | Tangy flavor | Darker color |
The Importance of Hydration and Other Essentials
Beyond flour, the water content (hydration) plays a crucial role in your 1 loaf sourdough bread recipe. Hydration is expressed as a percentage of the flour weight, and it directly impacts the dough's consistency and texture. A higher hydration dough will be wetter and stickier, resulting in a more open crumb structure. A lower hydration dough will be firmer and easier to handle, resulting in a denser crumb. Finding the right hydration level for your flour and your technique is key to sourdough success. Need help figuring out hydration? Check out this handy hydration calculator.
In addition to flour and water, salt is an essential ingredient in sourdough baking. It controls yeast activity, strengthens the gluten network, and enhances the overall flavor of the bread. Too little salt will result in a bland, weak loaf, while too much salt can inhibit fermentation and create an overly salty taste. The amount of salt you use will depend on your personal preference and the overall flavor profile you're aiming for. Finally, of course, you'll need your active sourdough starter. A healthy, active starter is the heart and soul of any sourdough bread, providing the wild yeasts and bacteria that drive the fermentation process. The activity of your starter will impact the overall fermentation time and the final flavor of your bread. For more on sourdough starters, check out this great guide.
- Water (hydration) impacts dough consistency and crumb structure
- Salt controls yeast activity and enhances flavor
- Active sourdough starter is crucial for fermentation
StepbyStep Guide: Baking Your 1 Loaf Sourdough Bread

StepbyStep Guide: Baking Your 1 Loaf Sourdough Bread
Mixing the Dough: The Foundation of Flavor
Let's get our hands dirty! The first step in our 1 loaf sourdough bread recipe is mixing the dough. This is where the magic begins. You'll combine your active sourdough starter (fed and bubbly!), water, flour, and salt. The exact quantities will depend on your chosen recipe, but the process is always the same: Gently combine the ingredients, ensuring everything is well incorporated. Don't overmix; a shaggy, slightly uneven dough is perfectly fine at this stage. The goal here is to get everything wet and combined, not to develop the gluten structure yet. That comes later!
Once everything is mixed, cover your dough and let it rest. This resting period, often called autolyse, allows the flour to fully hydrate, making the dough more manageable and improving its texture. The length of this rest varies depending on the recipe but is usually between 30 minutes to an hour. After the autolyse, you’ll begin the bulk fermentation process, where the real magic of sourdough happens. To learn more about autolyse and its impact on your dough, check out this great article on autolyse techniques.
- Gently combine starter, water, flour, and salt.
- Cover and let rest (autolyse) for 30-60 minutes.
- Prepare for bulk fermentation.
Bulk Fermentation and Shaping: Unleashing the Rise
Bulk fermentation is where your sourdough comes alive! During this stage, the yeasts and bacteria in your starter go to work, producing carbon dioxide and organic acids. This process leads to the dough rising and developing its characteristic tang. You'll typically perform a series of "stretch and folds" during bulk fermentation to strengthen the gluten structure and create an airy crumb. This involves gently stretching and folding sections of the dough, rotating the bowl between each fold. The number of stretch and folds and the timing depends on your recipe and the activity of your starter.
Once bulk fermentation is complete (you'll know by the significant increase in dough volume and the development of bubbles), it's time to shape your loaf. This involves gently coaxing the dough into its final form—a round boule, an oval batard, or another shape of your choosing. Gently shaping the dough helps to create surface tension, which helps the loaf retain its form during proofing. After shaping, you'll let the dough proof, allowing for the final rise before baking. For more tips on shaping your sourdough, check out this guide to sourdough shaping.
Stage | Description | Timing |
|---|---|---|
Bulk Fermentation | Yeasts and bacteria work, dough rises. | Several hours |
Stretch and Folds | Strengthen gluten, improve crumb. | During bulk fermentation |
Shaping | Form the loaf into its final shape. | After bulk fermentation |
Tips and Troubleshooting for Perfect 1 Loaf Sourdough Bread
Tips and Troubleshooting for Perfect 1 Loaf Sourdough Bread
Starter Strength: The Heart of the Matter
Your sourdough starter is the engine of your loaf. A weak or inactive starter will lead to a poor rise and a dense, flavorless bread. Ensure your starter is bubbly, active, and at its peak before you begin mixing your dough. A good rule of thumb is to feed your starter 4-6 hours before you plan to bake. If your starter is sluggish, try feeding it more frequently for a couple of days to revitalize it. Remember, a healthy starter is the key to a successful sourdough.
Don't underestimate the importance of a robust starter! A strong, active starter will give your dough the necessary lift and flavor. If your starter isn't performing as expected, take a look at your feeding schedule and the temperature of your environment. A consistently warm environment will help maintain starter activity. For more in-depth information on starter care, check out our guide to sourdough starter maintenance. A thriving starter is the foundation of delicious sourdough bread.
- Feed your starter 4-6 hours before baking.
- Ensure your starter is bubbly and active.
- Warm environment helps maintain starter activity.
Dough Hydration: Finding the Sweet Spot
The hydration level of your dough significantly impacts its texture and rise. Too much water, and you'll have a sticky, difficult-to-handle mess. Too little water, and your bread will be dense and dry. Experiment with different hydration levels to find what works best for your flour and your technique. Start with a recipe's suggested hydration, but don't be afraid to adjust it slightly based on your observations. Remember, the goal is a dough that's manageable but still slightly sticky.
Hydration is a crucial factor influencing your bread's texture and rise. Too much water can lead to a shaggy, sticky dough that's hard to work with, while too little water can result in a dense, crumbly loaf. Consider the type of flour you're using; different flours absorb water differently. A higher protein flour, for example, can often handle higher hydration. A lower protein flour may require less water. For a detailed guide on achieving the perfect hydration, consider checking out our article on mastering dough hydration. Finding the perfect balance will lead to baking success!
Hydration Level | Dough Consistency | Crumb Structure |
|---|---|---|
Low | Firm, easy to handle | Dense |
Medium | Slightly sticky, manageable | Open |
High | Very sticky, challenging | Very open |
Baking and Cooling: The Final Touches
The baking process is crucial for achieving that perfect crust and airy crumb. Using a Dutch oven helps create steam, leading to a crispier crust and better oven spring. Make sure your oven is properly preheated before adding your loaf. Keep a close eye on your bread during baking, and adjust the baking time as needed. Overbaking can lead to a dry, hard crust, while underbaking can result in a gummy interior. A reliable oven thermometer can help ensure accurate temperatures.
Once your loaf is baked, resist the urge to slice into it immediately! Allow it to cool completely on a wire rack before slicing. This cooling period allows the crumb to set, making for cleaner slices and preventing a gummy texture. Patience is key here; the wait is worth it for perfectly textured bread. For more tips on achieving that perfect bake and understanding oven temperatures, check out our detailed guide on baking sourdough bread. Let your bread cool completely before slicing to enjoy the best texture!
Remember, baking sourdough is a journey, not a race. Don't be discouraged if your first few attempts aren't perfect. With practice, you'll develop a feel for your dough and your oven, and you'll be baking beautiful, delicious sourdough loaves in no time. Enjoy the process, experiment, and most importantly, have fun!